key battery NISSAN PATHFINDER 2023 Owners Manual
[x] Cancel search | Manufacturer: NISSAN, Model Year: 2023, Model line: PATHFINDER, Model: NISSAN PATHFINDER 2023Pages: 665, PDF Size: 4.64 MB
Page 146 of 665
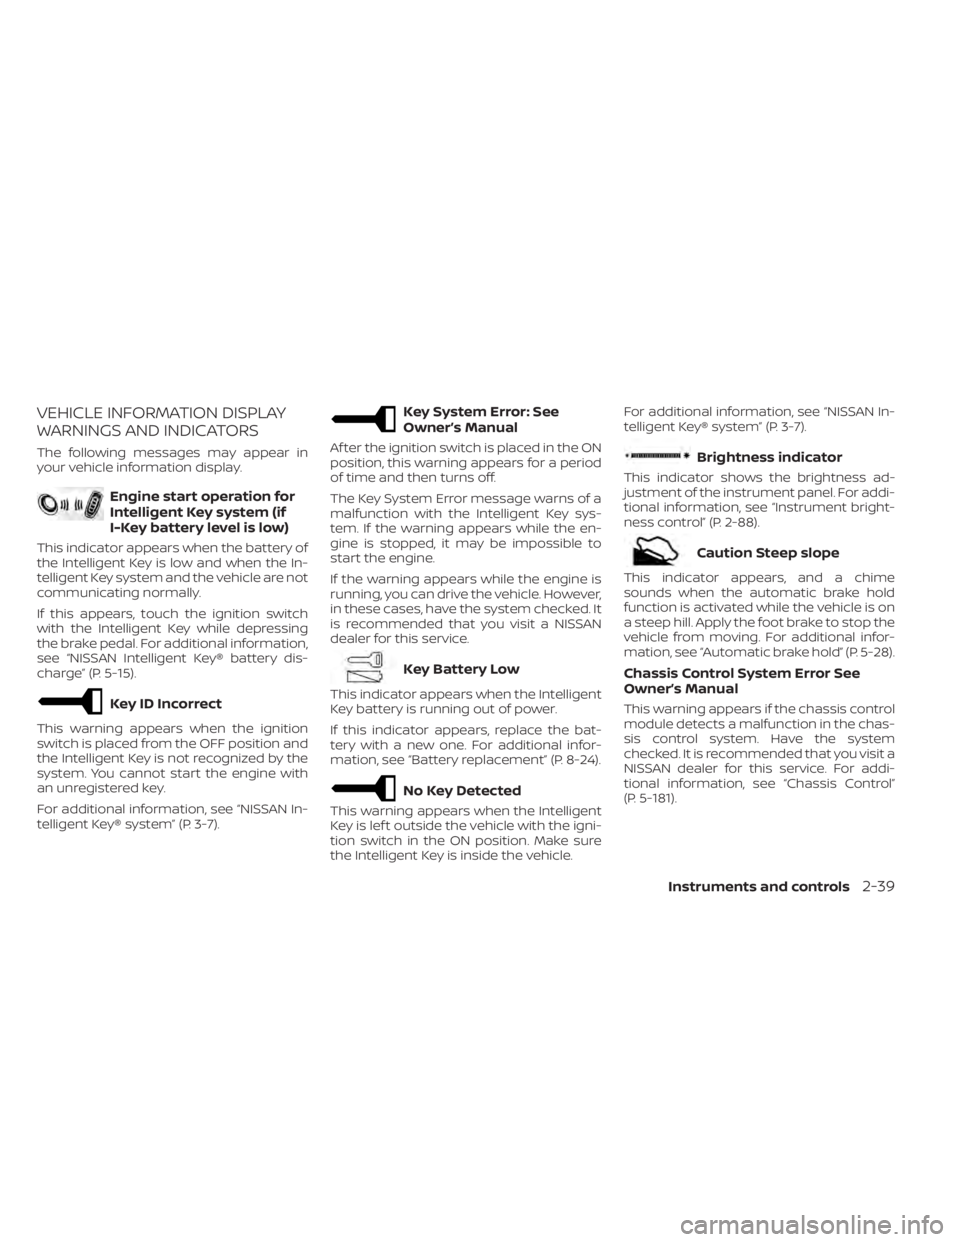
VEHICLE INFORMATION DISPLAY
WARNINGS AND INDICATORS
The following messages may appear in
your vehicle information display.
Engine start operation for
Intelligent Key system (if
I-Key battery level is low)
This indicator appears when the battery of
the Intelligent Key is low and when the In-
telligent Key system and the vehicle are not
communicating normally.
If this appears, touch the ignition switch
with the Intelligent Key while depressing
the brake pedal. For additional information,
see “NISSAN Intelligent Key® battery dis-
charge” (P. 5-15).
Key ID Incorrect
This warning appears when the ignition
switch is placed from the OFF position and
the Intelligent Key is not recognized by the
system. You cannot start the engine with
an unregistered key.
For additional information, see “NISSAN In-
telligent Key® system” (P. 3-7).
Key System Error: See
Owner’s Manual
Af ter the ignition switch is placed in the ON
position, this warning appears for a period
of time and then turns off.
The Key System Error message warns of a
malfunction with the Intelligent Key sys-
tem. If the warning appears while the en-
gine is stopped, it may be impossible to
start the engine.
If the warning appears while the engine is
running, you can drive the vehicle. However,
in these cases, have the system checked. It
is recommended that you visit a NISSAN
dealer for this service.
Key Battery Low
This indicator appears when the Intelligent
Key battery is running out of power.
If this indicator appears, replace the bat-
tery with a new one. For additional infor-
mation, see “Battery replacement” (P. 8-24).
No Key Detected
This warning appears when the Intelligent
Key is lef t outside the vehicle with the igni-
tion switch in the ON position. Make sure
the Intelligent Key is inside the vehicle.For additional information, see “NISSAN In-
telligent Key® system” (P. 3-7).
Brightness indicator
This indicator shows the brightness ad-
justment of the instrument panel. For addi-
tional information, see “Instrument bright-
ness control” (P. 2-88).
Caution Steep slope
This indicator appears, and a chime
sounds when the automatic brake hold
function is activated while the vehicle is on
a steep hill. Apply the foot brake to stop the
vehicle from moving. For additional infor-
mation, see “Automatic brake hold” (P. 5-28).
Chassis Control System Error See
Owner’s Manual
This warning appears if the chassis control
module detects a malfunction in the chas-
sis control system. Have the system
checked. It is recommended that you visit a
NISSAN dealer for this service. For addi-
tional information, see “Chassis Control”
(P. 5-181).
Instruments and controls2-39
Page 172 of 665
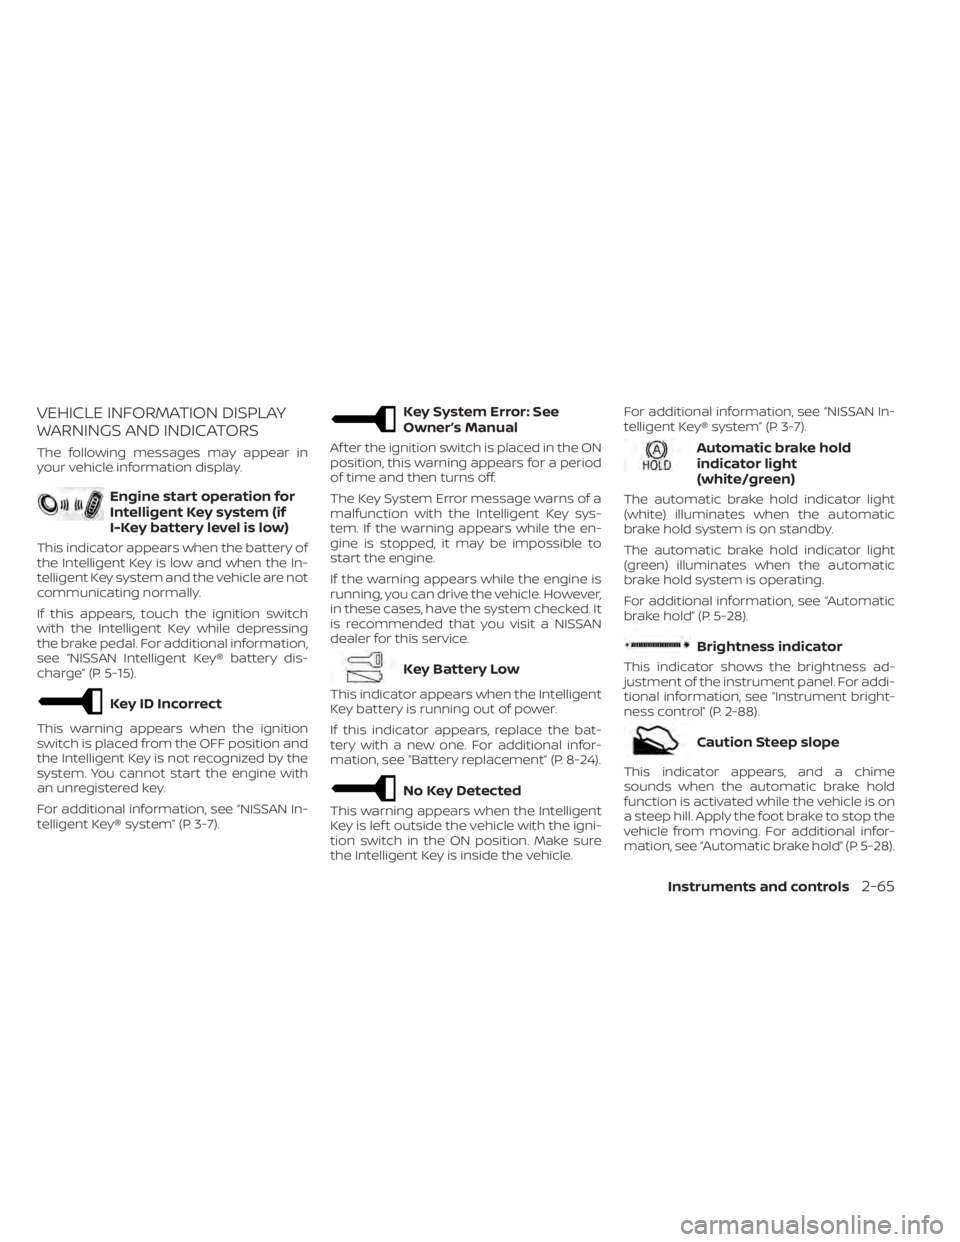
VEHICLE INFORMATION DISPLAY
WARNINGS AND INDICATORS
The following messages may appear in
your vehicle information display.
Engine start operation for
Intelligent Key system (if
I-Key battery level is low)
This indicator appears when the battery of
the Intelligent Key is low and when the In-
telligent Key system and the vehicle are not
communicating normally.
If this appears, touch the ignition switch
with the Intelligent Key while depressing
the brake pedal. For additional information,
see “NISSAN Intelligent Key® battery dis-
charge” (P. 5-15).
Key ID Incorrect
This warning appears when the ignition
switch is placed from the OFF position and
the Intelligent Key is not recognized by the
system. You cannot start the engine with
an unregistered key.
For additional information, see “NISSAN In-
telligent Key® system” (P. 3-7).
Key System Error: See
Owner’s Manual
Af ter the ignition switch is placed in the ON
position, this warning appears for a period
of time and then turns off.
The Key System Error message warns of a
malfunction with the Intelligent Key sys-
tem. If the warning appears while the en-
gine is stopped, it may be impossible to
start the engine.
If the warning appears while the engine is
running, you can drive the vehicle. However,
in these cases, have the system checked. It
is recommended that you visit a NISSAN
dealer for this service.
Key Battery Low
This indicator appears when the Intelligent
Key battery is running out of power.
If this indicator appears, replace the bat-
tery with a new one. For additional infor-
mation, see “Battery replacement” (P. 8-24).
No Key Detected
This warning appears when the Intelligent
Key is lef t outside the vehicle with the igni-
tion switch in the ON position. Make sure
the Intelligent Key is inside the vehicle.For additional information, see “NISSAN In-
telligent Key® system” (P. 3-7).
Automatic brake hold
indicator light
(white/green)
The automatic brake hold indicator light
(white) illuminates when the automatic
brake hold system is on standby.
The automatic brake hold indicator light
(green) illuminates when the automatic
brake hold system is operating.
For additional information, see “Automatic
brake hold” (P. 5-28).
Brightness indicator
This indicator shows the brightness ad-
justment of the instrument panel. For addi-
tional information, see “Instrument bright-
ness control” (P. 2-88).
Caution Steep slope
This indicator appears, and a chime
sounds when the automatic brake hold
function is activated while the vehicle is on
a steep hill. Apply the foot brake to stop the
vehicle from moving. For additional infor-
mation, see “Automatic brake hold” (P. 5-28).
Instruments and controls2-65
Page 212 of 665
WARNING
• Never put metallic materials be-
tween the wireless charger and a
smartphone.
• Those who use a pacemaker or other
medical equipment should contact
the electric medical equipment
manufacturer for the possible influ-
ences before use.
• Never put cloth over the smartphone
during charging process.
• Never charge a smartphone when it
is wet.
• Never put metallic materials or small
goods such as a cigarette lighter, In-
telligent Key or memory drive.
CAUTION
• Do not put an RFID/NFC/credit card
between the wireless charger and a
smartphone. This could cause data
corruption in the card.
• Do not use the wireless charger with
dust accumulated or dirt on the pad.
• Do not hit the surface of the wireless
charger. •
Do not spill liquid (water, drinks, etc.)
on the charging pad.
• Do not use grease, oil or alcohol for
cleaning charging pad.
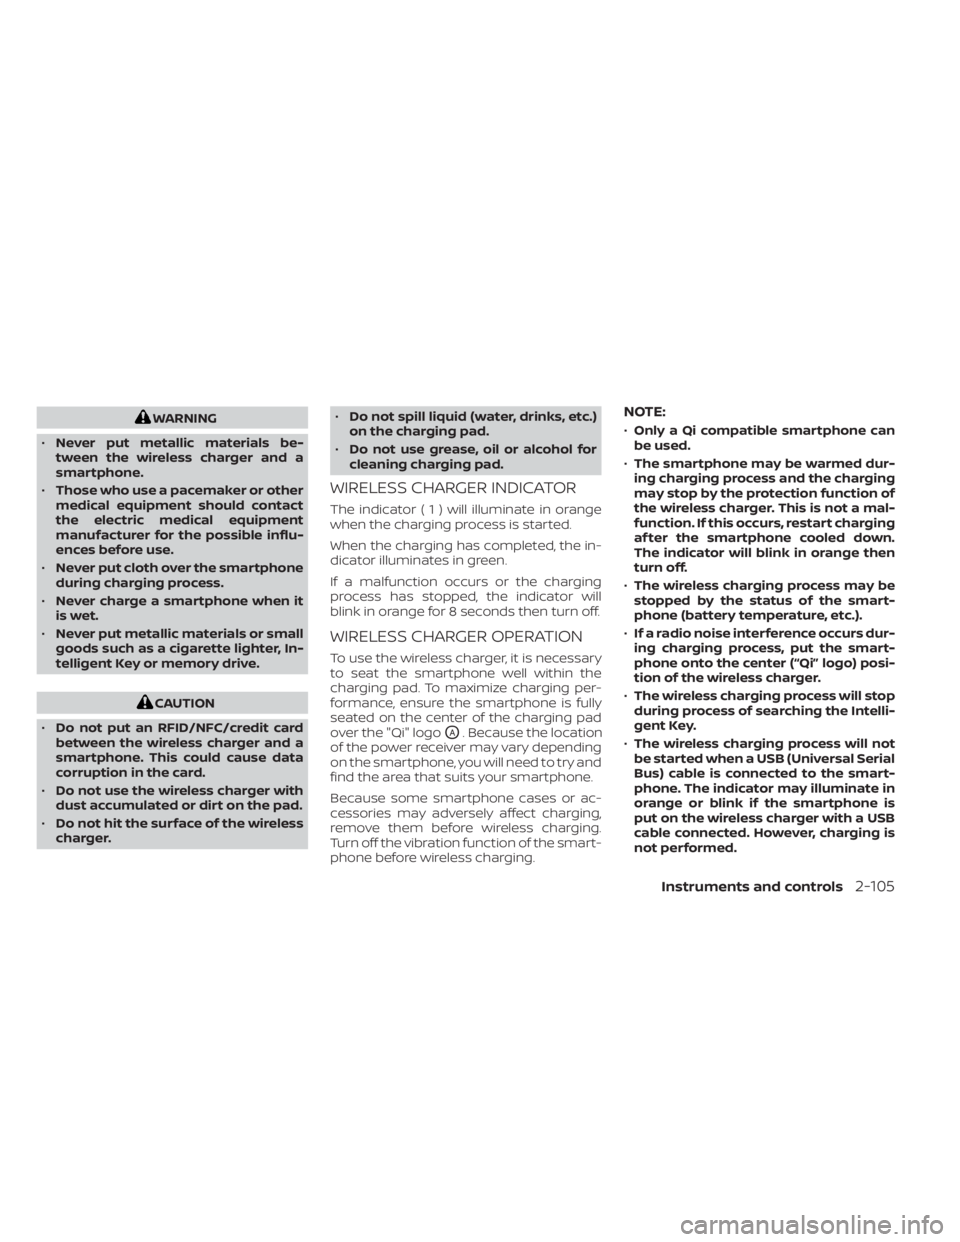
WIRELESS CHARGER INDICATOR
The indicator(1)willil luminate in orange
when the charging process is started.
When the charging has completed, the in-
dicator illuminates in green.
If a malfunction occurs or the charging
process has stopped, the indicator will
blink in orange for 8 seconds then turn off.
WIRELESS CHARGER OPERATION
To use the wireless charger, it is necessary
to seat the smartphone well within the
charging pad. To maximize charging per-
formance, ensure the smartphone is fully
seated on the center of the charging pad
over the "Qi" logo
OA. Because the location
of the power receiver may vary depending
on the smartphone, you will need to try and
find the area that suits your smartphone.
Because some smartphone cases or ac-
cessories may adversely affect charging,
remove them before wireless charging.
Turn off the vibration function of the smart-
phone before wireless charging.
NOTE:
• Only a Qi compatible smartphone can
be used.
• The smartphone may be warmed dur-
ing charging process and the charging
may stop by the protection function of
the wireless charger. This is not a mal-
function. If this occurs, restart charging
af ter the smartphone cooled down.
The indicator will blink in orange then
turn off.
• The wireless charging process may be
stopped by the status of the smart-
phone (battery temperature, etc.).
• If a radio noise interference occurs dur-
ing charging process, put the smart-
phone onto the center (“Qi” logo) posi-
tion of the wireless charger.
• The wireless charging process will stop
during process of searching the Intelli-
gent Key.
• The wireless charging process will not
be started when a USB (Universal Serial
Bus) cable is connected to the smart-
phone. The indicator may illuminate in
orange or blink if the smartphone is
put on the wireless charger with a USB
cable connected. However, charging is
not performed.
Instruments and controls2-105
Page 245 of 665
In such cases, correct the operating condi-
tions before using the Intelligent Key func-
tion or use the mechanical key.
Although the life of the battery varies de-
pending on the operating conditions, the
battery’s life is approximately two years. If
the battery is discharged, replace it with a
new one.
When the Intelligent Key battery is low, a
yellow indicator illuminates with the mes-
sage “Key Battery Low” in the vehicle infor-
mation display. For additional information,
see “Vehicle information display 7 inch (18
cm) Type A” (P. 2-23) or “Vehicle information
display 12.3 inch (31 cm) Type B” (P. 2-48).
Since the Intelligent Key is capable of re-
ceiving radio waves, if the key is lef t near
equipment which transmits strong radio
waves, such as signals from a TV and per-
sonal computer, the battery life may be-
come shorter.
For additional information, see “Battery re-
placement” (P. 8-24).
As many as four Intelligent Keys can be
registered and used with one vehicle. For
information about the purchase and use of
additional Intelligent Keys, it is recom-
mended that you visit a NISSAN dealer.
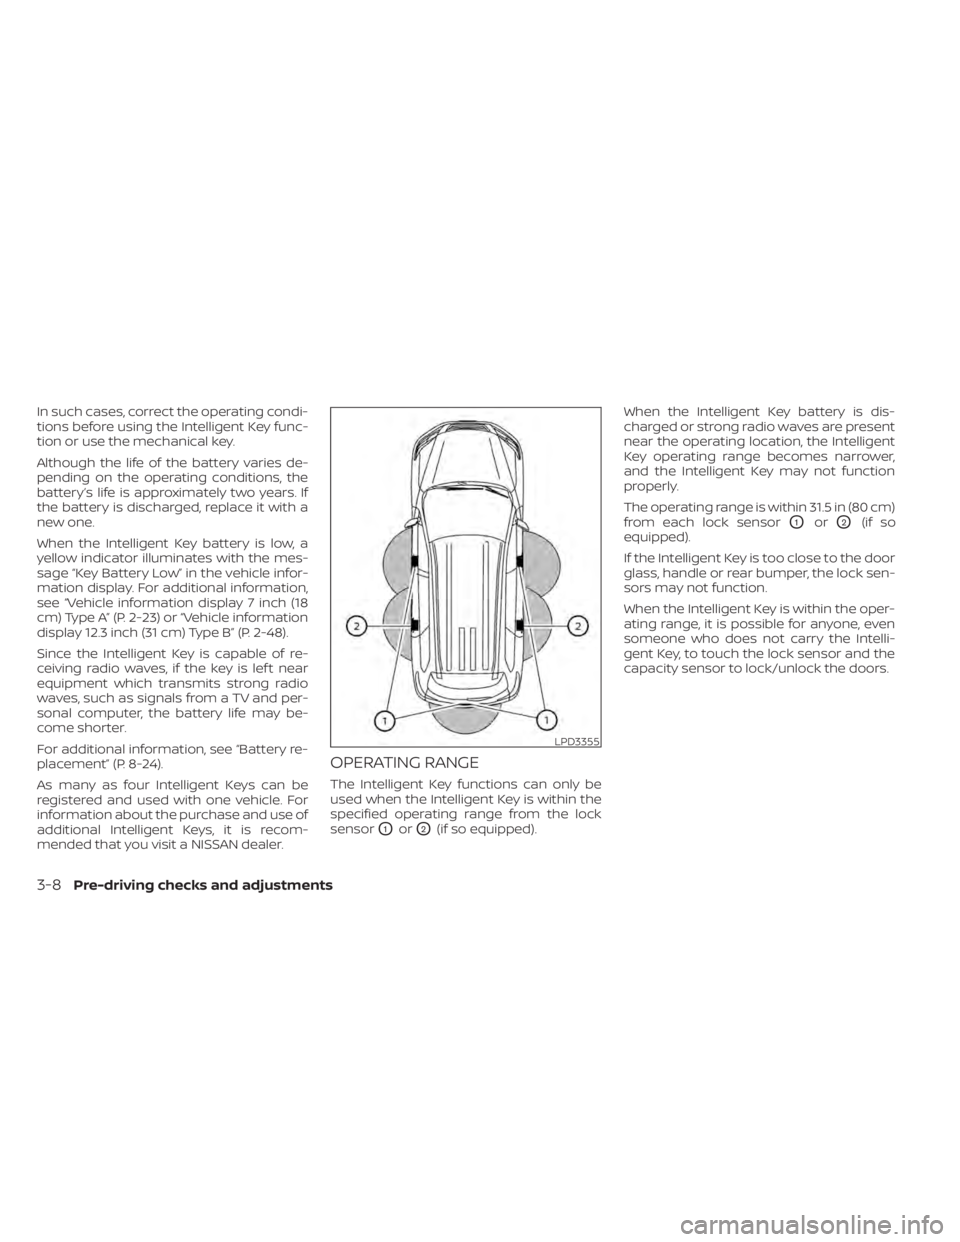
OPERATING RANGE
The Intelligent Key functions can only be
used when the Intelligent Key is within the
specified operating range from the lock
sensor
O1orO2(if so equipped).When the Intelligent Key battery is dis-
charged or strong radio waves are present
near the operating location, the Intelligent
Key operating range becomes narrower,
and the Intelligent Key may not function
properly.
The operating range is within 31.5 in (80 cm)
from each lock sensor
O1orO2(if so
equipped).
If the Intelligent Key is too close to the door
glass, handle or rear bumper, the lock sen-
sors may not function.
When the Intelligent Key is within the oper-
ating range, it is possible for anyone, even
someone who does not carry the Intelli-
gent Key, to touch the lock sensor and the
capacity sensor to lock/unlock the doors.
LPD3355
3-8Pre-driving checks and adjustments
Page 250 of 665
If a door handle is pulled while unlocking
the doors, that door may not be unlocked.
Returning the door handle to its original
position will unlock the door. If the door
does not unlock af ter returning the door
handle, touch the door handle lock sensor
to unlock the door.
All doors will be locked automatically un-
less one of the following operations is per-
formed within 1 minute af ter touching the
lock sensor.
• Opening any door.
• Pushing the ignition switch.
Using the interior lights
The interior lights illuminate for a period of
time when a door is unlocked.
The lights can be turned off without waiting
by performing one of the following
operations:
• Placing the ignition switch in the ONposition.
• Locking the doors with the Intelligent Key.
• Switching the interior light switch to the OFF position. • Switching the Auto Room Lamp feature
to the OFF position in the “Vehicle Set-
tings” menu on the vehicle information
display. For additional information, see
“Vehicle information display 7 inch (18 cm)
Type A” (P. 2-23) or “Vehicle information
display 12.3 inch (31 cm) Type B” (P. 2-48).
For additional information, see “Interior
lights” (P. 2-123).
HOW TO USE THE REMOTE
KEYLESS ENTRY FUNCTION
The remote keyless entry function can op-
erate all door locks using the remote key-
less function of the Intelligent Key. The re-
mote keyless function can operate at a
distance of 33 f t (10 m) away from the ve-
hicle. The operating distance depends
upon the conditions around the vehicle.
The remote keyless entry function will not
function under the following conditions:
• When the Intelligent Key is not within the operational range.
• When the doors or the rear lif tgate are open or not closed securely.
• When the Intelligent Key battery is discharged.
CAUTION
When locking the doors using the Intel-
ligent Key, be sure not to leave the key
in the vehicle.
Pre-driving checks and adjustments3-13
Page 254 of 665
Intelligent Key button operation
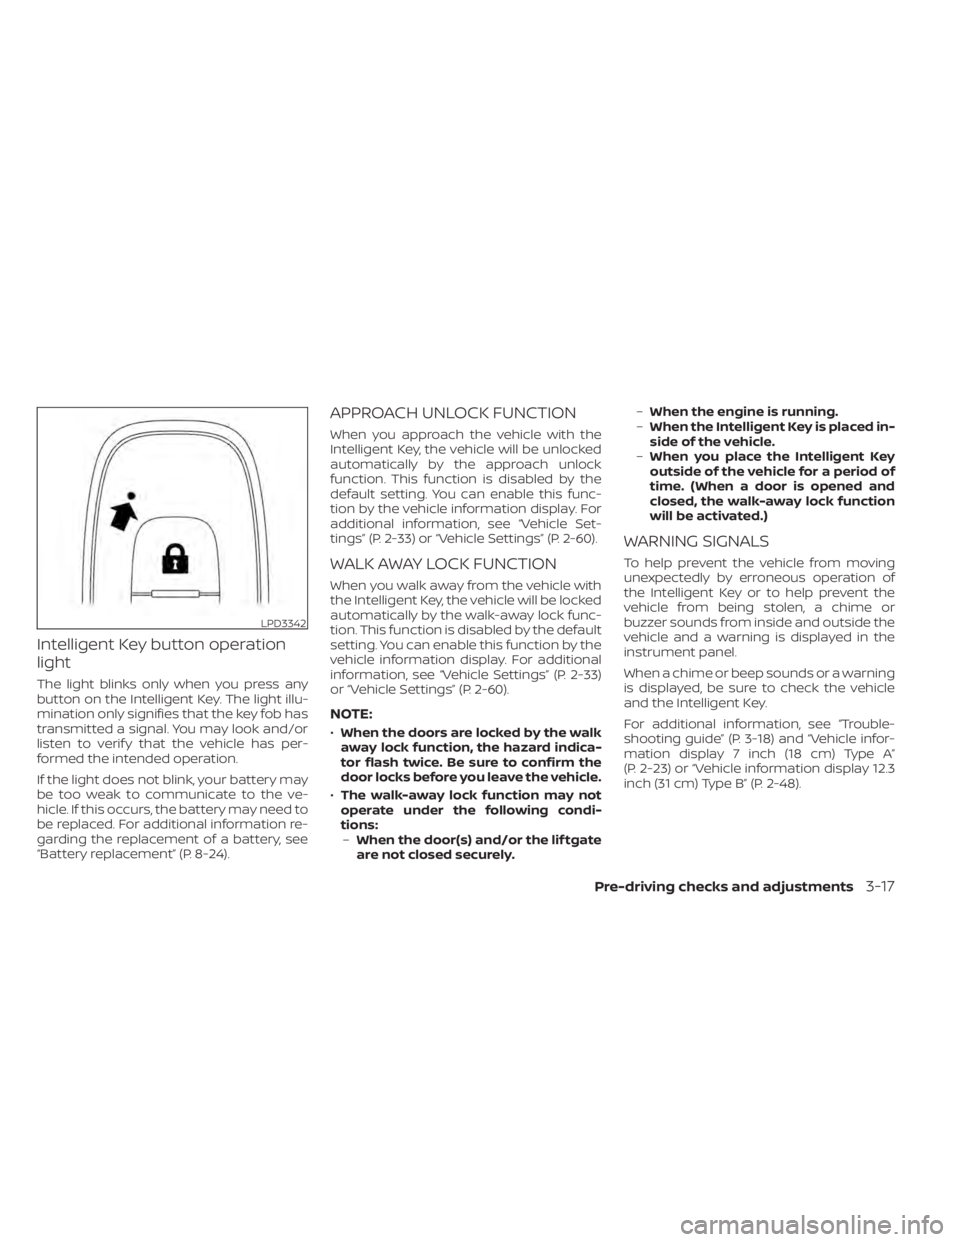
light
The light blinks only when you press any
button on the Intelligent Key. The light illu-
mination only signifies that the key fob has
transmitted a signal. You may look and/or
listen to verif y that the vehicle has per-
formed the intended operation.
If the light does not blink, your battery may
be too weak to communicate to the ve-
hicle. If this occurs, the battery may need to
be replaced. For additional information re-
garding the replacement of a battery, see
“Battery replacement” (P. 8-24).
APPROACH UNLOCK FUNCTION
When you approach the vehicle with the
Intelligent Key, the vehicle will be unlocked
automatically by the approach unlock
function. This function is disabled by the
default setting. You can enable this func-
tion by the vehicle information display. For
additional information, see “Vehicle Set-
tings” (P. 2-33) or “Vehicle Settings” (P. 2-60).
WALK AWAY LOCK FUNCTION
When you walk away from the vehicle with
the Intelligent Key, the vehicle will be locked
automatically by the walk-away lock func-
tion. This function is disabled by the default
setting. You can enable this function by the
vehicle information display. For additional
information, see “Vehicle Settings” (P. 2-33)
or “Vehicle Settings” (P. 2-60).
NOTE:
•When the doors are locked by the walk
away lock function, the hazard indica-
tor flash twice. Be sure to confirm the
door locks before you leave the vehicle.
• The walk-away lock function may not
operate under the following condi-
tions: – When the door(s) and/or the lif tgate
are not closed securely. –
When the engine is running.
– When the Intelligent Key is placed in-
side of the vehicle.
– When you place the Intelligent Key
outside of the vehicle for a period of
time. (When a door is opened and
closed, the walk-away lock function
will be activated.)
WARNING SIGNALS
To help prevent the vehicle from moving
unexpectedly by erroneous operation of
the Intelligent Key or to help prevent the
vehicle from being stolen, a chime or
buzzer sounds from inside and outside the
vehicle and a warning is displayed in the
instrument panel.
When a chime or beep sounds or a warning
is displayed, be sure to check the vehicle
and the Intelligent Key.
For additional information, see “Trouble-
shooting guide” (P. 3-18) and “Vehicle infor-
mation display 7 inch (18 cm) Type A”
(P. 2-23) or “Vehicle information display 12.3
inch (31 cm) Type B” (P. 2-48).
LPD3342
Pre-driving checks and adjustments3-17
Page 256 of 665
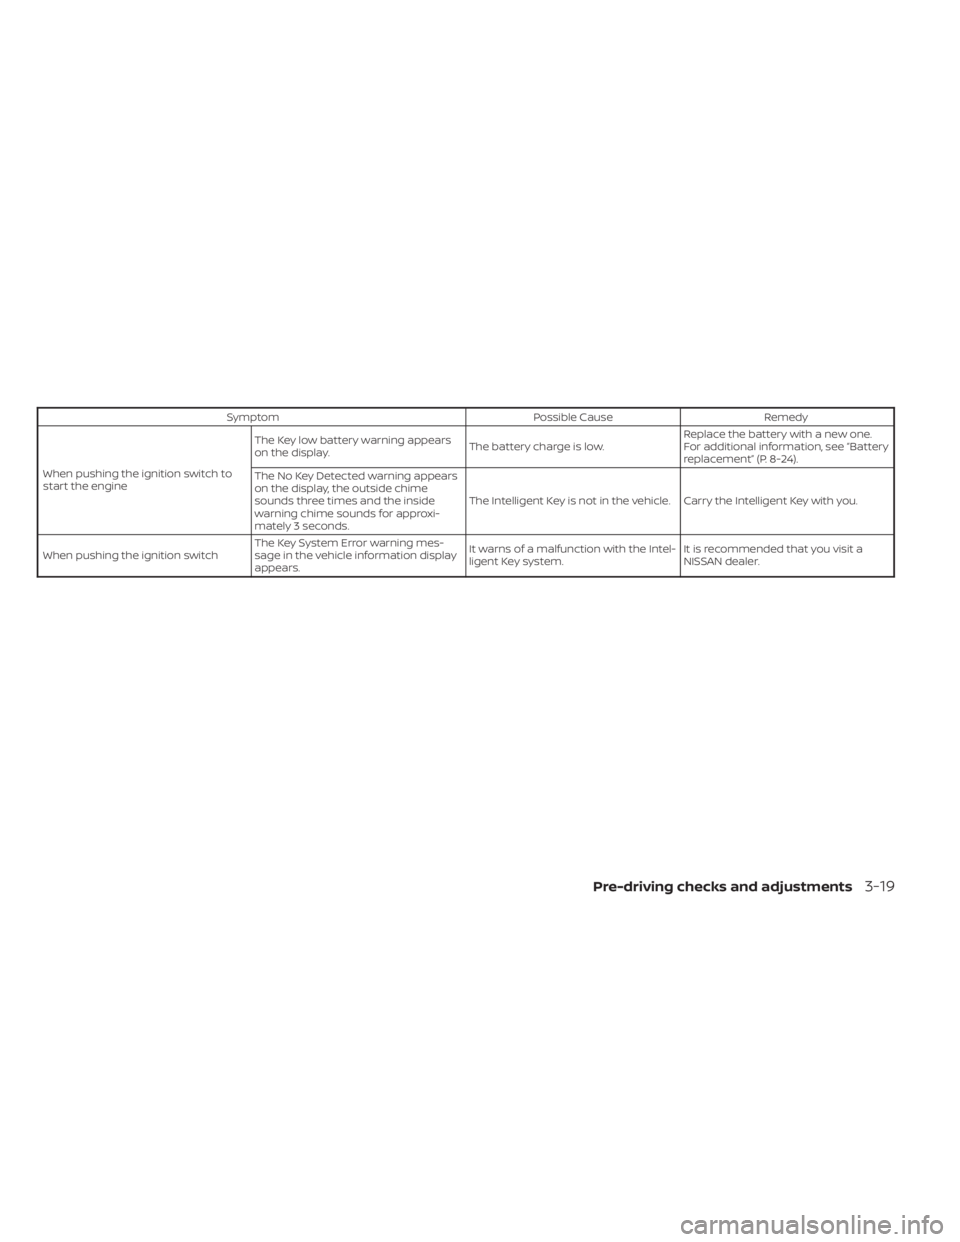
SymptomPossible CauseRemedy
When pushing the ignition switch to
start the engine The Key low battery warning appears
on the display.
The battery charge is low.Replace the battery with a new one.
For additional information, see “Battery
replacement” (P. 8-24).
The No Key Detected warning appears
on the display, the outside chime
sounds three times and the inside
warning chime sounds for approxi-
mately 3 seconds. The Intelligent Key is not in the vehicle. Carry the Intelligent Key with you.
When pushing the ignition switch The Key System Error warning mes-
sage in the vehicle information display
appears. It warns of a malfunction with the Intel-
ligent Key system.
It is recommended that you visit a
NISSAN dealer.
Pre-driving checks and adjustments3-19
Page 257 of 665
Thebutton will be on the NISSAN
Intelligent Key® if the vehicle has Remote
Engine Start. This feature allows the engine
to start from outside the vehicle.
Vehicles with an automatic climate control
system may default to either a heating or
cooling mode depending on outside and
cabin temperatures. For additional infor-
mation, see “Remote Engine Start with In-
telligent Climate Control” (P. 4-34).
Laws in some local communities may re-
strict or prohibit the use of Remote Engine
Start, or the amount of time a parked ve-
hicle engine may idle. For example, some
laws require a person using Remote Engine Start to have the vehicle in view or may
restrict idling time except in freezing tem-
peratures. Check local regulations for any
requirements.
Other conditions may affect the function of
the Remote Engine Start feature. For addi-
tional information, see “Conditions the Re-
mote Engine Start will not work” (P. 3-22).
Other conditions can affect the perfor-
mance of the Intelligent Key transmitter.
For additional information, see “NISSAN In-
telligent Key® system” (P. 3-7).
REMOTE ENGINE START
OPERATING RANGE
WARNING
• To help avoid risk of injury or death
through unintended operation of the
vehicle and/or its systems, including
entrapment in windows or inadver-
tent door lock activation, do not
leave children, people who require
the assistance of others or pets unat-
tended in your vehicle. Additionally,
the temperature inside a closed ve-
hicle on a warm day can quickly be-
come high enough to cause a signifi-
cant risk of injury or death to people
and pets. •
Do not use Remote Engine Start in
closed spaces such as a garage. Do
not breathe exhaust gases; they con-
tain colorless and odorless carbon
monoxide. Carbon monoxide is dan-
gerous. It can cause unconscious-
ness or death.
CAUTION
When the Intelligent Key battery is dis-
charged or other strong radio wave
sources are present near the operating
location, the Intelligent Key operating
range becomes narrower, and the Intel-
ligent Key may not function properly.
The Remote Engine Start function can only
be used when the Intelligent Key is within
the specified operating range from the
vehicle.
The Remote Engine Start operating range
is approximately 197 f t (60 m) from the
vehicle.
LPD2995
REMOTE ENGINE START (if so
equipped)
3-20Pre-driving checks and adjustments
Page 262 of 665
NOTE:
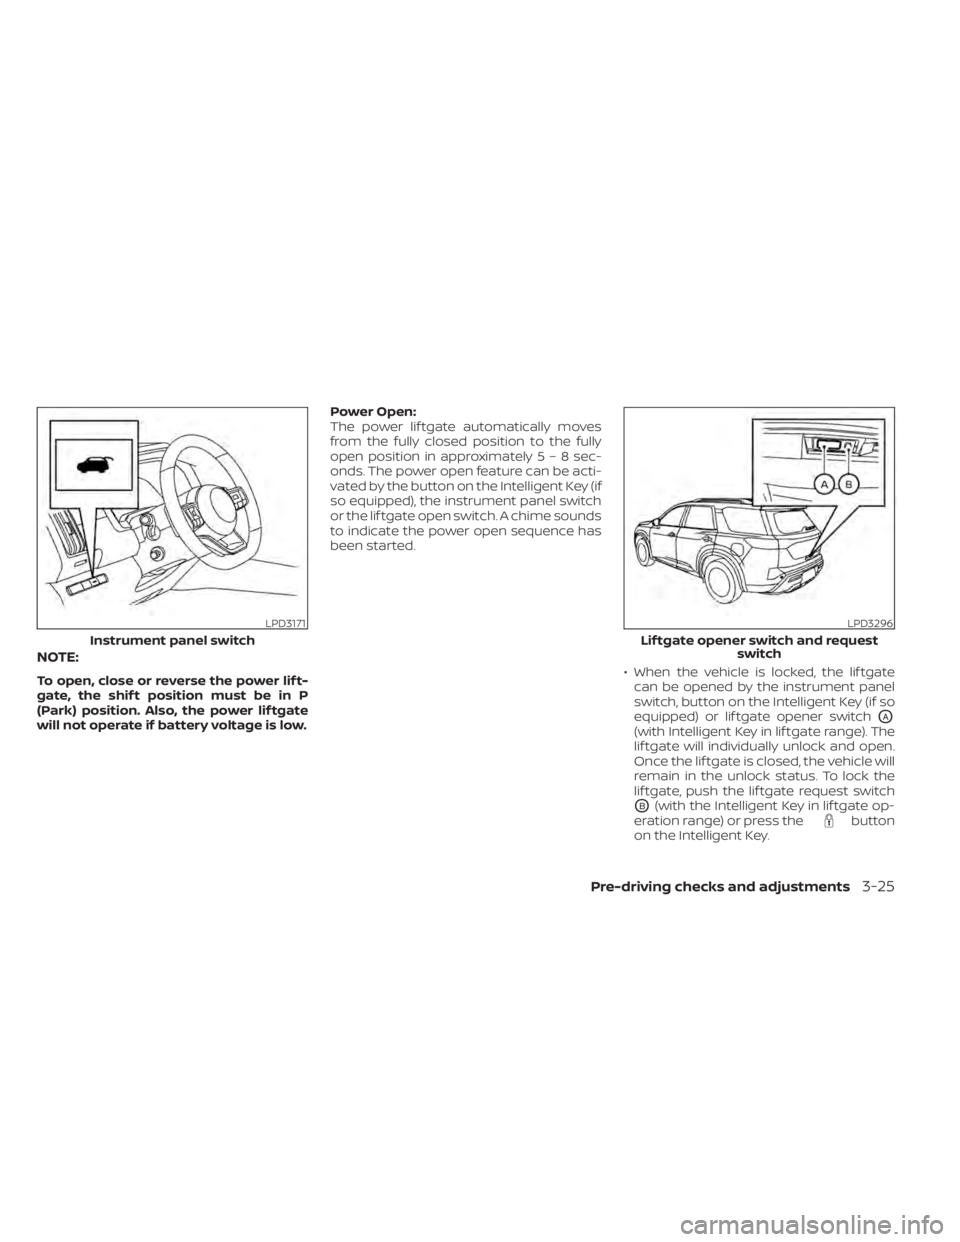
To open, close or reverse the power lif t-
gate, the shif t position must be in P
(Park) position. Also, the power lif tgate
will not operate if battery voltage is low.Power Open:
The power lif tgate automatically moves
from the fully closed position to the fully
open position in approximatel
y5–8sec-
onds. The power open feature can be acti-
vated by the button on the Intelligent Key (if
so equipped), the instrument panel switch
or the lif tgate open switch. A chime sounds
to indicate the power open sequence has
been started.
• When the vehicle is locked, the lif tgatecan be opened by the instrument panel
switch, button on the Intelligent Key (if so
equipped) or lif tgate opener switch
OA
(with Intelligent Key in lif tgate range). The
lif tgate will individually unlock and open.
Once the lif tgate is closed, the vehicle will
remain in the unlock status. To lock the
lif tgate, push the lif tgate request switch
OB(with the Intelligent Key in lif tgate op-
eration range) or press thebutton
on the Intelligent Key.
LPD3171
Instrument panel switch
LPD3296
Lif tgate opener switch and request switch
Pre-driving checks and adjustments3-25
Page 264 of 665
A pinch strip is mounted on each side of
the lif tgate. If an obstacle is detected by a
pinch strip during power close, the lif tgate
will reverse direction and return to the full
open position.
NOTE:
If the pinch strip is damaged or removed,
the power close function will not
operate.
WARNING
There are some small distances imme-
diately before the closed position
which cannot be detected. Make sure
that all passengers have their hands,
etc., inside the vehicle before closing
the lif tgate. Manual Mode:
If power operation is not available, the lif t-
gate may be operated manually. Power op-
eration may not be available if multiple ob-
stacles have been detected in a single
power cycle or if battery voltage is low.
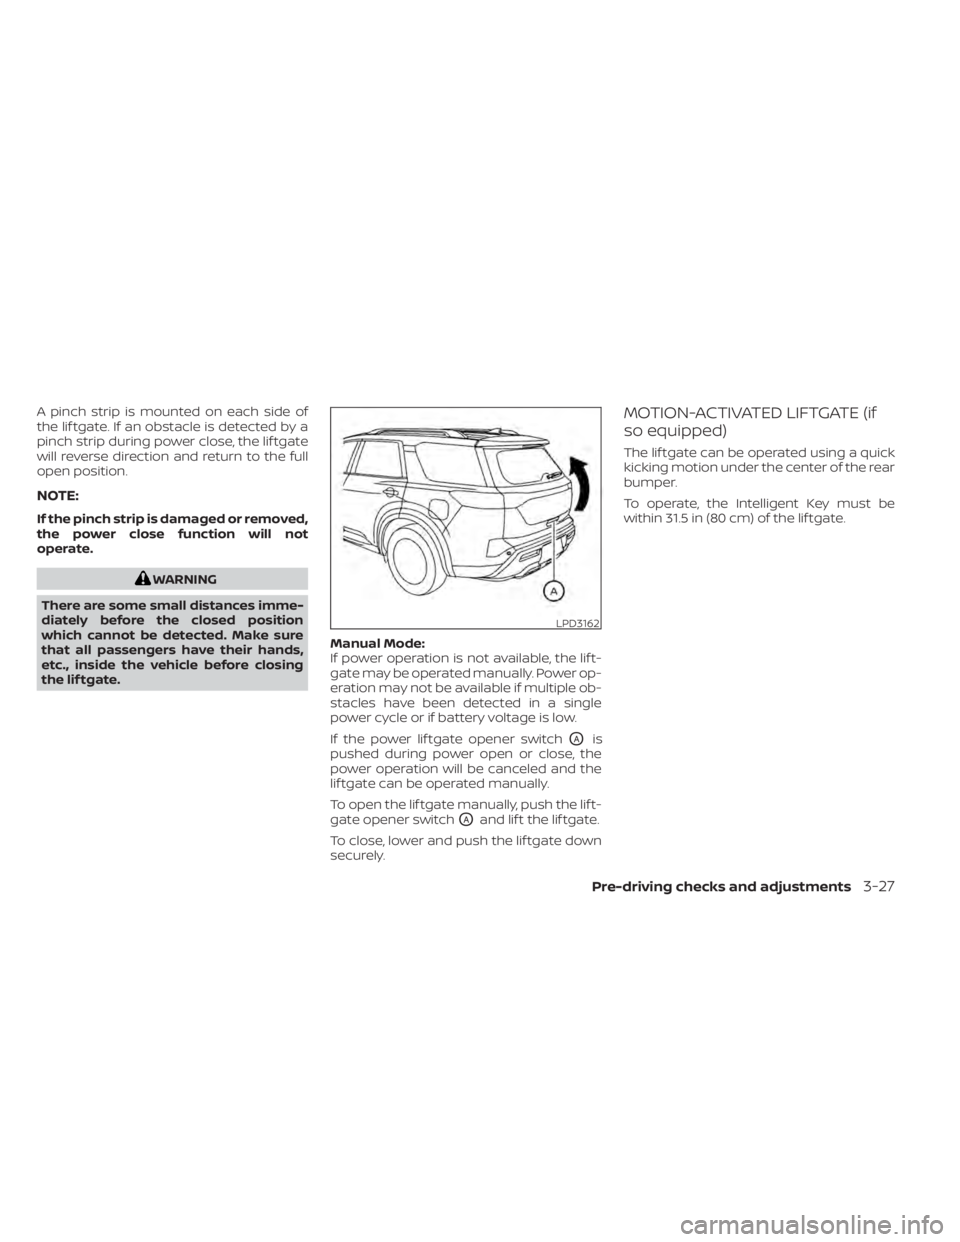
If the power lif tgate opener switch
OAis
pushed during power open or close, the
power operation will be canceled and the
lif tgate can be operated manually.
To open the lif tgate manually, push the lif t-
gate opener switch
OAand lif t the lif tgate.
To close, lower and push the lif tgate down
securely.
MOTION-ACTIVATED LIFTGATE (if
so equipped)
The lif tgate can be operated using a quick
kicking motion under the center of the rear
bumper.
To operate, the Intelligent Key must be
within 31.5 in (80 cm) of the lif tgate.
LPD3162
Pre-driving checks and adjustments3-27