sport mode NISSAN PATHFINDER 2023 Owners Manual
[x] Cancel search | Manufacturer: NISSAN, Model Year: 2023, Model line: PATHFINDER, Model: NISSAN PATHFINDER 2023Pages: 665, PDF Size: 4.64 MB
Page 55 of 665
SEAT BELT MAINTENANCE
•To clean the seat belt webbing, apply a
mild soap solution or any solution rec-
ommended for cleaning upholstery or
carpet. Then wipe with a cloth and allow
the seat belts to dry in the shade. Do not
allow the seat belts to retract until they
are completely dry.
• If dirt builds up in the shoulder belt
guide of the seat belt anchors, the seat
belts may retract slowly. Wipe the shoul-
der belt guide with a clean, dry cloth.
• Periodically check to see that the seat
belt and the metal components, such
as buckles, tongues, retractors, flexible
wires and anchors, work properly. If loose
parts, deterioration, cuts or other dam-
age on the webbing is found, the entire
seat belt assembly should be replaced.WARNING
Do not allow children to play with the
seat belts. Most seating positions are
equipped with Automatic Locking Re-
tractor (ALR) mode seat belts. If the seat
belt becomes wrapped around a child’s
neck with the ALR mode activated, the
child can be seriously injured or killed if
the seat belt retracts and becomes
tight. This can occur even if the vehicle
is parked. Unbuckle the seat belt to re-
lease the child. If the seat belt cannot
be unbuckled or is already unbuckled,
release the child by cutting the seat
belt with a suitable tool (such as a knife
or scissors) to release the seat belt.
Children need adults to help protect them.
They need to be properly restrained.
In addition to the general information in
this manual, child safety information is
available from many other sources, includ-
ing doctors, teachers, government traffic
safety offices, and community organiza-
tions. Every child is different, so be sure to
learn the best way to transport your child.
There are three basic types of child re-
straint systems:
• Rear-facing child restraints • Forward-facing child restraints
• Booster seats
The proper restraint depends on the child's
size. Generally, infants up to about 1 year
and less than 20 lbs. (9 kg) should be placed
in rear-facing child restraints. Forward-
facing child restraints are available for chil-
dren who outgrow rear-facing child re-
straints and are at least 1 year old. Booster
seats are used to help position a vehicle
lap/shoulder belt on a child who can no
longer use a forward-facing child restraint.
WARNING
Infants and children need special pro-
tection. The vehicle's seat belts may
not fit them properly. The shoulder belt
may come too close to the face or neck.
The lap belt may not fit over their small
hip bones. In an accident, an improp-
erly fitting seat belt could cause serious
or fatal injury. Always use appropriate
child restraints.
All U.S. states and Canadian provinces or
territories require the use of approved child
restraints for infants and small children. For
additional information, see “Child re-
straints” (P. 1-33).
CHILD SAFETY
1-30Safety-Seats, seat belts and supplemental restraint system
Page 147 of 665
Check Rear Seat For All Articles
When the system is enabled, this message
appears when the vehicle comes to a com-
plete stop, the vehicle is transitioned from
the D (Drive) position to P (Park) position,
and the driver exits the vehicle. This mes-
sage alerts the driver, af ter a period of time,
to check for items in the rear seat af ter the
audible alert has been provided.
NOTE:
This system is disabled until a driver en-
ables it using the vehicle information
display. For additional information, see
“How to use the vehicle information dis-
play ” (P. 2-24).
For additional information, see “Rear Door
Alert” (P. 2-100).
Rear Door Alert is activated
When the system is enabled, this message
appears when the Rear Door Alert system
is active and can remind the driver to check
the back seat.
• Using the steering wheel switch, a drivercan select “Dismiss Message” to clear the
display for a period of time. If no selection
is made, this message automatically
turns off af ter a period of time. • Using the steering wheel switch, a driver
can select “Disable Alert” to disable the
horn alert for the remainder of the cur-
rent trip.
WARNING
Selecting “Dismiss Message” during a
stop within a trip temporarily dis-
misses the message for that stop with-
out turning the system off. Alerts can
be provided for other stops during the
trip. Selecting “Disable Alert” turns off
the Rear Door Alert system for the re-
mainder of a trip and no audible alert
will be provided.
NOTE:
This system is disabled until a driver en-
ables it using the vehicle information
display. For additional information, see
“How to use the vehicle information dis-
play ” (P. 2-24).
For additional information, see “Rear Door
Alert” (P. 2-100).
Door/Lif tgate Open
This warning appears when a door or the
lif tgate has been opened.
Drive Mode Selector indicator
When a driving mode is selected using the
Drive Mode Selector, the selected mode in-
dicator is displayed.
• SAND (4WD models)
• MUD/RUT (4WD models)
• SNOW
• STANDARD (2WD models)
• AUTO (4WD models)
•ECO
• SPORT
•TOW
For additional information, see “Drive Mode
Selector” (P. 5-31).
Headlight System Error: See Owner’s
Manual
This warning appears when there is an er-
ror with the system. For additional informa-
tion, see “Headlight and turn signal switch”
(P. 2-82).
2-40Instruments and controls
Page 173 of 665
Chassis Control System Error See
Owner’s Manual
This warning appears if the chassis control
module detects a malfunction in the chas-
sis control system. Have the system
checked. It is recommended that you visit a
NISSAN dealer for this service. For addi-
tional information, see “Chassis Control”
(P. 5-181).
Check Rear Seat For All Articles
When the system is enabled, this message
appears when the vehicle comes to a com-
plete stop, the vehicle is transitioned from
the D (Drive) position to P (Park) position,
and the driver exits the vehicle. This mes-
sage alerts the driver, af ter a period of time,
to check for items in the rear seat af ter the
audible alert has been provided.
NOTE:
This system is disabled until a driver en-
ables it using the vehicle information
display. For additional information, see
“How to use the vehicle information dis-
play ” (P. 2-48).
For additional information, see “Rear Door
Alert” (P. 2-100).
Rear Door Alert is activated
When the system is enabled, this message
appears when the Rear Door Alert system
is active and can remind the driver to check
the back seat.
• Using the steering wheel switch, a drivercan select “Dismiss Message” to clear the
display for a period of time. If no selection
is made, this message automatically
turns off af ter a period of time.
• Using the steering wheel switch, a driver can select “Disable Alert” to disable the
horn alert for the remainder of the cur-
rent trip.
WARNING
Selecting “Dismiss Message” during a
stop within a trip temporarily dis-
misses the message for that stop with-
out turning the system off. Alerts can
be provided for other stops during the
trip. Selecting “Disable Alert” turns off
the Rear Door Alert system for the re-
mainder of a trip and no audible alert
will be provided.
NOTE:
This system is disabled until a driver en-
ables it using the vehicle information
display. For additional information, see
“How to use the vehicle information dis-
play ” (P. 2-48).
For additional information, see “Rear Door
Alert” (P. 2-100).
Door/Lif tgate Open
This warning appears when a door or the
lif tgate has been opened.
Drive Mode Selector indicator
When a driving mode is selected using the
Drive Mode Selector, the selected mode in-
dicator is displayed.
• SAND (4WD models)
• MUD/RUT (4WD models)
• SNOW
• STANDARD (2WD models)
• AUTO (4WD models)
•ECO
• SPORT
•TOW
For additional information, see “Drive Mode
Selector” (P. 5-31).
2-66Instruments and controls
Page 323 of 665
5 Starting and driving
Precautions when starting and driving..........5-4
Exhaust gas (carbon monoxide) ..............5-4
Three-way catalyst ...........................5-4
Tire Pressure Monitoring System
(TPMS) .......................................5-5
On-pavement and off-road driving
precautions ..................................5-8
Avoiding collision and rollover ................5-9
Off-roadrecovery ............................5-9
Rapid air pressure loss .......................5-9
Drinking alcohol/drugs and driving ..........5-10
Driving safety precautions ...................5-10
Push-button ignition switch ....................5-13
Operating range ............................ 5-14
Push-button ignition switch positions .......5-14
Emergency engine shut off ..................5-15
NISSAN Intelligent Key® battery
discharge ................................... 5-15
NISSAN Vehicle Immobilizer System .........5-16
Before starting the engine .....................5-16
Starting the engine ............................. 5-16
Remote Engine Start (if so equipped) ........5-17
Driving the vehicle .............................. 5-18
Engine protection mode ....................5-18
Automatic Transmission (A/T) ...............5-18
Parking brake .................................. 5-26Electronic parking brake (switch type)
.......5-26
Automatic brake hold .......................... 5-28
How to activate/deactivate the
automatic brake hold function ..............5-29
How to use the automatic brake hold
function ..................................... 5-30
Drive Mode Selector ............................ 5-31
STANDARD MODE (2WD models)/AUTO
MODE (4WD models) ........................ 5-32
SPORT mode ................................ 5-32
SNOW mode ................................ 5-32
TOW mode .................................. 5-33
MUD/RUT mode (4WD models) ..............5-33
SAND mode (4WD models) ..................5-33
ECO mode .................................. 5-33
Traffic Sign Recognition (TSR) (if so equipped) . . . 5-35 System operation ........................... 5-36
Turning the Traffic Sign Recognition
(TSR) system on and off .....................5-37
System temporarily unavailable .............5-37
S
ystem malfunction ......................... 5-37
System maintenance .......................5-38
Lane Departure Warning (LDW) .................5-38
LDW system operation ......................5-39
How to enable/disable the LDW system .....5-41
LDW system limitations .....................5-42
Page 354 of 665
Parking
When the vehicle is in the P (Park) position
with the brake force maintained by the au-
tomatic brake hold function, the parking
brake will automatically be applied and the
brake force of the automatic brake hold will
be released. The automatic brake hold in-
dicator light turns off. When the parking
brake is applied with the brake force main-
tained by the automatic brake hold func-
tion, the brake force of the automatic brake
hold will be released. The automatic brake
hold indicator light turns off.
NOTE:
• When the vehicle stops, but the brakeforce is not automatically applied, de-
press the brake pedal firmly until the
automatic brake hold indicator light
(green) or automatic brake hold indica-
tor (green) illuminates.
• Under the following conditions the electronic parking brake will automati-
cally be applied and the braking force
of the automatic brake hold will be
released:– The braking force is applied by the automatic brake hold function for 3
minutes or longer.
– The vehicle is in the P (Park) position. – The electronic parking brake is ap-
plied manually.
– The driver’s seat belt is unfastened.
– The driver’s door is opened.
– The ignition switch is placed in the OFF position.
– A malfunction occurs in the auto- matic brake hold function.
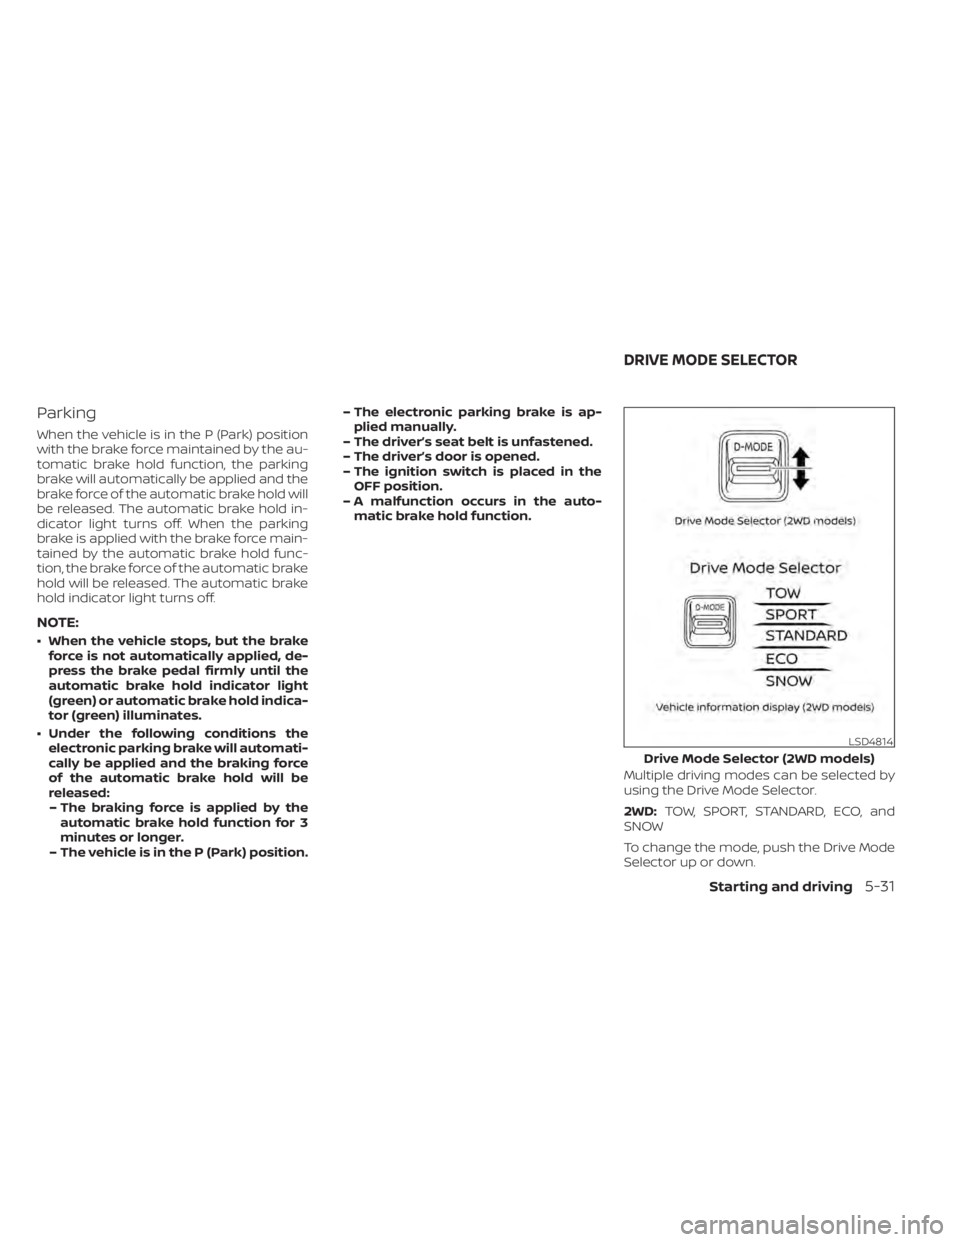
Multiple driving modes can be selected by
using the Drive Mode Selector.
2WD:TOW, SPORT, STANDARD, ECO, and
SNOW
To change the mode, push the Drive Mode
Selector up or down.
LSD4814
Drive Mode Selector (2WD models)
DRIVE MODE SELECTOR
Starting and driving5-31
Page 355 of 665
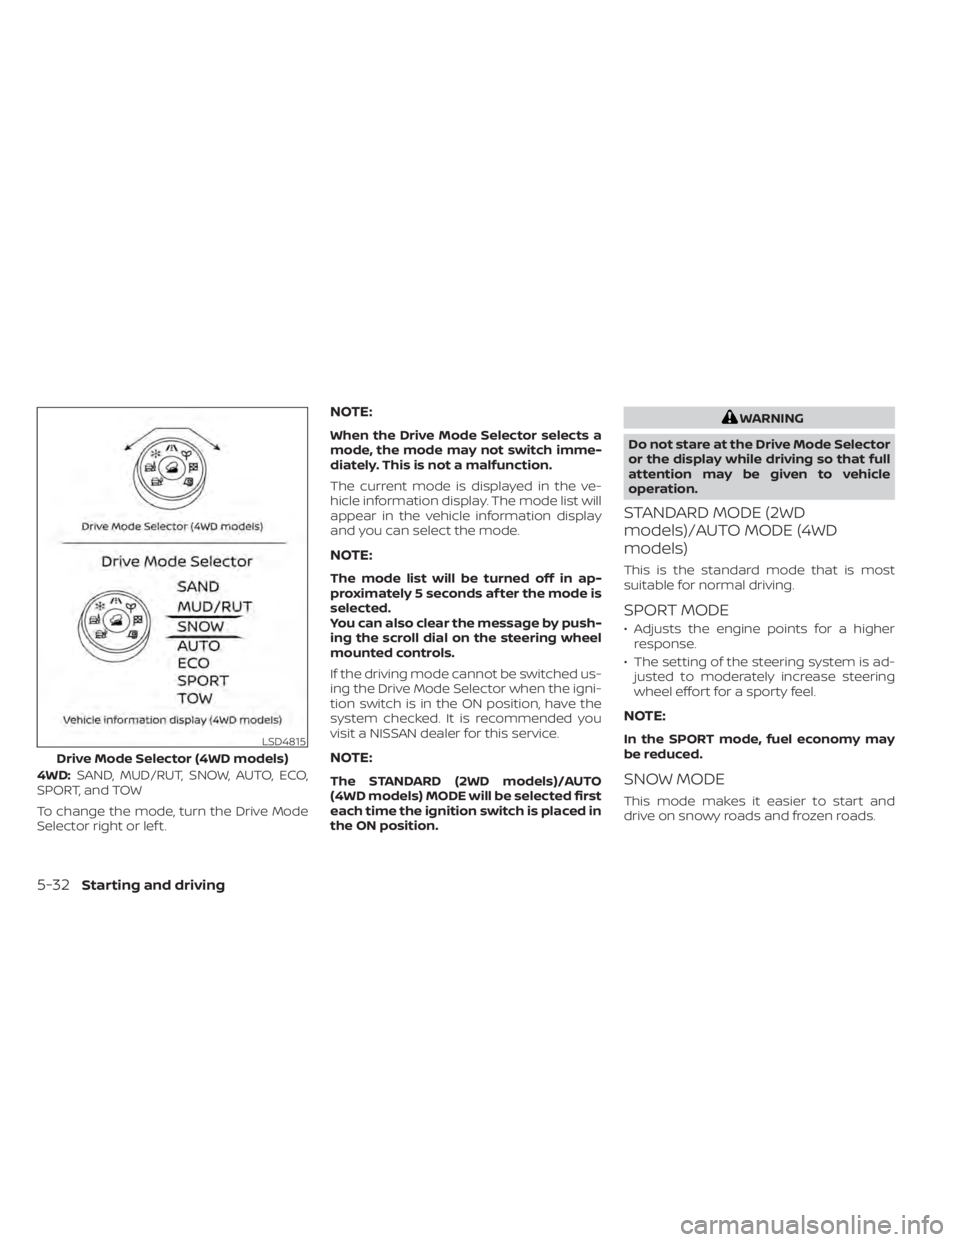
4WD:SAND, MUD/RUT, SNOW, AUTO, ECO,
SPORT, and TOW
To change the mode, turn the Drive Mode
Selector right or lef t.
NOTE:
When the Drive Mode Selector selects a
mode, the mode may not switch imme-
diately. This is not a malfunction.
The current mode is displayed in the ve-
hicle information display. The mode list will
appear in the vehicle information display
and you can select the mode.
NOTE:
The mode list will be turned off in ap-
proximately 5 seconds af ter the mode is
selected.
You can also clear the message by push-
ing the scroll dial on the steering wheel
mounted controls.
If the driving mode cannot be switched us-
ing the Drive Mode Selector when the igni-
tion switch is in the ON position, have the
system checked. It is recommended you
visit a NISSAN dealer for this service.
NOTE:
The STANDARD (2WD models)/AUTO
(4WD models) MODE will be selected first
each time the ignition switch is placed in
the ON position.
WARNING
Do not stare at the Drive Mode Selector
or the display while driving so that full
attention may be given to vehicle
operation.
STANDARD MODE (2WD
models)/AUTO MODE (4WD
models)
This is the standard mode that is most
suitable for normal driving.
SPORT MODE
• Adjusts the engine points for a higher response.
• The setting of the steering system is ad- justed to moderately increase steering
wheel effort for a sporty feel.
NOTE:
In the SPORT mode, fuel economy may
be reduced.
SNOW MODE
This mode makes it easier to start and
drive on snowy roads and frozen roads.
LSD4815
Drive Mode Selector (4WD models)
5-32Starting and driving