roof rack NISSAN PATHFINDER 2023 Owners Manual
[x] Cancel search | Manufacturer: NISSAN, Model Year: 2023, Model line: PATHFINDER, Model: NISSAN PATHFINDER 2023Pages: 665, PDF Size: 4.64 MB
Page 4 of 665
The information contained within this supplement revises or adds to the
"Fuel Recommendation" section of the "Technical and consumer information" and the
“Gas station information” section, the "Roof Rack" section of the "Instruments and controls"
section, the "Tire Chains" section of the "Do-It-Yourself" section, and the "Off-Road Mode"
section of the "Monitor, climate, audio, phone and voice recognition system" section for
the 2023 Pathfinder Owner's Manual.
Read carefully and keep in the vehicle.
Printing: JULY 2022
Publication No. SU23EA 1R53U0
OWNER’S MANUAL SUPPLEMENT
Page 5 of 665
FUEL RECOMMENDATION
(Rock Creek)
NISSAN recommends the use of unleaded
premium gasoline with an octane rating of
at least 91 AKI (Anti-Knock Index) number
(Research octane number 96). If unleaded
premium gasoline is not available, you
may use unleaded regular gasoline with an
octane rating of at least 87 AKI number
(Research octane number 91), but you may
notice a decrease in performance.
ROOF RACK (if so equipped)
WARNING
•Always install the crossbars onto the
roof side rails before loading cargo of
any kind. Loading cargo directly onto
the roof rack or the vehicle’s roof may
cause vehicle damage.
•Do not put load directly on the roof
rack. To avoid damage to paint, the
rubber seal and plastic supports,
use sof t padding or sof t cloth on the
crossbar before putting rough sur-
face load like plywood, lumber, etc.•Do not remove load label on both
sides of the front stanchions.
•Do not exceed maximum roof rack
load capacity and always distribute
the load uniformly. Heavy loading
of the roof rack has the potential
to affect the vehicle stability and
handling during sudden or unusual
handling maneuvers.
•
Properly secure all cargo with ropes or
straps to help prevent it from sliding or
shif ting. In a sudden stop or collision,
unsecured cargo could cause personal
injury.
•Drive extra carefully when the vehicle
is loaded at or near the cargo carry-
ing capacity, especially if the signifi-
cant portion of that load is carried on
the roof rack.
CAUTION
•Use care when placing or removing
items from the roof rack. If you can-
not comfortably lif t the items onto
the roof rack from the ground, use a
ladder or a stool.
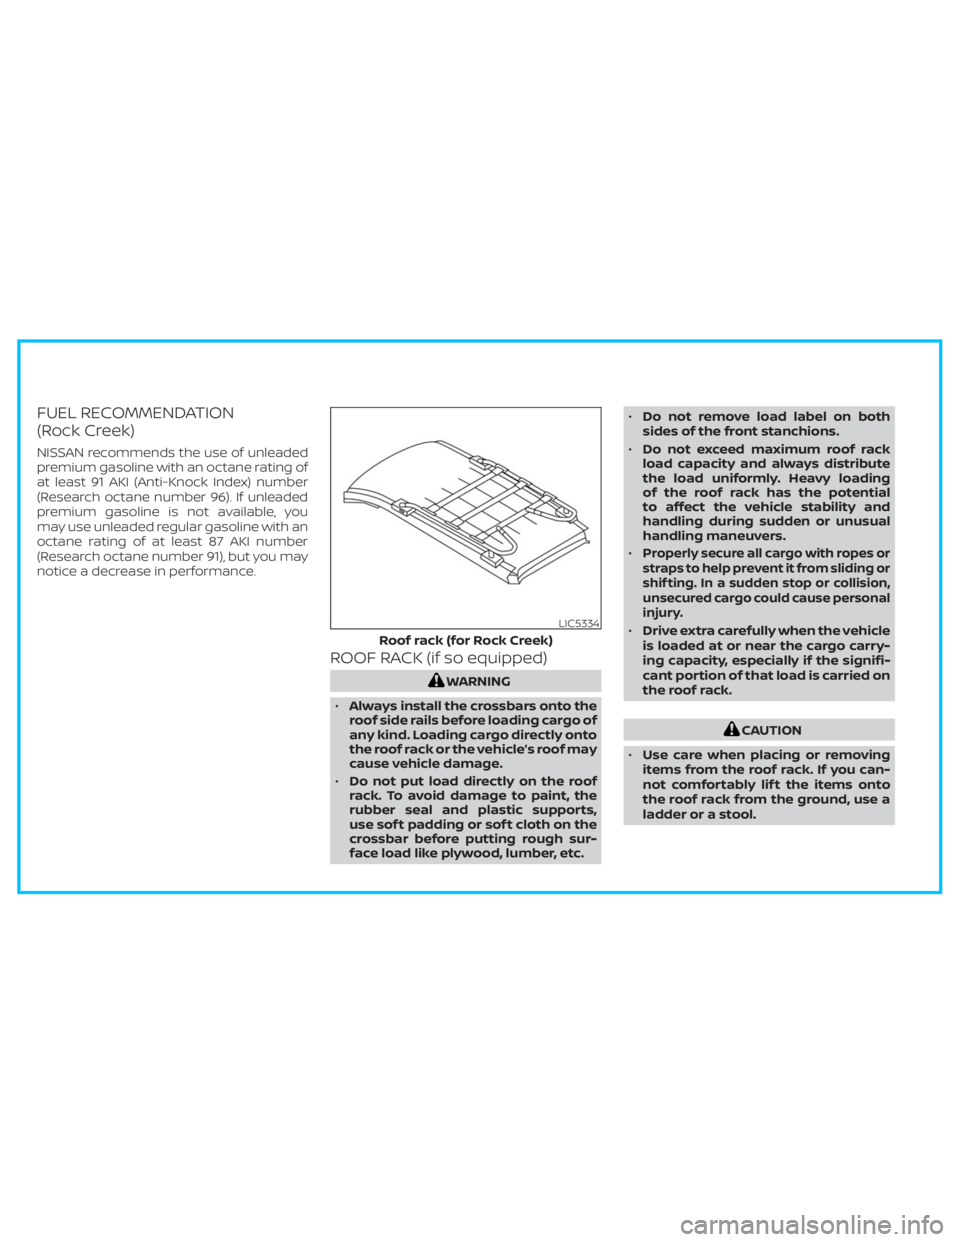
LIC5334
Roof rack (for Rock Creek)
Page 6 of 665
Genuine NISSAN accessory roof rack attach-
ments may be available through a NISSAN
dealer. It is recommended that you visit a
NISSAN dealer for additional information.
The service load capacity for the tubular
roof rack is 220 lbs. (100 kg.).
Be careful that your vehicle does not exceed
the Gross Vehicle Weight Rating (GVWR) or its
Gross Axle Weight Rating (GAWR front and
rear).
For additional information regarding GVWR
and GAWR, refer to:
• F.M.V.S.S. or C.V.M.S.S. certification label
(located on the driver’s door pillar).
TIRE CHAINS
WARNING
Do not use tire chains with vehicles
equipped with 265/60R18 size tires.
Use of tire chains on this tire size would
cause damage to the suspension com-
ponents or the vehicle’s body compo-
nents. This damage could cause you to
lose control of the vehicle, leading to an
accident resulting in possible injury or
death.Use of tire chains may be prohibited ac-
cording to location. Check the local laws
before installing tire chains. When installing
tire chains, make sure they are the proper
size for the tires on your vehicle and are
installed according to the chain manufac-
turer's suggestions.Use only SAE class “S”
chains.Class “S” chains are used on ve-
hicles with restricted tire to vehicle clear-
ance. Vehicles that can use Class “S” chains
are designed to meet the minimum clear-
ances between the tire and the closest
vehicle suspension or body component re-
quired to accommodate the use of a win-
ter traction device (tire chains or cables).
The minimum clearances are determined
using the factory equipped tire size. Other
types may damage your vehicle. Use chain
tensioners when recommended by the
tire chain manufacturer to ensure a tight
fit. Loose end links of the tire chain must
be secured or removed to prevent the
possibility of whipping action damage to
the fenders or underbody. If possible, avoid
fully loading your vehicle when using tire
chains. In addition, drive at a reduced speed.
Otherwise, your vehicle may be damaged
and/or vehicle handling and performance
may be adversely affected.
Do not use tire chains on dry roads. Driving
with chains in such conditions can cause
damage to the various mechanisms of the
vehicle due to some overstress.
OFF-ROAD MODE (for Rock Creek)
When the shif t lever is out of the R (Reverse)
position, selecting the Drive Mode Selector
(SAND or MUD/RUT) affects the Intelligent
Around View® Monitor display as follows:
1. Selecting the Drive Mode Selector (SAND
or MUD/RUT) position will activate the
Intelligent Around View® Monitor. The
front view/front-side view split screen
will be displayed.
2. When the vehicle is shif ted to the Drive
Mode Selector (SAND or MUD/RUT) posi-
tion with the bird’s-eye view displayed,
the passenger side of the display will
change to the front-side view.
When in the off-road mode, the Intelligent
Around View® Monitor will not return to the
previous screen.
The screen displayed on the Intelligent
Around View® Monitor will automatically re-
turn to the previous screen 3 minutes af ter
the vehicle was shif ted out of the Drive
Mode Selector (SAND or MUD/RUT) position.
Page 100 of 665
•Modif ying or tampering with the
front passenger seat may result in
serious personal injury. For example,
do not change the front seats by
placing material on the seat cushion
or by installing additional trim mate-
rial, such as seat covers, on the seat
that are not specifically designed to
assure proper air bag operation. Ad-
ditionally, do not stow any objects
under the front passenger seat or the
seat cushion and seatback. Such ob-
jects may interfere with the proper
operation of the occupant classifica-
tion sensor (weight sensor).
• No unauthorized changes should be
made to any components or wiring
of the seat belt system. This may af-
fect the front air bag system. Tam-
pering with the seat belt system may
result in serious personal injury. •
It is recommended that you visit a
NISSAN dealer for work on and
around the front air bag. It is also rec-
ommended that you visit a NISSAN
dealer for installation of electrical
equipment. The Supplemental Re-
straint System (SRS) wiring har-
nesses* should not be modified or
disconnected. Unauthorized electri-
cal test equipment and probing de-
vices should not be used on the air
bag system.
• A cracked windshield should be re-
placed immediately by a qualified re-
pair facility. A cracked windshield
could affect the function of the
supplemental air bag system.
*The SRS wiring harness connectors are
yellow and orange for easy
identification.
When selling your vehicle, we request that
you inform the buyer about the front air
bag system and guide the buyer to the
appropriate sections in this Owner's
Manual.
FRONT, 2ND ROW OUTBOARD, AND
FRONT CENTRAL (if so equipped)
SEAT-MOUNTED SIDE-IMPACT
SUPPLEMENTAL AIR BAG AND
ROOF-MOUNTED CURTAIN
SIDE-IMPACT AND ROLLOVER
SUPPLEMENTAL AIR BAG SYSTEMS
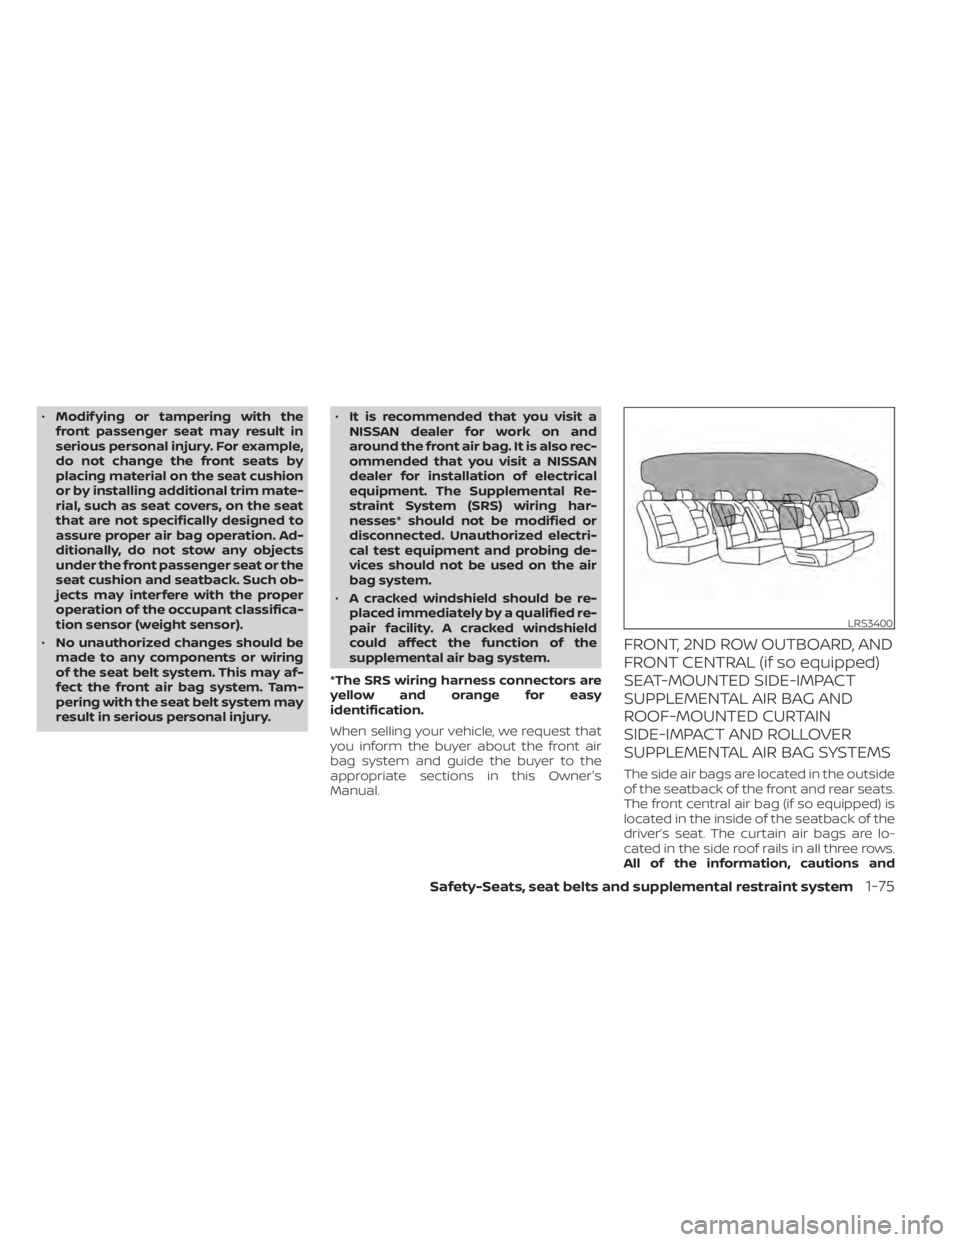
The side air bags are located in the outside
of the seatback of the front and rear seats.
The front central air bag (if so equipped) is
located in the inside of the seatback of the
driver’s seat. The curtain air bags are lo-
cated in the side roof rails in all three rows.
All of the information, cautions and
LRS3400
Safety-Seats, seat belts and supplemental restraint system1-75
Page 109 of 665
Horn........................................... 2-89
Climate controlled seat switches
(if so equipped) ................................. 2-90
Heated seat switches (if so equipped) ..........2-91
Heated 2nd row seat switches
(if so equipped) ................................. 2-92
Heated steering wheel switch (if so equipped) . . 2-93
Hill descent control switch (if so equipped) .....2-94
Steering Assist switch (for vehicles with
ProPILOT Assist) (if so equipped) ................2-95
Head Up Display (HUD) (if so equipped) .........2-95
HowtousetheHUD......................... 2-96
Driver Assistance/Navigation linking ........2-97
Emergency call (SOS) button (if so equipped) . . . 2-98 Emergency support ......................... 2-98
Rear Door Alert ................................ 2-100
Power outlets ................................. 2-101
12v outlets ................................. 2-101
120v outlet (if so equipped) .................2-102
USB/iPod® charging ports .....................2-103
Wireless charger (if so equipped) ..............2-104
Wireless charger indicator ..................2-105Wireless charger operation
.................2-105
Extended storage switch ......................2-106
Storage ....................................... 2-107
Front-door pockets ........................ 2-107
Lower console storage tray ................2-108
Seatback pockets (if so equipped) ..........2-108
Storagetrays............................... 2-109
Glovebox .................................. 2-110
Console box ................................ 2-110
2nd row console (if so equipped) ...........2-110
Overhead sunglasses storage ...............2-111
Cup holders ................................ 2-112
Cargo area storage bin .....................2-114
Luggage hooks ............................ 2-115
Roof rack (if so equipped) ..................2-116
Windows ....................................... 2-117
Power windows .............................
2-117
R
ear door sunshade (if so equipped) .......2-120
Power moonroof (if so equipped) ..............2-120
Automatic moonroof and sunshade .......2-121
Interior lights .................................. 2-123
Map lights .................................. 2-123
Page 118 of 665
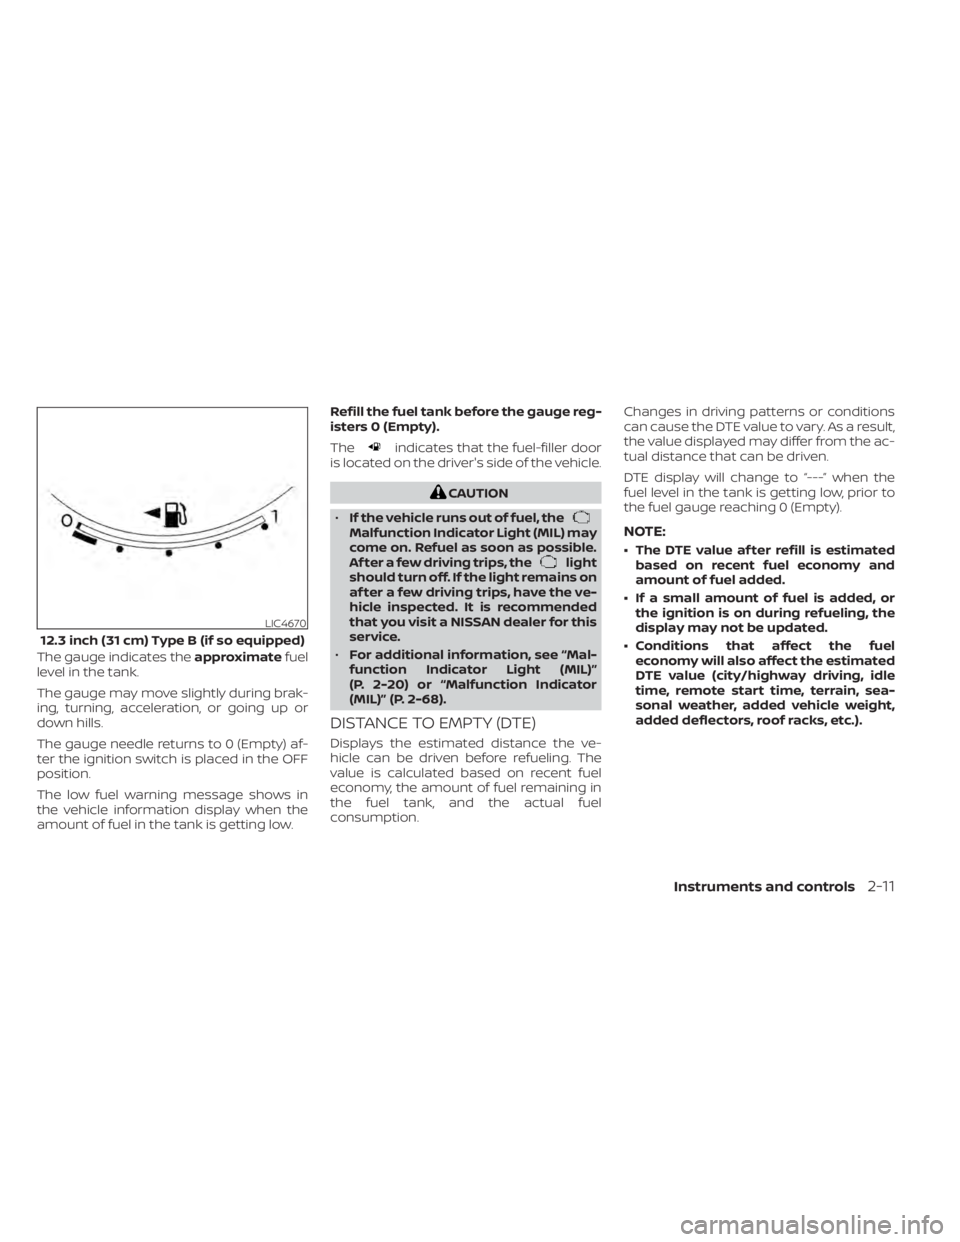
The gauge indicates theapproximatefuel
level in the tank.
The gauge may move slightly during brak-
ing, turning, acceleration, or going up or
down hills.
The gauge needle returns to 0 (Empty) af-
ter the ignition switch is placed in the OFF
position.
The low fuel warning message shows in
the vehicle information display when the
amount of fuel in the tank is getting low. Refill the fuel tank before the gauge reg-
isters 0 (Empty).
The
indicates that the fuel-filler door
is located on the driver's side of the vehicle.
CAUTION
• If the vehicle runs out of fuel, the
Malfunction Indicator Light (MIL) may
come on. Refuel as soon as possible.
Af ter a few driving trips, the
light
should turn off. If the light remains on
af ter a few driving trips, have the ve-
hicle inspected. It is recommended
that you visit a NISSAN dealer for this
service.
• For additional information, see “Mal-
function Indicator Light (MIL)”
(P. 2-20) or “Malfunction Indicator
(MIL)” (P. 2-68).
DISTANCE TO EMPTY (DTE)
Displays the estimated distance the ve-
hicle can be driven before refueling. The
value is calculated based on recent fuel
economy, the amount of fuel remaining in
the fuel tank, and the actual fuel
consumption. Changes in driving patterns or conditions
can cause the DTE value to vary. As a result,
the value displayed may differ from the ac-
tual distance that can be driven.
DTE display will change to “---” when the
fuel level in the tank is getting low, prior to
the fuel gauge reaching 0 (Empty).
NOTE:
• The DTE value af ter refill is estimated
based on recent fuel economy and
amount of fuel added.
• If a small amount of fuel is added, or the ignition is on during refueling, the
display may not be updated.
• Conditions that affect the fuel economy will also affect the estimated
DTE value (city/highway driving, idle
time, remote start time, terrain, sea-
sonal weather, added vehicle weight,
added deflectors, roof racks, etc.).
LIC4670
12.3 inch (31 cm) Type B (if so equipped)
Instruments and controls2-11
Page 183 of 665
Your vehicle has two types of security
systems:
• Vehicle security system
• NISSAN Vehicle Immobilizer System
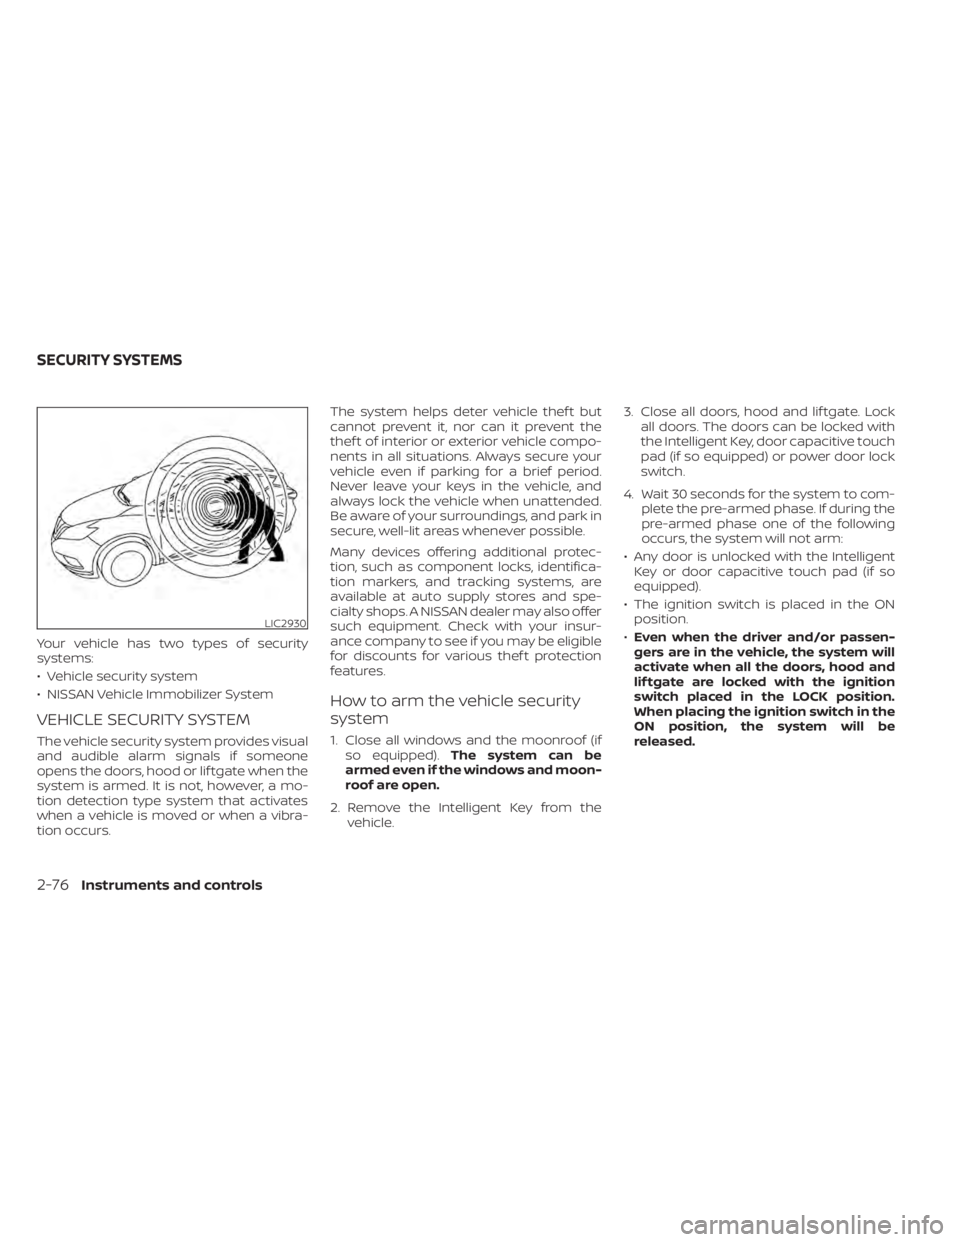
VEHICLE SECURITY SYSTEM
The vehicle security system provides visual
and audible alarm signals if someone
opens the doors, hood or lif tgate when the
system is armed. It is not, however, a mo-
tion detection type system that activates
when a vehicle is moved or when a vibra-
tion occurs.The system helps deter vehicle thef t but
cannot prevent it, nor can it prevent the
thef t of interior or exterior vehicle compo-
nents in all situations. Always secure your
vehicle even if parking for a brief period.
Never leave your keys in the vehicle, and
always lock the vehicle when unattended.
Be aware of your surroundings, and park in
secure, well-lit areas whenever possible.
Many devices offering additional protec-
tion, such as component locks, identifica-
tion markers, and tracking systems, are
available at auto supply stores and spe-
cialty shops. A NISSAN dealer may also offer
such equipment. Check with your insur-
ance company to see if you may be eligible
for discounts for various thef t protection
features.
How to arm the vehicle security
system
1. Close all windows and the moonroof (if
so equipped). The system can be
armed even if the windows and moon-
roof are open.
2. Remove the Intelligent Key from the vehicle. 3. Close all doors, hood and lif tgate. Lock
all doors. The doors can be locked with
the Intelligent Key, door capacitive touch
pad (if so equipped) or power door lock
switch.
4. Wait 30 seconds for the system to com- plete the pre-armed phase. If during the
pre-armed phase one of the following
occurs, the system will not arm:
• Any door is unlocked with the Intelligent Key or door capacitive touch pad (if so
equipped).
• The ignition switch is placed in the ON position.
• Even when the driver and/or passen-
gers are in the vehicle, the system will
activate when all the doors, hood and
lif tgate are locked with the ignition
switch placed in the LOCK position.
When placing the ignition switch in the
ON position, the system will be
released.
LIC2930
SECURITY SYSTEMS
2-76Instruments and controls
Page 223 of 665
ROOF RACK (if so equipped)
WARNING
• Always install the crossbars onto the
roof side rails before loading cargo of
any kind. Loading cargo directly onto
the roof side rails or the vehicle’s roof
may cause vehicle damage.
• Roof rack cross bars should be evenly
distributed.
• Do not exceed maximum roof rack
crossbars load capacity and always
distribute the load uniformly. •
Heavy loading of the crossbars has
the potential to affect the vehicle
stability and handling during sudden
or unusual handling maneuvers.
• Properly secure all cargo with ropes
or straps to help prevent it from slid-
ing or shif ting. In a sudden stop or
collision, unsecured cargo could
cause personal injury.
• Drive extra carefully when the vehicle
is loaded at or near the cargo carry-
ing capacity, especially if the signifi-
cant portion of that load is carried on
the crossbars.CAUTION
• Use care when placing or removing
items from the roof rack. If you can-
not comfortably lif t the items onto
the roof rack from the ground, use a
ladder or a stool.
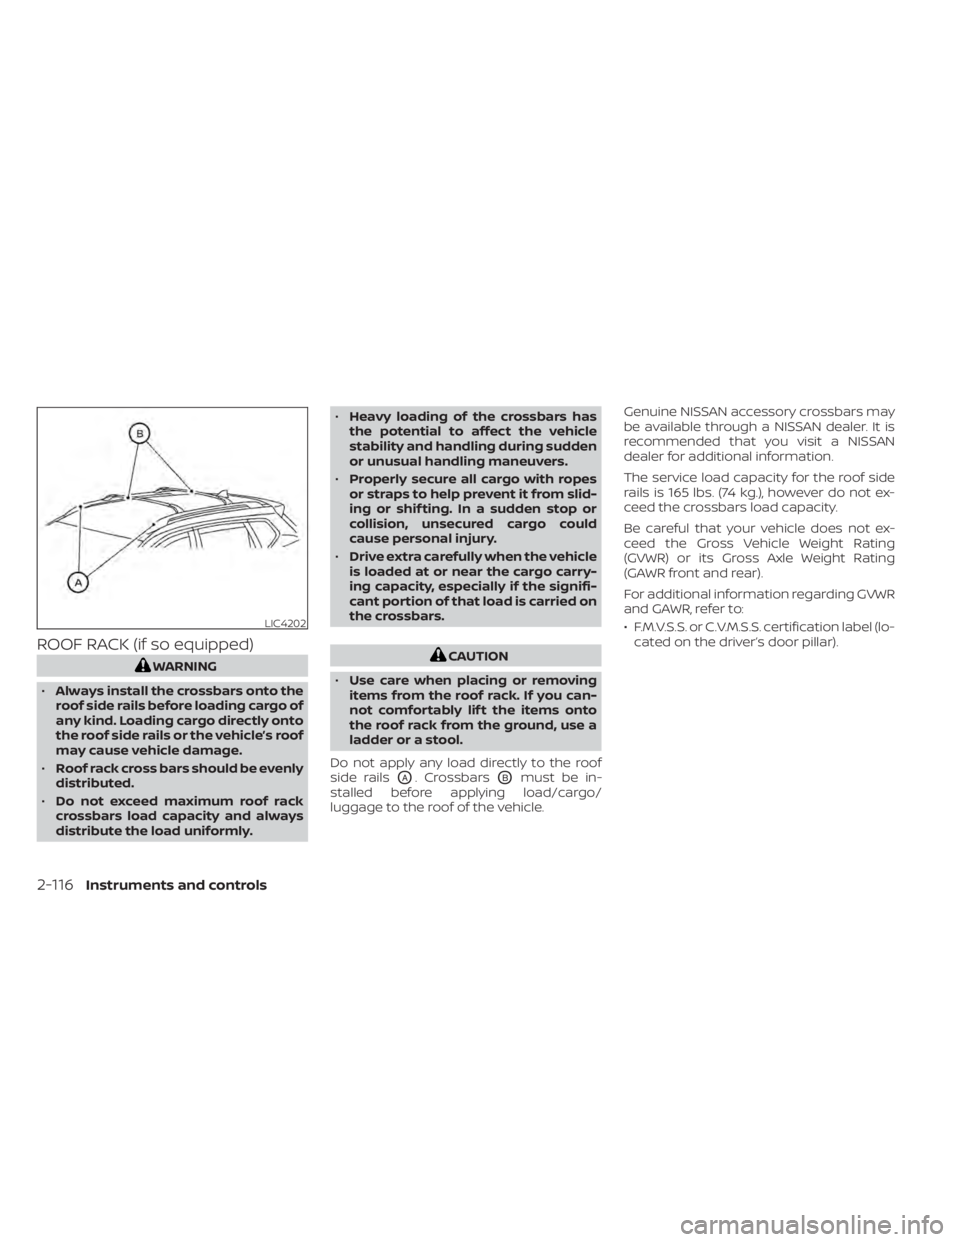
Do not apply any load directly to the roof
side rails
OA. CrossbarsOBmust be in-
stalled before applying load/cargo/
luggage to the roof of the vehicle. Genuine NISSAN accessory crossbars may
be available through a NISSAN dealer. It is
recommended that you visit a NISSAN
dealer for additional information.
The service load capacity for the roof side
rails is 165 lbs. (74 kg.), however do not ex-
ceed the crossbars load capacity.
Be careful that your vehicle does not ex-
ceed the Gross Vehicle Weight Rating
(GVWR) or its Gross Axle Weight Rating
(GAWR front and rear).
For additional information regarding GVWR
and GAWR, refer to:
• F.M.V.S.S. or C.V.M.S.S. certification label (lo-
cated on the driver’s door pillar).
LIC4202
2-116Instruments and controls
Page 224 of 665
Installing Crossbars (if so
equipped)
WARNING
• It is recommended that you have the
roof rack crossbars installed by a
NISSAN dealer.
• Protect the painted area on the ve-
hicle roof under the crossbars by
placing a piece of cloth under the
cross bars to prevent scratch
damage.
• Make sure the moonroof (if so
equipped) is in the closed position
during the installation process.
POWER WINDOWS
WARNING
• Make sure that all passengers have
their hands, etc., inside the vehicle
while it is in motion and before clos-
ing the windows. Use the window
lock switch to prevent unexpected
use of the power windows.
• To help avoid risk of injury or death
through unintended operation of the
vehicle and/or its systems, including
entrapment in windows or inadver-
tent door lock activation, do not
leave children, people who require
the assistance of others or pets unat-
tended in your vehicle. Additionally,
the temperature inside a closed ve-
hicle on a warm day can quickly be-
come high enough to cause a signifi-
cant risk of injury or death to people
and pets.
The power windows operate when the ig-
nition switch is placed in the ON position or
for a period of time af ter the ignition switch
is placed in the OFF position. If the driver's
or passenger's door is opened during this
period of time, the power to the windows is
canceled.
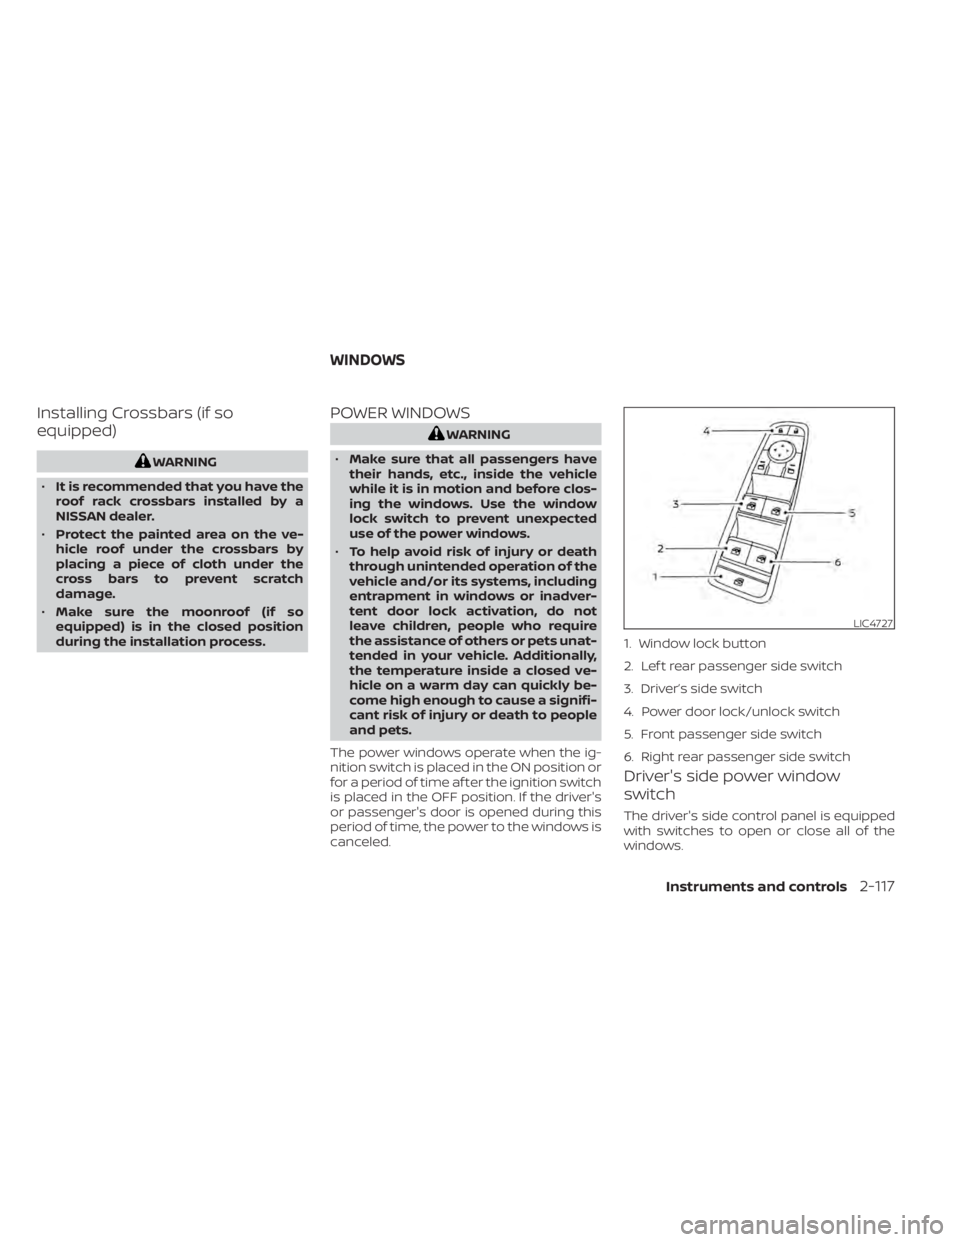
Driver's side power window
switch
The driver's side control panel is equipped
with switches to open or close all of the
windows.
LIC4727
1. Window lock button
2. Lef t rear passenger side switch
3. Driver’s side switch
4. Power door lock/unlock switch
5. Front passenger side switch
6. Right rear passenger side switch
WINDOWS
Instruments and controls2-117
Page 540 of 665
7 Appearance and care
Cleaning exterior................................ 7-2
Washing ..................................... 7-2
Waxing ....................................... 7-3
Removing spots .............................. 7-3
Underbody ................................... 7-3
Glass ......................................... 7-3
Aluminum alloy wheels ....................... 7-3
Chromeparts................................ 7-3
Tire dressings ................................ 7-4
Cleaning interior ................................ 7-4
Air fresheners ................................ 7-5 Power moonroof (if so equipped)
............. 7-5
Floor mats (if so equipped) ................... 7-5
Seatbelts ....................................7-6
Cleaning the seat tracks ..................... 7-7
Corrosion protection ............................ 7-7
Most common factors contributing to
vehicle corrosion ............................. 7-7
Environmental factors influence the
rate of corrosion ............................. 7-7
Protect your vehicle from corrosion .......... 7-7