horn NISSAN PATHFINDER HYBRID 2015 Owners Manual
[x] Cancel search | Manufacturer: NISSAN, Model Year: 2015, Model line: PATHFINDER HYBRID, Model: NISSAN PATHFINDER HYBRID 2015Pages: 524, PDF Size: 6.49 MB
Page 29 of 524
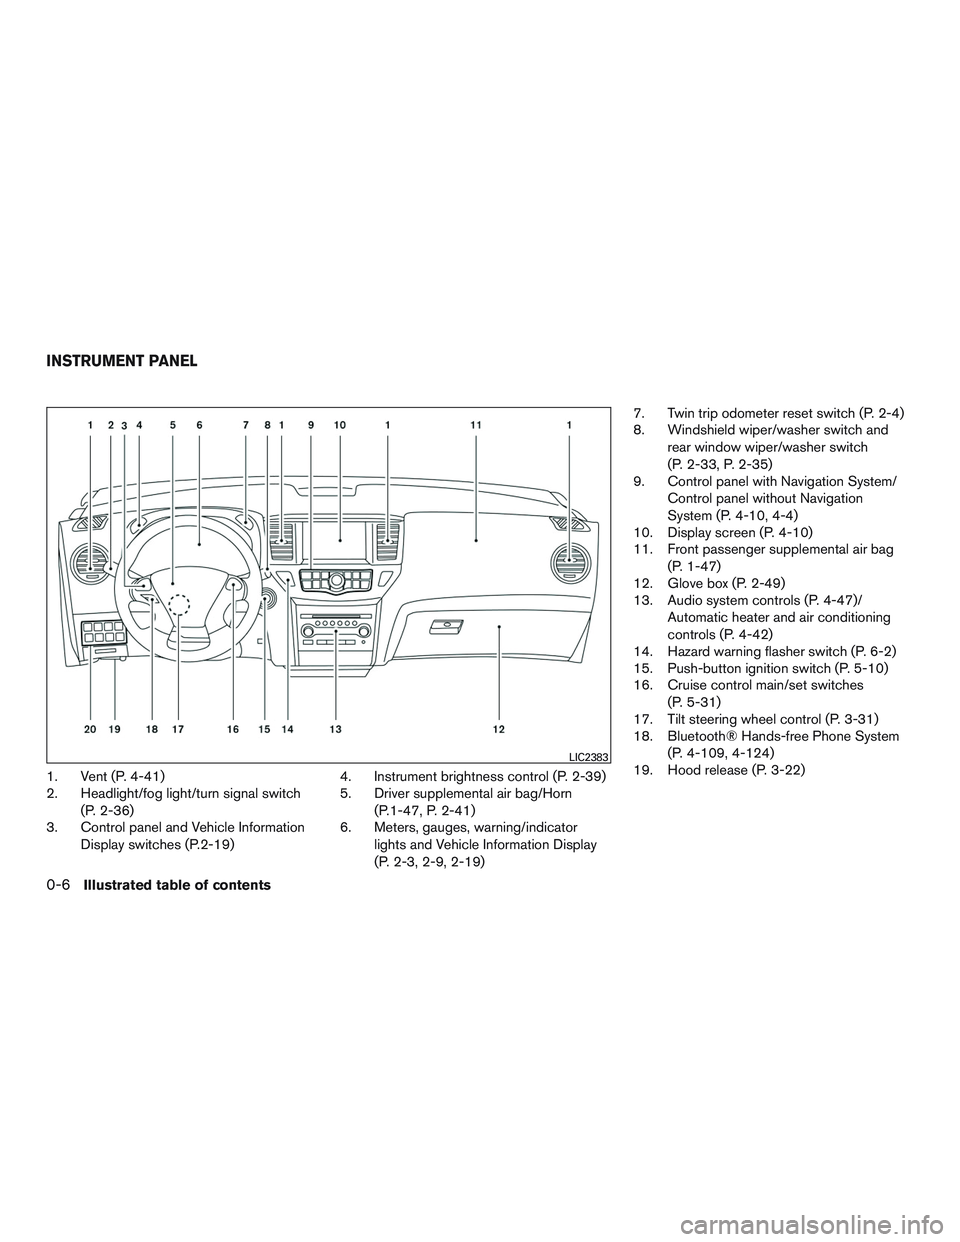
1. Vent (P. 4-41)
2. Headlight/fog light/turn signal switch
(P. 2-36)
3. Control panel and Vehicle Information
Display switches (P.2-19)4. Instrument brightness control (P. 2-39)
5. Driver supplemental air bag/Horn
(P.1-47, P. 2-41)
6. Meters, gauges, warning/indicator
lights and Vehicle Information Display
(P. 2-3, 2-9, 2-19)7. Twin trip odometer reset switch (P. 2-4)
8. Windshield wiper/washer switch and
rear window wiper/washer switch
(P. 2-33, P. 2-35)
9. Control panel with Navigation System/
Control panel without Navigation
System (P. 4-10, 4-4)
10. Display screen (P. 4-10)
11. Front passenger supplemental air bag
(P. 1-47)
12. Glove box (P. 2-49)
13. Audio system controls (P. 4-47)/
Automatic heater and air conditioning
controls (P. 4-42)
14. Hazard warning flasher switch (P. 6-2)
15. Push-button ignition switch (P. 5-10)
16. Cruise control main/set switches
(P. 5-31)
17. Tilt steering wheel control (P. 3-31)
18. Bluetooth® Hands-free Phone System
(P. 4-109, 4-124)
19. Hood release (P. 3-22)
LIC2383
INSTRUMENT PANEL
0-6Illustrated table of contents
Page 103 of 524
2 Instruments and controls
Instrument panel...................................2-2
Meters and gauges................................2-3
Speedometer and odometer.....................2-4
Tachometer....................................2-5
Fuel gauge....................................2-5
Assist Charge Gauge...........................2-6
Compass display (if so equipped)...................2-6
Zone variation change procedure.................2-7
Warning/indicator lights and audible reminders.......2-9
Checking bulbs...............................2-10
Warning lights................................2-10
Indicator lights................................2-15
Audible reminders.............................2-18
Vehicle Information Display........................2-18
How to use the vehicle information display.......2-19
Startup display................................2-19
Settings......................................2-19
Vehicle information display warnings and
indicators.....................................2-27
Security systems.................................2-31
Vehicle security system.........................2-31
NISSAN vehicle immobilizer system.............2-32
Windshield wiper and washer switch...............2-33Switch operation..............................2-34
Rear window wiper and washer switch..............2-35
Rear window and outside mirror defroster switch.....2-36
Headlight and turn signal switch....................2-36
Headlight control switch........................2-37
Daytime running light system (Canada only)......2-39
Instrument brightness control...................2-39
Turn signal switch.............................2-39
Fog light switch...............................2-40
Horn............................................2-41
Heated seats (if so equipped)......................2-41
Heated 2nd row seats (if so equipped)..............2-42
Climate controlled seat switch (if so equipped)......2-43
Heated steering wheel (if so equipped).............2-44
Vehicle Dynamic Control (VDC) off switch
...........2-45
Power inverter switch (if so equipped)..............2-45
Tow mode switch.................................2-46
Power outlets....................................2-46
12v outlets...................................2-46
120v outlet (if so equipped)....................2-48
Storage.........................................2-48
Map pockets..................................2-48
Seatback pocket..............................2-49
Page 105 of 524
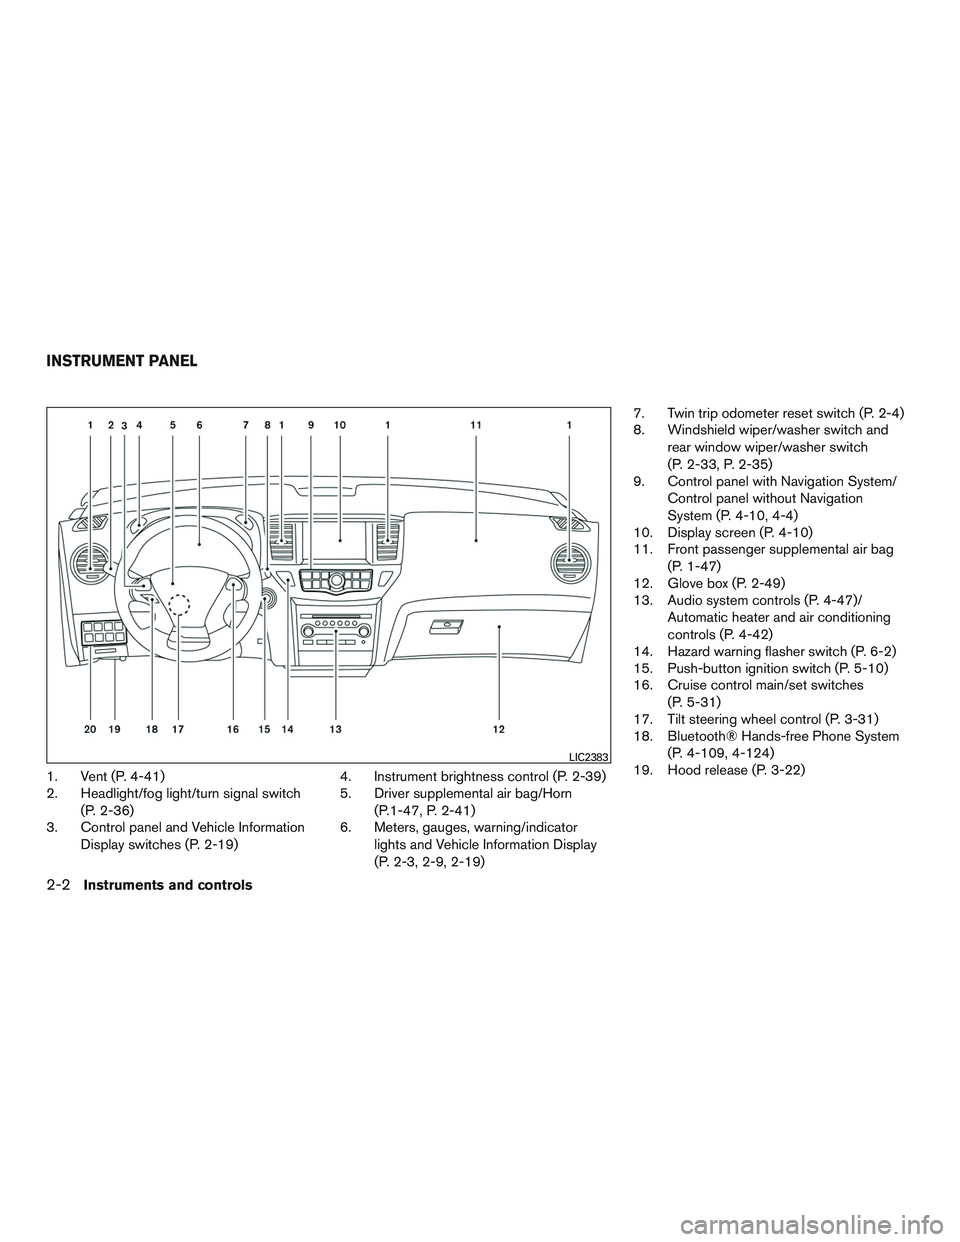
1. Vent (P. 4-41)
2. Headlight/fog light/turn signal switch
(P. 2-36)
3. Control panel and Vehicle Information
Display switches (P. 2-19)4. Instrument brightness control (P. 2-39)
5. Driver supplemental air bag/Horn
(P.1-47, P. 2-41)
6. Meters, gauges, warning/indicator
lights and Vehicle Information Display
(P. 2-3, 2-9, 2-19)7. Twin trip odometer reset switch (P. 2-4)
8. Windshield wiper/washer switch and
rear window wiper/washer switch
(P. 2-33, P. 2-35)
9. Control panel with Navigation System/
Control panel without Navigation
System (P. 4-10, 4-4)
10. Display screen (P. 4-10)
11. Front passenger supplemental air bag
(P. 1-47)
12. Glove box (P. 2-49)
13. Audio system controls (P. 4-47)/
Automatic heater and air conditioning
controls (P. 4-42)
14. Hazard warning flasher switch (P. 6-2)
15. Push-button ignition switch (P. 5-10)
16. Cruise control main/set switches
(P. 5-31)
17. Tilt steering wheel control (P. 3-31)
18. Bluetooth® Hands-free Phone System
(P. 4-109, 4-124)
19. Hood release (P. 3-22)
LIC2383
INSTRUMENT PANEL
2-2Instruments and controls
Page 123 of 524
Vehicle Settings
The vehicle settings allows the customer to
change settings for interior lights, intelligent key
settings, unlock settings and other vehicle set-
tings.
The vehicle settings can be changed using
the
,, and the ENTER buttons.
Welcome light (if so equipped)
The welcome light can be set to be ON or OFF.
From the Vehicle Settings menu, select “Wel-
come Light”. Use the ENTER button to turn this
feature ON or OFF.
Auto Room Lamp
The interior lights can be set to be ON or OFF if
any door is unlocked. From the Vehicle Settings
menu, select “Auto Room Light”. Use the ENTER
button to turn this feature ON or OFF.
Light Sensitivity (if so equipped)
The light sensitivity can be set to illuminate earlier
based on the brightness outside the vehicle.
From the Vehicle Settings menu, select “Light
Sensitivity”. Use the ENTER button to change the
sensitivity.Light Off Delay (if so equipped)
The duration of the automatic headlights can be
changed from 0 to 180 seconds. From the Ve-
hicle Settings menu, select “Light Off Delay”. Use
the ENTER button to change the duration.
Wiper with Speed
The wiper with speed can be set to be ON or
OFF. From the Vehicle Settings menu, select
“Wiper with Speed”. Use the ENTER button to
turn this feature ON or OFF.
I-Key Door Lock
When this item is turned on, the request switch
on the door is activated. From the Vehicle Set-
tings menu, select “I-Key Door Unlock”. Use the
ENTER button to activate this function.
Selective-Unlock
When this item is turned on, only the driver’s door
is unlocked first after the door unlock operation.
When the door handle request switch on the
driver’s or front passenger’s side door is pushed
to be unlocked, only the corresponding door is
unlocked first. All the doors can be unlocked if the
door unlock operation is performed again within
1 minute. When this item is turned to OFF, all the
doors will be unlocked after the door unlock
operation is performed once. From the VehicleSettings menu, select “Selective Unlock”. Use
the ENTER button to activate this function.
Auto Door Unlock
The auto door unlock function automatically un-
locks all the doors when the shift lever is placed in
the P (Park) position. From the Vehicle Settings
menu, select “Auto Door Unlock”. Use the EN-
TER button to enable/disable this function.
Answer back horn
When the answer back horn is on, the horn will
chirp and the hazard indicators will flash once
when locking the vehicle with the Intelligent Key.
Remote Start (if so equipped)
The remote start function can be turned on or off.
If the setting is OFF the vehicle cannot be started
using the Intelligent Key. From the Vehicle Set-
tings menu, select “Remote Start”. Use the EN-
TER button to enable/disable.
Battery Saver
The battery saver automatically turns off the igni-
tion after a period of time when the ignition switch
is left in the ACC or ON position.
2-20Instruments and controls
Page 134 of 524
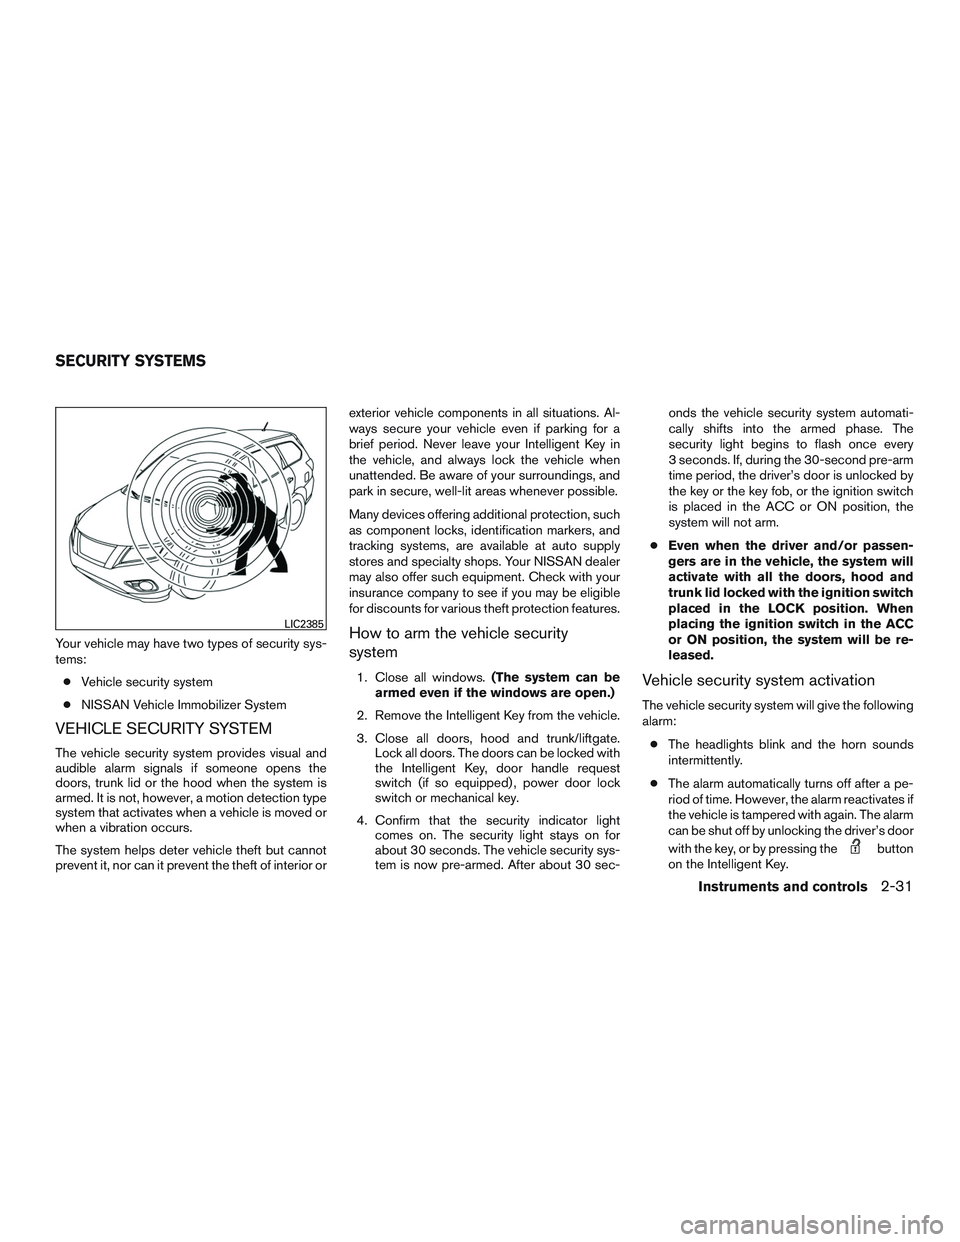
Your vehicle may have two types of security sys-
tems:
●Vehicle security system
●NISSAN Vehicle Immobilizer System
VEHICLE SECURITY SYSTEM
The vehicle security system provides visual and
audible alarm signals if someone opens the
doors, trunk lid or the hood when the system is
armed. It is not, however, a motion detection type
system that activates when a vehicle is moved or
when a vibration occurs.
The system helps deter vehicle theft but cannot
prevent it, nor can it prevent the theft of interior orexterior vehicle components in all situations. Al-
ways secure your vehicle even if parking for a
brief period. Never leave your Intelligent Key in
the vehicle, and always lock the vehicle when
unattended. Be aware of your surroundings, and
park in secure, well-lit areas whenever possible.
Many devices offering additional protection, such
as component locks, identification markers, and
tracking systems, are available at auto supply
stores and specialty shops. Your NISSAN dealer
may also offer such equipment. Check with your
insurance company to see if you may be eligible
for discounts for various theft protection features.
How to arm the vehicle security
system
1. Close all windows.(The system can be
armed even if the windows are open.)
2. Remove the Intelligent Key from the vehicle.
3. Close all doors, hood and trunk/liftgate.
Lock all doors. The doors can be locked with
the Intelligent Key, door handle request
switch (if so equipped) , power door lock
switch or mechanical key.
4. Confirm that the security indicator light
comes on. The security light stays on for
about 30 seconds. The vehicle security sys-
tem is now pre-armed. After about 30 sec-onds the vehicle security system automati-
cally shifts into the armed phase. The
security light begins to flash once every
3 seconds. If, during the 30-second pre-arm
time period, the driver’s door is unlocked by
the key or the key fob, or the ignition switch
is placed in the ACC or ON position, the
system will not arm.
●Even when the driver and/or passen-
gers are in the vehicle, the system will
activate with all the doors, hood and
trunk lid locked with the ignition switch
placed in the LOCK position. When
placing the ignition switch in the ACC
or ON position, the system will be re-
leased.Vehicle security system activation
The vehicle security system will give the following
alarm:
●The headlights blink and the horn sounds
intermittently.
●The alarm automatically turns off after a pe-
riod of time. However, the alarm reactivates if
the vehicle is tampered with again. The alarm
can be shut off by unlocking the driver’s door
with the key, or by pressing the
button
on the Intelligent Key.
LIC2385
SECURITY SYSTEMS
Instruments and controls2-31
Page 144 of 524
The headlights must be on and the low beams
selected for the fog lights to operate. The fog
lights automatically turn off when the high beam
headlights are selected.
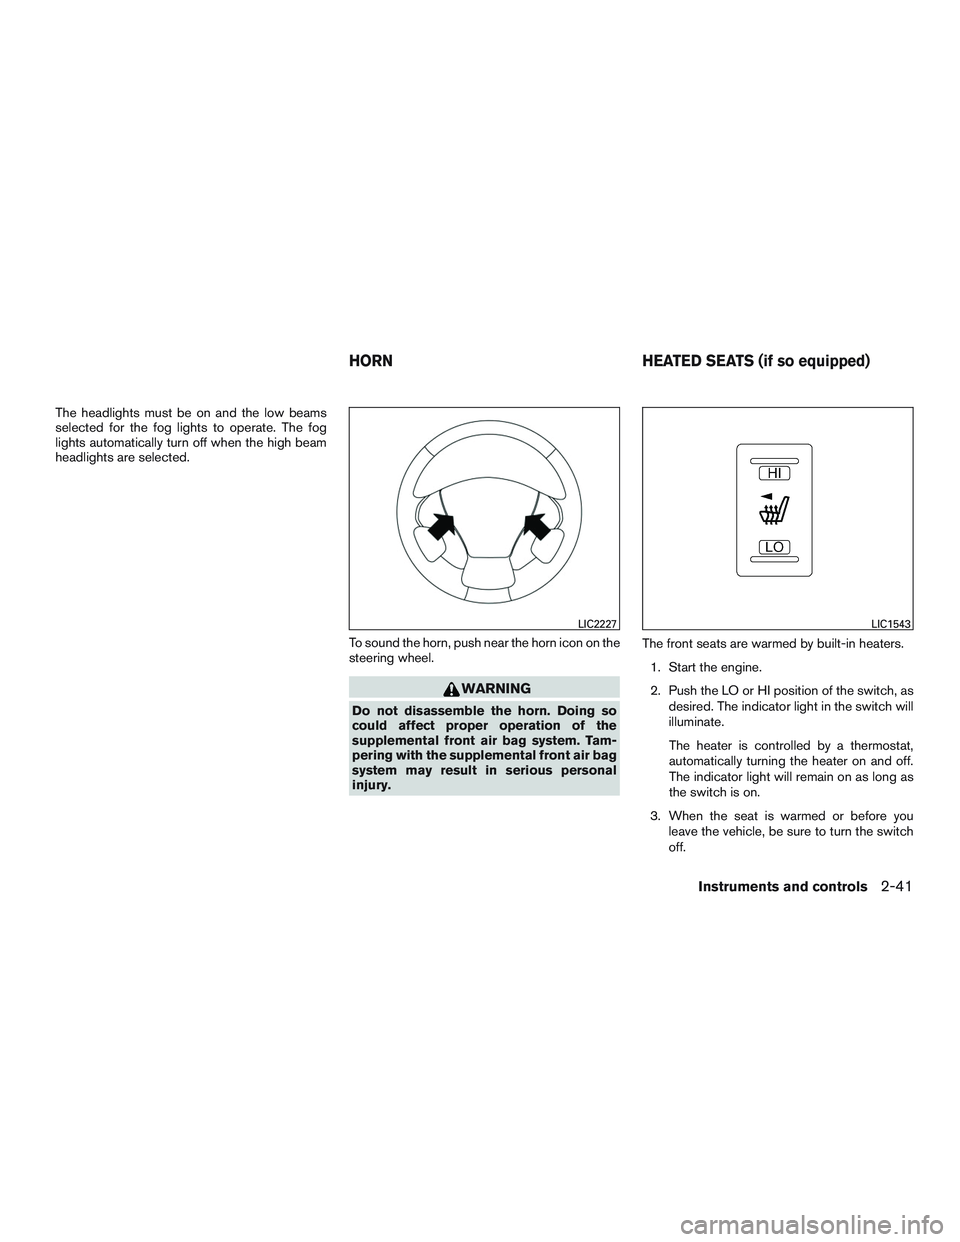
To sound the horn, push near the horn icon on the
steering wheel.
WARNING
Do not disassemble the horn. Doing so
could affect proper operation of the
supplemental front air bag system. Tam-
pering with the supplemental front air bag
system may result in serious personal
injury.The front seats are warmed by built-in heaters.
1. Start the engine.
2. Push the LO or HI position of the switch, as
desired. The indicator light in the switch will
illuminate.
The heater is controlled by a thermostat,
automatically turning the heater on and off.
The indicator light will remain on as long as
the switch is on.
3. When the seat is warmed or before you
leave the vehicle, be sure to turn the switch
off.
LIC2227LIC1543
HORN HEATED SEATS (if so equipped)
Instruments and controls2-41
Page 185 of 524
HOW TO USE THE REMOTE
KEYLESS ENTRY FUNCTION
The remote keyless entry function can operate all
door locks using the remote keyless function of
the Intelligent Key. The remote keyless function
can operate at a distance of 33 ft (10 m) away
from the vehicle. The operating distance de-
pends upon the conditions around the vehicle.
The remote keyless entry function will not func-
tion under the following conditions:
●When the Intelligent Key is not within the
operational range.
●When the doors or the rear liftgate are open
or not closed securely.
●When the Intelligent Key battery is dis-
charged.
CAUTION
When locking the doors using the Intelli-
gent Key, be sure not to leave the key in
the vehicle.
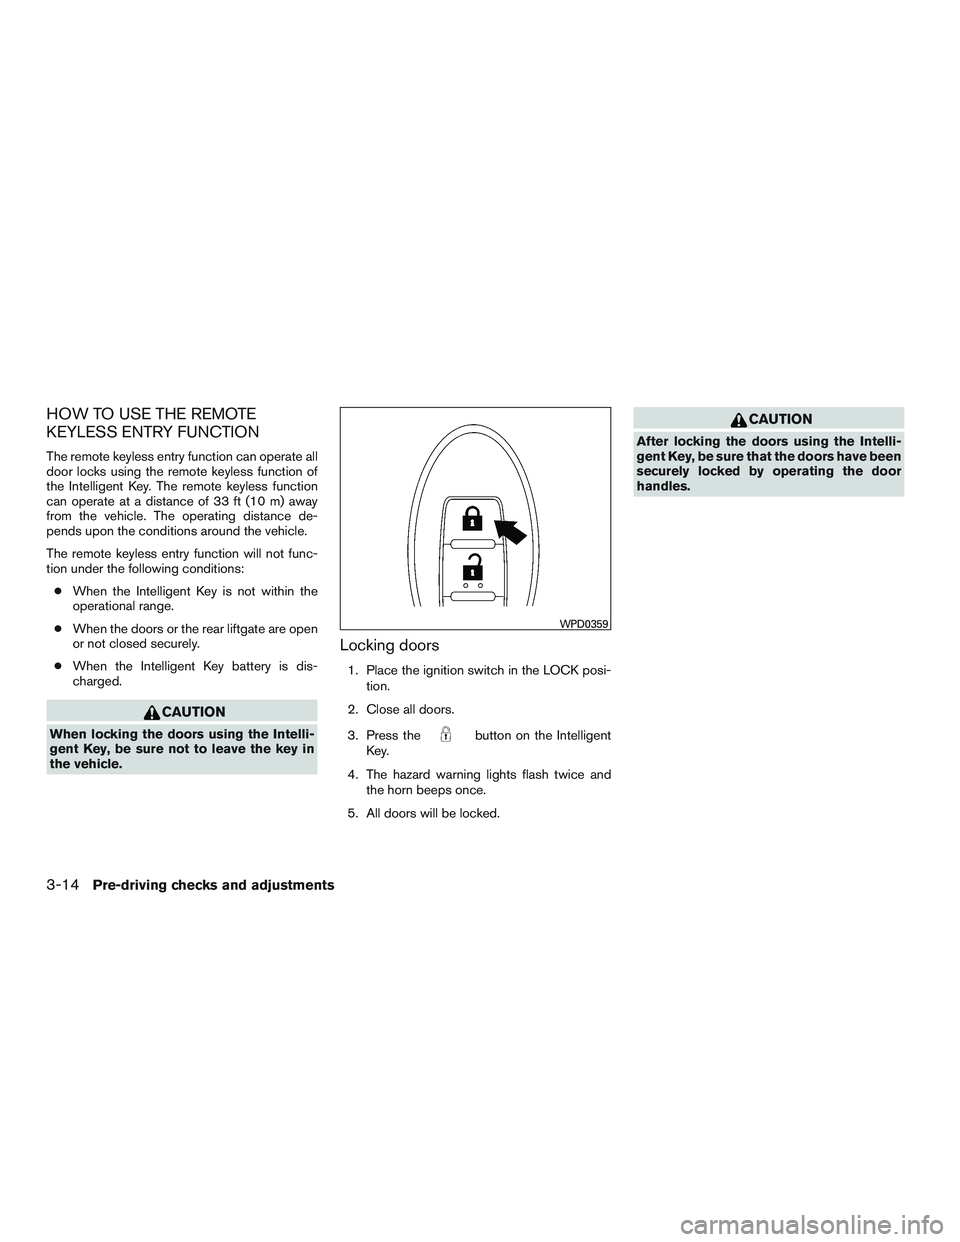
Locking doors
1. Place the ignition switch in the LOCK posi-
tion.
2. Close all doors.
3. Press the
button on the Intelligent
Key.
4. The hazard warning lights flash twice and
the horn beeps once.
5. All doors will be locked.
CAUTION
After locking the doors using the Intelli-
gent Key, be sure that the doors have been
securely locked by operating the door
handles.
WPD0359
3-14Pre-driving checks and adjustments
Page 188 of 524
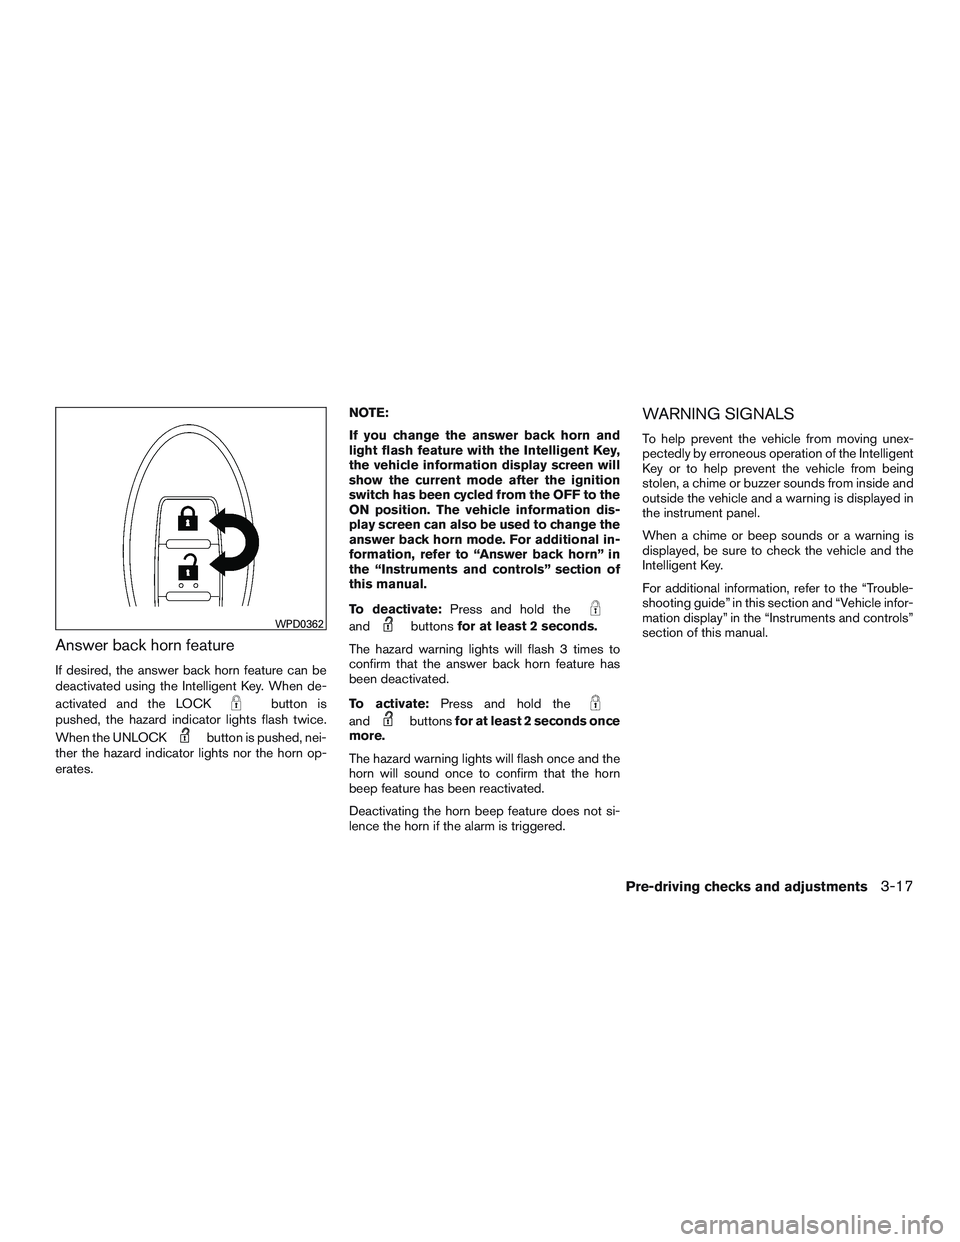
Answer back horn feature
If desired, the answer back horn feature can be
deactivated using the Intelligent Key. When de-
activated and the LOCK
button is
pushed, the hazard indicator lights flash twice.
When the UNLOCK
button is pushed, nei-
ther the hazard indicator lights nor the horn op-
erates.NOTE:
If you change the answer back horn and
light flash feature with the Intelligent Key,
the vehicle information display screen will
show the current mode after the ignition
switch has been cycled from the OFF to the
ON position. The vehicle information dis-
play screen can also be used to change the
answer back horn mode. For additional in-
formation, refer to “Answer back horn” in
the “Instruments and controls” section of
this manual.
To deactivate:Press and hold the
andbuttonsfor at least 2 seconds.
The hazard warning lights will flash 3 times to
confirm that the answer back horn feature has
been deactivated.
To activate:Press and hold the
andbuttonsfor at least 2 seconds once
more.
The hazard warning lights will flash once and the
horn will sound once to confirm that the horn
beep feature has been reactivated.
Deactivating the horn beep feature does not si-
lence the horn if the alarm is triggered.
WARNING SIGNALS
To help prevent the vehicle from moving unex-
pectedly by erroneous operation of the Intelligent
Key or to help prevent the vehicle from being
stolen, a chime or buzzer sounds from inside and
outside the vehicle and a warning is displayed in
the instrument panel.
When a chime or beep sounds or a warning is
displayed, be sure to check the vehicle and the
Intelligent Key.
For additional information, refer to the “Trouble-
shooting guide” in this section and “Vehicle infor-
mation display” in the “Instruments and controls”
section of this manual.
WPD0362
Pre-driving checks and adjustments3-17
Page 371 of 524
Operation:
1. Add air to the tire.
2. After a few seconds, the hazard indicators
will start flashing.
3. When the designated pressure is reached,
the horn beeps once and the hazard indica-
tors stop flashing.
4. Perform the above steps for each tire.
●If the tire is over-inflated more than ap-
proximately 4 psi (30 kPa) , the horn
beeps and the hazard indicators flash
three times. To correct the pressure, push
the core of the valve stem on the tire
briefly to release pressure. When the
pressure reaches the designated pres-
sure, the horn beeps once.
●If the hazard indicator does not flash
within approximately 15 seconds after
starting to inflate the tire, it indicates that
the Easy Fill Tire Alert is not operating.
●The TPMS will not activate the Easy Fill
Tire Alert under the following conditions:
– If there is interference from an external
device or transmitter.
– The air pressure from the inflation device
is not sufficient to inflate the tire.– There is a malfunction in the TPMS sys-
tem.
– There is a malfunction in the horn or haz-
ard indicators.
– The identification code of the tires pres-
sure sensor is not registered to the sys-
tem.
– The battery of the tire pressure sensor is
low.
●If the Easy Fill Tire Alert does not operate
due to TPMS interference, move the ve-
hicle about 3 ft (1 m) backward or forward
and try again.
If the Easy Fill Tire Alert is not working, use a tire
pressure gauge.
ON-PAVEMENT AND OFF-ROAD
DRIVING PRECAUTIONS
Utility vehicles have a significantly higher
rollover rate than other types of vehicles.
They have higher ground clearance than passen-
ger cars to make them capable of performing in a
variety of on-pavement and off-road applications.
This gives them a higher center of gravity than
ordinary vehicles. An advantage of higher ground
clearance is a better view of the road, allowing
you to anticipate problems. However, they are notdesigned for cornering at the same speeds as
conventional 2-wheel drive vehicles any more
than low-slung sports cars are designed to per-
form satisfactorily under off-road conditions. If at
all possible, avoid sharp turns at high speeds. As
with other vehicles of this type, failure to operate
this vehicle correctly may result in loss of control
or vehicle rollover. In a rollover crash, an unbelted
person is significantly more likely to die than a
person wearing a seat belt.
For additional information, refer to “Driving safety
precautions” in this section.
AVOIDING COLLISION AND
ROLLOVER
WARNING
Failure to operate this vehicle in a safe
and prudent manner may result in loss of
control or an accident.
Be alert and drive defensively at all times. Obey
all traffic regulations. Avoid excessive speed,
high speed cornering, or sudden steering ma-
neuvers, because these driving practices could
cause you to lose control of your vehicle.As with
any vehicle, loss of control could result in a
collision with other vehicles or objects or
cause the vehicle to roll over, particularly if
the loss of control causes the vehicle to
5-6Starting and driving
Page 518 of 524
Front air bag system
(See supplemental restraint system)......1-54
Front power seat adjustment...........1-4
Frontseats.....................1-2
Fuel
Capacities and recommended
fuel/lubricants.................9-2
Fuel economy................5-35
Fuel-filler door and cap...........3-28
Fuel gauge...................2-5
Fuel octane rating...............9-5
Loose fuel cap warning........2-30,3-29
Fuel gauge.....................2-5
Fuses.......................8-22
Fusible links...................8-22
G
Garage door opener, HomeLink® Universal
Transceiver....................2-63
Gascap .....................3-28
Gauge
Fuel gauge...................2-5
Odometer...................2-4
Power meter..................2-6
Speedometer.................2-4
Tachometer..................2-5
Trip odometer.................2-4
General maintenance...............8-2
Glovebox.....................2-49
Gloveboxlock..................2-49H
Hands-free phone system,
Bluetooth®...............4-109, 4-124
Hazard warning flasher switch..........6-2
Headlight and turn signal switch........2-36
Headlight control switch............2-37
Headlights....................8-26
Head restraints..................1-11
Heated seats............2-41,2-42,2-43
Heated steering wheel.............2-44
Heater
Heater and air conditioner controls.....4-43
Heater operation...............4-44
High voltage components..........HEV-10
Hill descent control system...........5-45
Hill start assist system..............5-46
HomeLink® Universal Transceiver.......2-63
Hood release...................3-22
Hook
Luggage hook................2-53
Horn .......................2-41
Hybrid System
Stops operating while driving.........6-9
Vehicle does not start............6-10
Hybrid vehicle characteristics........HEV-12
I
Ignition Switch
Push-Button Ignition Switch........5-10
Imageviewer...................4-19
Immobilizer system.........2-32,3-4,5-13
Important vehicle information label.......9-11In-cabin microfilter................8-19
Increasing fuel economy.............5-35
Indicator lights and audible reminders
(See warning/indicator lights and audible
reminders).....................2-9
Inside automatic anti-glare mirror........3-33
Instrument brightness control..........2-39
Instrumentpanel...............0-6,2-2
Instrument panel dimmer switch........2-39
Intelligent Key system
Key operating range..............3-9
Key operation................3-10
Mechanical key................3-3
Remote keyless entry operation.......3-14
Troubleshooting guide............3-18
Warning signals...............3-18
Interior light....................2-61
Inverter
Checking inverter coolant level.......8-10
Inverter cooling system............8-9
iPod®Player ...............4-84, 4-86
ISOFIX child restraints.............1-27
J
Jump starting...................6-11
K
Key fob battery replacement..........8-24
Keyless entry
With Intelligent Key system
(See Intelligent Key system).........3-14
Keys, For Intelligent Key system.......3-2,3-7
10-3