check engine NISSAN QASHQAI 2011 User Guide
[x] Cancel search | Manufacturer: NISSAN, Model Year: 2011, Model line: QASHQAI, Model: NISSAN QASHQAI 2011Pages: 297, PDF Size: 4.09 MB
Page 38 of 297
Downloaded from www.Manualslib.com manuals search engine An improperly installed child restraint could
lead to serious injury in an accident.
Child restraints specially designed for infants and
small children are offered by several manufacturers.
When selecting any child restraint, keep the follow-
ing points in mind:
Choose a child restraint that complies with the
latest European safety standard, ECE Regula-
tion 44.04.
Place your child in the child restraint and check
the various adjustments to be sure that the child
restraint is suitable for your child. Always follow
all of the recommended procedures.
Check the child restraint in your vehicle to be
sure it is compatible with the vehicle’s seat belt
system.
Refer to the tables further on in this section for a
list of the recommended fitment positions and
the approved child restraint for your vehicle.
WARNING
Never install a rear facing child restraint in the
front seat without first deactivating the front
passenger air bag.
Adjustable seatbacks should be positioned to
fit the child seat; however, the seatback
should be as upright as possible.
Follow all of the child restraint manufacturer’s
instructions for installation and use.
Choose a child restraint appropriate to the
child and the vehicle. It may not be possible
to properly install some types of child restraint
in your vehicle.
Improper use of a child restraint can increase
injuries to the infant or child and other occu-
pants in the vehicle.
When your child restraint is not in use, keep it
secured with a seat belt to prevent it from
being thrown forwards in case of a sudden
stop or accident.
Remember that a child restraint left in a closed
vehicle can become very hot. Check the seat-
ing surface and buckles before placing your
child in the child restraint.
After attaching a child restraint, test the seat
before you place the child in it. Check that it
does not tilt too far from side to side. Try to
tug it forwards and check whether the belt
holds it in place. If the restraint is not secure,
tighten the belt as necessary, or put the re-
straint in another seat and test it again.
If the child restraint is not anchored properly,
the risk of a child being injured in a collision
or sudden stop greatly increases.
The front passenger seat should be
positioned to fit the child seat appropriately.
See “Installation of a child restraint system on
the front passenger seat” later in this section.
For a front facing child restraint installed on a
three-point type lap/shoulder belt, make sure the shoulder belt does not go in front of the
child’s face or neck. If it does, put the shoul-
der belt behind the child restraint.
If the child restraint is equipped with a locking
clip, ensure that the clip is securely fastened
to the vehicle seat belt. If the locking clip is
not used, injuries could result from the child
restraint tipping over during normal vehicle
braking or cornering.
Safety — seats, seat belts and supplemental restraint system1-19
Page 43 of 297
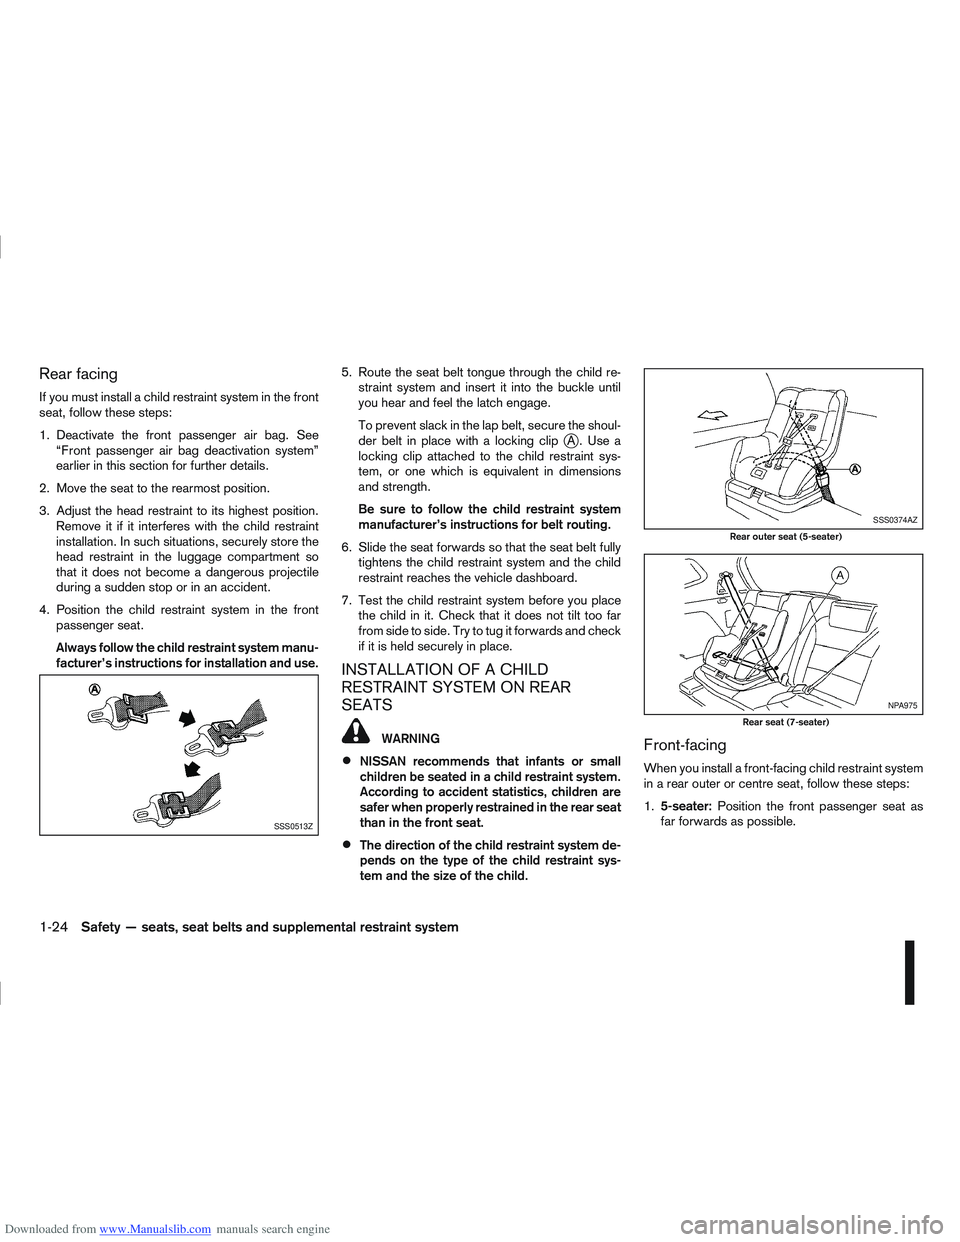
Downloaded from www.Manualslib.com manuals search engine Rear facing
If you must install a child restraint system in the front
seat, follow these steps:
1. Deactivate the front passenger air bag. See“Front passenger air bag deactivation system”
earlier in this section for further details.
2. Move the seat to the rearmost position.
3. Adjust the head restraint to its highest position. Remove it if it interferes with the child restraint
installation. In such situations, securely store the
head restraint in the luggage compartment so
that it does not become a dangerous projectile
during a sudden stop or in an accident.
4. Position the child restraint system in the front passenger seat.
Always follow the child restraint system manu-
facturer’s instructions for installation and use. 5. Route the seat belt tongue through the child re-
straint system and insert it into the buckle until
you hear and feel the latch engage.
To prevent slack in the lap belt, secure the shoul-
der belt in place with a locking clip
jA. Use a
locking clip attached to the child restraint sys-
tem, or one which is equivalent in dimensions
and strength.
Be sure to follow the child restraint system
manufacturer’s instructions for belt routing.
6. Slide the seat forwards so that the seat belt fully tightens the child restraint system and the child
restraint reaches the vehicle dashboard.
7. Test the child restraint system before you place the child in it. Check that it does not tilt too far
from side to side. Try to tug it forwards and check
if it is held securely in place.
INSTALLATION OF A CHILD
RESTRAINT SYSTEM ON REAR
SEATS
WARNING
NISSAN recommends that infants or small
children be seated in a child restraint system.
According to accident statistics, children are
safer when properly restrained in the rear seat
than in the front seat.
The direction of the child restraint system de-
pends on the type of the child restraint sys-
tem and the size of the child.
Front-facing
When you install a front-facing child restraint system
in a rear outer or centre seat, follow these steps:
1.5-seater: Position the front passenger seat as
far forwards as possible.
SSS0513Z
SSS0374AZ
Rear outer seat (5-seater)
NPA975
Rear seat (7-seater)
1-24Safety — seats, seat belts and supplemental restraint system
Page 44 of 297
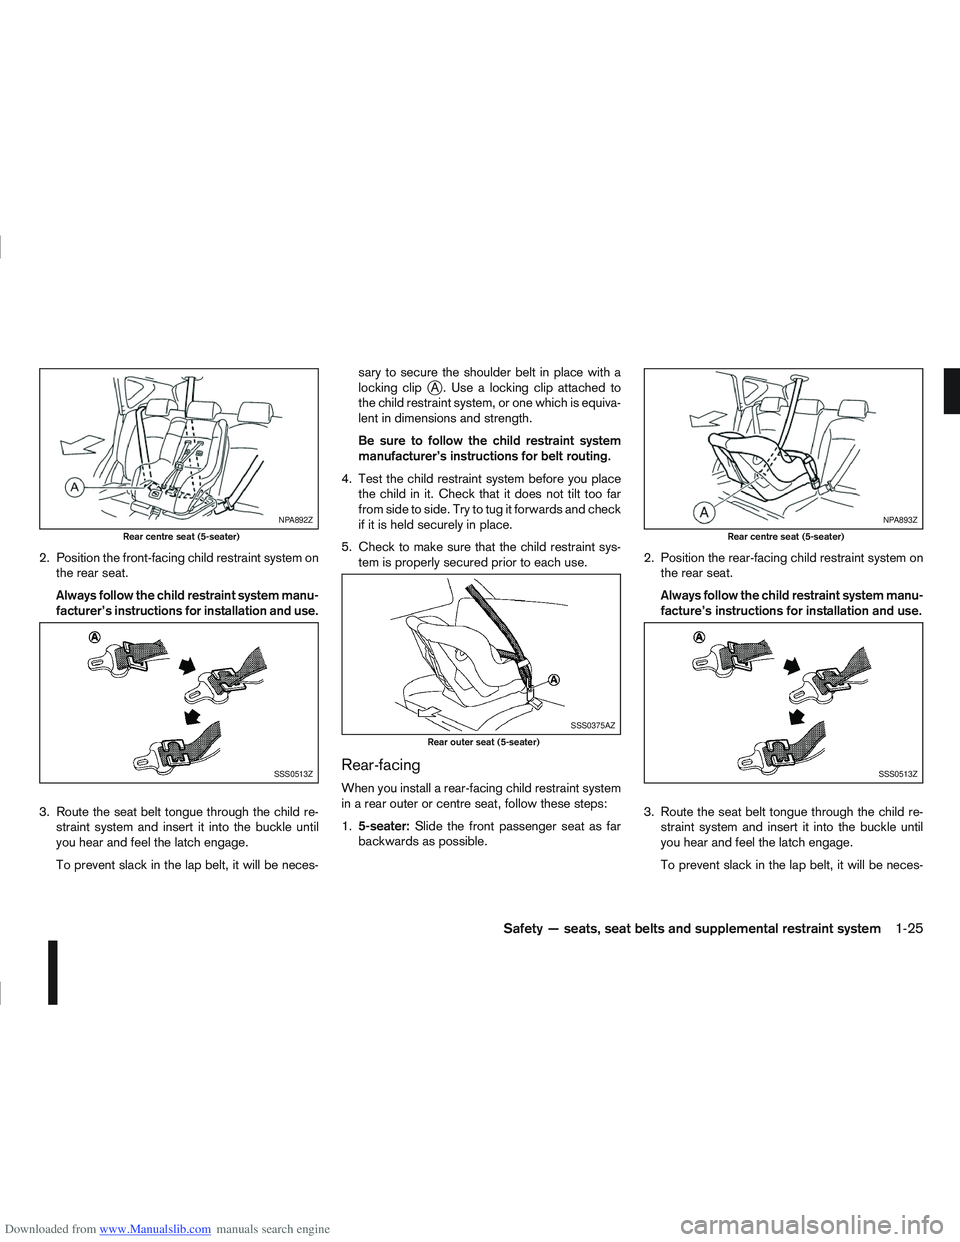
Downloaded from www.Manualslib.com manuals search engine 2. Position the front-facing child restraint system onthe rear seat.
Always follow the child restraint system manu-
facturer’s instructions for installation and use.
3. Route the seat belt tongue through the child re- straint system and insert it into the buckle until
you hear and feel the latch engage.
To prevent slack in the lap belt, it will be neces- sary to secure the shoulder belt in place with a
locking clip
jA . Use a locking clip attached to
the child restraint system, or one which is equiva-
lent in dimensions and strength.
Be sure to follow the child restraint system
manufacturer’s instructions for belt routing.
4. Test the child restraint system before you place the child in it. Check that it does not tilt too far
from side to side. Try to tug it forwards and check
if it is held securely in place.
5. Check to make sure that the child restraint sys- tem is properly secured prior to each use.
Rear-facing
When you install a rear-facing child restraint system
in a rear outer or centre seat, follow these steps:
1.5-seater: Slide the front passenger seat as far
backwards as possible. 2. Position the rear-facing child restraint system on
the rear seat.
Always follow the child restraint system manu-
facture’s instructions for installation and use.
3. Route the seat belt tongue through the child re- straint system and insert it into the buckle until
you hear and feel the latch engage.
To prevent slack in the lap belt, it will be neces-
NPA892Z
Rear centre seat (5-seater)
SSS0513Z
SSS0375AZ
Rear outer seat (5-seater)
NPA893Z
Rear centre seat (5-seater)
SSS0513Z
Safety — seats, seat belts and supplemental restraint system1-25
Page 45 of 297
Downloaded from www.Manualslib.com manuals search engine sary to secure the shoulder belt in place with a
locking clipjA . Use a locking clip attached to
the child restraint system, or one which is equiva-
lent in dimensions and strength.
Be sure to follow the child restraint system
manufacturer’s instructions for belt routing.
4. Test the child restraint system before you place the child in it. Check that it does not tilt too far
from side to side. Try to tug it forwards and check
if it is held securely in place.
5. Check to make sure that the child restraint sys- tem is properly secured prior to each use.
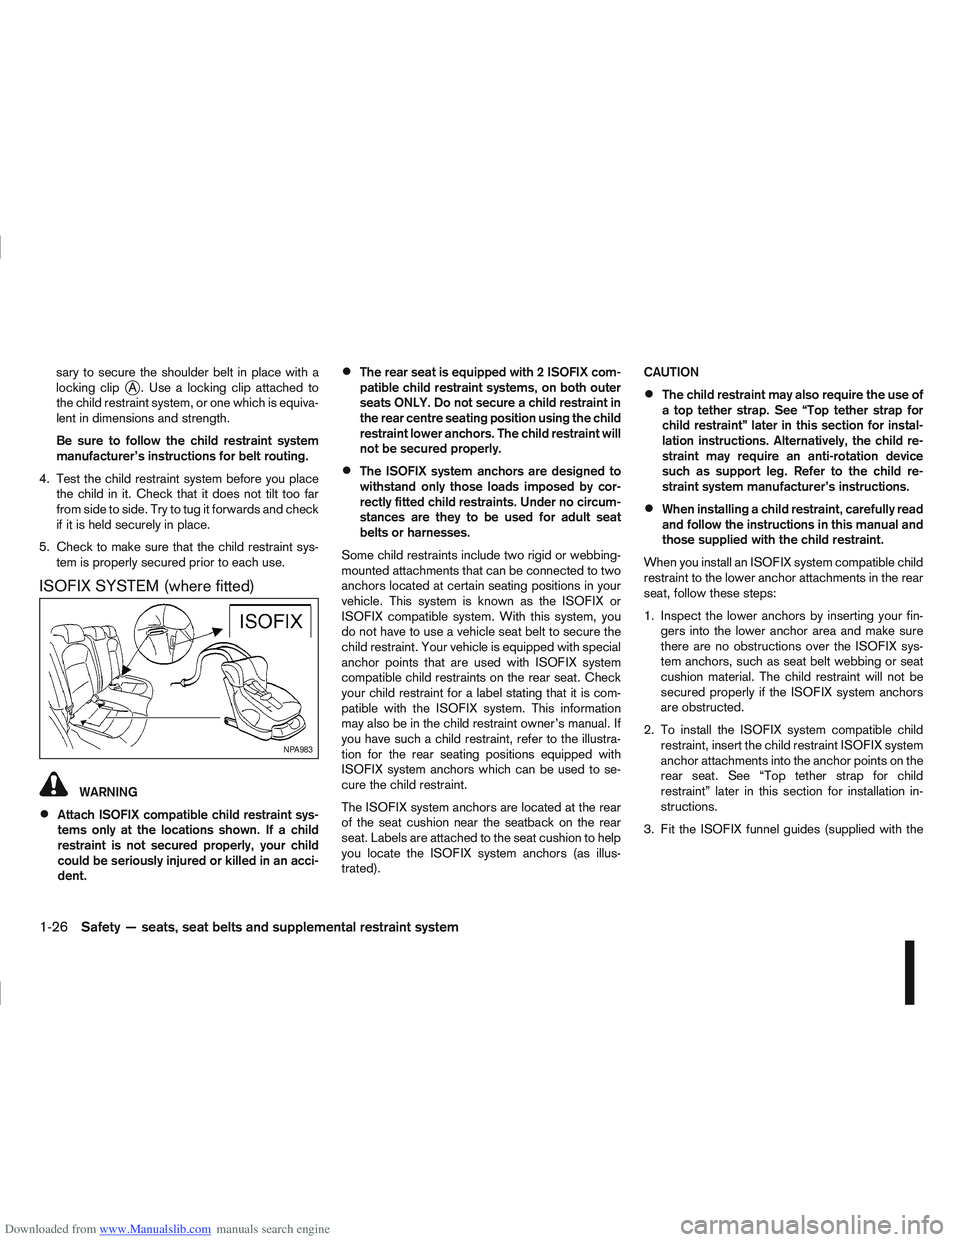
ISOFIX SYSTEM (where fitted)
WARNING
Attach ISOFIX compatible child restraint sys-
tems only at the locations shown. If a child
restraint is not secured properly, your child
could be seriously injured or killed in an acci-
dent.
The rear seat is equipped with 2 ISOFIX com-
patible child restraint systems, on both outer
seats ONLY. Do not secure a child restraint in
the rear centre seating position using the child
restraint lower anchors. The child restraint will
not be secured properly.
The ISOFIX system anchors are designed to
withstand only those loads imposed by cor-
rectly fitted child restraints. Under no circum-
stances are they to be used for adult seat
belts or harnesses.
Some child restraints include two rigid or webbing-
mounted attachments that can be connected to two
anchors located at certain seating positions in your
vehicle. This system is known as the ISOFIX or
ISOFIX compatible system. With this system, you
do not have to use a vehicle seat belt to secure the
child restraint. Your vehicle is equipped with special
anchor points that are used with ISOFIX system
compatible child restraints on the rear seat. Check
your child restraint for a label stating that it is com-
patible with the ISOFIX system. This information
may also be in the child restraint owner’s manual. If
you have such a child restraint, refer to the illustra-
tion for the rear seating positions equipped with
ISOFIX system anchors which can be used to se-
cure the child restraint.
The ISOFIX system anchors are located at the rear
of the seat cushion near the seatback on the rear
seat. Labels are attached to the seat cushion to help
you locate the ISOFIX system anchors (as illus-
trated). CAUTION
The child restraint may also require the use of
a top tether strap. See “Top tether strap for
child restraint” later in this section for instal-
lation instructions. Alternatively, the child re-
straint may require an anti-rotation device
such as support leg. Refer to the child re-
straint system manufacturer’s instructions.
When installing a child restraint, carefully read
and follow the instructions in this manual and
those supplied with the child restraint.
When you install an ISOFIX system compatible child
restraint to the lower anchor attachments in the rear
seat, follow these steps:
1. Inspect the lower anchors by inserting your fin- gers into the lower anchor area and make sure
there are no obstructions over the ISOFIX sys-
tem anchors, such as seat belt webbing or seat
cushion material. The child restraint will not be
secured properly if the ISOFIX system anchors
are obstructed.
2. To install the ISOFIX system compatible child restraint, insert the child restraint ISOFIX system
anchor attachments into the anchor points on the
rear seat. See “Top tether strap for child
restraint” later in this section for installation in-
structions.
3. Fit the ISOFIX funnel guides (supplied with the
NPA983
1-26Safety — seats, seat belts and supplemental restraint system
Page 46 of 297
Downloaded from www.Manualslib.com manuals search engine ISOFIX child seat – where fitted) to the vehicle
ISOFIX brackets located in slots on the slope of
the rear outer seat cushions (refer to the ISOFIX
label for appropriate locations).
4. After attaching the child restraint and before plac- ing the child in it, use force to check that it does
not tilt too far from side to side and tug it forward
to make sure that the child restraint is securely
held in place. Make sure that both ISOFIX an-
chorages have latched correctly.
5. Make sure that the child restraint is properly se- cured prior to each use.
NOTE
For forward facing ISOFIX child restraint posi-
tion on the rear seat, slide the front seat as far
forwards as possible.
For rearward facing ISOFIX child restraint po-
sition on the rear seat, slide the front seat
backwards until it touches the edge of the
child restraint.
TOP TETHER STRAP FOR CHILD
RESTRAINT
j
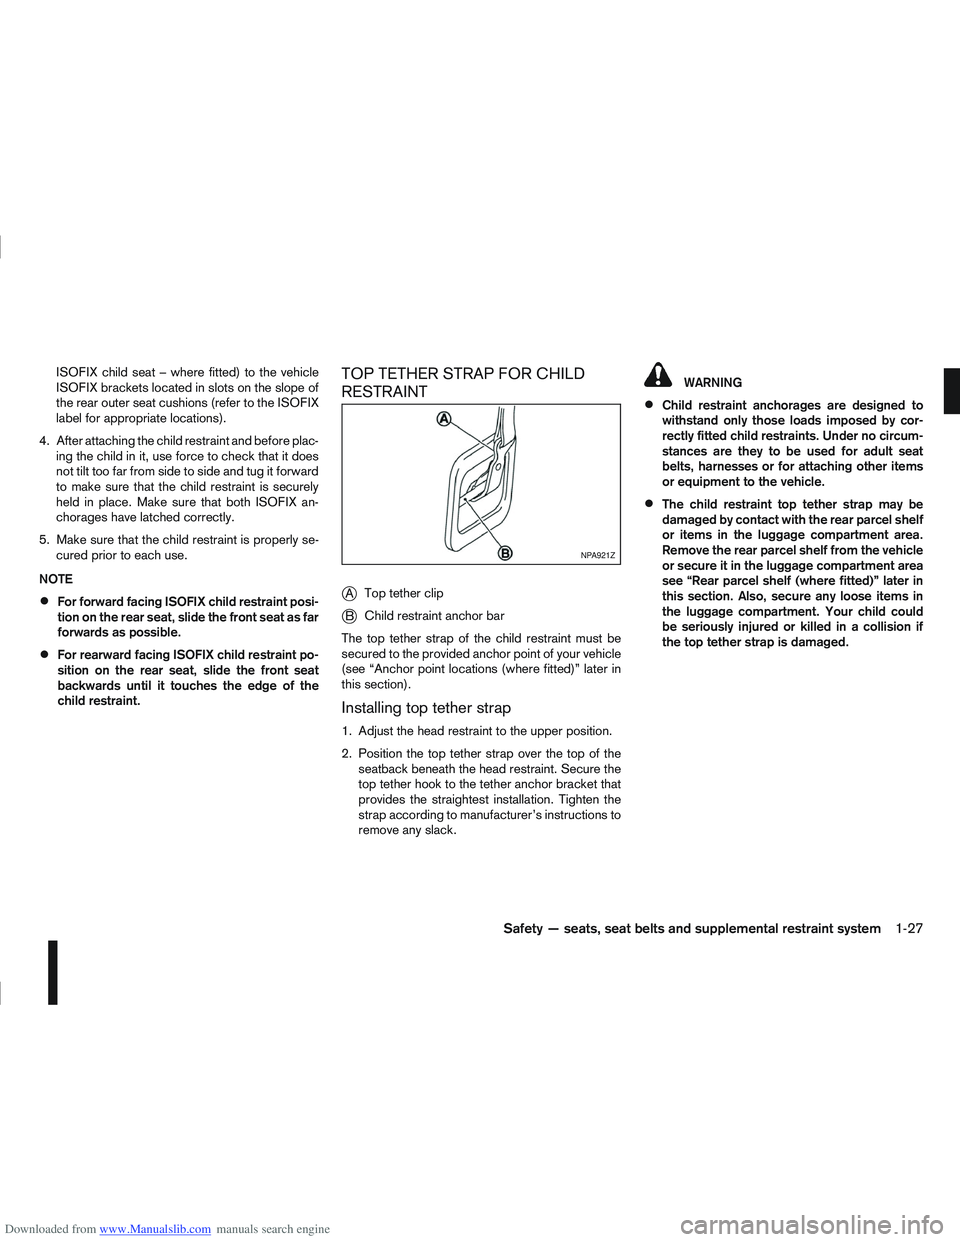
A Top tether clip
jB Child restraint anchor bar
The top tether strap of the child restraint must be
secured to the provided anchor point of your vehicle
(see “Anchor point locations (where fitted)” later in
this section).
Installing top tether strap
1. Adjust the head restraint to the upper position.
2. Position the top tether strap over the top of the seatback beneath the head restraint. Secure the
top tether hook to the tether anchor bracket that
provides the straightest installation. Tighten the
strap according to manufacturer’s instructions to
remove any slack.
WARNING
Child restraint anchorages are designed to
withstand only those loads imposed by cor-
rectly fitted child restraints. Under no circum-
stances are they to be used for adult seat
belts, harnesses or for attaching other items
or equipment to the vehicle.
The child restraint top tether strap may be
damaged by contact with the rear parcel shelf
or items in the luggage compartment area.
Remove the rear parcel shelf from the vehicle
or secure it in the luggage compartment area
see “Rear parcel shelf (where fitted)” later in
this section. Also, secure any loose items in
the luggage compartment. Your child could
be seriously injured or killed in a collision if
the top tether strap is damaged.
NPA921Z
Safety — seats, seat belts and supplemental restraint system1-27
Page 49 of 297
Downloaded from www.Manualslib.com manuals search engine 2Instruments and controls
Instruments and controls
Meters and gauges .................................................. 2-2
Speedometer...................................................... 2-2
Fuel gauge ......................................................... 2-2
Tachometer ........................................................ 2-2
Engine coolant temperature gauge ...................... 2-2
Warning/indicator lights and audible reminders ........ 2-3 Checking bulbs .................................................. 2-3
Warning lights .................................................... 2-3
Indicator lights .................................................... 2-7
Audible reminders............................................... 2-9
Vehicle information display ....................................... 2-11 Warnings and alerts............................................ 2-12
Odometer/twin trip odometer .............................. 2-16
Brightness control .............................................. 2-16
Trip computer ..................................................... 2-16
Settings menu .................................................... 2-18
Cruise control/Speed limiter indicator (where
fitted).................................................................. 2-21
Wiper and washer switch ........................................ 2-21 Windscreen ........................................................ 2-22
Rear window ...................................................... 2-23
Defogger switch ...................................................... 2-23 Rear window defogger ....................................... 2-23
Outside mirror defogger (where fitted) ................ 2-24
Headlight and turn signal switch............................... 2-24 Xenon headlights (where fitted) ........................... 2-24
Headlight switch ................................................. 2-24
Turn signal switch ............................................... 2-26
Fog light switch ....................................................... 2-26 Front fog light (where fitted) ................................ 2-26 Rear fog light ...................................................... 2-27
Headlight aiming control .......................................... 2-27 Headlight aiming control switch (where fitted) ..... 2-27
Automatic aiming control (xenon headlights) ........ 2-27
Headlight cleaner (where fitted) ............................... 2-28
Hazard warning flasher switch ................................. 2-28
Horn ........................................................................\
2-29
Seat heating (where fitted) ....................................... 2-29
Power outlet ............................................................ 2-30
Storage ................................................................... 2-31 Storage trays ...................................................... 2-31
Glove box ........................................................... 2-31
Console box ....................................................... 2-32
Cup holders ....................................................... 2-32
Bottle holder ....................................................... 2-32
Map pocket (where fitted) ................................... 2-32
Seat pocket (where fitted)................................... 2-32
Roof rail (where fitted) ........................................ 2-32
Rear parcel shelf (where fitted) ................................ 2-33
Tonneau cover (where fitted).................................... 2-33
Windows ................................................................. 2-34 Power windows .................................................. 2-34
C-View® glass roof (where fitted) ............................ 2-36 Sunshade operation ............................................ 2-36
System reinitialisation.......................................... 2-37
Interior lights ............................................................ 2-37 Front Room light ................................................. 2-37
Map lights (where fitted) ..................................... 2-38
Rear room/reading light ...................................... 2-38
Luggage compartment light ................................ 2-38
Page 52 of 297
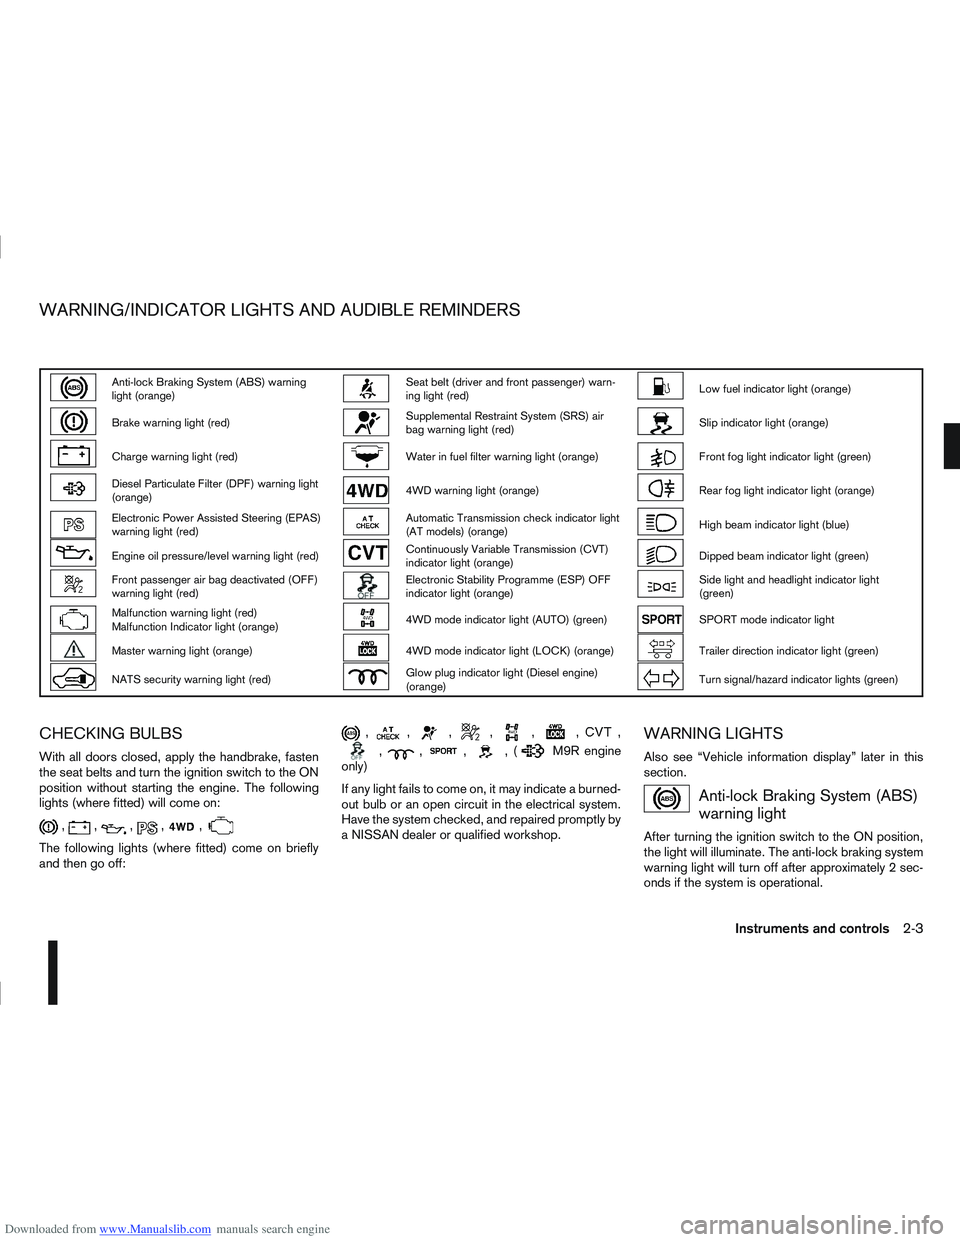
Downloaded from www.Manualslib.com manuals search engine Anti-lock Braking System (ABS) warning
light (orange)Seat belt (driver and front passenger) warn-
ing light (red)Low fuel indicator light (orange)
Brake warning light (red)Supplemental Restraint System (SRS) air
bag warning light (red)Slip indicator light (orange)
Charge warning light (red)Water in fuel filter warning light (orange)Front fog light indicator light (green)
Diesel Particulate Filter (DPF) warning light
(orange)4WD warning light (orange)Rear fog light indicator light (orange)
Electronic Power Assisted Steering (EPAS)
warning light (red)Automatic Transmission check indicator light
(AT models) (orange)High beam indicator light (blue)
Engine oil pressure/level warning light (red)Continuously Variable Transmission (CVT)
indicator light (orange)Dipped beam indicator light (green)
Front passenger air bag deactivated (OFF)
warning light (red)Electronic Stability Programme (ESP) OFF
indicator light (orange)Side light and headlight indicator light
(green)
Malfunction warning light (red)
Malfunction Indicator light (orange)4WD mode indicator light (AUTO) (green)SPORT mode indicator light
Master warning light (orange)4WD mode indicator light (LOCK) (orange)Trailer direction indicator light (green)
NATS security warning light (red)Glow plug indicator light (Diesel engine)
(orange)Turn signal/hazard indicator lights (green)
CHECKING BULBS
With all doors closed, apply the handbrake, fasten
the seat belts and turn the ignition switch to the ON
position without starting the engine. The following
lights (where fitted) will come on:
,,,,,
The following lights (where fitted) come on briefly
and then go off:
,,,,,,,
,,,,(M9R engine
only)
If any light fails to come on, it may indicate a burned-
out bulb or an open circuit in the electrical system.
Have the system checked, and repaired promptly by
a NISSAN dealer or qualified workshop.
WARNING LIGHTS
Also see “Vehicle information display” later in this
section.
Anti-lock Braking System (ABS)
warning light
After turning the ignition switch to the ON position,
the light will illuminate. The anti-lock braking system
warning light will turn off after approximately 2 sec-
onds if the system is operational.
WARNING/INDICATOR LIGHTS AND AUDIBLE REMINDERS
Instruments and controls2-3
Page 53 of 297
Downloaded from www.Manualslib.com manuals search engine If the light comes on while the engine is running, it
may indicate that the anti-lock portion of the braking
system is not functioning properly. Have the system
checked by a NISSAN dealer or qualified workshop.
Brake warning light
This light functions for both the handbrake and the
footbrake systems.
Handbrake indicator:
The light comes on when the handbrake is applied.
Low brake fluid warning:
The light warns of a low brake fluid level. If the light
comes on while the engine is running with the hand-
brake not applied, stop the vehicle and perform the
following procedure:
1. Check the brake fluid level. Add brake fluid asnecessary. See “Brake and clutch fluid” in the
“8. Maintenance and do-it-yourself” section.
WARNING
If the level is below the MIN (minimum) mark
on the brake fluid reservoir, do not drive until
the brake system has been checked at a
NISSAN dealer or qualified workshop.
2. If the brake fluid level is correct: Have the warning system checked by a NISSAN
dealer or qualified workshop.
WARNING
Driving your vehicle could be dangerous. Have
it towed to the nearest NISSAN dealer or quali-
fied workshop.
Depressing the brake pedal with the engine
stopped could increase your stopping dis-
tance and require greater pedal travel dis-
tance and effort.
Charge warning light
If the light comes on while the engine is running, it
may indicate that the charging system is not func-
tioning properly. Turn the engine off and check the
alternator belt. If the belt is loose, broken, missing
or if the light remains on, see a NISSAN dealer or
qualified workshop immediately.
CAUTION
Do not continue driving if the alternator belt is
loose, broken or missing.
Diesel Particulate Filter (DPF)
warning light (where fitted)
WARNING
Be careful not to burn yourself with exhaust
gases.
Do not park the vehicle over flammable mate-
rials such as dry grass, waste paper or rags,
as they may burn easily.
If the vehicle continues to be driven at a low
speed with the DPF warning light illuminated,
the fail-safe will limit engine revolutions and/
or torque. In this case, the engine oil must be
replaced and the process of burning accumu-
lated particulate matter must be carried out
by a NISSAN dealer or qualified workshop.
Service regeneration is a maintenance item
and is not covered by the NISSAN warranty.
Use engine oil for DPF equipped models. For
details, see “Capacities and recommended
fuel/lubricants” in the “9. Technical
information” section.
CAUTION
The DPF becomes extremely hot after burning
particulate matter.
M9R engine only:
When the ignition switch is turned to the ON posi-
tion, the Diesel Particulate Filter (DPF) warning light
illuminates for a few seconds and then goes out.
This indicates that the system is operational.
All diesel engines:
NISSAN GREEN PROGRAM
Some diesel engine models are fitted with a Diesel
Particulate Filter (DPF), which is a device that re-
moves carbon (soot) from the exhaust gas. To oper-
ate effectively, the DPF system must routinely con-
duct a cleaning operation, called regeneration, that
2-4Instruments and controls
Page 55 of 297
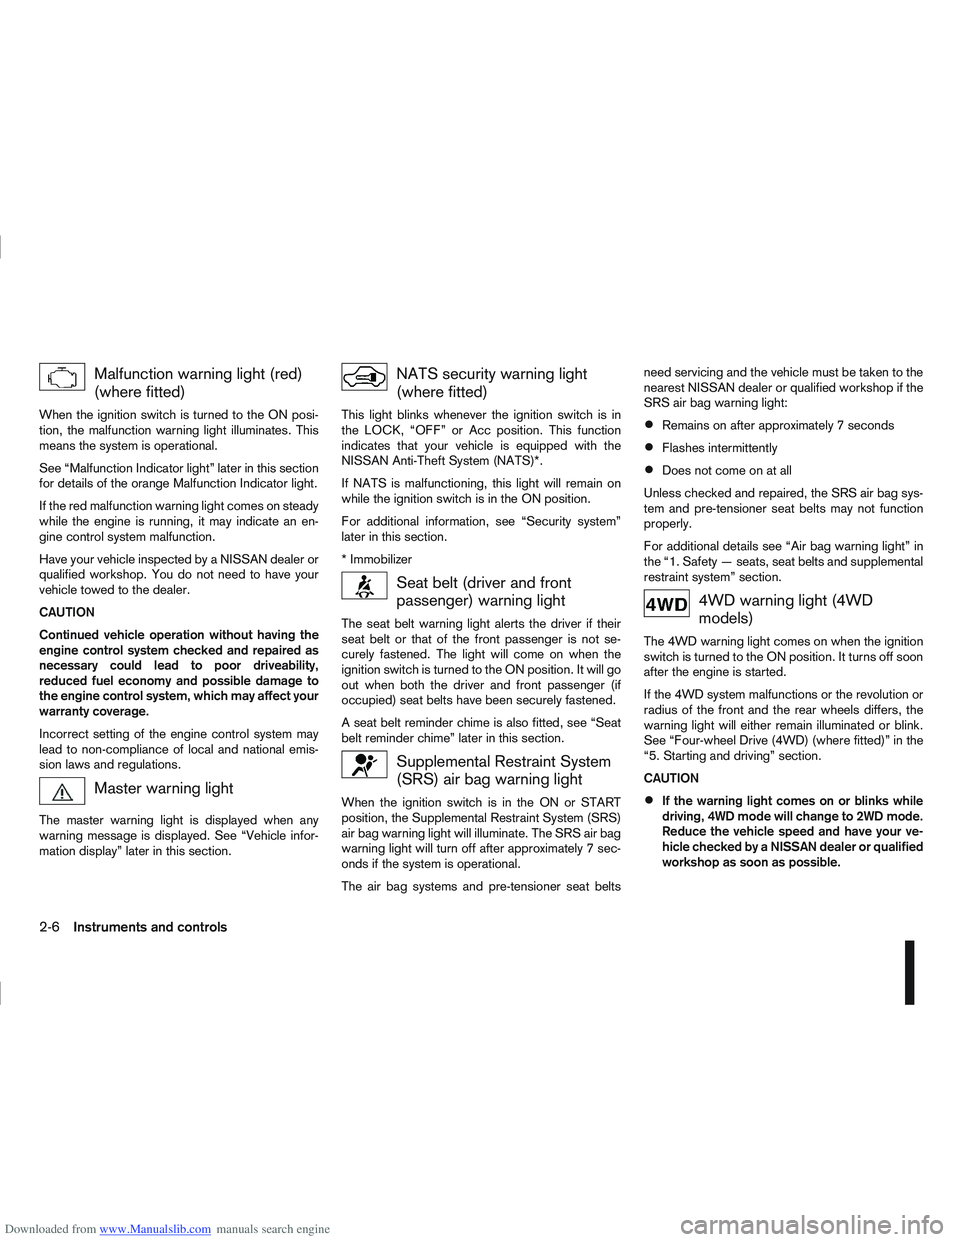
Downloaded from www.Manualslib.com manuals search engine Malfunction warning light (red)
(where fitted)
When the ignition switch is turned to the ON posi-
tion, the malfunction warning light illuminates. This
means the system is operational.
See “Malfunction Indicator light” later in this section
for details of the orange Malfunction Indicator light.
If the red malfunction warning light comes on steady
while the engine is running, it may indicate an en-
gine control system malfunction.
Have your vehicle inspected by a NISSAN dealer or
qualified workshop. You do not need to have your
vehicle towed to the dealer.
CAUTION
Continued vehicle operation without having the
engine control system checked and repaired as
necessary could lead to poor driveability,
reduced fuel economy and possible damage to
the engine control system, which may affect your
warranty coverage.
Incorrect setting of the engine control system may
lead to non-compliance of local and national emis-
sion laws and regulations.
Master warning light
The master warning light is displayed when any
warning message is displayed. See “Vehicle infor-
mation display” later in this section.
NATS security warning light
(where fitted)
This light blinks whenever the ignition switch is in
the LOCK, “OFF” or Acc position. This function
indicates that your vehicle is equipped with the
NISSAN Anti-Theft System (NATS)*.
If NATS is malfunctioning, this light will remain on
while the ignition switch is in the ON position.
For additional information, see “Security system”
later in this section.
* Immobilizer
Seat belt (driver and front
passenger) warning light
The seat belt warning light alerts the driver if their
seat belt or that of the front passenger is not se-
curely fastened. The light will come on when the
ignition switch is turned to the ON position. It will go
out when both the driver and front passenger (if
occupied) seat belts have been securely fastened.
A seat belt reminder chime is also fitted, see “Seat
belt reminder chime” later in this section.
Supplemental Restraint System
(SRS) air bag warning light
When the ignition switch is in the ON or START
position, the Supplemental Restraint System (SRS)
air bag warning light will illuminate. The SRS air bag
warning light will turn off after approximately 7 sec-
onds if the system is operational.
The air bag systems and pre-tensioner seat beltsneed servicing and the vehicle must be taken to the
nearest NISSAN dealer or qualified workshop if the
SRS air bag warning light:
Remains on after approximately 7 seconds
Flashes intermittently
Does not come on at all
Unless checked and repaired, the SRS air bag sys-
tem and pre-tensioner seat belts may not function
properly.
For additional details see “Air bag warning light” in
the “1. Safety — seats, seat belts and supplemental
restraint system” section.
4WD warning light (4WD
models)
The 4WD warning light comes on when the ignition
switch is turned to the ON position. It turns off soon
after the engine is started.
If the 4WD system malfunctions or the revolution or
radius of the front and the rear wheels differs, the
warning light will either remain illuminated or blink.
See “Four-wheel Drive (4WD) (where fitted)” in the
“5. Starting and driving” section.
CAUTION
If the warning light comes on or blinks while
driving, 4WD mode will change to 2WD mode.
Reduce the vehicle speed and have your ve-
hicle checked by a NISSAN dealer or qualified
workshop as soon as possible.
2-6Instruments and controls
Page 56 of 297
Downloaded from www.Manualslib.com manuals search engine Do not drive on dry, hard surfaced roads in
the LOCK position.
If the 4WD warning light blinks in the follow-
ing sequence while driving, proceed as in-
structed:
– Blinks rapidly (about twice a second)Pull off the road at a safe place and idle
the engine. The driving mode will change
to 2WD to prevent the 4WD system from
malfunctioning. The vehicle can be driven
again as soon as the warning light turns
off.
– Blinks slowly (about once every 2 seconds) Change the driving mode to 2WD and re-
duce the vehicle speed as soon as safely
possible.
If the warning light is still on after performing the
above operation, have the system checked by a
NISSAN dealer or qualified workshop as soon as
possible.
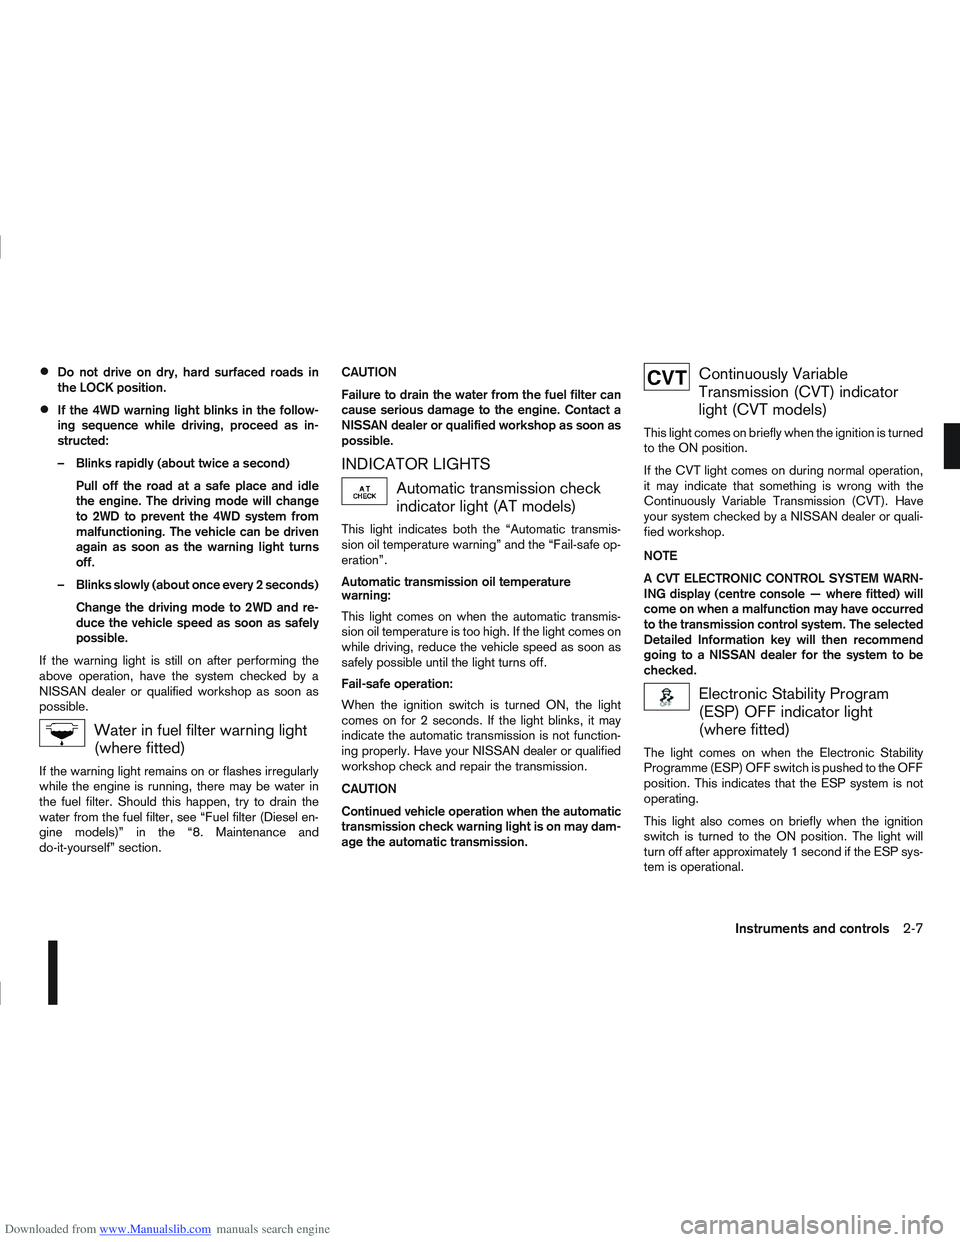
Water in fuel filter warning light
(where fitted)
If the warning light remains on or flashes irregularly
while the engine is running, there may be water in
the fuel filter. Should this happen, try to drain the
water from the fuel filter, see “Fuel filter (Diesel en-
gine models)” in the “8. Maintenance and
do-it-yourself” section. CAUTION
Failure to drain the water from the fuel filter can
cause serious damage to the engine. Contact a
NISSAN dealer or qualified workshop as soon as
possible.
INDICATOR LIGHTS
Automatic transmission check
indicator light (AT models)
This light indicates both the “Automatic transmis-
sion oil temperature warning” and the “Fail-safe op-
eration”.
Automatic transmission oil temperature
warning:
This light comes on when the automatic transmis-
sion oil temperature is too high. If the light comes on
while driving, reduce the vehicle speed as soon as
safely possible until the light turns off.
Fail-safe operation:
When the ignition switch is turned ON, the light
comes on for 2 seconds. If the light blinks, it may
indicate the automatic transmission is not function-
ing properly. Have your NISSAN dealer or qualified
workshop check and repair the transmission.
CAUTION
Continued vehicle operation when the automatic
transmission check warning light is on may dam-
age the automatic transmission.
Continuously Variable
Transmission (CVT) indicator
light (CVT models)
This light comes on briefly when the ignition is turned
to the ON position.
If the CVT light comes on during normal operation,
it may indicate that something is wrong with the
Continuously Variable Transmission (CVT). Have
your system checked by a NISSAN dealer or quali-
fied workshop.
NOTE
A CVT ELECTRONIC CONTROL SYSTEM WARN-
ING display (centre console — where fitted) will
come on when a malfunction may have occurred
to the transmission control system. The selected
Detailed Information key will then recommend
going to a NISSAN dealer for the system to be
checked.
Electronic Stability Program
(ESP) OFF indicator light
(where fitted)
The light comes on when the Electronic Stability
Programme (ESP) OFF switch is pushed to the OFF
position. This indicates that the ESP system is not
operating.
This light also comes on briefly when the ignition
switch is turned to the ON position. The light will
turn off after approximately 1 second if the ESP sys-
tem is operational.
Instruments and controls2-7