stop start NISSAN QUEST 1997 V40 / 1.G User Guide
[x] Cancel search | Manufacturer: NISSAN, Model Year: 1997, Model line: QUEST, Model: NISSAN QUEST 1997 V40 / 1.GPages: 247, PDF Size: 2.01 MB
Page 154 of 247
The anti-lock brake system controls the
brakes at each wheel so the wheels do not
lock when braking abruptly or when braking
on slippery surfaces. The system detects the
rotation speed at each wheel and varies the
brake fluid pressure to prevent each wheel
from locking and sliding. By preventing wheel
lockup, the system helps the driver maintain
steering control and helps to minimize swerv-
ing and spinning on slippery surfaces.
Using the system
Depress the brake pedal and hold it down.
WARNING
Do not pump the brake pedal. Doing so
may result in increased stopping dis-
tances.
Normal operation
The anti-lock brake system does not operate
at speeds below 3 to 6 MPH (5 to 10 km/h) to
completely stop the vehicle. (The speeds vary
according to road conditions.) When the anti-
lock system senses one or more wheels are
close to locking up, the actuator (under the
hood) rapidly applies and releases hydraulic
pressure (like pumping the brakes veryquickly). While the actuator is working, you
may feel a pulsation in the brake pedal and
hear a noise or vibration from the actuator
under the hood. This is normal and indicates
the anti-lock system is working properly. How-
ever, the pulsation may indicate road condi-
tions are hazardous and extra care is required
while driving.
Self-test feature
The anti-lock brake system consists of elec-
tronic sensors, electric pumps, and hydraulic
solenoids controlled by a computer. The com-
puter has a built-in diagnostic feature that
tests the system each time you start the
engine and move the vehicle at a low speed in
forward or reverse. When the self-test occurs,
you may hear a ``clunk'' noise and/or feel a
pulsation in the brake pedal. This is normal
and is not an indication of any malfunction. If
the computer senses any malfunction, it
switches the anti-lock brake system OFF and
turns on the ABS brake warning light in the
dashboard. The brake system then operates
normally, but without anti-lock assistance.
If the light comes on during the self-test, or
while driving, take your vehicle to your NIS-
SAN dealer for repair at your earliest conve-
nience.
WARNING
The anti-lock brake system is a sophis-
ticated device, but it cannot prevent
accidents resulting from careless or
dangerous driving techniques. It can
help maintain vehicle control during
braking on slippery surfaces, but re-
member that the stopping distance on
slippery surfaces will be longer than on
normal surfaces, even with the anti-
lock system. Stopping distances may
also be longer on rough, gravel or
snow covered roads, or if you are using
tire chains. Always maintain a safe dis-
tance from the vehicle in front of you.
Ultimately, the responsibility for safety
of self and others rests in the hands of
the driver.
Tire type and condition of tires may
also affect braking effectiveness.
cWhen replacing tires, install the
specified size of tires on all 4 wheels.
ANTI-LOCK BRAKE SYSTEM
(ABS) (if so equipped)
4-15
ZX
Page 156 of 247
ing to the chain manufacturer's sugges-
tions. In addition, drive at a reduced
speed, otherwise, your vehicle may be
damaged and/or vehicle handling and
performance may be adversely affected.
Tire chains
Use of tire chains may be prohibited accord-
ing to location. Check the local laws before
installing tire chains. When installing tire
chains, make sure they are of proper size
for the tires on your vehicle and are installed
according to the chain manufacturer's sug-
gestions.Use only SAE Class ``S'' chains.
Other types may damage your vehicle. Use
chain tensioners when recommended by
the tire chain manufacturer to ensure a tight
fit. Loose end links of the tire chain must be
secured or removed to prevent the possibil-
ity of whipping action damage to the fenders
or undercarriage. If possible, avoid fully
loading your vehicle when using tire chains.
In addition, drive at a reduced speed. Do not
exceed maximum speed suggested by
chain manufacturer. Otherwise, your ve-
hicle may be damaged and/or vehicle han-
dling and performance may be adversely
affected.Never install tire chains on T-type and small
size spare tires. Do not use tire chains on
dry roads.
Special winter equipment
It is recommended that the following items
be carried in the vehicle during winter:
1. A scraper and stiff-bristled brush to re-
move ice and snow from the windows
and wiper blades.
2. A sturdy, flat board to be placed under
the jack to give it firm support.
3. A shovel to dig the vehicle out of snow-
drifts.
4. Extra window washer fluid to refill the
reservoir tank.
Driving on snow or ice
WARNING
cWet ice (32ÉF, 0ÉC and freezing rain),
very cold snow or ice can be slick
and very hard to drive on. The ve-
hicle will have a lot less traction or
``grip'' under these conditions. Try to
avoid driving on wet ice until the
road is salted or sanded.cWhatever the condition, drive with
caution. Accelerate and slow down
with care. If accelerating or down-
shifting too fast, the drive wheels
will lose even more traction.
cAllow more stopping distance under
these conditions. Braking should be
started sooner than on dry
pavement.
cAllow greater following distances on
slippery roads.
cWatch for slippery spots (glare ice).
These may appear on an otherwise
clear road in shaded areas. If a patch
of ice is seen ahead, brake before
reaching it. Try not to brake while
actually on the ice, and avoid any
sudden steering maneuvers.
cDo not use the cruise control on
slippery roads.
cSnow can trap dangerous exhaust
gases under your vehicle. Keep
snow clear of the exhaust pipe and
from around your vehicle.
4-17
ZX
Page 167 of 247
CAUTION
cAutomatic transmission models can-
not be push started. This may cause
transmission damage.
cThree way catalyst equipped models
should not be started by pushing
since the three way catalyst may be
damaged.
cNever try to start the vehicle by tow-
ing it, when the engine starts, the
forward surge could cause the ve-
hicle to collide with the tow vehicle.If your vehicle is overheating (indicated by
an extremely high temperature gauge read-
ing), or if you feel a lack of engine power,
detect abnormal noise, etc., take the follow-
ing steps:
WARNING
cDo not continue to drive if your ve-
hicle overheats. Doing so could
cause a vehicle fire.
cTo avoid the danger of being
scalded, never remove the radiator
cap while the engine is still hot.
When the radiator cap is removed,
pressurized hot water will spurt out,
possibly causing serious injury.
cDo not open the hood if steam is
coming out.
1. Move the vehicle safely off the road,
apply the parking brake and move the
gearshift lever to the P (Park) position.
Do not stop the engine.
2. Turn off the air conditioner switch. Open
all the windows, move the temperature
control dial to warm and fan control knob
to 4.3. If engine overheating is caused by climb-
ing a long hill on a hot day, run the engine
at a fast idle (approximately 1,500 RPM)
until the temperature gauge indication
returns to normal.
4. Get out of the vehicle. Look and listen for
steam or coolant escaping from the ra-
diator before opening the hood. Wait until
no steam or coolant can be seen before
proceeding.
5. Open the hood.
WARNING
If steam or water is coming from the
engine, stand clear to prevent getting
burned.
6. Visually check drive belts for damage or
looseness. Also check to make sure the
cooling fan is running. The radiator hoses
and radiator should not leak water. If
coolant is leaking, the water pump belt is
missing or loose, or the cooling fan does
not run, stop the engine.
PUSH STARTING IF YOUR VEHICLE
OVERHEATS
5-10
ZX
Page 168 of 247
WARNING
cBe careful not to allow your hands,
hair or clothing to come into contact
with, or to get caught in, the running
fan, belts, or motor fan.
c
The fan motor may start at any time
when the coolant temperature is high.
7. After the engine cools down completely,
check the coolant level in the reservoir
tank with the engine running. Add coolant
to the reservoir tank, if necessary. Have
your vehicle repaired at the nearest
NISSAN dealer.
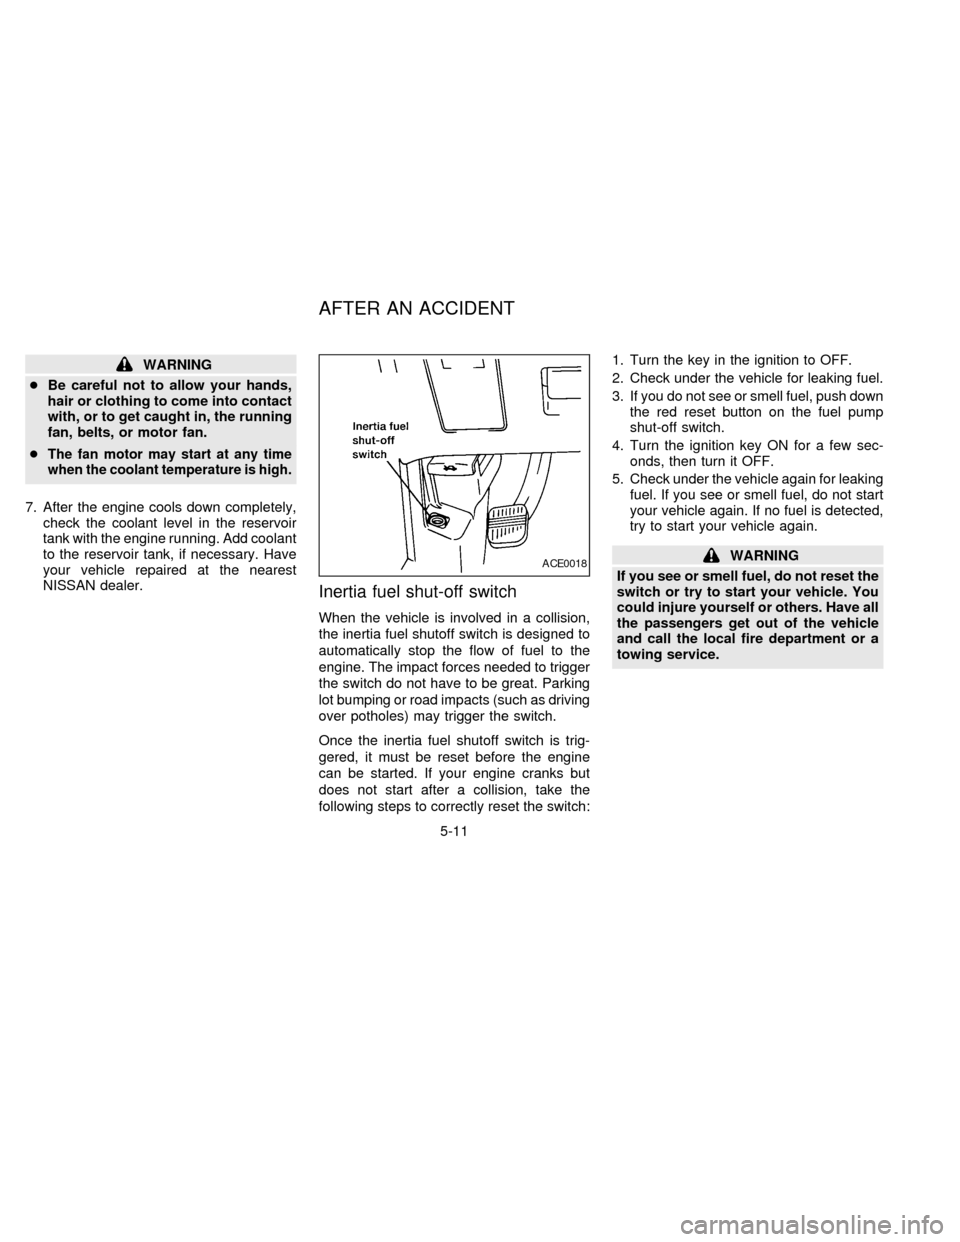
Inertia fuel shut-off switch
When the vehicle is involved in a collision,
the inertia fuel shutoff switch is designed to
automatically stop the flow of fuel to the
engine. The impact forces needed to trigger
the switch do not have to be great. Parking
lot bumping or road impacts (such as driving
over potholes) may trigger the switch.
Once the inertia fuel shutoff switch is trig-
gered, it must be reset before the engine
can be started. If your engine cranks but
does not start after a collision, take the
following steps to correctly reset the switch:1. Turn the key in the ignition to OFF.
2. Check under the vehicle for leaking fuel.
3. If you do not see or smell fuel, push down
the red reset button on the fuel pump
shut-off switch.
4. Turn the ignition key ON for a few sec-
onds, then turn it OFF.
5. Check under the vehicle again for leaking
fuel. If you see or smell fuel, do not start
your vehicle again. If no fuel is detected,
try to start your vehicle again.
WARNING
If you see or smell fuel, do not reset the
switch or try to start your vehicle. You
could injure yourself or others. Have all
the passengers get out of the vehicle
and call the local fire department or a
towing service.ACE0018
AFTER AN ACCIDENT
5-11
ZX
Page 236 of 247
Trailer brakes
If your trailer is equipped with a braking
system, make sure it conforms to Federal
and/or local regulations and it is properly
installed.
WARNING
Never connect a trailer brake system
directly to the vehicle brake system.
Pre-towing tips
cBe certain your vehicle maintains a level
position when a loaded and/or unloaded
trailer is hitched. Do not drive the vehicle
if it has an abnormal nose-up or nose-
down condition; check for improper
tongue load, overload, worn suspension
or other possible causes of either condi-
tion.
cAlways secure items in the trailer to
prevent load shift while driving.
cBe certain your rear view mirrors conform
to all federal, state or local regulations. If
not, install any mirrors required for towing
before driving the vehicle.
Trailer towing tips
In order to gain skill and an understanding
of the vehicle's behavior, you should prac-
tice turning, stopping and backing up in an
area which is free from traffic. Steering,
stability, and braking performance are
somewhat different than under normal driv-
ing conditions.
cAlways secure items in the trailer to
prevent load shift while driving.
c
Avoid abrupt starts, acceleration or stops.
cAvoid sharp turns or lane changes.
cAlways drive your vehicle at a moderate
speed.
cAlways block the wheels on both vehicle
and trailer when parking. Parking on a
slope is not recommended; however, if
you must do so, first block the wheels
and apply the parking brake, and then
move the transmission shift selector le-
ver into the P (Park) position. If you move
the shift selector lever to the P (Park)
position before blocking the wheels and
applying the parking brake, transmission
damage could occur.
cWhen going down a hill, shift into a lowergear and use the engine braking effect.
When ascending a long grade, downshift
the transmission to a lower gear and
reduce speed to reduce chances of en-
gine overloading and/or overheating.
cIf the engine coolant rises to an ex-
tremely high temperature when the air
conditioning system is on, turn the air
conditioner off. Coolant heat can be ad-
ditionally vented by opening the win-
dows, switching the fan control dial to
high and setting the temperature control
dial to the WARM position.
cTrailer towing requires more fuel than
normal circumstances.
cAvoid towing a trailer for the first 500
miles (800 km) of the vehicle's life.
cHave your vehicle serviced more often
than at intervals specified in the recom-
mended Maintenance Schedule.
cWhen making a turn, your trailer wheels
will be closer to the inside of the turn than
your vehicle wheels. To compensate for
this, make a larger than normal turning
radius during the turn.
cCrosswinds and rough roads adversely
9-17
ZX
Page 239 of 247
Due to legal requirements in some states
and Canadian Provinces, your vehicle may
be required to be in the ready condition for
an Inspection/Maintenance (I/M) test of the
emission control system.
The vehicle is set to the ready condition
when it is driven through certain driving
patterns. Usually, the ready condition can
be obtained by ordinary usage of the ve-
hicle.
If a powertrain system component is re-
paired or the battery is disconnected, the
vehicle may be reset to a not ready condi-
tion. Before taking the I/M test, drive the
vehicle through the following pattern to set
the vehicle to the ready condition. If you
cannot or do not want to perform the driving
pattern, an authorized NISSAN dealer can
conduct it for you.
WARNING
Always drive the vehicle in a safe man-
ner according to traffic conditions and
obey all traffic laws.
1. Start the engine when the engine coolant
temperature gauge needle points to C.
Allow the engine to idle until the gaugeneedle points between the C and H (nor-
mal operating temperature).
2. Accelerate the vehicle to 55 MPH (88
km/h), then quickly release the accelera-
tor pedal completely and keep it released
for at least 6 seconds.
3. Quickly depress the accelerator pedal for
a moment, then drive the vehicle at a
speed of 53 to 60 MPH (86 to 96 km/h)
for at least 5 minutes.
4.Stop the vehicle.
5.Accelerate the vehicle to 35 mph (55
km/h) and keep the speed for 20 seconds.
6.Repeat steps 4 through 5 at least 3 times.
7.Accelerate the vehicle to 55 mph (88
km/h) and keep the speed for at least 3
minutes.
8. Stop the vehicle and turn the engine off.
9. Repeat steps 1 through 8 at least one
more time.
If step 1 through 7 are interrupted, repeat
the preceding step. Any safe driving mode
is acceptable between steps. Do not stop
the engine until step 7 is completed.
READINESS FOR
INSPECTION/MAINTENANCE
(I/M) TEST
9-20
ZX
Page 241 of 247

10 Index
A
After an accident........................................ 5-11
Air bag (See supplemental restraint
system) ...................................................... 2-42
Air bag warning light .................................. 2-47
Air cleaner housing filter ............................ 7-13
Air conditioner
Air conditioner operation ............... 3-20, 3-5
Air conditioner service .......................... 3-14
Air conditioner specification label ......... 9-11
Air conditioner system refrigerant and
lubrication recommendations.................. 9-6
Heater and air conditioner (automatic)
(if so equipped)..................................... 3-10
Heater and air conditioner (manual)....... 3-3
Rear seat heater and air
conditioner ............................................ 3-13
Air flow charts .............................................. 3-7
Alarm system (See theft warning) ............. 1-10
Anchor point locations ............................... 2-69
Antenna
Manual .................................................. 3-20
Power.................................................... 3-20
Anti-lock brake system (ABS).................... 4-15
Anti-lock brake warning light ....................... 1-8
Armrests..................................................... 2-30Ashtray (See cigarette lighter and
ashtray) ...................................................... 1-16
Audio system
AM-FM radio with cassette player ........ 3-14
Compact disc (CD) player .................... 3-21
Autolamp switch......................................... 1-13
Automatic
Automatic power window switch .......... 1-20
Automatic transmission fluid (ATF) ........ 7-8
Driving with automatic transmission ....... 4-5
B
Battery........................................................ 7-11
Before starting the engine ........................... 4-5
Brake
Anti-lock brake system (ABS) .............. 4-15
Brake booster ....................................... 7-17
Brake fluid ..................................... 7-10, 9-2
Brake light (See stop light) ................... 7-21
Brake pedal .......................................... 7-16
Brake system ........................................ 4-14
Brake warning light ................................. 1-7
Brake wear indicators ............................. 1-9
Parking brake check ............................. 7-16
Parking brake operation ......................... 4-9
Self-adjusting brakes ............................ 7-16
Break-in schedule ...................................... 4-12Bulb check/instrument panel ....................... 1-6
Bulb replacement ....................................... 7-21
C
Capacities and recommended fuel/
lubricants...................................................... 9-2
Cargo net ................................................... 2-13
Cargo (See vehicle loading
information) ................................................ 9-12
Cassette player (See audio system) ......... 3-14
CB radio or car phone ............................... 3-25
Check engine indicator light
(See malfunction indicator light) .................. 1-9
Child restraint with top tether strap ........... 2-65
Child restraints for infants and small
children ...................................................... 2-60
Child safety sliding door lock....................... 2-4
Cigarette lighter (accessory)
and ashtray ................................................ 1-16
Cleaning exterior and interior ...................... 6-2
Clock .......................................................... 1-23
Coin tray .................................................... 1-17
Cold weather driving .................................. 4-16
Compact disc (CD) player ......................... 3-21
Controls
Audio controls ....................................... 3-14
Audio controls (rear) ............................. 3-24
ZX
Page 243 of 247

G
Gauge
Engine coolant temperature gauge ........ 1-4
Fuel gauge.............................................. 1-5
Odometer ................................................ 1-4
Speedometer .......................................... 1-4
Tachometer............................................. 1-4
Trip odometer ......................................... 1-4
General maintenance .................................. 8-2
H
Hazard warning flasher switch .................. 1-15
Head restraints .......................................... 2-30
Headlight control switch............................. 1-13
Headlights .................................................. 7-19
Heater
Heater and air conditioner (automatic)
(if so equipped)..................................... 3-10
Heater and air conditioner (manual)....... 3-3
Rear seat heater and air
conditioner ............................................ 3-13
Hood release ............................................. 2-10
I
Ignition switch .............................................. 4-4
Important vehicle information label............ 9-10
Increasing fuel economy............................ 4-12
Indicator lights and chimes (See warning/indicator lights and chimes) ......................... 1-6
Inertial fuel shut off switch ......................... 5-11
Inside mirror ............................................... 2-80
Instrument brightness control .................... 1-15
Integrated child safety seats...................... 2-71
Interior lights .............................................. 1-24
J
Jump starting ...................................... 5-8, 7-12
K
Key ............................................................... 2-2
Keyless entry system (See multi-remote
control system) ............................................ 2-7
L
Labels
Air conditioner specification label ......... 9-11
Emission control information label........ 9-10
Engine serial number ............................. 9-9
F.M.V.S.S. certification label ................ 9-10
Vehicle identification number ................. 9-9
Vehicle identification number (VIN)
plate ........................................................ 9-9
Warning labels (for SRS) ..................... 2-47
License plate
Installing the license plate .................... 9-11Light
Air bag warning light............................. 2-47
Brake light (See stop light) ................... 7-21
Bulb check/instrument panel .................. 1-6
Bulb replacement.................................. 7-21
Cornering light ...................................... 1-15
Headlight control switch ....................... 1-13
Headlights ............................................. 7-19
Interior lights ......................................... 1-24
Light bulbs ............................................ 7-19
Luggage compartment lights ................ 1-24
Spotlights .............................................. 1-25
Warning/indicator lights and chimes ...... 1-6
Lock
Child safety sliding door lock ................. 2-4
Door locks............................................... 2-2
Fuel filler lid lock opener lever ............. 2-15
Power door lock...................................... 2-5
Rear door lock ...................................... 2-11
Luggage compartment lights ..................... 1-24
Luggage rack ............................................. 2-14
Luggage (See vehicle loading
information ................................................. 9-12
M
Maintenance
General maintenance ............................. 8-2
Inside the vehicle.................................... 8-3
Maintenance precautions ....................... 7-2
Outside the vehicle ................................. 8-2
Periodic maintenance schedules ............ 8-5
10-3
ZX
Page 245 of 247

Seats
Five passenger seating ........................ 2-18
Five passenger seating with cargo
room...................................................... 2-18
Flexible seating..................................... 2-32
Integrated child safety seats ................ 2-71
Manual front seat adjustment ............... 2-26
Power support front seat ...................... 2-28
Seat positions ....................................... 2-21
Second row bench seat........................ 2-21
Second row bucket seats ..................... 2-24
Seven passenger seating ..................... 2-17
Sliding three-passenger seat................ 2-38
Three-passenger bench seat in fully
forward position .................................... 2-19
Three-passenger bench seat in storage
position ................................................. 2-17
Seats/floor mats ......................................... 2-15
Self-adjusting brakes ................................. 7-16
Service manual order form ........................ 9-21
Seven passenger seating .......................... 2-17
Shifting
Automatic transmission .......................... 4-6
Sliding three-passenger seat ..................... 2-38
Spark plug replacement............................. 7-12
Speedometer ............................................... 1-4
Spotlights ................................................... 1-25
SRS warning label ..................................... 2-47
Starting
Before starting the engine ...................... 4-5
Jump starting................................. 5-8, 7-12
Precautions when starting anddriving ..................................................... 4-2
Push starting......................................... 5-10
Starting the engine ................................. 4-8
Steering
Power steering fluid ........................ 7-9, 9-2
Tilting steering wheel............................ 2-78
Stop light .................................................... 7-21
Storage
Coin tray ............................................... 1-17
Compact disc storage........................... 1-18
Under seat storage tray........................ 2-31
Sun shade.................................................. 1-21
Sunroof ...................................................... 1-21
Supplemental restraint system
Information and warning labels ............ 2-47
Switch
Autolamp switch ................................... 1-13
Automatic power window switch .......... 1-20
Hazard warning flasher switch ............. 1-15
Headlight control switch ....................... 1-13
Ignition switch ......................................... 4-4
Overdrive switch ..................................... 4-7
Rear window defogger switch .............. 1-12
Rear window wiper and washer
switches ................................................ 1-12
Turn signal switch................................. 1-14
Windshield wiper and washer
switch .................................................... 1-11
T
Tabletop seats ........................................... 2-31Tachometer .................................................. 1-4
Theft warning ............................................. 1-10
Three way catalyst....................................... 4-2
Three-passenger bench seat..................... 2-57
Three-passenger bench seat in fully
forward position ......................................... 2-19
Three-passenger bench seat in storage
position....................................................... 2-17
Tilting steering wheel ................................. 2-78
Timing belt ................................................... 9-7
Timing chain ................................................ 9-7
Tire
Flat tire.................................................... 5-2
Spare tire .............................................. 7-29
Tire chains ............................................ 7-26
Tire placard........................................... 9-11
Tire pressure ........................................ 7-25
Tire rotation .......................................... 7-27
Tool kit .................................................... 5-2
Types of tires ........................................ 7-26
Uniform tire quality grading .................. 9-18
Wheels and tires ........................... 7-25, 9-8
Wheel/tire size ........................................ 9-8
Towing
Tow truck towing .................................. 5-12
Towing load/specification chart ............ 9-14
Trailer towing ........................................ 9-13
Transmission
Automatic transmission fluid (ATF) ........ 7-8
Driving with automatic transmission ....... 4-5
Travel (See registering your vehicle in
another country)........................................... 9-9
10-5
ZX