AUX NISSAN QUEST 1998 V40 / 1.G Owners Manual
[x] Cancel search | Manufacturer: NISSAN, Model Year: 1998, Model line: QUEST, Model: NISSAN QUEST 1998 V40 / 1.GPages: 260, PDF Size: 2.18 MB
Page 16 of 260
cDo not sit in seats that have been
removed from the vehicle. They may
tip over and you could be injured.
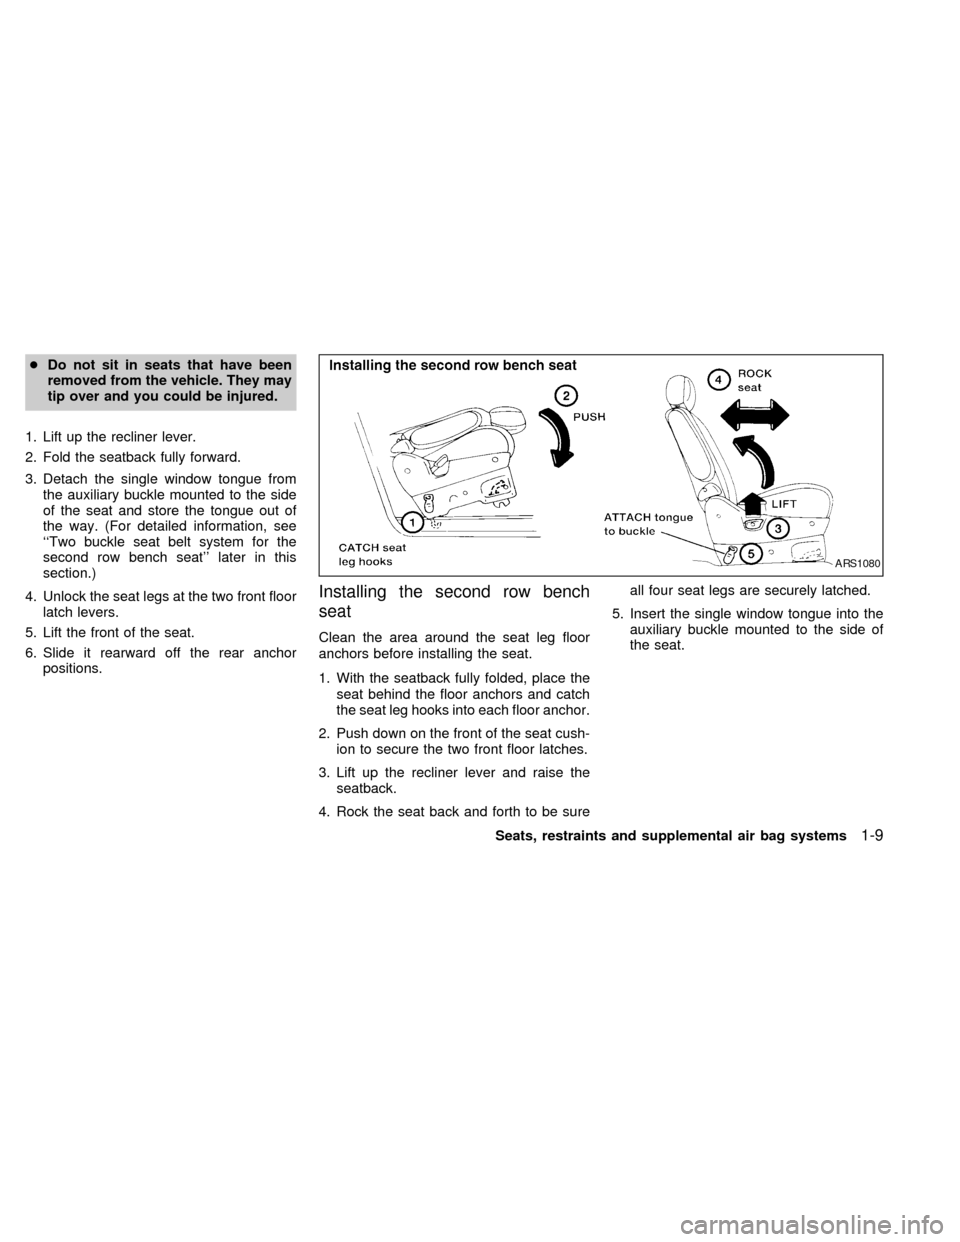
1. Lift up the recliner lever.
2. Fold the seatback fully forward.
3. Detach the single window tongue from
the auxiliary buckle mounted to the side
of the seat and store the tongue out of
the way. (For detailed information, see
``Two buckle seat belt system for the
second row bench seat'' later in this
section.)
4. Unlock the seat legs at the two front floor
latch levers.
5. Lift the front of the seat.
6. Slide it rearward off the rear anchor
positions.
Installing the second row bench
seat
Clean the area around the seat leg floor
anchors before installing the seat.
1. With the seatback fully folded, place the
seat behind the floor anchors and catch
the seat leg hooks into each floor anchor.
2. Push down on the front of the seat cush-
ion to secure the two front floor latches.
3. Lift up the recliner lever and raise the
seatback.
4. Rock the seat back and forth to be sureall four seat legs are securely latched.
5. Insert the single window tongue into the
auxiliary buckle mounted to the side of
the seat.
ARS1080
Seats, restraints and supplemental air bag systems1-9
ZX
Page 39 of 260
WARNING
cIt is very important that you follow
the instructions in this section be-
fore anyone rides in this seating po-
sition of the two-passenger bench
seat.
cFailure to do so may result in im-
proper positioning of seat belt which
could lead to increased likelihood or
severity of injury in a sudden stop or
collision.
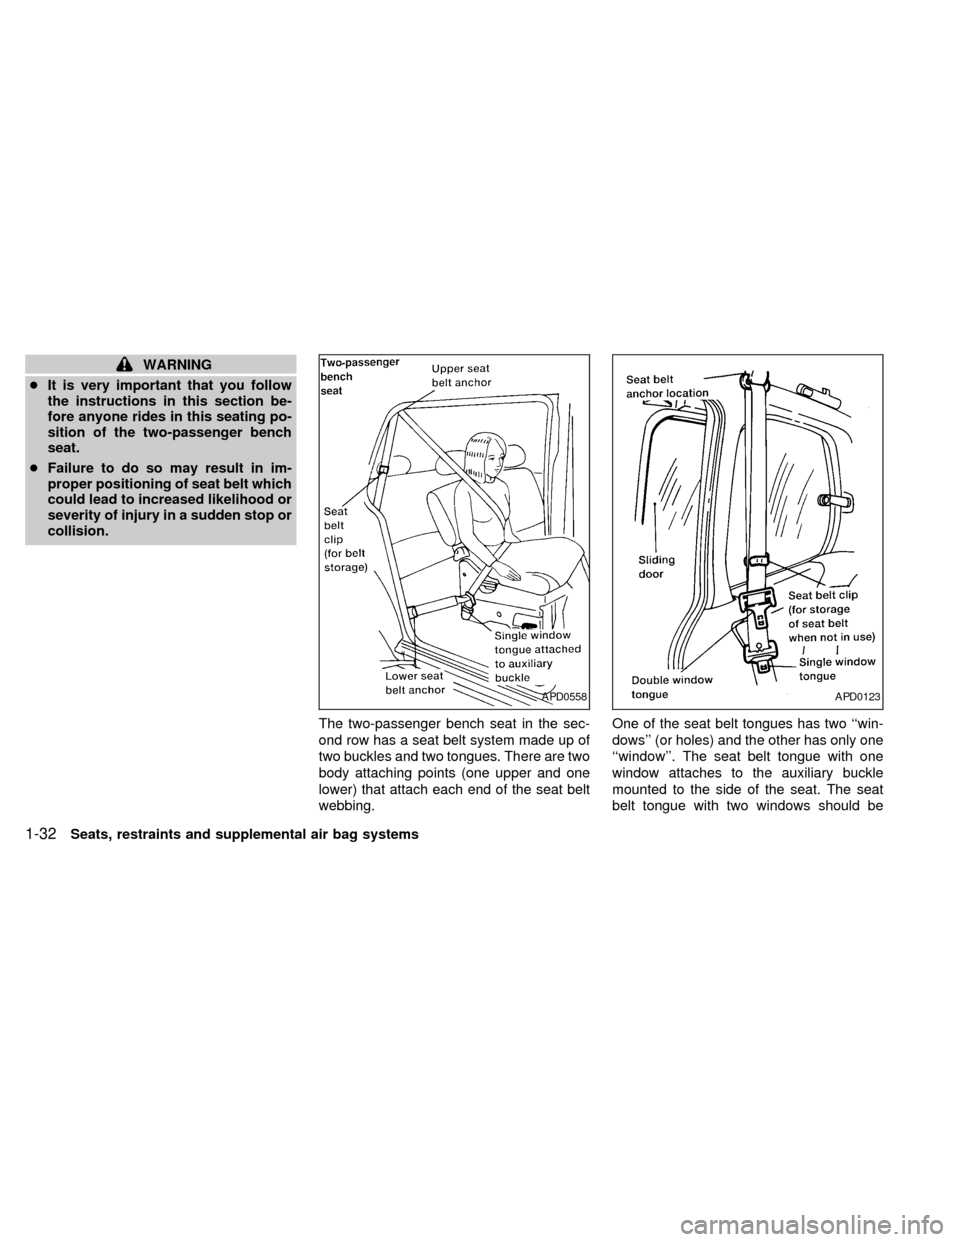
The two-passenger bench seat in the sec-
ond row has a seat belt system made up of
two buckles and two tongues. There are two
body attaching points (one upper and one
lower) that attach each end of the seat belt
webbing.One of the seat belt tongues has two ``win-
dows'' (or holes) and the other has only one
``window''. The seat belt tongue with one
window attaches to the auxiliary buckle
mounted to the side of the seat. The seat
belt tongue with two windows should be
APD0558APD0123
1-32Seats, restraints and supplemental air bag systems
ZX
Page 40 of 260

positioned properly and fastened to the
buckle mounted in the middle of the seat.
When the two buckle seat belt system is not
in use, the webbing can be secured with the
seat belt clip. The seat belt clip should not
be used with a child seat or during seat belt
usage. The seat belt clip opening should
face the front of the vehicle.
A twisted belt may prevent the retractor
from working properly. If the two buckle seat
belt system is twisted, disengage the single
window tongue from the auxiliary buckle on
the side of the seat, remove the twist and
reinstall the tongue into the auxiliary buckle
until you hear a snap and feel the latch
engage.
Both tongues must be attached to their
appropriate buckles whenever someone
is riding in that seating position. If the
tongue is released to allow a third row
passenger to enter or exit, the tongue
must be reattached.When the two-passenger bench seat is re-
moved from the vehicle, you must detach
the single window tongue from the auxiliary
buckle.
If the three-passenger bench seat is
moved up to the second row position,
the outside passenger (near the sliding
door) only needs to use the double win-
dow tongue and the standard buckle.
Because the third row seat is so much
wider and is closer to the sliding door,
the single window tongue and the auxil-
iary buckle are not necessary.
APD0093
Seats, restraints and supplemental air bag systems1-33
ZX
Page 41 of 260
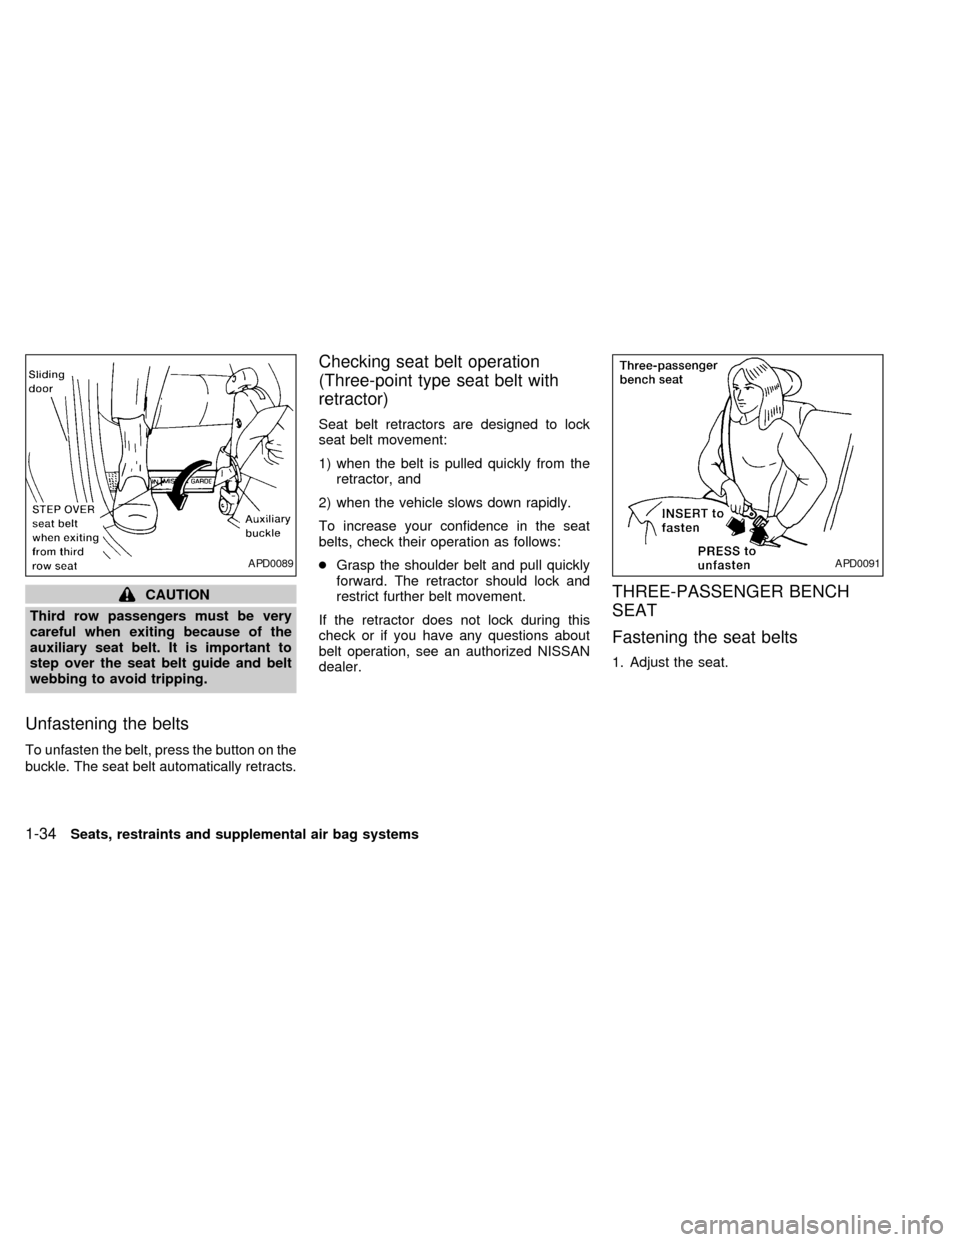
CAUTION
Third row passengers must be very
careful when exiting because of the
auxiliary seat belt. It is important to
step over the seat belt guide and belt
webbing to avoid tripping.
Unfastening the belts
To unfasten the belt, press the button on the
buckle. The seat belt automatically retracts.
Checking seat belt operation
(Three-point type seat belt with
retractor)
Seat belt retractors are designed to lock
seat belt movement:
1) when the belt is pulled quickly from the
retractor, and
2) when the vehicle slows down rapidly.
To increase your confidence in the seat
belts, check their operation as follows:
cGrasp the shoulder belt and pull quickly
forward. The retractor should lock and
restrict further belt movement.
If the retractor does not lock during this
check or if you have any questions about
belt operation, see an authorized NISSAN
dealer.
THREE-PASSENGER BENCH
SEAT
Fastening the seat belts
1. Adjust the seat.
APD0089APD0091
1-34Seats, restraints and supplemental air bag systems
ZX
Page 50 of 260
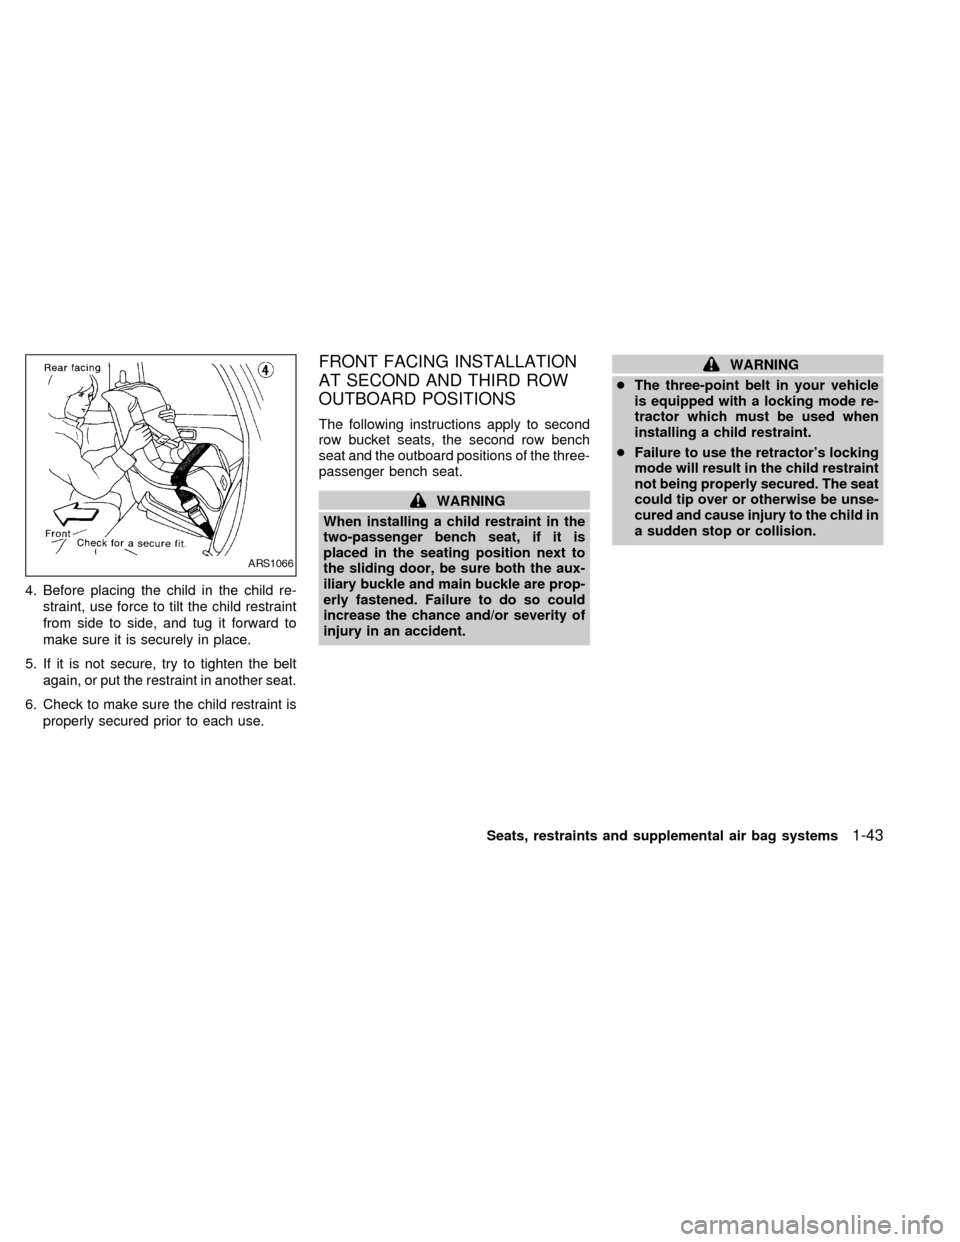
4. Before placing the child in the child re-
straint, use force to tilt the child restraint
from side to side, and tug it forward to
make sure it is securely in place.
5. If it is not secure, try to tighten the belt
again, or put the restraint in another seat.
6. Check to make sure the child restraint is
properly secured prior to each use.
FRONT FACING INSTALLATION
AT SECOND AND THIRD ROW
OUTBOARD POSITIONS
The following instructions apply to second
row bucket seats, the second row bench
seat and the outboard positions of the three-
passenger bench seat.
WARNING
When installing a child restraint in the
two-passenger bench seat, if it is
placed in the seating position next to
the sliding door, be sure both the aux-
iliary buckle and main buckle are prop-
erly fastened. Failure to do so could
increase the chance and/or severity of
injury in an accident.
WARNING
cThe three-point belt in your vehicle
is equipped with a locking mode re-
tractor which must be used when
installing a child restraint.
cFailure to use the retractor's locking
mode will result in the child restraint
not being properly secured. The seat
could tip over or otherwise be unse-
cured and cause injury to the child in
a sudden stop or collision.
ARS1066
Seats, restraints and supplemental air bag systems1-43
ZX
Page 52 of 260
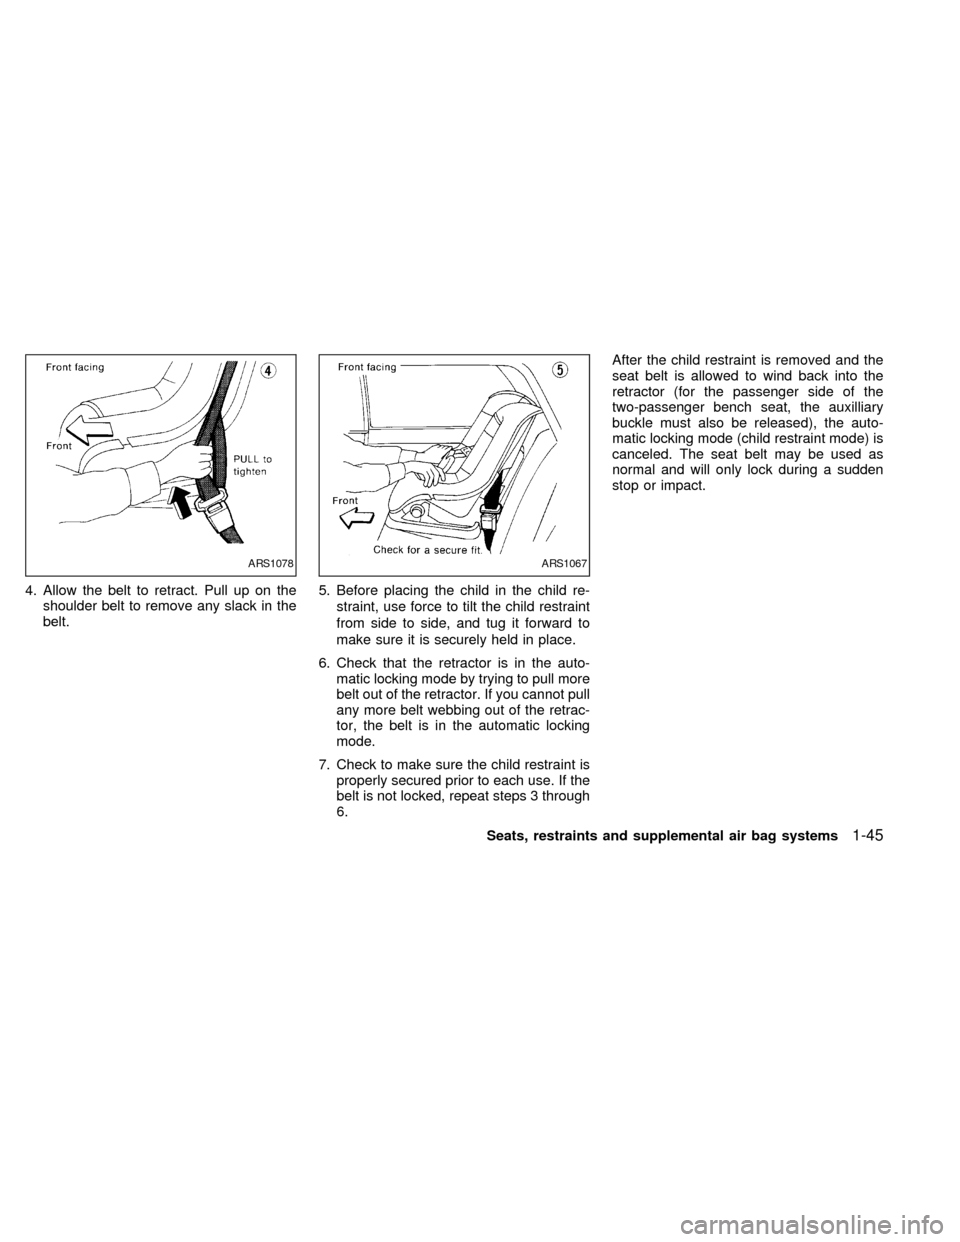
4. Allow the belt to retract. Pull up on the
shoulder belt to remove any slack in the
belt.5. Before placing the child in the child re-
straint, use force to tilt the child restraint
from side to side, and tug it forward to
make sure it is securely held in place.
6. Check that the retractor is in the auto-
matic locking mode by trying to pull more
belt out of the retractor. If you cannot pull
any more belt webbing out of the retrac-
tor, the belt is in the automatic locking
mode.
7. Check to make sure the child restraint is
properly secured prior to each use. If the
belt is not locked, repeat steps 3 through
6.After the child restraint is removed and the
seat belt is allowed to wind back into the
retractor (for the passenger side of the
two-passenger bench seat, the auxilliary
buckle must also be released), the auto-
matic locking mode (child restraint mode) is
canceled. The seat belt may be used as
normal and will only lock during a sudden
stop or impact.
ARS1078ARS1067
Seats, restraints and supplemental air bag systems1-45
ZX
Page 53 of 260
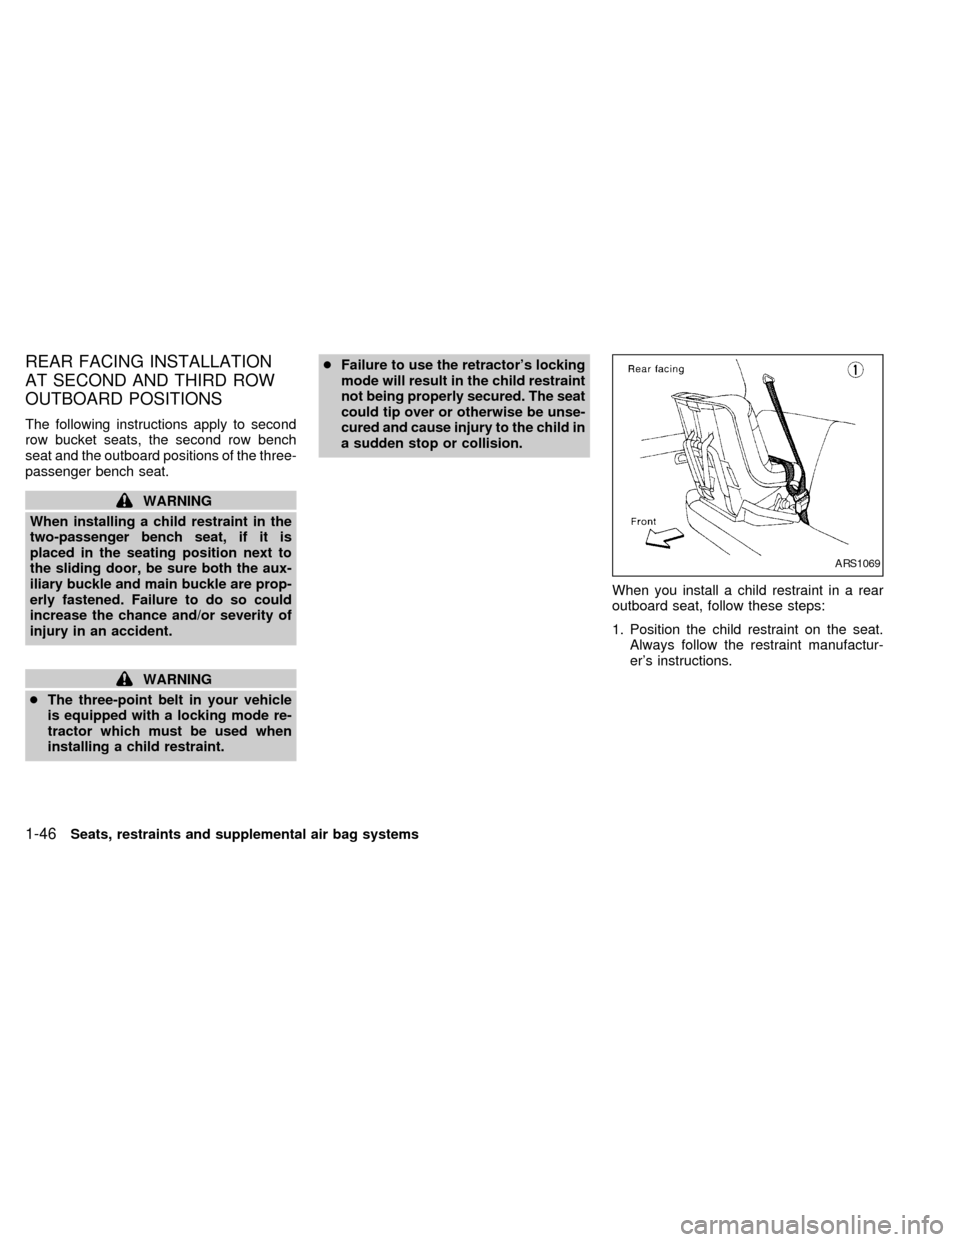
REAR FACING INSTALLATION
AT SECOND AND THIRD ROW
OUTBOARD POSITIONS
The following instructions apply to second
row bucket seats, the second row bench
seat and the outboard positions of the three-
passenger bench seat.
WARNING
When installing a child restraint in the
two-passenger bench seat, if it is
placed in the seating position next to
the sliding door, be sure both the aux-
iliary buckle and main buckle are prop-
erly fastened. Failure to do so could
increase the chance and/or severity of
injury in an accident.
WARNING
cThe three-point belt in your vehicle
is equipped with a locking mode re-
tractor which must be used when
installing a child restraint.cFailure to use the retractor's locking
mode will result in the child restraint
not being properly secured. The seat
could tip over or otherwise be unse-
cured and cause injury to the child in
a sudden stop or collision.
When you install a child restraint in a rear
outboard seat, follow these steps:
1. Position the child restraint on the seat.
Always follow the restraint manufactur-
er's instructions.
ARS1069
1-46Seats, restraints and supplemental air bag systems
ZX
Page 55 of 260

5. Before placing the child in the child re-
straint, use force to tilt the child restraint
from side to side, and tug it forward to
make sure it is securely held in place.
6. Check that the retractor is in the auto-
matic locking mode by trying to pull more
belt out of the retractor. If you cannot pull
any more belt webbing out of the retrac-
tor, the belt is in the automatic locking
mode.
7. Check to make sure the child restraint is
properly secured prior to each use. If the
belt is not locked, repeat steps 3 through
6.After the child restraint is removed and the
seat belt is allowed to wind back into the
retractor (for the passenger side of the
two-passenger bench seat, the auxilliary
buckle must also be released), the auto-
matic locking mode (child restraint mode) is
canceled. The seat belt may be used as
normal and will only lock during a sudden
stop or impact.
ARS1072
1-48Seats, restraints and supplemental air bag systems
ZX