engine NISSAN QUEST 1999 V41 / 2.G Owners Manual
[x] Cancel search | Manufacturer: NISSAN, Model Year: 1999, Model line: QUEST, Model: NISSAN QUEST 1999 V41 / 2.GPages: 286, PDF Size: 2.46 MB
Page 3 of 286

Welcome To The World Of NISSAN
Your new NISSAN is the result of our dedication
to produce the finest in safe, reliable and eco-
nomical transportation. Your vehicle is the prod-
uct of a successful worldwide company that
manufactures cars and trucks in over 17 coun-
tries and distributes them in 170 nations.
NISSAN vehicles are designed and manufactured
by Nissan Motor Co., Ltd. which was founded in
Tokyo, Japan in 1933, and NISSAN affiliates world-
wide, collectively growing to become the fifth largest
automaker in the world. In addition to cars and
trucks, NISSAN also makes textile machinery, fork-
lift trucks, marine engines, boats and other products.
NISSAN has made a substantial and growing
investment in North America, starting with the
opening of Nissan Motor Corporation U.S.A. in
1960 and continuing with the production of some
cars and trucks at one of the world's most
modern manufacturing facilities, Nissan MotorManufacturing Corporation U.S.A. in Smyrna,
Tennessee, vehicle styling at Nissan Design
International in San Diego, California, and engi-
neering at Nissan Research and Development in
Farmington Hills, Michigan.
NISSAN and its dealers employ about 60,000
Americans.
NISSAN is also a substantial contributor to the
Canadian economy. Nissan Canada Inc., its sup-
pliers and over 150 dealers employ approxi-
mately 4,500 people. These include company
employees and the staffs of NISSAN dealers all
across Canada. In addition, many Canadians
work for companies that supply NISSAN and
NISSAN dealers with materials and services
ranging from the operation of port facilities and
transportation services, to the supply of lubri-
cants, parts and accessories.NISSAN pioneered the use of electronics and
computers in automobiles, and has led the indus-
try in improving both performance and fuel effi-
ciency through new engine designs and the use
of synthetic materials to reduce vehicle weight.
The company has also developed ways to build
quality into its vehicles at each stage of the
production process, both through extensive use
of automation and Ð most importantly Ð
through an awareness thatpeopleare the cen-
tral element in quality control.
From the time the parts arrived from our suppli-
ers until you took delivery of your new NISSAN,
dozens of checks were made to ensure that only
the best job was being done in producing and
delivering your vehicle. NISSAN also takes great
care to ensure that when you take your NISSAN
to your dealer for maintenance, the service techni-
cian will perform his work according to the quality
standards that have been established by the
factory.
Safety has also been built into your NISSAN. As
you know, seat belts are an integral part of the
safety systems that will help protect you and your
passengers in the event of a sudden stop or an
accident. We urge you to use the seat belts every
time you drive the vehicle.
The NISSAN story of growth and achievement
reflects our major goal: to provide you, our
customer, with a vehicle that is built with quality
and craftsmanship Ð a product that we can be
proud to build and you can be proud to own.
AFW0001
ZX
Page 11 of 286
POWER FRONT SEAT
ADJUSTMENT (if so equipped)
WARNING
cDo not adjust the driver's seat while
driving. The seat may move sud-
denly and could cause loss of con-
trol of the vehicle.
c
Do not leave children unattended in-
side the vehicle. They could unknow-
ingly activate switches or controls.
Unattended children could become
involved in serious accidents.
For memory seat and mirror information
see ``Memory driver seat and mirrors'' in the
``Pre-driving checks and adjustments'' sec-
tion.
Operating tips
cThe motor has an auto-reset overload
protection circuit. If the motor stops dur-
ing operation, wait 30 seconds, then re-
activate the switch.
cDo not operate the power support seat
for a long period of time when the engine
is off. This discharges the battery.
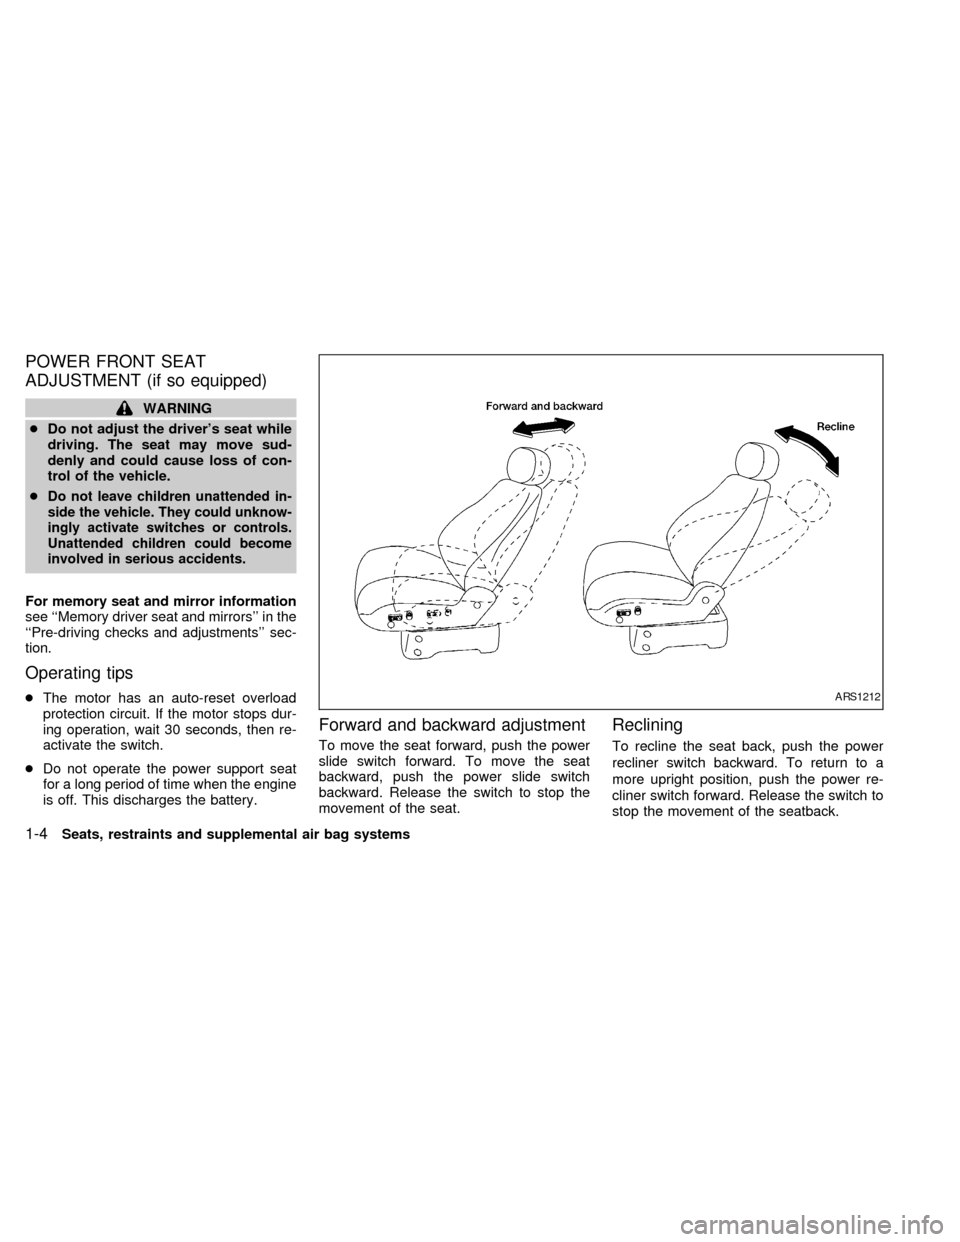
Forward and backward adjustment
To move the seat forward, push the power
slide switch forward. To move the seat
backward, push the power slide switch
backward. Release the switch to stop the
movement of the seat.
Reclining
To recline the seat back, push the power
recliner switch backward. To return to a
more upright position, push the power re-
cliner switch forward. Release the switch to
stop the movement of the seatback.
ARS1212
1-4Seats, restraints and supplemental air bag systems
ZX
Page 48 of 286
cPeriodically check to see that the seat
belt and the metal componentssuch
as buckles, tongues, retractors, flexible
wires and anchors work properly. If loose
parts, deterioration, cuts or other dam-
age on the webbing is found, the entire
seat belt assembly should be replaced.WARNING
cInfants and small children should
always be placed in an appropriate
child restraint system while riding in
the vehicle. Failure to use a child
restraint can result in serious injury
or death.
cInfants and small children should
never be carried on your lap. It is not
possible for even the strongest adult
to resist the forces of a severe acci-
dent. The child could be crushed
between the adult and parts of the
vehicle. Also, do not put the same
seat belt around both your child and
yourself.
c
Never install a rear-facing child re-
straint in the front seat. An inflating air
bag could seriously injure or kill your
child. A rear-facing child restraint
must only be used in the rear seat.
cNISSAN recommends that the child
restraint be installed in a rear seat.
According to accident statistics,
children are safer when properly re-
strained in a rear seat than in a front
seat.cAn improperly installed child re-
straint could lead to serious injury in
an accident.
cIn general, child restraint systems
are designed to be installed with a
lap belt or the lap portion of a three-
point type seat belt.
Child restraints for infants and children of
various sizes are offered by several manu-
facturers. When selecting any child re-
straint, keep the following points in mind:
1) Choose only a restraint with a label cer-
tifying that it complies with Federal Motor
Vehicle Safety Standard 213 or Cana-
dian Motor Vehicle Safety Standard 213.
2) Check the child restraint in your vehicle
to be sure it is compatible with the vehi-
cle's seat and seat belt system. Choose
a child restraint that meets the guidelines
of the Society of Automotive Engineers
recommended practice J1819 for child
seat installation.
3) If the child restraint is compatible with
your vehicle, place your child in the child
restraint and check the various adjust-
ments to be sure the child restraint is
CHILD RESTRAINTS
Seats, restraints and supplemental air bag systems1-41
ZX
Page 86 of 286

2 Instruments and controls
Meters and gauges ................................................2-3
Speedometer and odometer ..................................2-4
Tachometer ............................................................2-4
Engine coolant temperature gauge........................2-4
Fuel gauge .............................................................2-5
Warning/indicator lights and chimes ......................2-6
Theft warning (if so equipped) .............................2-10
Windshield wiper and washer switch ...................2-12
Rear window wiper and washer switches ............2-13
Rear window defogger switch ..............................2-13
Headlight control switch .......................................2-13
Daytime running light system (Canada only) .......2-14
Autolamp switch (if so equipped) .........................2-14
Turn signal switch .............................................2-15
Cornering light ......................................................2-15
Instrument brightness control ...............................2-16
Hazard warning flasher switch .............................2-16
Cigarette lighter and ashtray (accessory) ............2-17
Rear power point ..................................................2-18
Cup holder ............................................................2-18
Map pockets .........................................................2-20
Overhead storage compartment ..........................2-20Power windows ....................................................2-21
Automatic power window switch ..........................2-21
Sunroof (if so equipped).......................................2-22
Manual vent windows ...........................................2-23
Power vent windows (if so equipped) ..................2-23
Interior lights .........................................................2-24
Luggage compartment lights ................................2-24
Personal reading light ..........................................2-24
Map lights .............................................................2-25
Illuminated entry system ......................................2-25
Storage compartment for garage door
transmitter (if so equipped) ..................................2-25
Integrated HomeLinkTuniversal transceiver
(if so equipped) ....................................................2-27
Programming the HomeLinkTuniversal
transceiver ............................................................2-27
Operating the transceiver .....................................2-28
Programming problem diagnosis .........................2-28
Rolling codes ........................................................2-29
Clearing the programming information.................2-30
If your vehicle is ever stolen ................................2-30
ZX
Page 89 of 286
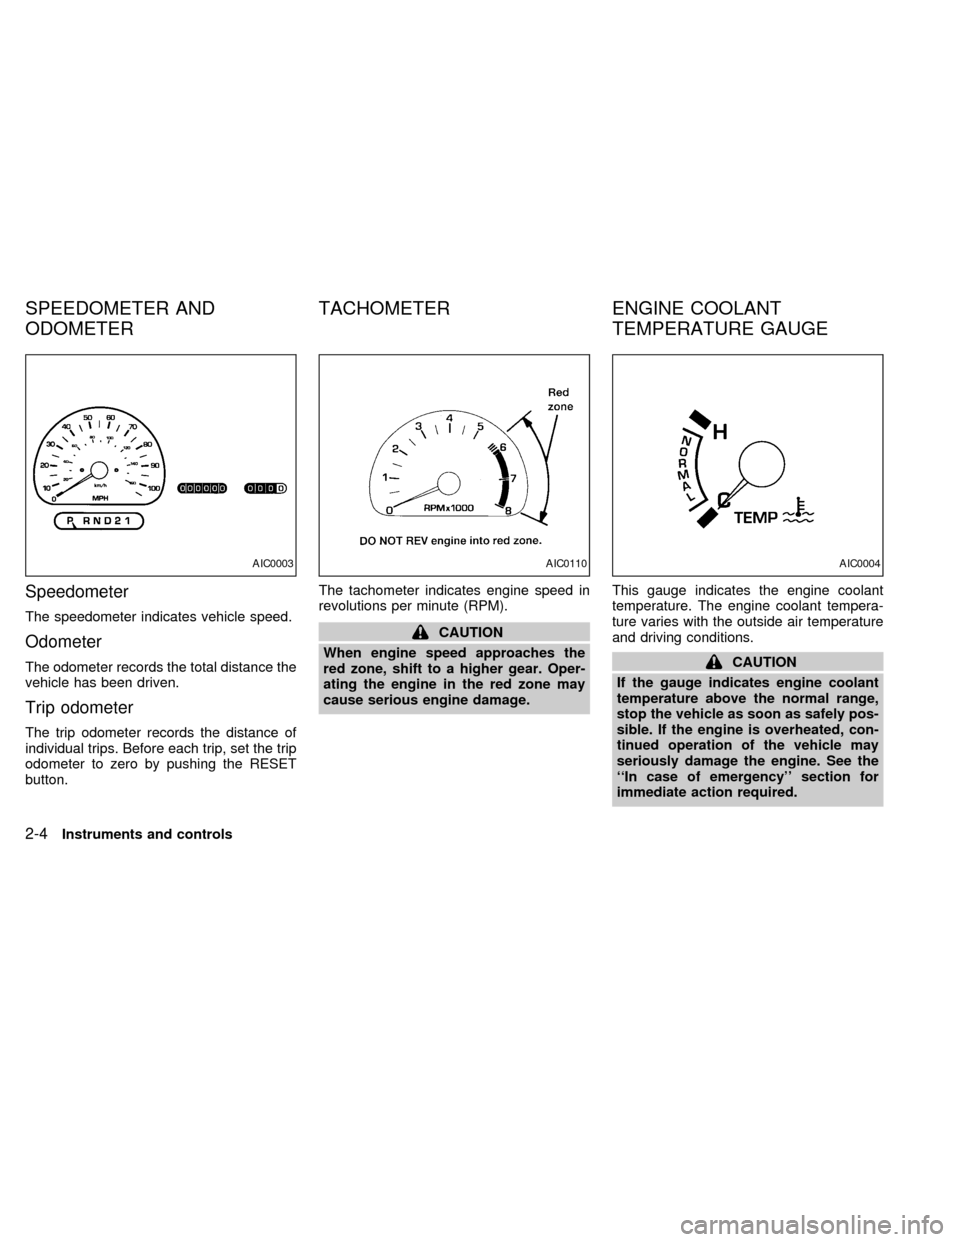
Speedometer
The speedometer indicates vehicle speed.
Odometer
The odometer records the total distance the
vehicle has been driven.
Trip odometer
The trip odometer records the distance of
individual trips. Before each trip, set the trip
odometer to zero by pushing the RESET
button.The tachometer indicates engine speed in
revolutions per minute (RPM).
CAUTION
When engine speed approaches the
red zone, shift to a higher gear. Oper-
ating the engine in the red zone may
cause serious engine damage.This gauge indicates the engine coolant
temperature. The engine coolant tempera-
ture varies with the outside air temperature
and driving conditions.
CAUTION
If the gauge indicates engine coolant
temperature above the normal range,
stop the vehicle as soon as safely pos-
sible. If the engine is overheated, con-
tinued operation of the vehicle may
seriously damage the engine. See the
``In case of emergency'' section for
immediate action required.
AIC0003AIC0110AIC0004
SPEEDOMETER AND
ODOMETERTACHOMETER ENGINE COOLANT
TEMPERATURE GAUGE
2-4Instruments and controls
ZX
Page 91 of 286
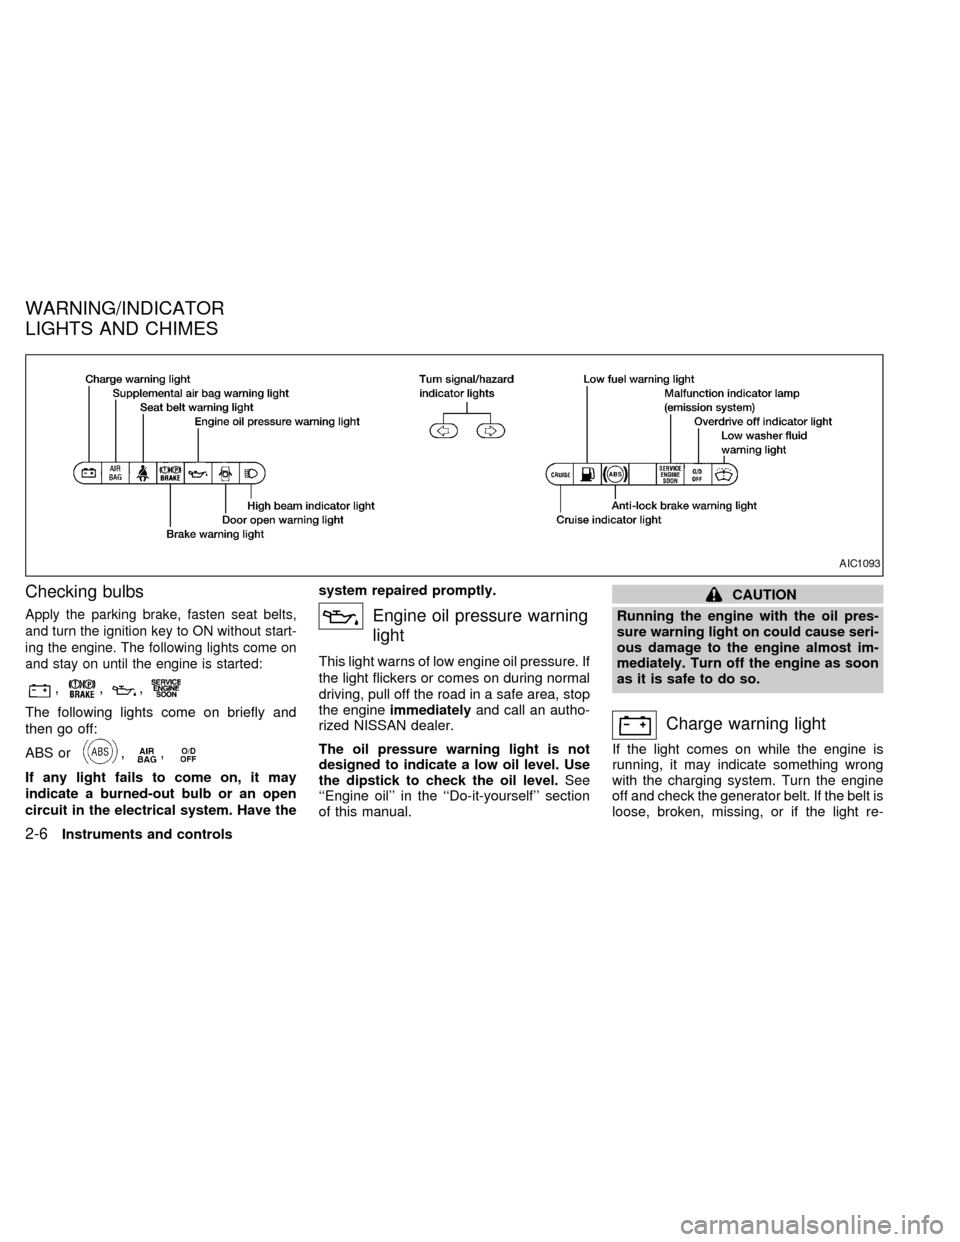
Checking bulbs
Apply the parking brake, fasten seat belts,
and turn the ignition key to ON without start-
ing the engine. The following lights come on
and stay on until the engine is started:
,,,
The following lights come on briefly and
then go off:
ABS or
,,
If any light fails to come on, it may
indicate a burned-out bulb or an open
circuit in the electrical system. Have thesystem repaired promptly.
Engine oil pressure warning
light
This light warns of low engine oil pressure. If
the light flickers or comes on during normal
driving, pull off the road in a safe area, stop
the engineimmediatelyand call an autho-
rized NISSAN dealer.
The oil pressure warning light is not
designed to indicate a low oil level. Use
the dipstick to check the oil level.See
``Engine oil'' in the ``Do-it-yourself'' section
of this manual.
CAUTION
Running the engine with the oil pres-
sure warning light on could cause seri-
ous damage to the engine almost im-
mediately. Turn off the engine as soon
as it is safe to do so.
Charge warning light
If the light comes on while the engine is
running, it may indicate something wrong
with the charging system. Turn the engine
off and check the generator belt. If the belt is
loose, broken, missing, or if the light re-
AIC1093
WARNING/INDICATOR
LIGHTS AND CHIMES
2-6Instruments and controls
ZX
Page 92 of 286
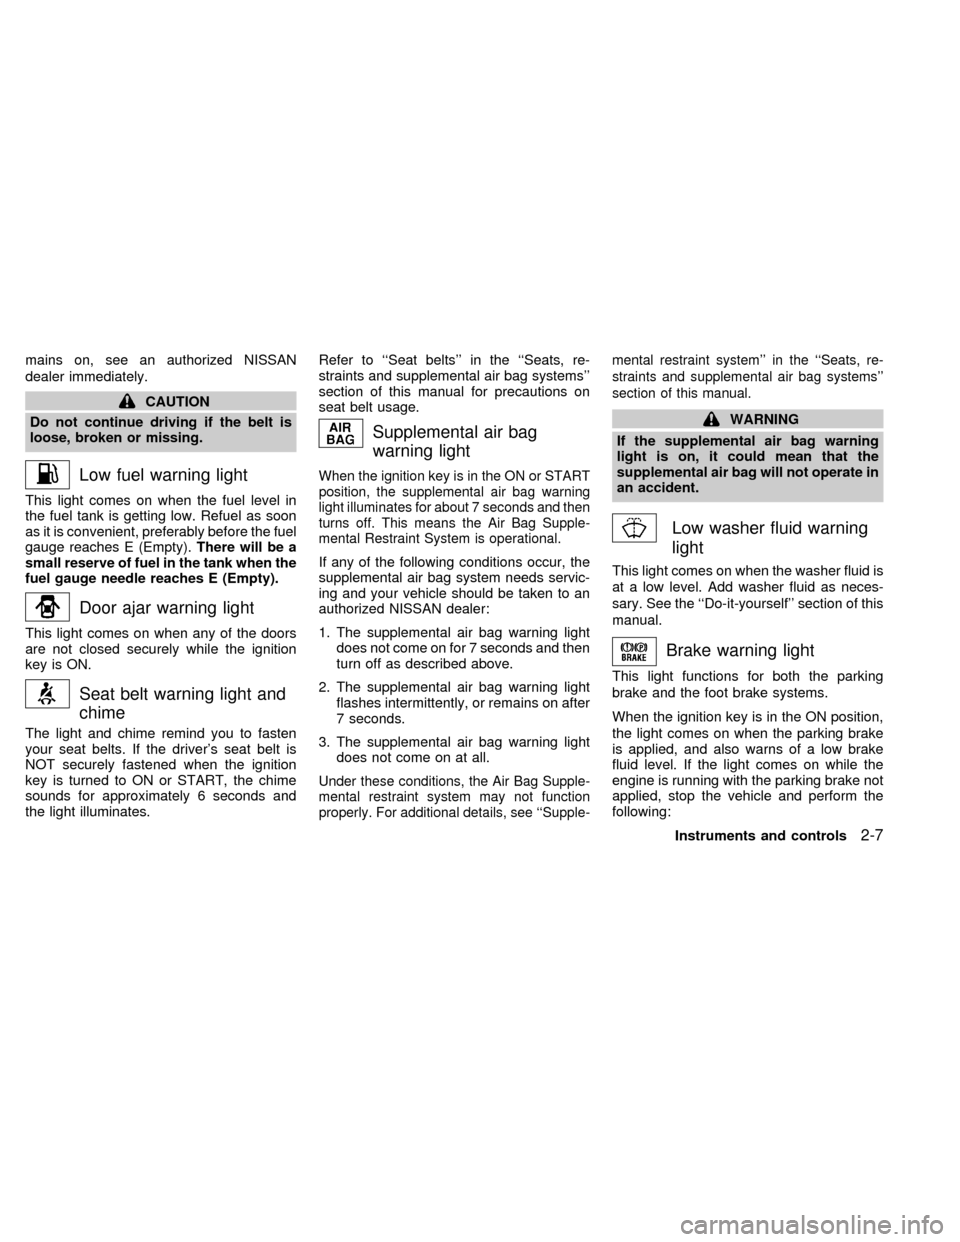
mains on, see an authorized NISSAN
dealer immediately.
CAUTION
Do not continue driving if the belt is
loose, broken or missing.
Low fuel warning light
This light comes on when the fuel level in
the fuel tank is getting low. Refuel as soon
as it is convenient, preferably before the fuel
gauge reaches E (Empty).There will be a
small reserve of fuel in the tank when the
fuel gauge needle reaches E (Empty).
Door ajar warning light
This light comes on when any of the doors
are not closed securely while the ignition
key is ON.
Seat belt warning light and
chime
The light and chime remind you to fasten
your seat belts. If the driver's seat belt is
NOT securely fastened when the ignition
key is turned to ON or START, the chime
sounds for approximately 6 seconds and
the light illuminates.Refer to ``Seat belts'' in the ``Seats, re-
straints and supplemental air bag systems''
section of this manual for precautions on
seat belt usage.
Supplemental air bag
warning light
When the ignition key is in the ON or START
position, the supplemental air bag warning
light illuminates for about 7 seconds and then
turns off. This means the Air Bag Supple-
mental Restraint System is operational.
If any of the following conditions occur, the
supplemental air bag system needs servic-
ing and your vehicle should be taken to an
authorized NISSAN dealer:
1. The supplemental air bag warning light
does not come on for 7 seconds and then
turn off as described above.
2. The supplemental air bag warning light
flashes intermittently, or remains on after
7 seconds.
3. The supplemental air bag warning light
does not come on at all.
Under these conditions, the Air Bag Supple-
mental restraint system may not function
properly. For additional details, see ``Supple-mental restraint system'' in the ``Seats, re-
straints and supplemental air bag systems''
section of this manual.
WARNING
If the supplemental air bag warning
light is on, it could mean that the
supplemental air bag will not operate in
an accident.
Low washer fluid warning
light
This light comes on when the washer fluid is
at a low level. Add washer fluid as neces-
sary. See the ``Do-it-yourself'' section of this
manual.
Brake warning light
This light functions for both the parking
brake and the foot brake systems.
When the ignition key is in the ON position,
the light comes on when the parking brake
is applied, and also warns of a low brake
fluid level. If the light comes on while the
engine is running with the parking brake not
applied, stop the vehicle and perform the
following:
Instruments and controls
2-7
ZX
Page 93 of 286
1.Check the brake fluid level. Add brake fluid
as necessary. See ``Brake fluid'' in the
``Do-it-yourself'' section of this manual.
2. If the brake fluid level is correct, have the
warning system checked by an autho-
rized NISSAN dealer.
WARNING
cYour brake system may not be work-
ing properly if the warning light is
on. Driving could be dangerous. If
you judge it to be safe, drive care-
fully to the nearest service station
for repairs. Otherwise, have your ve-
hicle towed.
cPressing the brake pedal with the
engine stopped and/or low brake
fluid level may increase your stop-
ping distance and braking will re-
quire greater pedal effort as well as
pedal travel.
cIf the brake fluid level is below the
minimum mark on the brake fluid
reservoir, do not drive until the brake
system has been checked at an au-
thorized NISSAN dealer.
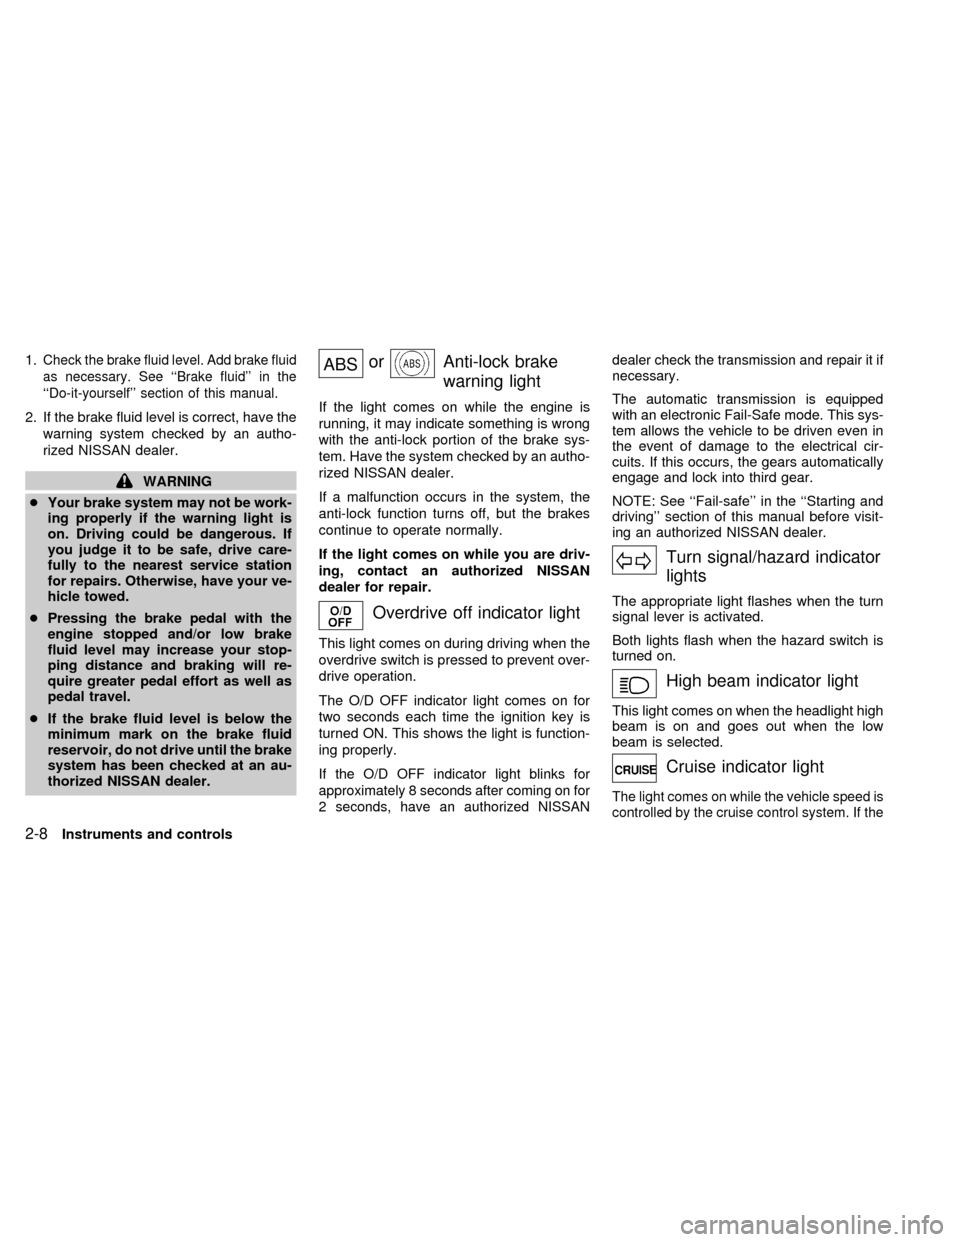
ABSorAnti-lock brake
warning light
If the light comes on while the engine is
running, it may indicate something is wrong
with the anti-lock portion of the brake sys-
tem. Have the system checked by an autho-
rized NISSAN dealer.
If a malfunction occurs in the system, the
anti-lock function turns off, but the brakes
continue to operate normally.
If the light comes on while you are driv-
ing, contact an authorized NISSAN
dealer for repair.
Overdrive off indicator light
This light comes on during driving when the
overdrive switch is pressed to prevent over-
drive operation.
The O/D OFF indicator light comes on for
two seconds each time the ignition key is
turned ON. This shows the light is function-
ing properly.
If the O/D OFF indicator light blinks for
approximately 8 seconds after coming on for
2 seconds, have an authorized NISSANdealer check the transmission and repair it if
necessary.
The automatic transmission is equipped
with an electronic Fail-Safe mode. This sys-
tem allows the vehicle to be driven even in
the event of damage to the electrical cir-
cuits. If this occurs, the gears automatically
engage and lock into third gear.
NOTE: See ``Fail-safe'' in the ``Starting and
driving'' section of this manual before visit-
ing an authorized NISSAN dealer.
Turn signal/hazard indicator
lights
The appropriate light flashes when the turn
signal lever is activated.
Both lights flash when the hazard switch is
turned on.
High beam indicator light
This light comes on when the headlight high
beam is on and goes out when the low
beam is selected.
Cruise indicator light
The light comes on while the vehicle speed is
controlled by the cruise control system. If the
2-8Instruments and controls
ZX
Page 94 of 286
CRUISE indicator blinks, have the system
checked by an authorized NISSAN dealer.
Key reminder chime
The chime sounds if the driver's door is
opened while the key is left in the ignition
switch. Remove the key and take it with you
when leaving the vehicle.
Light reminder chime
A chime sounds when the driver's door is
opened if the headlight control switch is
turned on (ignition switch is turned OFF).
The chime will not sound when the Auto-
lamp (if so equipped) shut-off delay is acti-
vated. Refer to the ``Autolamp Switch'' in-
structions later in this section.
Turn the headlight control switch to OFF
when you leave the vehicle.
Brake pad wear warning
The disc brake pads have audible wear
warnings. When a brake pad requires re-
placement, it makes a high pitched scraping
sound when the vehicle is in motion whether
or not the brake pedal is depressed. Have
the brakes checked as soon as possible if
the warning sound is heard.
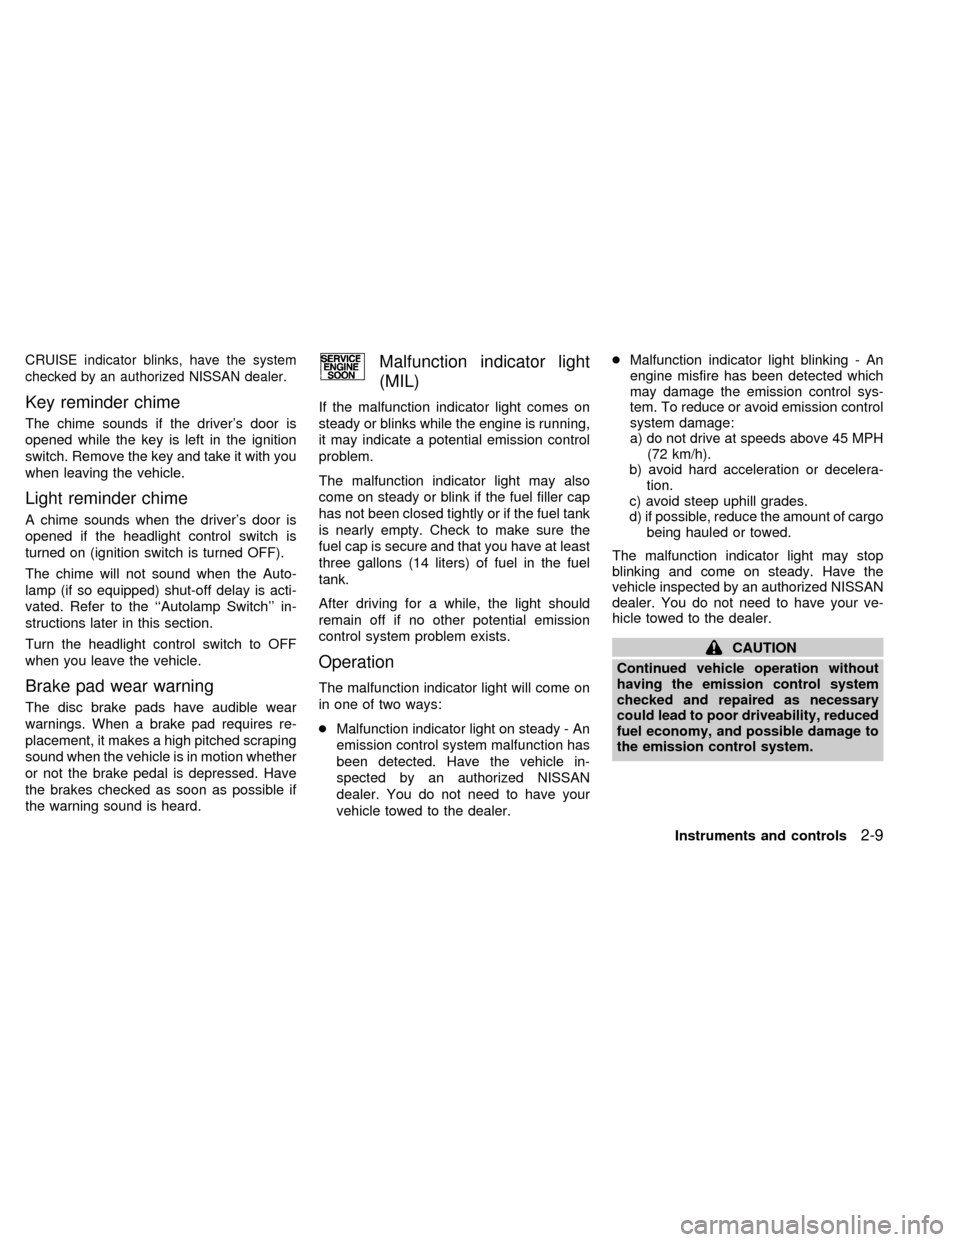
Malfunction indicator light
(MIL)
If the malfunction indicator light comes on
steady or blinks while the engine is running,
it may indicate a potential emission control
problem.
The malfunction indicator light may also
come on steady or blink if the fuel filler cap
has not been closed tightly or if the fuel tank
is nearly empty. Check to make sure the
fuel cap is secure and that you have at least
three gallons (14 liters) of fuel in the fuel
tank.
After driving for a while, the light should
remain off if no other potential emission
control system problem exists.
Operation
The malfunction indicator light will come on
in one of two ways:
cMalfunction indicator light on steady - An
emission control system malfunction has
been detected. Have the vehicle in-
spected by an authorized NISSAN
dealer. You do not need to have your
vehicle towed to the dealer.cMalfunction indicator light blinking - An
engine misfire has been detected which
may damage the emission control sys-
tem. To reduce or avoid emission control
system damage:
a) do not drive at speeds above 45 MPH
(72 km/h).
b) avoid hard acceleration or decelera-
tion.
c) avoid steep uphill grades.
d) if possible, reduce the amount of cargo
being hauled or towed.
The malfunction indicator light may stop
blinking and come on steady. Have the
vehicle inspected by an authorized NISSAN
dealer. You do not need to have your ve-
hicle towed to the dealer.
CAUTION
Continued vehicle operation without
having the emission control system
checked and repaired as necessary
could lead to poor driveability, reduced
fuel economy, and possible damage to
the emission control system.
Instruments and controls
2-9
ZX
Page 98 of 286
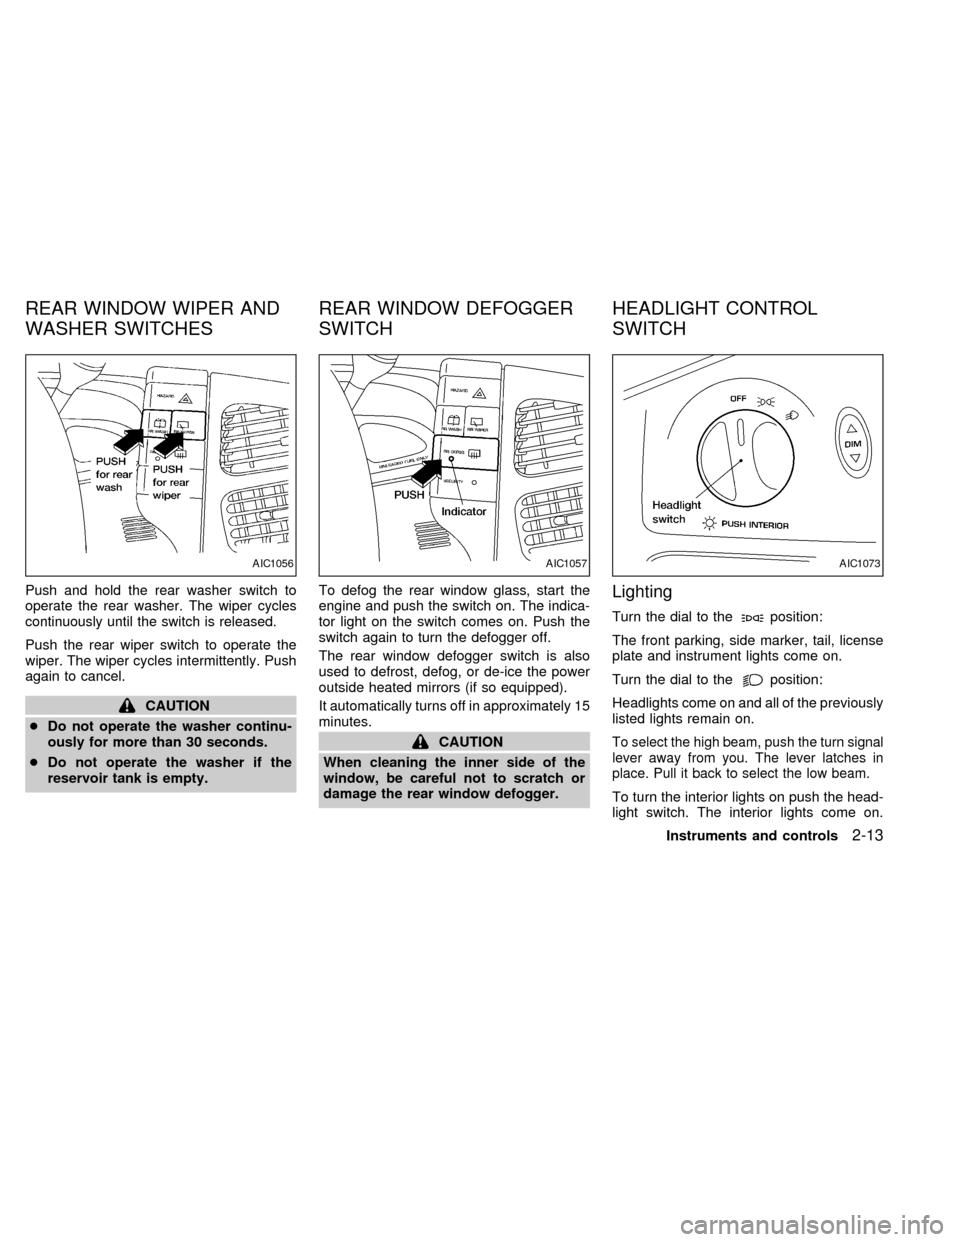
Push and hold the rear washer switch to
operate the rear washer. The wiper cycles
continuously until the switch is released.
Push the rear wiper switch to operate the
wiper. The wiper cycles intermittently. Push
again to cancel.
CAUTION
cDo not operate the washer continu-
ously for more than 30 seconds.
cDo not operate the washer if the
reservoir tank is empty.To defog the rear window glass, start the
engine and push the switch on. The indica-
tor light on the switch comes on. Push the
switch again to turn the defogger off.
The rear window defogger switch is also
used to defrost, defog, or de-ice the power
outside heated mirrors (if so equipped).
It automatically turns off in approximately 15
minutes.
CAUTION
When cleaning the inner side of the
window, be careful not to scratch or
damage the rear window defogger.
Lighting
Turn the dial to theposition:
The front parking, side marker, tail, license
plate and instrument lights come on.
Turn the dial to the
position:
Headlights come on and all of the previously
listed lights remain on.
To select the high beam, push the turn signal
lever away from you. The lever latches in
place. Pull it back to select the low beam.
To turn the interior lights on push the head-
light switch. The interior lights come on.
AIC1056AIC1057AIC1073
REAR WINDOW WIPER AND
WASHER SWITCHESREAR WINDOW DEFOGGER
SWITCHHEADLIGHT CONTROL
SWITCH
Instruments and controls2-13
ZX