NISSAN QUEST 2000 V41 / 2.G Owners Manual
Manufacturer: NISSAN, Model Year: 2000, Model line: QUEST, Model: NISSAN QUEST 2000 V41 / 2.GPages: 292, PDF Size: 2.48 MB
Page 151 of 292

WHA0014
4-10Heater, air conditioner and audio systems
ZX
Page 152 of 292

WARNING
cThe air conditioner cooling function
operates only when the engine is
running.
cDo not leave children, impaired
adults, or pets alone in your vehicle.
On hot, sunny days, temperatures in
a closed vehicle could quickly be-
come high enough to cause severe
or possibly fatal injuries to people or
animals.
cDo not use the recirculation mode
for long periods as it may cause theinterior air to become stale and the
windows to fog up.
cPositioning of the heater and air con-
ditioner controls should not be done
while driving so full attention may be
given to vehicle operation.
The cabin air filter (if so equipped) requires
periodic maintenance. See the ``Do it your-
self'' section for additional information.
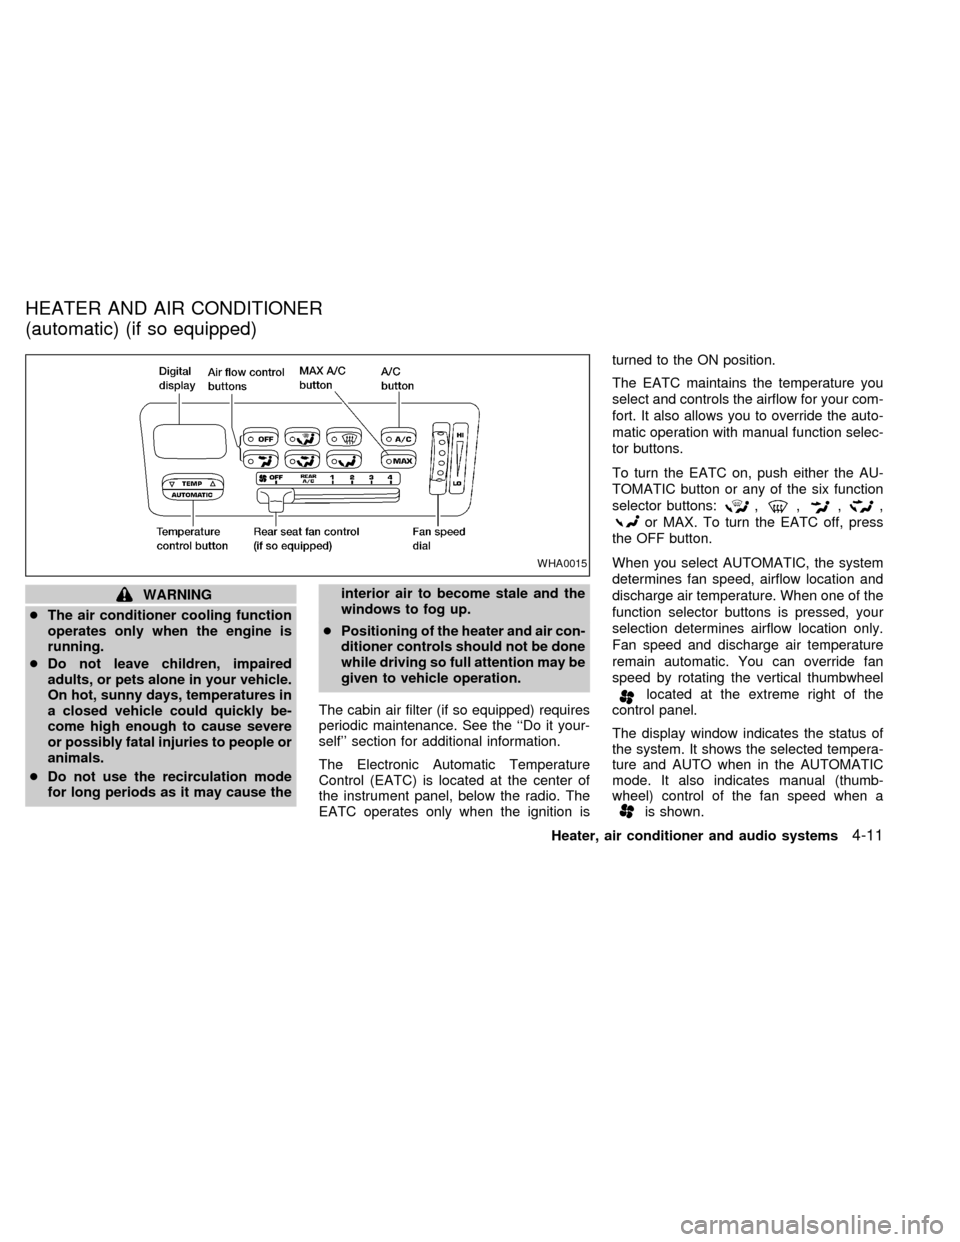
The Electronic Automatic Temperature
Control (EATC) is located at the center of
the instrument panel, below the radio. The
EATC operates only when the ignition isturned to the ON position.
The EATC maintains the temperature you
select and controls the airflow for your com-
fort. It also allows you to override the auto-
matic operation with manual function selec-
tor buttons.
To turn the EATC on, push either the AU-
TOMATIC button or any of the six function
selector buttons:
,,,,
or MAX. To turn the EATC off, press
the OFF button.
When you select AUTOMATIC, the system
determines fan speed, airflow location and
discharge air temperature. When one of the
function selector buttons is pressed, your
selection determines airflow location only.
Fan speed and discharge air temperature
remain automatic. You can override fan
speed by rotating the vertical thumbwheel
located at the extreme right of the
control panel.
The display window indicates the status of
the system. It shows the selected tempera-
ture and AUTO when in the AUTOMATIC
mode. It also indicates manual (thumb-
wheel) control of the fan speed when a
is shown.
WHA0015
HEATER AND AIR CONDITIONER
(automatic) (if so equipped)
Heater, air conditioner and audio systems4-11
ZX
Page 153 of 292

AUTOMATIC OPERATION
Push the AUTOMATIC button and select the
desired temperature. The selected tempera-
ture and AUTO show in the display window.
The EATC heats or cools to achieve the set
temperature.
When in AUTOMATIC and weather conditions
require heat, air is sent to the floor. However,
a feature is included in the EATC to prevent
blowing cold air to the floor if the engine
coolant is not warm enough to allow heating.
In three or four minutes the fan speed gradu-
ally increases and airflow changes to the floor.
If unique conditions exist, such as window
fogging, the five override buttons allow spe-
cific airflow selection. The thumbwheel al-
lows you to adjust the fan speed to suit your
needs.
Temperature selection
TheTEMPbutton on the left side of
the control panel is for temperature selec-
tion. The
side lowers the set tempera-
ture, and theside raises the set tem-
perature. Press and hold either side of the
button to rapidly change the temperature
setting in one degree increments to either
65ÉF (18ÉC) or 85ÉF (29ÉC). If you wantcontinuous maximum cooling, push the
side of the TEMP button until 60ÉF
(16ÉC) shows in the display window. The
EATC cools at maximum and disregards the
60ÉF (16ÉC) setting until a warmer tempera-
ture is selected. If you want continuous
maximum heating, push the
side of the
TEMP button until 90ÉF (32ÉC) shows in the
display window. The EATC provides maxi-
mum heat regardless of the 90ÉF (32ÉC)
setting until a cooler temperature is se-
lected.
Fan speed and thumbwheel
Your EATC automatically adjusts the fan
speed to the existing conditions. To control
the fan speed yourself, use the thumbwheel
located at the extreme right side of the
EATC control panel. Using the thumbwheel
cancels the automatic fan speed control,
and causes a
to appear in the display
window. Rotate the thumbwheel up for HI
speeds and down for LO speeds.
To return to auto fan control, press the
AUTOMATIC button.
Air flow control
Your EATC has five buttons which allow you
to make special selections. The buttons aregrouped in the middle of the EATC panel
and allow you to determine airflow location.
Pressing any of the air control buttons
changes airflow location only, and does not
affect the ability of the system to control
temperature or fan speed. Return to fully
automatic operation by pushing the AUTO-
MATIC button.
Push this button for airflow to the front and
rear floor outlets and windshield at the same
time. The
indicator light comes on,
and the display window shows the set tem-
perature.
Push this button to obtain maximum airflow
to the windshield. Adjust the temperature
setting as required for defrosting. The
indicator light comes on, and the
display window shows the set temperature.
When the outside temperature is about
45ÉF (7ÉC) or above, the air is dehumidified
to prevent window fogging.
Push this button to select airflow through
4-12Heater, air conditioner and audio systems
ZX
Page 154 of 292

the instrument panel registers. The
indicator light comes on, and the
display window shows the set temperature.
The EATC heats the air if the selected
temperature is warmer than the outside air
coming into the vehicle. However, the air is
not cooled regardless of the temperature
setting, unless the A/C button is selected.
Push this button to get air from the front and
rear floor outlets and instrument panel ven-
tilators at the same time. The
indicator
light comes on and the display window
shows the set temperature. The EATC
heats the air if the selected temperature is
warmer than the outside air coming into the
vehicle. However, the air is not cooled re-
gardless of the temperature setting, unless
the A/C button is selected.
Push this button to direct airflow to the front
and rear floor outlets. Theindicator
light comes on, and the display window
shows the set temperature. The EATC
heats the air if the selected temperature is
warmer than the outside air coming into the
vehicle. However, the air is not cooled re-gardless of the temperature setting, unless
the A/C button is selected.
Push the MAX button to choose air recircu-
lation. In this mode the EATC system recir-
culates the air inside the vehicle rather than
drawing air from outside. Air is distributed
through the instrument panel ventilators
similar to
mode. Use this mode to rap-
idly cool the inside of the vehicle, or to
dehumidify the air inside the vehicle.
Activate the air conditioner in any of the
override modes listed above by pressing the
A/C button. The A/C indicator light comes
on to verify activation, and cooled air flows
from the vents. Fan speed continues to be
controlled by the EATC unless the fan
speed thumbwheel is used to override.English/metric mode
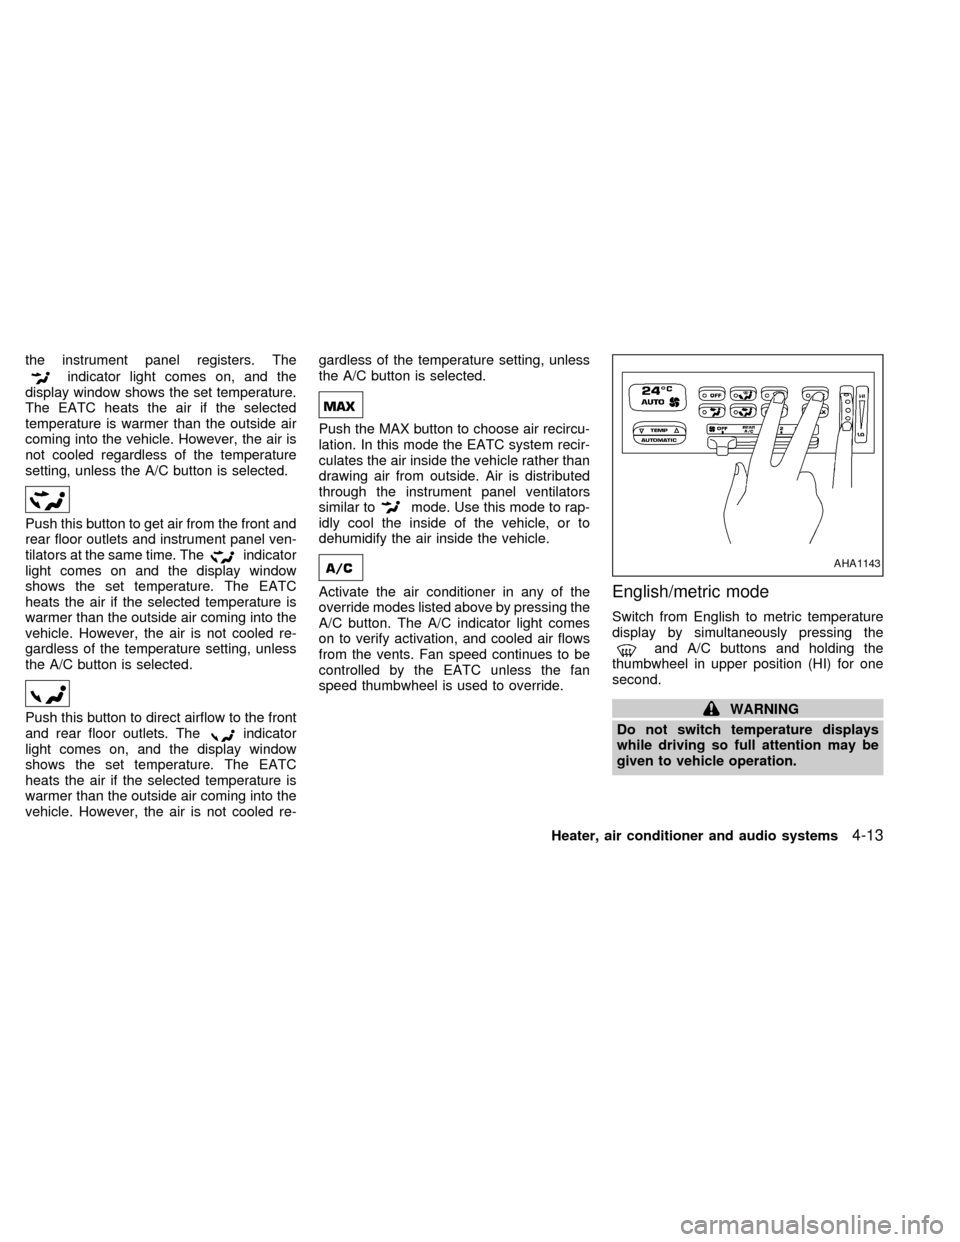
Switch from English to metric temperature
display by simultaneously pressing the
and A/C buttons and holding the
thumbwheel in upper position (HI) for one
second.
WARNING
Do not switch temperature displays
while driving so full attention may be
given to vehicle operation.
AHA1143
Heater, air conditioner and audio systems4-13
ZX
Page 155 of 292

To operate the rear seat air conditioner, the
engine must be running.
The rear seat air conditioner can be turned
on and off from the front controls. If the rear
seat fan control lever on the front panel is set
to OFF, the rear air conditioner is turned off.
If it is set to any of the fan speed positions, air
is discharged from the rear vents at the
corresponding speed. When the rear seat
fan control lever on the front panel is set to
REAR A/C, the rear seat passengers control
their own fan speed.
The rear seat air conditioner only works when
the front seat air conditioner is operating.
CONTROLS
Fan control dial
This dial turns the fan on and off, and
controls fan speed.
WHA0016
REAR SEAT AIR
CONDITIONER (if so equipped)
4-14Heater, air conditioner and audio systems
ZX
Page 156 of 292

The air conditioning system in your NISSAN
vehicle is charged with a refrigerant de-
signed with the environment in mind.
This refrigerant does not harm the
earth's ozone layer.
Special charging equipment and lubricant
are required when servicing your NISSAN
air conditioner. Using improper refrigerants
or lubricants causes severe damage to your
air conditioning system. See ``Air condition-
ing system refrigerant and lubricant recom-
mendations'' in the ``Technical and con-
sumer information'' section of this manual.
An authorized NISSAN dealer is able to
service your environmentally ``friendly'' air
conditioning system.WARNING
The air conditioner system contains
refrigerant under high pressure. To
avoid personal injury, any air condi-
tioner service should be done by an
experienced technician with proper
equipment.
SERVICING AIR
CONDITIONING
Heater, air conditioner and audio systems4-15
ZX
Page 157 of 292

FM-AM RADIO WITH CASSETTE
PLAYER
NOTE: Audio control features include com-
mand buttons for CD players which can be
installed as optional equipment to upgradethe audio system. A CD player is not in-
cluded with this system, but can be pur-
chased as an option at any time. Consult
with an authorized NISSAN dealer for fea-
ture availability.
Audio main operation
To turn the radio on, turn the ignition key to
ACC or ON. If you listen to the radio with the
engine not running, turn the key to the ACC
position.
Radio reception is affected by station signal
strength, distance from radio transmitter,
buildings, bridges, mountains, and other
external influences. Intermittent changes in
reception quality normally are caused by
external influences.
Using a cellular phone in or near the
vehicle may influence radio reception
quality.
Power/Volume control
Push the VOL knob to turn the radio on.
Push the VOL knob once more to turn the
radio OFF.
Turn the knob to raise or lower volume. If
the knob is set above a certain volume level
and the ignition is turned off, the volume will
come back on at a nominal listening level
when the ignition is turned back on.
AHA1057
AUDIO SYSTEM
4-16Heater, air conditioner and audio systems
ZX
Page 158 of 292

Adjusting tone quality and speaker bal-
ance
Bass
Bass control allows you to adjust the lower,
bass frequencies to your preference.
Push the BASS button and the setting indi-
cator bar appears in the display window.
Pressing the SELECT button either
or
increases or decreases the level of
bass, as indicated by the number of bar
segments showing in the display window.
Following bass adjustment, the display win-
dow shows the current setting for three
seconds, then returns to the display prior to
adjustment.
Treble
Treble control allows you to adjust the
higher, treble frequencies to your prefer-
ence.
Push the TREB button and the setting indi-
cator bar appears in the display window.
Pressing the SELECT button either
or
increases or decreases the level of
bass, as indicated by the number of bar
segments showing in the display window.
Following bass adjustment, the display win-
dow shows the current setting for three
seconds, then returns to the display prior to
adjustment.
Balance
Balance control allows you to adjust the
sound distribution between the right and left
speakers.
Push the BAL button and the setting indica-
tor bar appears in the display window. Press
the SELECT button
to shift the sound
to the right speakers. The single indicator
bar moves to the right of the display win-
dow. Press the SELECT button
to shift
the sound to the left speakers. The single
indicator bar moves to the left of the display
window. When the indicator bar is in the
center position the sound is equally distrib-
uted between the right and left speakers.
Following balance adjustment, the display
window shows the current setting for three
seconds, then returns to the display prior to
adjustment.
Fader
Fader control allows you to adjust sounddistribution between the front and rear
speakers.
Push the FADE button and the setting indi-
cator bar appears in the display window.
Press the SELECT button
to shift the
sound to the front speakers. The single
indicator bar moves to the right of the dis-
play window. Press the SELECT button
to shift the sound to the rear speakers.
The single indicator bar moves to the left of
the display window. When the indicator bar
is in the center position the sound is equally
distributed between the front and rear
speakers.
Following fader adjustment, the display win-
dow shows the current setting for three
seconds, then returns to the display prior to
adjustment.
COMP button
Press this button to activate the compres-
sion function. This reduces the dynamic
range, which provides the listener with a
more consistent level of volume. The dis-
play window shows a C when the COMP
button is pushed.
Heater, air conditioner and audio systems
4-17
ZX
Page 159 of 292

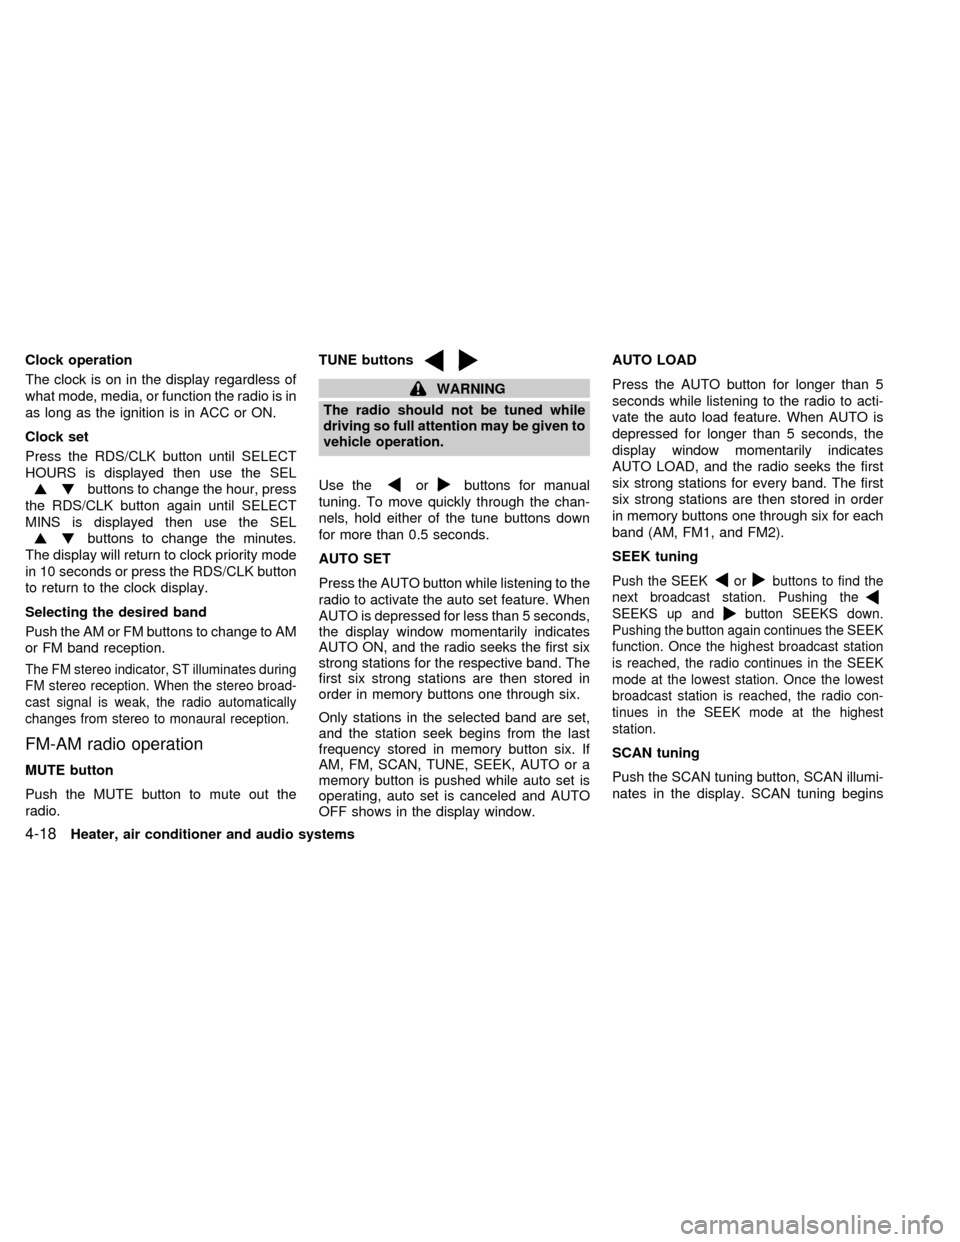
Clock operation
The clock is on in the display regardless of
what mode, media, or function the radio is in
as long as the ignition is in ACC or ON.
Clock set
Press the RDS/CLK button until SELECT
HOURS is displayed then use the SEL
buttons to change the hour, press
the RDS/CLK button again until SELECT
MINS is displayed then use the SEL
buttons to change the minutes.
The display will return to clock priority mode
in 10 seconds or press the RDS/CLK button
to return to the clock display.
Selecting the desired band
Push the AM or FM buttons to change to AM
or FM band reception.
The FM stereo indicator, ST illuminates during
FM stereo reception. When the stereo broad-
cast signal is weak, the radio automatically
changes from stereo to monaural reception.
FM-AM radio operation
MUTE button
Push the MUTE button to mute out the
radio.TUNE buttons
WARNING
The radio should not be tuned while
driving so full attention may be given to
vehicle operation.
Use the
orbuttons for manual
tuning. To move quickly through the chan-
nels, hold either of the tune buttons down
for more than 0.5 seconds.
AUTO SET
Press the AUTO button while listening to the
radio to activate the auto set feature. When
AUTO is depressed for less than 5 seconds,
the display window momentarily indicates
AUTO ON, and the radio seeks the first six
strong stations for the respective band. The
first six strong stations are then stored in
order in memory buttons one through six.
Only stations in the selected band are set,
and the station seek begins from the last
frequency stored in memory button six. If
AM, FM, SCAN, TUNE, SEEK, AUTO or a
memory button is pushed while auto set is
operating, auto set is canceled and AUTO
OFF shows in the display window.AUTO LOAD
Press the AUTO button for longer than 5
seconds while listening to the radio to acti-
vate the auto load feature. When AUTO is
depressed for longer than 5 seconds, the
display window momentarily indicates
AUTO LOAD, and the radio seeks the first
six strong stations for every band. The first
six strong stations are then stored in order
in memory buttons one through six for each
band (AM, FM1, and FM2).
SEEK tuning
Push the SEEKorbuttons to find the
next broadcast station. Pushing the
SEEKS up andbutton SEEKS down.
Pushing the button again continues the SEEK
function. Once the highest broadcast station
is reached, the radio continues in the SEEK
mode at the lowest station. Once the lowest
broadcast station is reached, the radio con-
tinues in the SEEK mode at the highest
station.
SCAN tuning
Push the SCAN tuning button, SCAN illumi-
nates in the display. SCAN tuning begins
4-18Heater, air conditioner and audio systems
ZX
Page 160 of 292

from low to high frequencies and stops at
each broadcasting station for 5 seconds.
Pushing the button again during this 5 sec-
ond period stops SCAN tuning and remains
tuned to that station.
Station memory operations
Six stations can be set for the AM band.
Twelve stations can be set for the FM band
(six for FM1, six for FM2).
1. Push the FM or AM buttons to select AM,FM1, or FM2. The selected band illumi-
nates in the display.
2. Tune to the desired station.
3. Push the desired station select button for
more than 1.5 seconds. The radio mutes
when the select button is pushed.
4. When the sound resumes, memorizing is
complete.
5. Other station select buttons can be set in
the same manner.
If the battery is disconnected, or if the radio
fuse opens, the radio memory is canceled.
In that case, reset the desired stations.
RDS (Radio Data System)
RDS stands for Radio Data System, and is
a data information service transmitted by
some radio stations on the FM band (not
AM band) encoded within a regular radio
broadcast. Most RDS stations are currently
in large cities, but many stations are now
considering broadcasting RDS data.
RDS can display:
cStation name or call-sign, such as
``WHFR 98.3''.
AHA1107
Heater, air conditioner and audio systems4-19
ZX