check NISSAN QUEST 2001 V41 / 2.G Manual PDF
[x] Cancel search | Manufacturer: NISSAN, Model Year: 2001, Model line: QUEST, Model: NISSAN QUEST 2001 V41 / 2.GPages: 304, PDF Size: 2.54 MB
Page 236 of 304
CAUTION
DO NOT OVERFILL. Use ONLY Nissan
Matic `D' (Continental U.S. and Alaska)
or Canada NISSAN Automatic Trans-
mission Fluid. Dexron
TMIII/MerconTM
or equivalent may also be used. Out-
side the continental United States and
Alaska contact a Nissan dealership for
more information regarding suitable
fluids, including recommended
brand(s) of Dexron
TMIII/MerconTM.
NOTE:
If the vehicle has been driven for a long
time at high speeds, or in city traffic in
hot weather, or if it is being used to pull
a trailer, the accurate fluid level cannot
be read. You should wait until the fluid
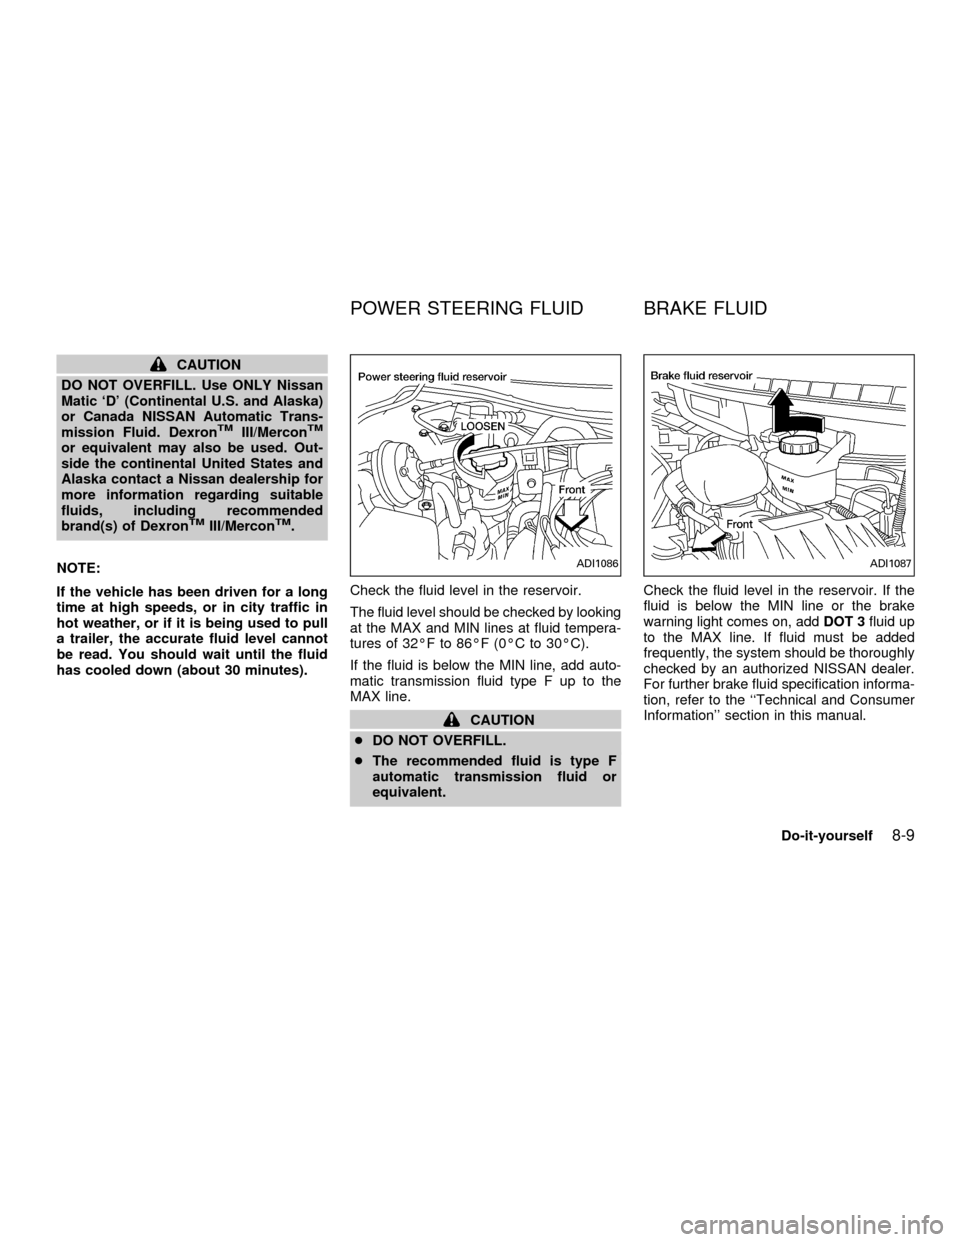
has cooled down (about 30 minutes).Check the fluid level in the reservoir.
The fluid level should be checked by looking
at the MAX and MIN lines at fluid tempera-
tures of 32ÉF to 86ÉF (0ÉC to 30ÉC).
If the fluid is below the MIN line, add auto-
matic transmission fluid type F up to the
MAX line.
CAUTION
cDO NOT OVERFILL.
cThe recommended fluid is type F
automatic transmission fluid or
equivalent.Check the fluid level in the reservoir. If the
fluid is below the MIN line or the brake
warning light comes on, addDOT 3fluid up
to the MAX line. If fluid must be added
frequently, the system should be thoroughly
checked by an authorized NISSAN dealer.
For further brake fluid specification informa-
tion, refer to the ``Technical and Consumer
Information'' section in this manual.
ADI1086ADI1087
POWER STEERING FLUID BRAKE FLUID
Do-it-yourself8-9
ZX
Page 237 of 304
WARNING
Use only new fluid from a sealed con-
tainer. Old, inferior, or contaminated
fluid may damage the brake system.
The use of improper fluids can damage
the brake system and affect the vehi-
cle's stopping ability.
CAUTION
Do not spill the fluid on painted sur-
faces. This will damage the paint. If
fluid is spilled, wash with water.
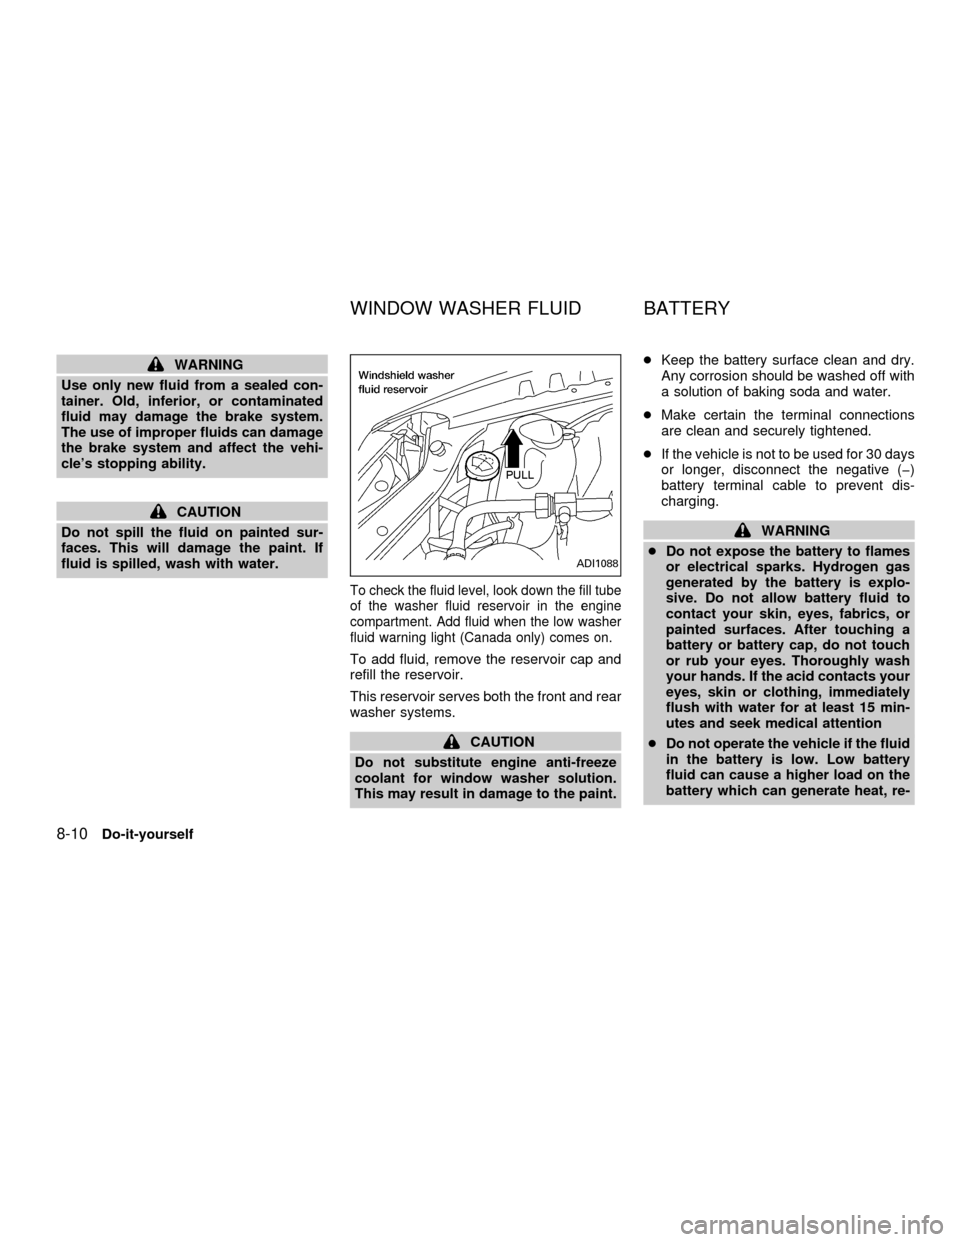
To check the fluid level, look down the fill tube
of the washer fluid reservoir in the engine
compartment. Add fluid when the low washer
fluid warning light (Canada only) comes on.
To add fluid, remove the reservoir cap and
refill the reservoir.
This reservoir serves both the front and rear
washer systems.
CAUTION
Do not substitute engine anti-freeze
coolant for window washer solution.
This may result in damage to the paint.cKeep the battery surface clean and dry.
Any corrosion should be washed off with
a solution of baking soda and water.
cMake certain the terminal connections
are clean and securely tightened.
cIf the vehicle is not to be used for 30 days
or longer, disconnect the negative (þ)
battery terminal cable to prevent dis-
charging.
WARNING
cDo not expose the battery to flames
or electrical sparks. Hydrogen gas
generated by the battery is explo-
sive. Do not allow battery fluid to
contact your skin, eyes, fabrics, or
painted surfaces. After touching a
battery or battery cap, do not touch
or rub your eyes. Thoroughly wash
your hands. If the acid contacts your
eyes, skin or clothing, immediately
flush with water for at least 15 min-
utes and seek medical attention
cDo not operate the vehicle if the fluid
in the battery is low. Low battery
fluid can cause a higher load on the
battery which can generate heat, re-
ADI1088
WINDOW WASHER FLUID BATTERY
8-10Do-it-yourself
ZX
Page 238 of 304
duce battery life, and in some cases
lead to explosion.
cWhen working on or near the battery,
always wear suitable eye protection
and remove all jewelry.
cBattery posts, terminals and related
accessories contain lead and lead
compounds. Wash hands after han-
dling.
cKeep the battery out of the reach of
children.
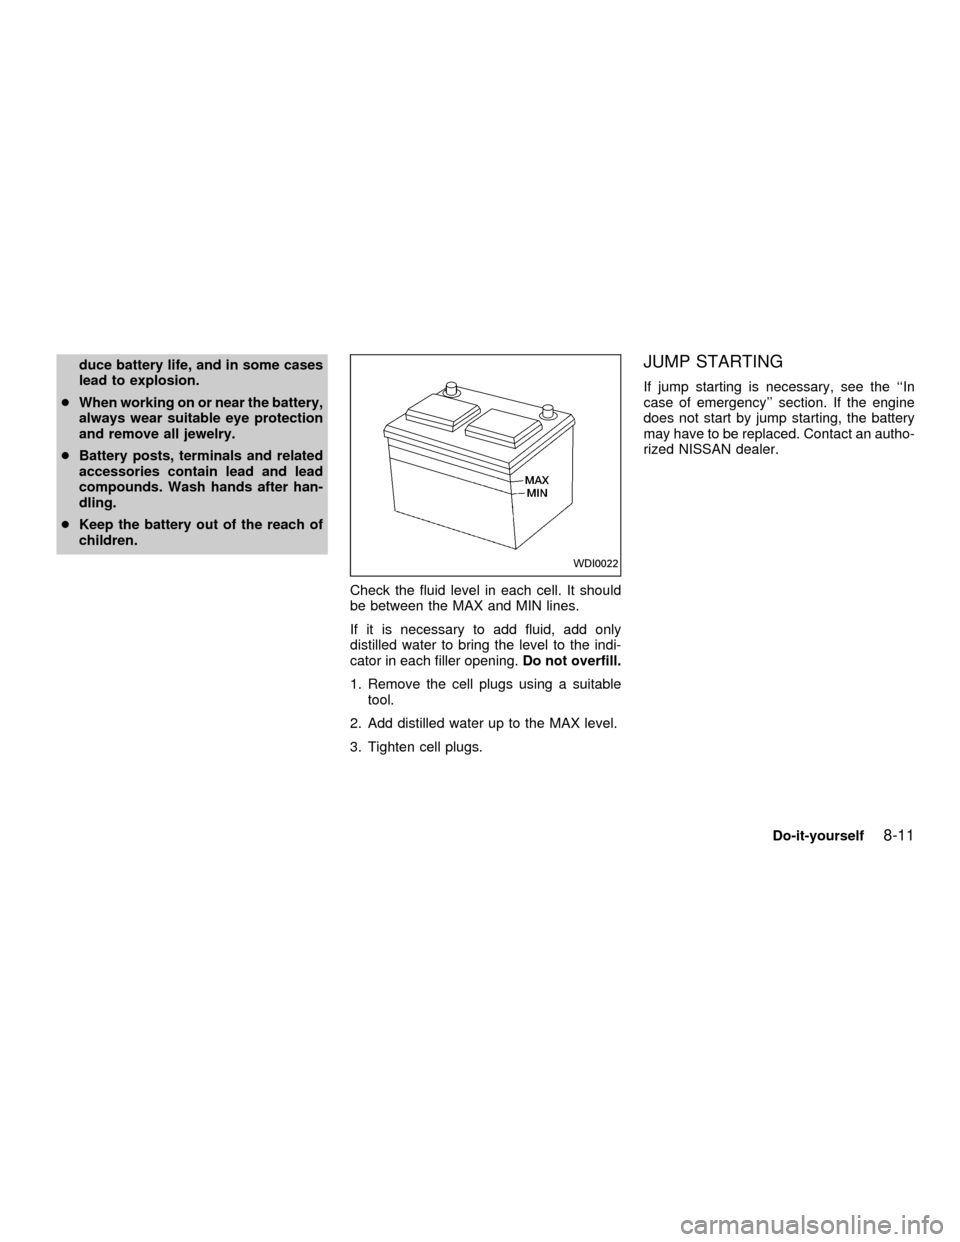
Check the fluid level in each cell. It should
be between the MAX and MIN lines.
If it is necessary to add fluid, add only
distilled water to bring the level to the indi-
cator in each filler opening.Do not overfill.
1. Remove the cell plugs using a suitable
tool.
2. Add distilled water up to the MAX level.
3. Tighten cell plugs.JUMP STARTING
If jump starting is necessary, see the ``In
case of emergency'' section. If the engine
does not start by jump starting, the battery
may have to be replaced. Contact an autho-
rized NISSAN dealer.
WDI0022
Do-it-yourself8-11
ZX
Page 239 of 304

WARNING
Be sure the ignition key is in the OFF or
LOCK position. The engine could rotate
unexpectedly.
1. Visually inspect each belt for signs of
unusual wear, cuts, fraying or looseness.
If the belt is loose or in poor condition,
have it replaced or adjusted by an autho-
rized NISSAN dealer.2. Have the belts checked regularly for con-
dition and tension in accordance with the
maintenance schedule found in the
``Maintenance'' section of this manual.REPLACING SPARK PLUGS
WARNING
Be sure the engine and ignition switch
are off and that the parking brake is
engaged securely.
CAUTION
Be sure to use the correct socket to
remove the spark plugs. An incorrect
socket can damage the spark plugs.
ADI0060ADI0061
DRIVE BELTS SPARK PLUGS
8-12Do-it-yourself
ZX
Page 246 of 304
CHECKING PARKING BRAKE
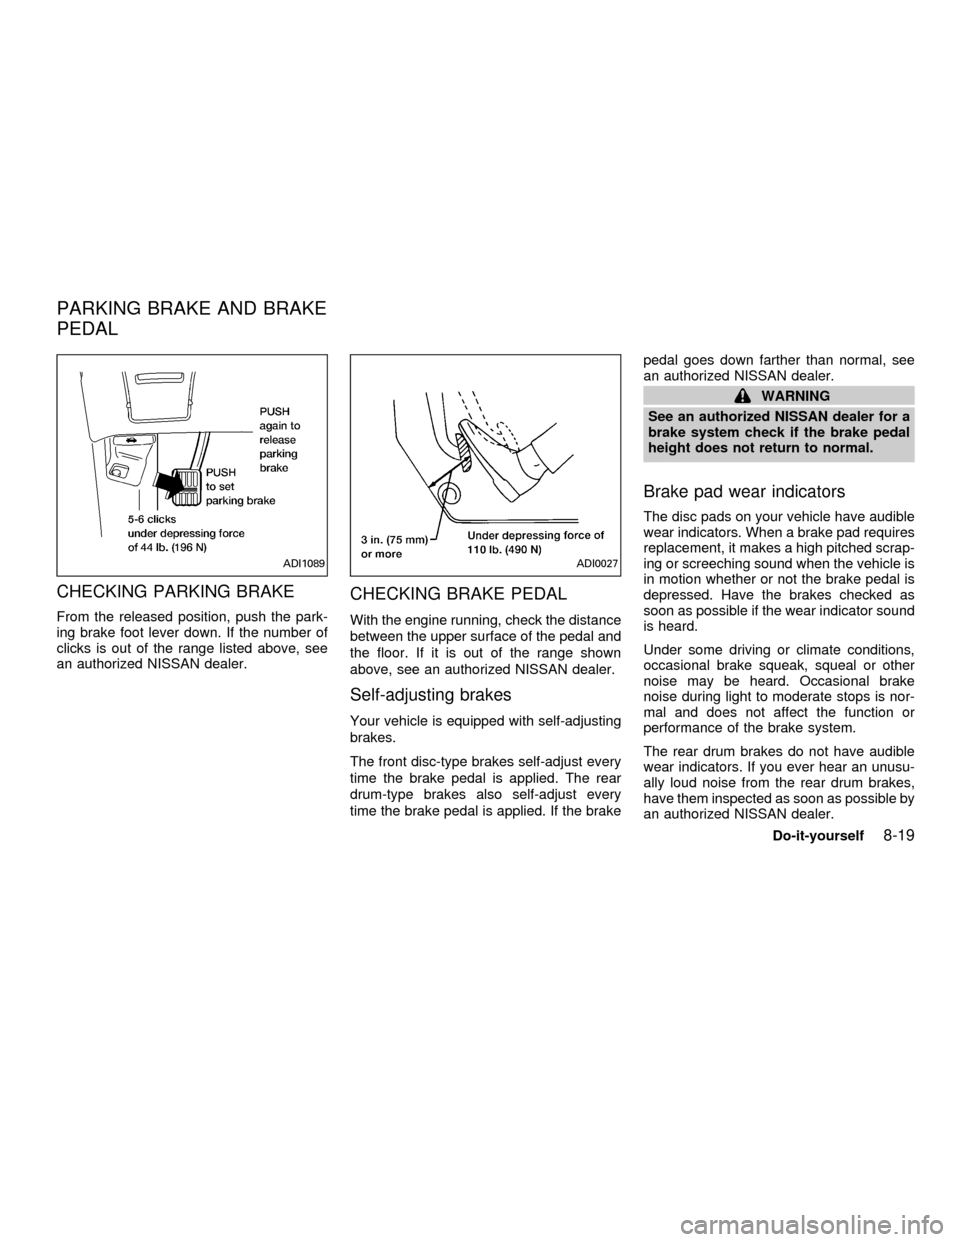
From the released position, push the park-
ing brake foot lever down. If the number of
clicks is out of the range listed above, see
an authorized NISSAN dealer.
CHECKING BRAKE PEDAL
With the engine running, check the distance
between the upper surface of the pedal and
the floor. If it is out of the range shown
above, see an authorized NISSAN dealer.
Self-adjusting brakes
Your vehicle is equipped with self-adjusting
brakes.
The front disc-type brakes self-adjust every
time the brake pedal is applied. The rear
drum-type brakes also self-adjust every
time the brake pedal is applied. If the brakepedal goes down farther than normal, see
an authorized NISSAN dealer.
WARNING
See an authorized NISSAN dealer for a
brake system check if the brake pedal
height does not return to normal.
Brake pad wear indicators
The disc pads on your vehicle have audible
wear indicators. When a brake pad requires
replacement, it makes a high pitched scrap-
ing or screeching sound when the vehicle is
in motion whether or not the brake pedal is
depressed. Have the brakes checked as
soon as possible if the wear indicator sound
is heard.
Under some driving or climate conditions,
occasional brake squeak, squeal or other
noise may be heard. Occasional brake
noise during light to moderate stops is nor-
mal and does not affect the function or
performance of the brake system.
The rear drum brakes do not have audible
wear indicators. If you ever hear an unusu-
ally loud noise from the rear drum brakes,
have them inspected as soon as possible by
an authorized NISSAN dealer.
ADI1089ADI0027
PARKING BRAKE AND BRAKE
PEDAL
Do-it-yourself8-19
ZX
Page 247 of 304
Proper brake inspection intervals should
be followed.For more information regard-
ing brake inspections, see the appropriate
maintenance schedule information in the
``Maintenance'' section of this manual.
BRAKE BOOSTER
Check the brake booster function as fol-
lows:
1. With the engine off, press and release
the brake pedal several times. When
brake pedal movement (distance of
travel) remains the same from one pedal
application to the next, continue on to the
next step.
2. While depressing the brake pedal, start
the engine. The pedal height should drop
a little.
3. With the brake pedal depressed, turn the
engine off. Keep the pedal depressed for
about 30 seconds; the pedal height
should not change.
4. Run the engine for one minute without
depressing the brake pedal, then turn it
off. Depress the brake pedal several
times. The pedal travel distance will de-
crease gradually with each depressionas the vacuum is released from the
booster.
If the brakes do not operate properly, see an
authorized NISSAN dealer.
ENGINE COMPARTMENT
CAUTION
Never use a fuse of a higher amperage
rating than that specified on the fuse
box cover. This could damage the elec-
trical system or cause a fire.
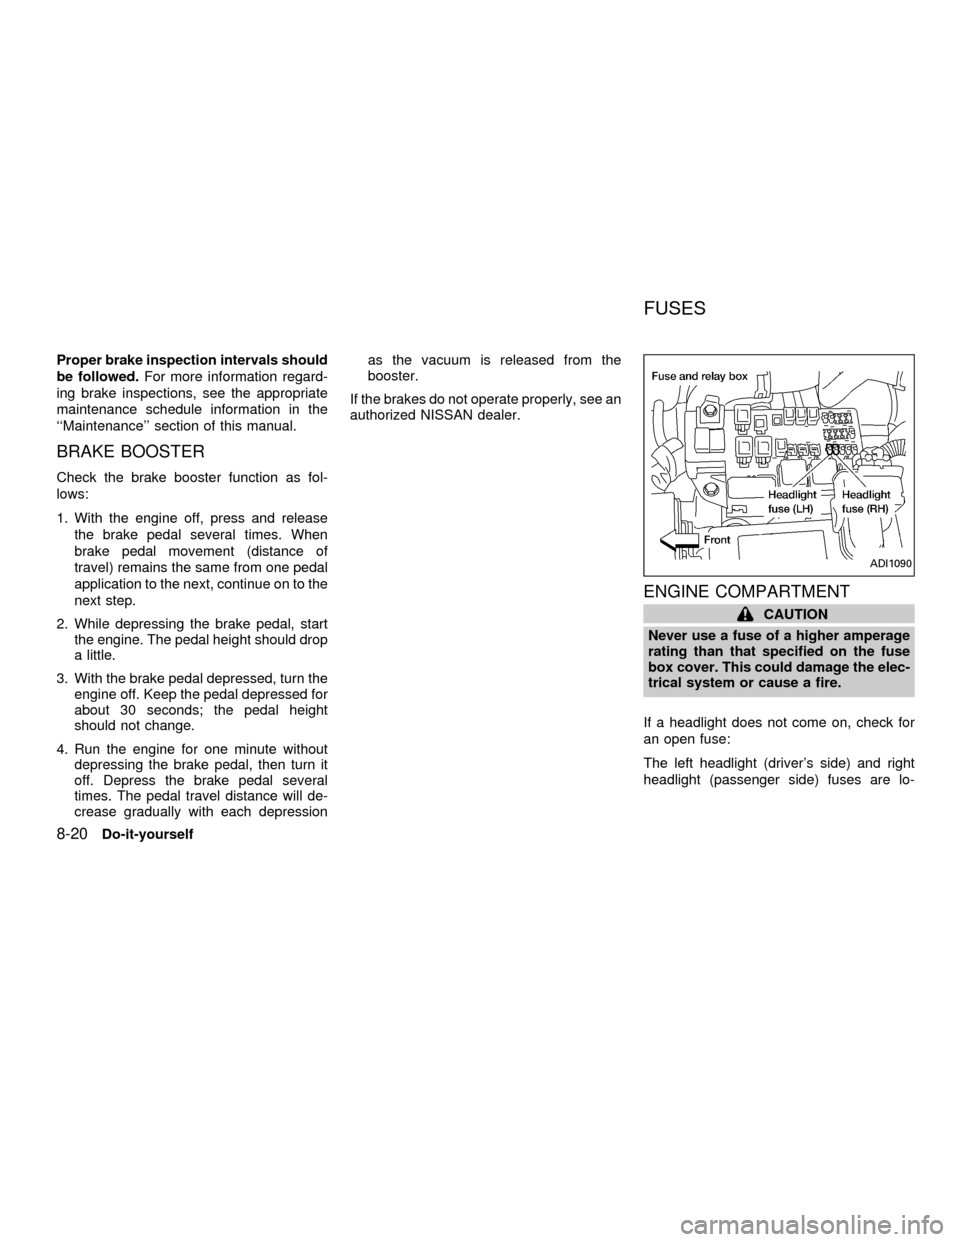
If a headlight does not come on, check for
an open fuse:
The left headlight (driver's side) and right
headlight (passenger side) fuses are lo-
ADI1090
FUSES
8-20Do-it-yourself
ZX
Page 248 of 304
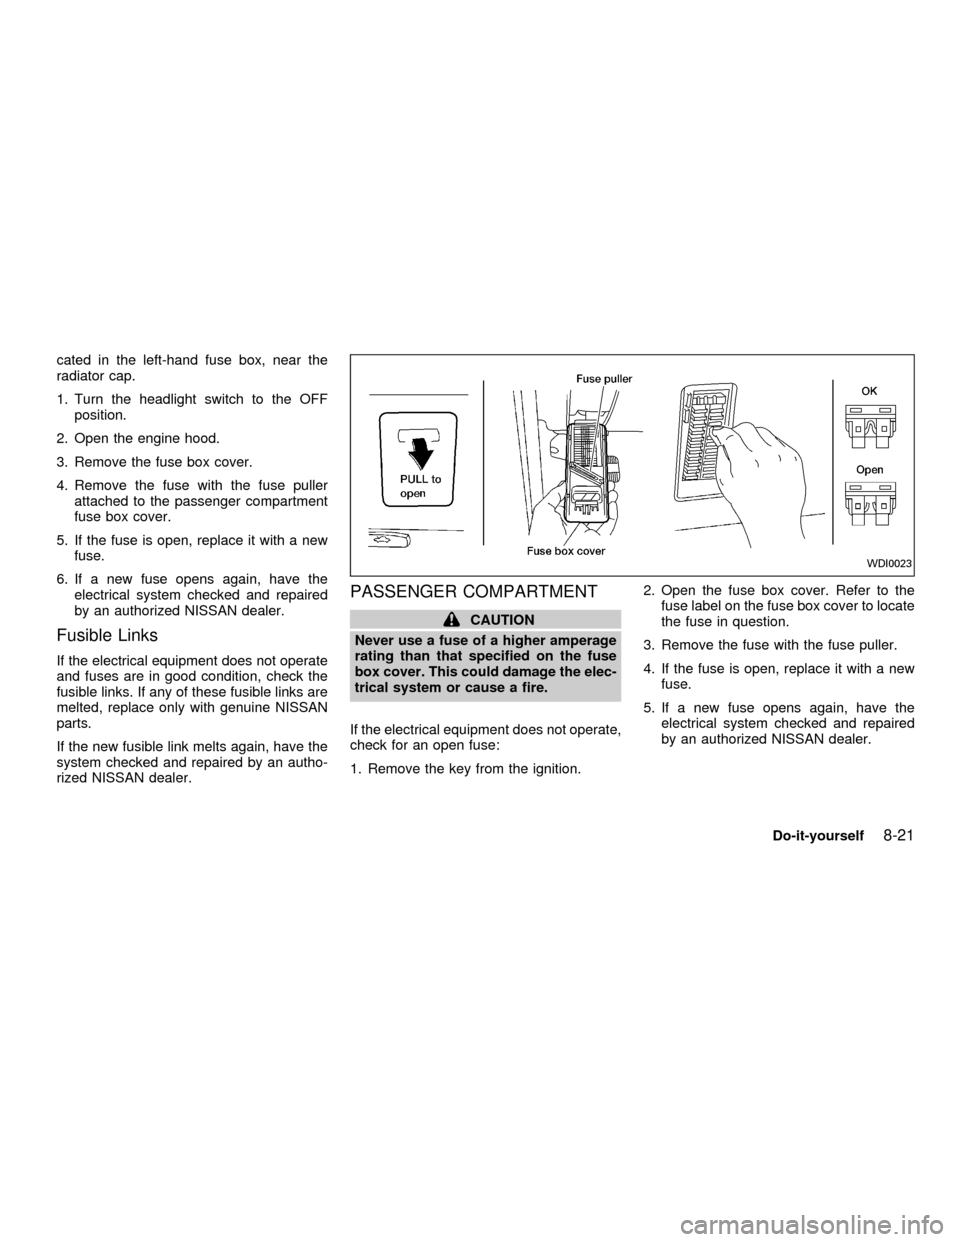
cated in the left-hand fuse box, near the
radiator cap.
1. Turn the headlight switch to the OFF
position.
2. Open the engine hood.
3. Remove the fuse box cover.
4. Remove the fuse with the fuse puller
attached to the passenger compartment
fuse box cover.
5. If the fuse is open, replace it with a new
fuse.
6. If a new fuse opens again, have the
electrical system checked and repaired
by an authorized NISSAN dealer.
Fusible Links
If the electrical equipment does not operate
and fuses are in good condition, check the
fusible links. If any of these fusible links are
melted, replace only with genuine NISSAN
parts.
If the new fusible link melts again, have the
system checked and repaired by an autho-
rized NISSAN dealer.
PASSENGER COMPARTMENT
CAUTION
Never use a fuse of a higher amperage
rating than that specified on the fuse
box cover. This could damage the elec-
trical system or cause a fire.
If the electrical equipment does not operate,
check for an open fuse:
1. Remove the key from the ignition.2. Open the fuse box cover. Refer to the
fuse label on the fuse box cover to locate
the fuse in question.
3. Remove the fuse with the fuse puller.
4. If the fuse is open, replace it with a new
fuse.
5. If a new fuse opens again, have the
electrical system checked and repaired
by an authorized NISSAN dealer.
WDI0023
Do-it-yourself8-21
ZX
Page 249 of 304

Replace the battery as follows:
1. Open the lid using a coin.
2. Replace the battery with a new one.
Insert the batteries as illustrated above.
Recommended battery: Panasonic
CR2025, 3V or equivalent.
3. Close the lid securely.
4. Press the
button, then thebutton
two or three times to check the multi-
remote controller operation.
If the batteries are removed for any reason
other than replacement, perform step 4.
cAn improperly disposed battery can
hurt the environment. Always conform
to local regulations for battery disposal.
cThe multi-remote controller is water-
resistant; however, if it does get wet,
immediately wipe completely dry.
cThe operational range of the multi-
remote controller extends to approxi-
mately 30 ft (10 m) from the vehicle.
This range may vary with conditions.
FCC Notice:
Changes or modifications not expressly
approved by the manufacturer for com-
pliance could void the user's authority to
operate the equipment.
This device complies with part 15 of the FCC
Rules and RSS-210 of Industry Canada.
Operation is subject to the following two
conditions: (1) This device may not
cause harmful interference, and (2) this
device must accept any interference re-
ceived, including interference that may
cause undesired operation of the device.APD1087
MULTI-REMOTE CONTROLLER
BATTERY REPLACEMENT
8-22Do-it-yourself
ZX
Page 256 of 304

TIRE PRESSURE
If you have a flat tire, see the ``In case of
emergency'' section of this manual.
Maximum inflation pressure
Do not exceed the maximum inflation pres-
sure shown on the side wall of the tire.
Tire inflation pressure
Periodically check the tire pressure (includ-
ing the spare). Incorrect tire pressure may
adversely affect tire life and vehicle han-
dling. Tire pressure should be checked
ADI1095
DI1033M
WHEELS AND TIRES
Do-it-yourself8-29
ZX
Page 257 of 304
when tires are COLD. Tires are considered
COLD after the vehicle has been parked for
three or more hours, or driven less than 1
mile (1.6 km). COLD tire pressures are
shown on the tire placard affixed to the
inside of the glove box.
WARNING
cImproperly inflated tires can fail sud-
denly and cause an accident.
cThe vehicle capacity weight is indi-
cated on the tire placard. Do not load
your vehicle beyond this capacity.
Overloading your vehicle may result
in reduced tire life, unsafe operating
conditions due to premature tire fail-
ure, or unfavorable handling charac-
teristics and could also lead to a
serious accident. Loading beyond
the specified capacity may also re-
sult in failure of other vehicle com-
ponents.
c
Before taking a long trip, or whenever
you have loaded your vehicle heavily,
use a tire pressure gauge to ensure
that the tire pressures are at the
specified level.
cDo not drive your vehicle over 85
MPH (140 km/h) unless it is equipped
with high speed rated tires. Driving
faster than 85 MPH (140 km/h) may
result in tire failure, loss of control
and possible injury.
TYPES OF TIRES
WARNING
When changing or replacing tires, be
sure all four tires are of the same type
(i.e., summer, all season or snow) and
construction. An authorized NISSAN
dealer may be able to help you with
information about tire type, size, speed
rating and availability. Replacement
tires may have a lower speed rating
than the factory equipped tires, and
may not match the potential maximum
vehicle speed. Never exceed the maxi-
mum speed rating of the tire.
All season tires
NISSAN specifies All Season tires to pro-
vide good performance all year, including
snowy and icy road conditions. All SeasonTires are identified by ``ALL SEASON''
and/or ``M&S'' on the tire sidewall. Snow
tires have better snow traction than All
Season tires and may be more appropriate
in some areas.
Snow tires
If snow tires are needed, it is necessary to
select tires equivalent in size and load rating
to the original equipment tires. If you do not,
it can adversely affect the safety and han-
dling of your vehicle.
Generally, snow tires have lower speed
ratings than factory equipped tires and may
not match the potential maximum vehicle
speed. Never exceed the maximum speed
rating of the tire.
If you operate your vehicle in snowy or icy
conditions, NISSAN recommends the use of
snow or all season tires on all four wheels.
For additional traction on icy roads, studded
tires may be used. However, some U.S.
states and Canadian provinces prohibit their
use. Check local, state and provincial laws
before installing studded tires. Skid and
traction capabilities of studded snow tires
on wet or dry surfaces may be poorer than
that of non-studded snow tires.
8-30Do-it-yourself
ZX