reset NISSAN QUEST 2001 V41 / 2.G Owners Manual
[x] Cancel search | Manufacturer: NISSAN, Model Year: 2001, Model line: QUEST, Model: NISSAN QUEST 2001 V41 / 2.GPages: 304, PDF Size: 2.54 MB
Page 11 of 304

FRONT POWER SEAT
ADJUSTMENT (if so equipped)
WARNING
cDo not adjust the driver's seat while
driving so full attention may be given
to vehicle operation.
c
Do not leave children unattended in-
side the vehicle. They could unknow-
ingly activate switches or controls.
Unattended children could become
involved in serious accidents.
For memory seat and mirror information
see ``Memory driver seat and mirrors'' in the
``Pre-driving checks and adjustments'' sec-
tion.
Operating tips
cThe motor has an auto-reset overload
protection circuit. If the motor stops dur-
ing operation, wait 30 seconds, then re-
activate the switch.cDo not operate the power support seat
for a long period of time when the engine
is off. This discharges the battery.
1-4Seats, restraints and supplemental air bag systems
ZX
Page 93 of 304

SPEEDOMETER AND
ODOMETER
Speedometer
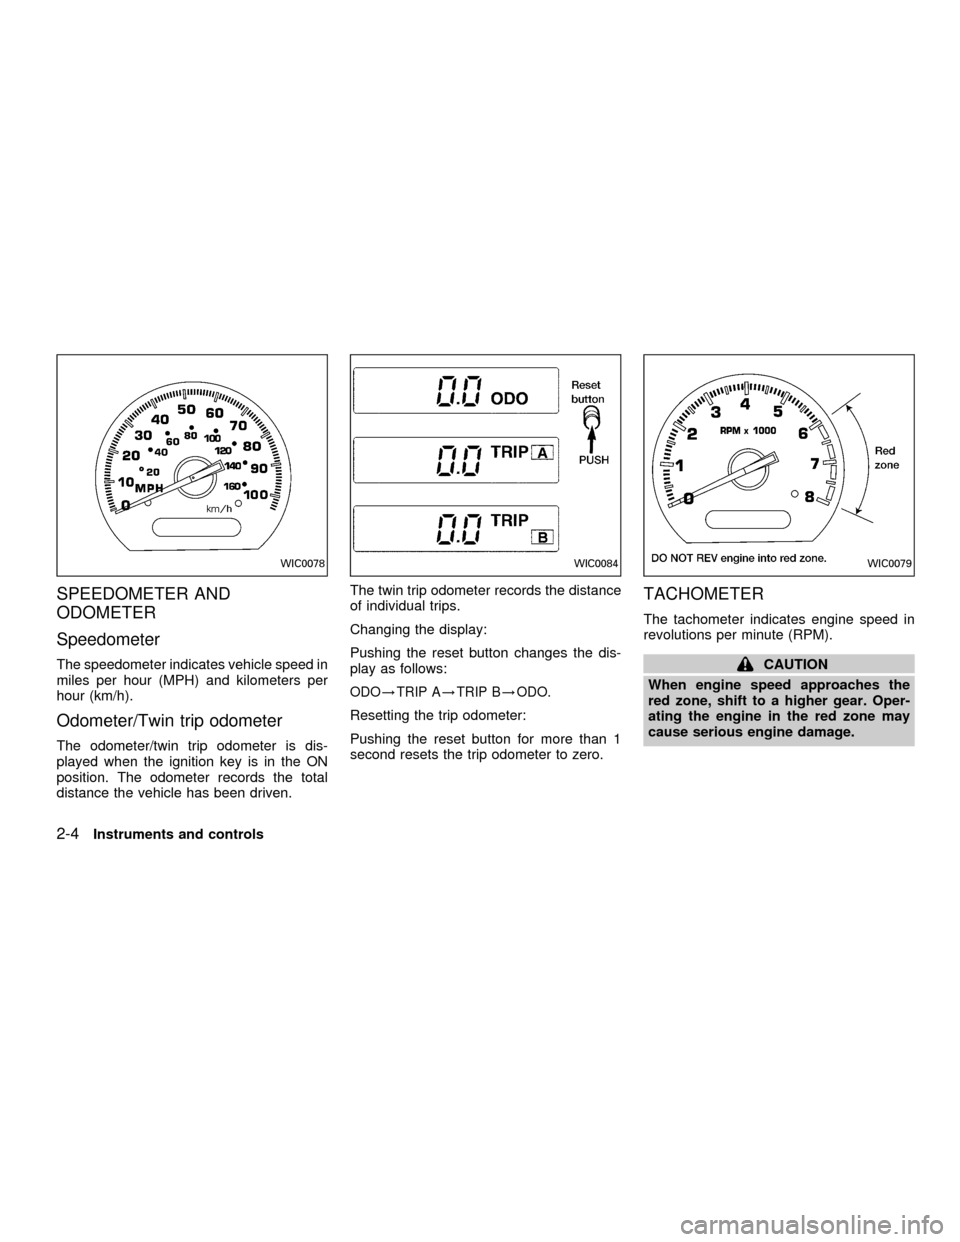
The speedometer indicates vehicle speed in
miles per hour (MPH) and kilometers per
hour (km/h).
Odometer/Twin trip odometer
The odometer/twin trip odometer is dis-
played when the ignition key is in the ON
position. The odometer records the total
distance the vehicle has been driven.The twin trip odometer records the distance
of individual trips.
Changing the display:
Pushing the reset button changes the dis-
play as follows:
ODO!TRIP A!TRIP B!ODO.
Resetting the trip odometer:
Pushing the reset button for more than 1
second resets the trip odometer to zero.
TACHOMETER
The tachometer indicates engine speed in
revolutions per minute (RPM).
CAUTION
When engine speed approaches the
red zone, shift to a higher gear. Oper-
ating the engine in the red zone may
cause serious engine damage.
WIC0078WIC0084WIC0079
2-4Instruments and controls
ZX
Page 121 of 304

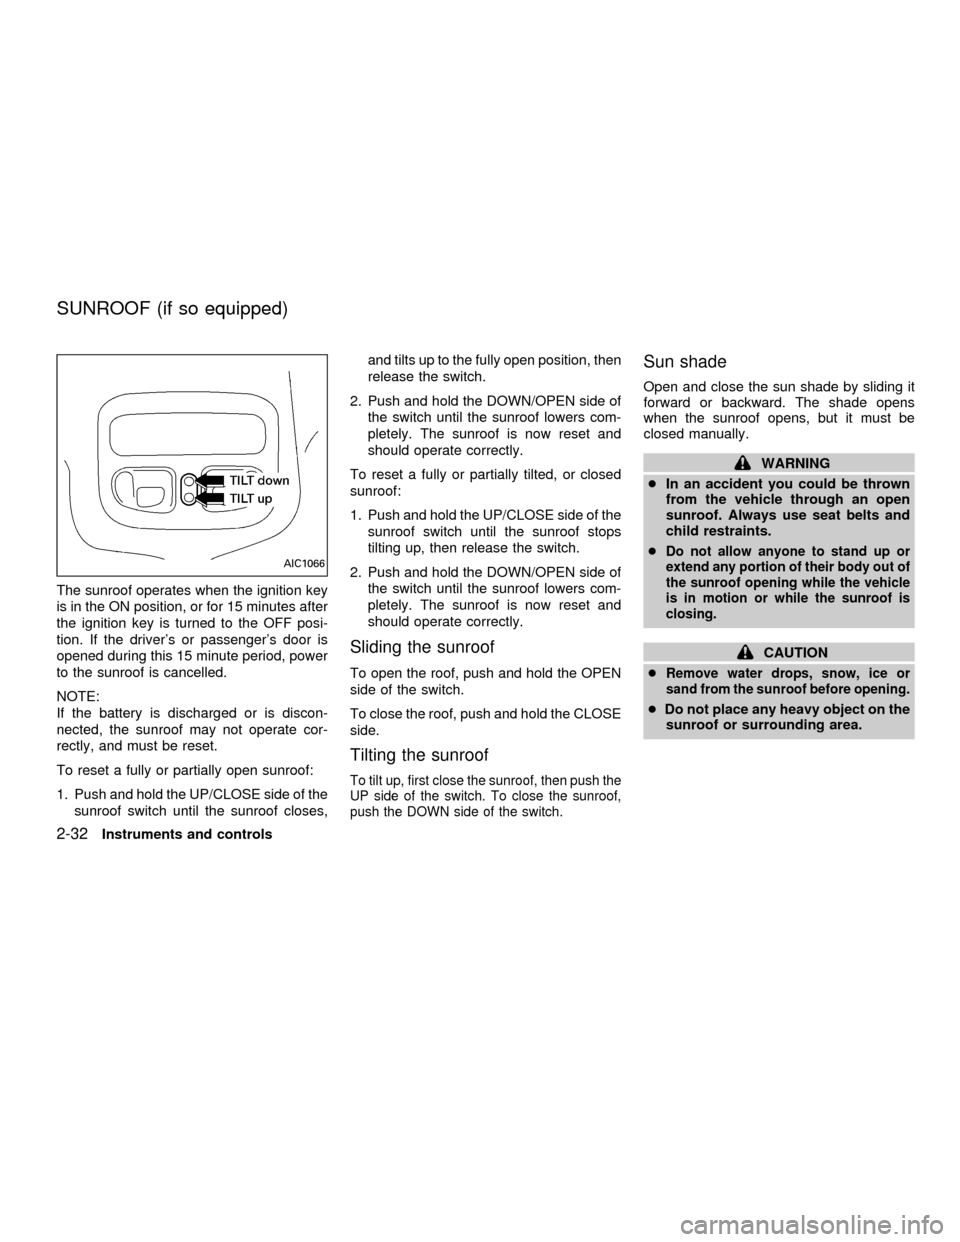
The sunroof operates when the ignition key
is in the ON position, or for 15 minutes after
the ignition key is turned to the OFF posi-
tion. If the driver's or passenger's door is
opened during this 15 minute period, power
to the sunroof is cancelled.
NOTE:
If the battery is discharged or is discon-
nected, the sunroof may not operate cor-
rectly, and must be reset.
To reset a fully or partially open sunroof:
1. Push and hold the UP/CLOSE side of the
sunroof switch until the sunroof closes,and tilts up to the fully open position, then
release the switch.
2. Push and hold the DOWN/OPEN side of
the switch until the sunroof lowers com-
pletely. The sunroof is now reset and
should operate correctly.
To reset a fully or partially tilted, or closed
sunroof:
1. Push and hold the UP/CLOSE side of the
sunroof switch until the sunroof stops
tilting up, then release the switch.
2. Push and hold the DOWN/OPEN side of
the switch until the sunroof lowers com-
pletely. The sunroof is now reset and
should operate correctly.
Sliding the sunroof
To open the roof, push and hold the OPEN
side of the switch.
To close the roof, push and hold the CLOSE
side.
Tilting the sunroof
To tilt up, first close the sunroof, then push the
UP side of the switch. To close the sunroof,
push the DOWN side of the switch.
Sun shade
Open and close the sun shade by sliding it
forward or backward. The shade opens
when the sunroof opens, but it must be
closed manually.
WARNING
cIn an accident you could be thrown
from the vehicle through an open
sunroof. Always use seat belts and
child restraints.
c
Do not allow anyone to stand up or
extend any portion of their body out of
the sunroof opening while the vehicle
is in motion or while the sunroof is
closing.
CAUTION
c
Remove water drops, snow, ice or
sand from the sunroof before opening.
cDo not place any heavy object on the
sunroof or surrounding area.
AIC1066
SUNROOF (if so equipped)
2-32Instruments and controls
ZX
Page 136 of 304

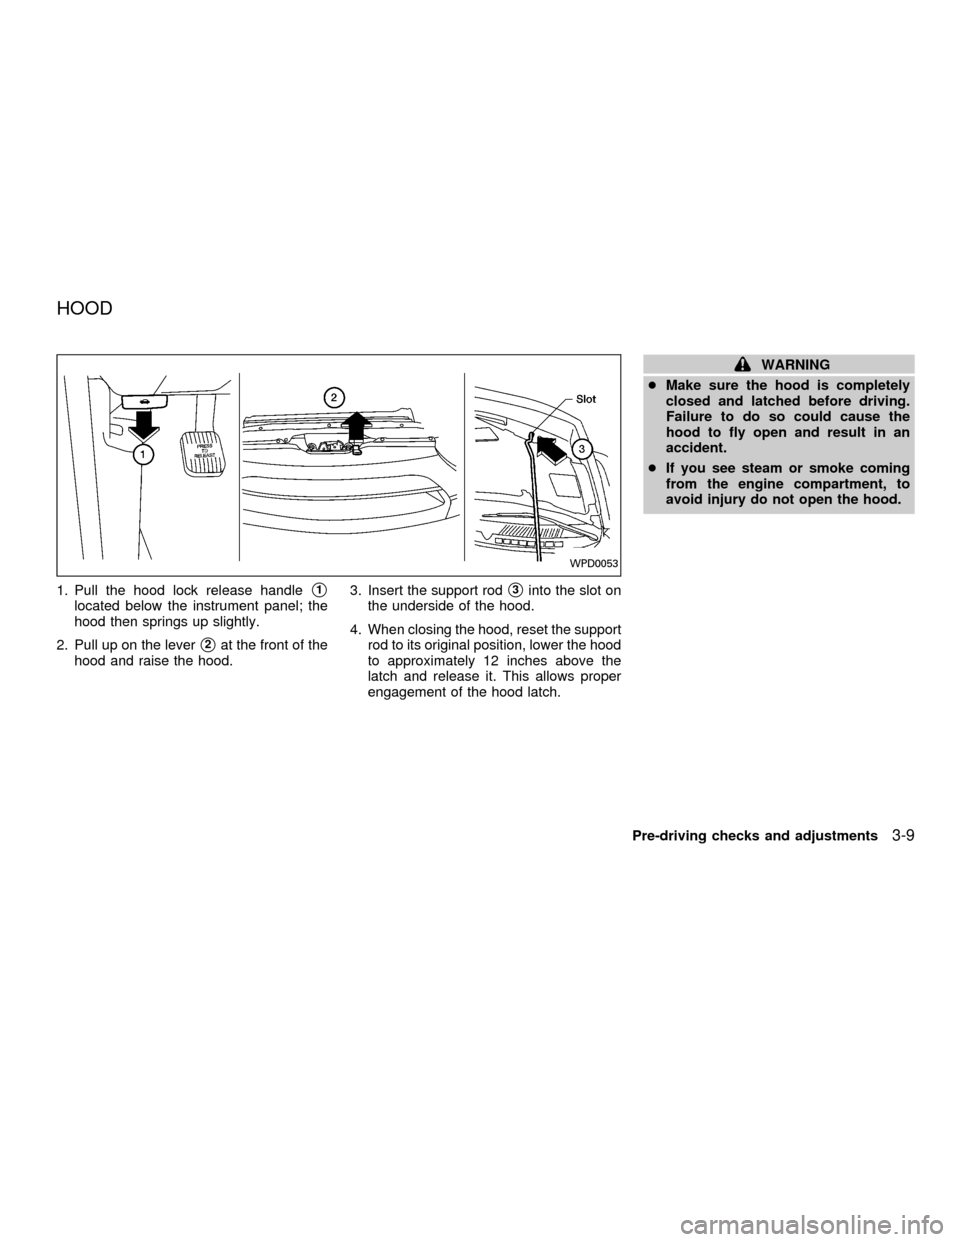
1. Pull the hood lock release handles1
located below the instrument panel; the
hood then springs up slightly.
2. Pull up on the lever
s2at the front of the
hood and raise the hood.3. Insert the support rod
s3into the slot on
the underside of the hood.
4. When closing the hood, reset the support
rod to its original position, lower the hood
to approximately 12 inches above the
latch and release it. This allows proper
engagement of the hood latch.
WARNING
cMake sure the hood is completely
closed and latched before driving.
Failure to do so could cause the
hood to fly open and result in an
accident.
cIf you see steam or smoke coming
from the engine compartment, to
avoid injury do not open the hood.
WPD0053
HOOD
Pre-driving checks and adjustments3-9
ZX
Page 140 of 304

Memory Driver Seat and Mirror But-
tons
The memory seat and mirror buttons are
located on the driver door. Pressing the
memory driver seat and mirror position 1 or
position 2 button will recall the memory set-
tings for both outside mirrors and driver seat
for that memory seat position, provided the
vehicle is in P (Park) or N (Neutral). For easy
vehicle exit, press memory driver seat and
mirror position 1 and position 2 buttons to-
gether to move the driver seat fully rearward
and fully downward. This function is preset
and cannot be changed.
Programming Memory Positions
1. Move the driver seat and outside mirrors
to the desired position using the manual
controls.
2. Push and hold the memory seat and
mirror position 1 or position 2 button for
at least 3 seconds.
cThe indicator light will illuminate and re-
main illuminated until the position is pro-
grammed.cAfter the position has been programmed
the indicator light will flash to indicate the
position is set.
The driver seat and/or outside mirrors must
be adjusted before programming position 1
or position 2.
Programming a multi-remote con-
troller
1. Move the driver seat and outside mirrors
by pressing the desired position 1 or
position 2 button.
2. Press and hold the same (position 1 or
position 2) button.
3. Within 10 seconds press the
button on
the multi-remote controller.
The controller is now programmed for that
(position 1 or position 2) button.
After the multi-remote controller has been
programmed, the memory seat and mirror
button indicator light will flash to indicate the
controller is programmed. If the memory
seat button is pressed and held the indicator
light will remain illuminated for as long as
the button is held or 10 seconds which ever
is shorter.To remove a multi-remote controller from
the memory seat system press and hold
both memory seat and mirror position but-
tons 1 and 2 and then press the
button
on the multi-remote controller.
Pre-driving checks and adjustments
3-13
ZX
Page 165 of 304

Pushing the button again during this 5 sec-
ond period stops SCAN tuning and remains
tuned to that station.
Station memory operations
Six stations can be set for the AM band.
Twelve stations can be set for the FM band
(six for FM1, six for FM2).
1. Push the FM or AM buttons to select AM,FM1, or FM2. The selected band illumi-
nates in the display.
2. Tune to the desired station.
3. Push the desired station select button for
more than 1.5 seconds. The radio mutes
when the select button is pushed.
4. When the sound resumes, memorizing is
complete.
5. Other station select buttons can be set in
the same manner.
If the battery is disconnected, or if the radio
fuse opens, the radio memory is canceled.
In that case, reset the desired stations.
RDS (Radio Data System)
RDS stands for Radio Data System, and is
a data information service transmitted by
some radio stations on the FM band (not
AM band) encoded within a regular radio
broadcast. Most RDS stations are currently
in large cities, but many stations are now
considering broadcasting RDS data.
RDS can display:
cStation name or call-sign, such as
``WHFR 98.3''.
AHA1107
4-22Heater, air conditioner and audio systems
ZX
Page 171 of 304

tinues in the SEEK mode at the highest
station.
SCAN tuning
Push the SCAN tuning button, SCAN illumi-
nates in the display. SCAN tuning begins
from low to high frequencies and stops at
each broadcasting station for 5 seconds.
Pushing the button again during this 5 sec-
ond period stops SCAN tuning and remains
tuned to that station.
Station memory operations
Six stations can be set for the AM band.
Twelve stations can be set for the FM band
(six for FM1, six for FM2).
1. Push the FM or AM buttons to select AM,FM1, or FM2. The selected band illumi-
nates in the display.
2. Tune to the desired station.
3. Push the desired station select button for
more than 1.5 seconds. The radio mutes
when the select button is pushed.
4. When the sound resumes, memorizing is
complete.
5. Other station select buttons can be set in
the same manner.
If the battery is disconnected, or if the radio
fuse opens, the radio memory is canceled.
In that case, reset the desired stations.
RDS (Radio Data System)
RDS stands for Radio Data System, and is
a data information service transmitted by
some radio stations on the FM band (not
AM band) encoded within a regular radio
broadcast. Most RDS stations are currently
in large cities, but many stations are now
considering broadcasting RDS data.
RDS can display:
cStation name or call-sign, such as
``WHFR 98.3''.
AHA1108
4-28Heater, air conditioner and audio systems
ZX
Page 178 of 304

REAR AUDIO CONTROLS (if so
equipped)
Radio features controlled by the rear seat
remote control (if so equipped) are listed
below:cVolume: þ/+
cMedia select: AM/FM, tape, CD, CD
changer.
cSpeakers ON/OFFcMem: proceed to the next preset station
(AM/FM).
cSeek:bc
Push the Memory three and Memory five
buttons on the front radio controls simulta-
neously to turn the rear controls on. Push
them again to turn the rear audio controls off.
The(headphones symbol) illuminates
in the front display when the rear audio
controls are on. Two headphone jacks are
provided so two rear seat passengers may
listen to the audio system privately.
The rear volume controls can only increase
the volume to the level at which the front
radio volume control is set.
Headphones are not included with the ve-
hicle. Most portable radio headphones work
with the rear audio controls.
For vehicles equipped with the premium
FM-AM radio with cassette player, compact
disc player and 6 disc CD player, if the rear
passengers turn off the rear speakers and
are using headphones they may choose to
listen to a different media than the front
passengers. The rear passengers can listen
to the radio while the front passengers can
listen to the same thing, a cassette tape,
AHA1060
Heater, air conditioner and audio systems4-35
ZX
Page 179 of 304

CD, or the CD changer. The radio will go
into DUAL PLAY mode and the rear pas-
sengers can use the rear controls to change
media.
VOLUME button
The VOLUME button allows the rear pas-
sengers to adjust the headphone volume
level.
MEDIA button
The MEDIA button allows the rear passen-
ger to change between AM, FM1, FM2,
TAPE, CD, and CD DJ. The media options
are listed on the faceplate of the rear audio
controls. When a source of media is se-
lected, that media selection is backlit.
MEM button
In AM, FM1, or FM2 mode the MEM button
allows the rear passenger to successively
access memory preset station 1 through 6.
In CD DJ mode the MEM button allows the
rear passengers to select other compact
discs in the CD changer.
SEEK button
In AM, FM1, or FM2 mode the SEEK
andbutton allows the rear pas-
sengers to find the next radio station up or
down the station band frequency.
In TAPE mode the SEEK
and
button allows the rear passengers use Au-
tomatic Music Search (AMS) to find the next
or previous song on the cassette.
In CD mode the SEEK
andbutton
allows the rear passengers to find the next
or previous selection on the CD.
In CD DJ mode the SEEK
and
button allows the rear passengers to find
the next or previous selection on the CD.
For vehicles equipped with the FM-AM radio
with cassette player, when the rear seat
controls are on, push the SPKRS ON-OFF
button to turn all speakers off. Push again to
turn all speakers on.
For vehicles equipped with the premium
FM-AM radio with cassette player, compact
disc player and 6 disc CD player, when the
rear seat controls are on, push the SPKRS
ON-OFF button to turn the rear speakers
off. Push again to turn the rear speakers on.If the rear audio system was on when the
ignition was turned OFF, the audio system
``remembers'' and the rear system is still on
when the engine is started again. The sys-
tem also ``remembers'' if the speakers were
ON or OFF. Therefore, the speakers may
have to be turned on again by pressing the
SPKRS ON-OFF button or turning the rear
audio controls off.
4-36Heater, air conditioner and audio systems
ZX
Page 185 of 304

and five memory preset buttons to turn OFF
the RSEM.
VOLUME button
The VOLUME button allows the rear pas-
sengers to adjust the headphone volume
level.
Push the1button to increase the volume.
Push the2button to decrease the volume.
MEDIA button
The MEDIA button allows the rear passen-
gers to change between the different media
options. When a source of media is se-
lected, that media selection is backlit.
cAM - AM radio frequency band
cFM1, FM2 - FM radio frequency bands
cTAPE - cassette tape
cCD - single CD player
cCD DJ - CD changer
cVCP - video cassette player
cAUX - auxiliary jack input
MEM button
In AM, FM1 or FM2 mode, the MEM button
allows the rear passengers to successively
access memory preset stations 1 through 6.
In CD DJ mode, the MEM button allows the
rear passengers to select other compact
discs in the CD changer. Play will begin with
the first track.
SEEK button
In AM, FM1 or FM2 mode, the SEEK < and
> buttons allow the rear passengers to find
the next radio station up or down the station
band frequency.
In TAPE mode, the SEEK < and > buttons
allow the rear passengers to use Automatic
Music Search (AMS) to find the next or
previous song on the cassette.
In CD mode, the SEEK < and > buttons
allow the rear passengers to find the next or
previous selection on the CD.
In CD DJ mode, the SEEK < and > buttons
allow the rear passengers to find the next or
previous selection on the CD.
Speaker control button
With the speakers ON, rear seat passen-
gers can adjust the audio output to all
system speakers - both front and rear to-
gether (headphones are disabled in this
mode). The rear seat passengers cannot
raise the volume of the system above the
level of the front radio.
With the speakers OFF, the headphones
are enabled. The rear seat passengers
have control over the desired headphone
volume levels.
Headphone jacks
Two headphone jacks are available so two
rear seat passengers may listen to the
audio system.
Headphones are not included with the ve-
hicle. Most portable radio headphones will
work with the rear audio controls.
Auxiliary Input Jacks
The auxiliary input jacks on the RSEM con-
trol panel accept video and audio connec-
tors for all standard video games. Other
compatible devices such as DVD players,
camcorders and portable CD players can
4-42Heater, air conditioner and audio systems
ZX