AUX NISSAN QUEST 2002 V41 / 2.G Owners Manual
[x] Cancel search | Manufacturer: NISSAN, Model Year: 2002, Model line: QUEST, Model: NISSAN QUEST 2002 V41 / 2.GPages: 294, PDF Size: 2.49 MB
Page 20 of 294
CAUTION
cThe seats are heavy. Two people
should remove or install them.
cDo not sit in seats that have been
removed from the vehicle. They may
tip over and you could be injured.
1. Detach the single window seat belt
tongue from the auxiliary buckle mounted
to the side of the seat and store the
tongue out of the way. For detailed infor-
mation, see ``Two buckle seat belt sys-
tem for the second row bench seat'' later
in this section.
2. Lift up the recliner lever.
3. Fold the seatback fully forward.
4. Unlock the seat legs at the two rear floor
latch levers by pulling up on the two
straps.
5. Lift the back of the seat.
6. Slide the seat rearward off the front an-
chor positions.
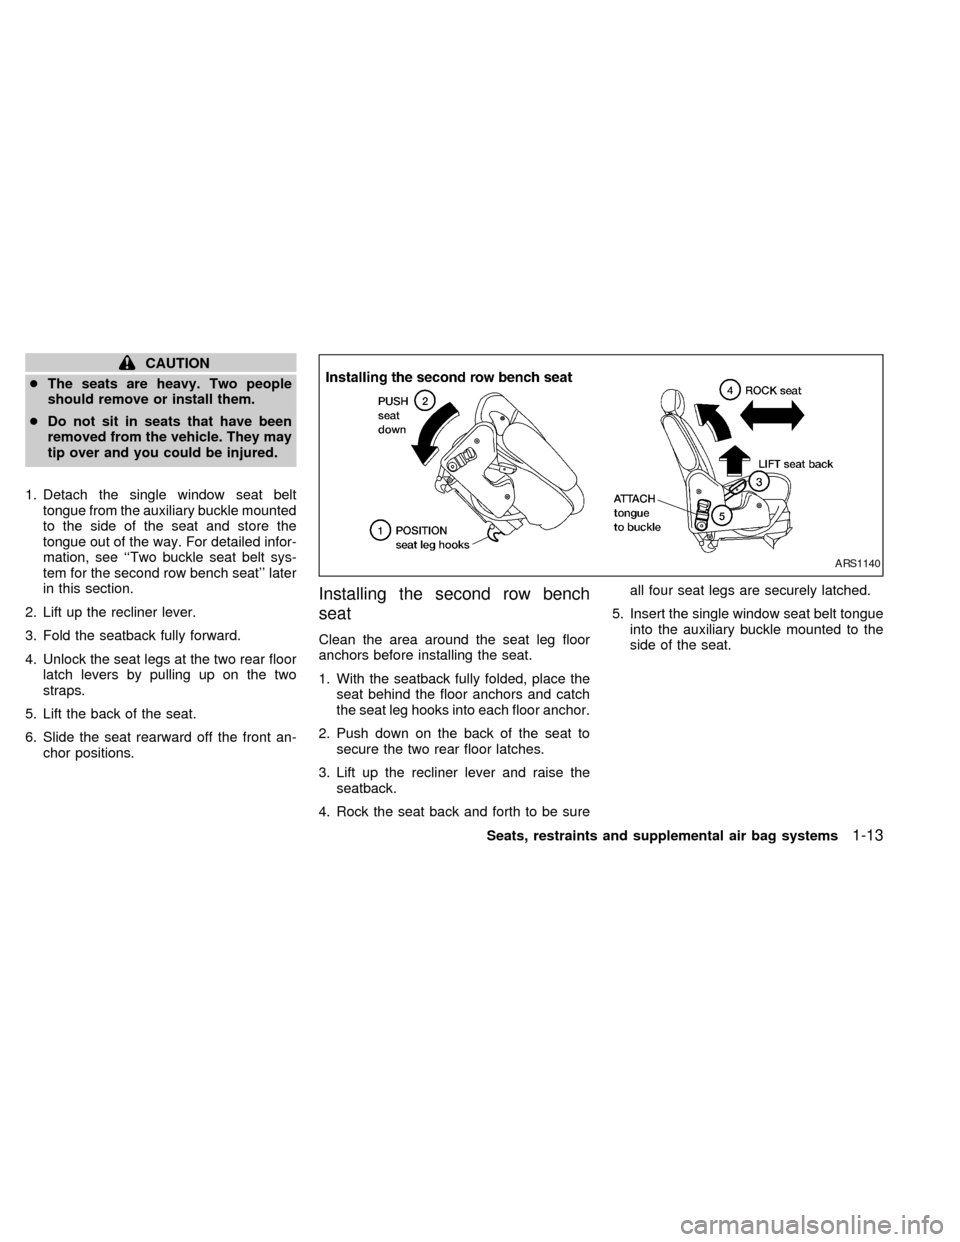
Installing the second row bench
seat
Clean the area around the seat leg floor
anchors before installing the seat.
1. With the seatback fully folded, place the
seat behind the floor anchors and catch
the seat leg hooks into each floor anchor.
2. Push down on the back of the seat to
secure the two rear floor latches.
3. Lift up the recliner lever and raise the
seatback.
4. Rock the seat back and forth to be sureall four seat legs are securely latched.
5. Insert the single window seat belt tongue
into the auxiliary buckle mounted to the
side of the seat.
ARS1140
Seats, restraints and supplemental air bag systems1-13
ZX
Page 54 of 294

One of the seat belt tongues has two ``win-
dows'' (or holes) and the other has only one
``window''. The seat belt tongue with one
window attaches to the auxiliary buckle
mounted to the side of the seat. The seat
belt tongue with two windows should bepositioned properly and fastened to the
buckle mounted in the middle of the seat.
When the two buckle seat belt system is not
in use, the webbing can be secured with the
seat belt clip. The seat belt clip should not
be used with a child seat or during seat belt
usage. The seat belt clip opening should
face the front of the vehicle.
A twisted belt may prevent the retractor
from working properly. If the two buckle seat
belt system is twisted, disengage the single
window tongue from the auxiliary buckle on
the side of the seat, remove the twist and
reinstall the tongue into the auxiliary buckle
until you hear a snap and feel the latch
engage.
Both tongues must be attached to their
appropriate buckles whenever someone
is riding in that seating position. If the
tongues are released to allow a third row
passenger to enter or exit, the tongues
must be reattached.
WRS0051
ARS1126
Seats, restraints and supplemental air bag systems1-47
ZX
Page 55 of 294
When the two-passenger bench seat is re-
moved from the vehicle, you must detach
the single window tongue from the auxiliary
buckle.
When the three-passenger bench seat is
moved up to the second row position, the
passenger seated near the passenger
side sliding door needs to use the double
window tongue and the standard buckle
only. Because the three-passenger
bench seat is wider and closer to the
passenger side sliding door, the single
window seat belt tongue and the auxiliary
buckle are not necessary.
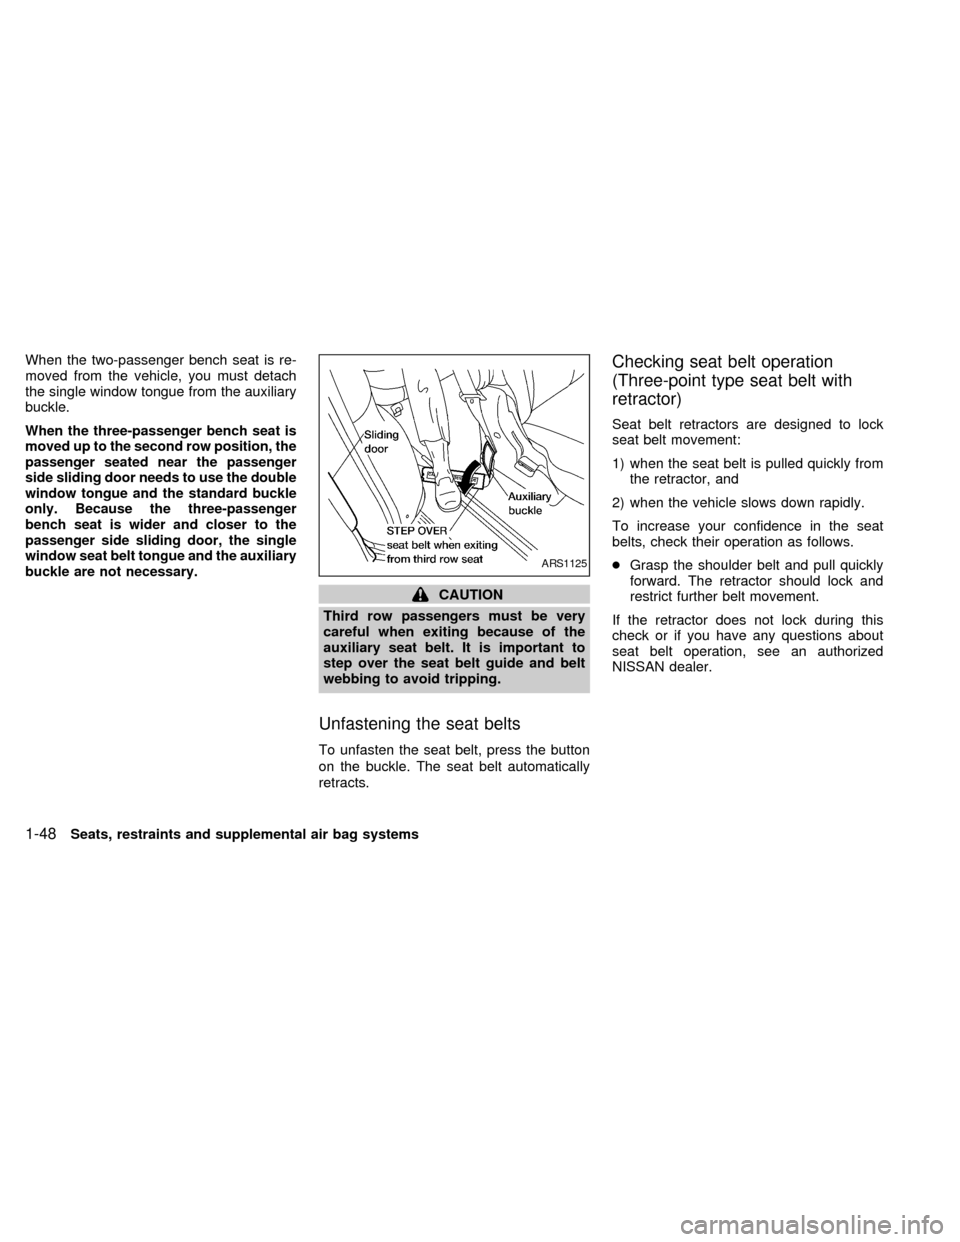
CAUTION
Third row passengers must be very
careful when exiting because of the
auxiliary seat belt. It is important to
step over the seat belt guide and belt
webbing to avoid tripping.
Unfastening the seat belts
To unfasten the seat belt, press the button
on the buckle. The seat belt automatically
retracts.
Checking seat belt operation
(Three-point type seat belt with
retractor)
Seat belt retractors are designed to lock
seat belt movement:
1) when the seat belt is pulled quickly from
the retractor, and
2) when the vehicle slows down rapidly.
To increase your confidence in the seat
belts, check their operation as follows.
cGrasp the shoulder belt and pull quickly
forward. The retractor should lock and
restrict further belt movement.
If the retractor does not lock during this
check or if you have any questions about
seat belt operation, see an authorized
NISSAN dealer.
ARS1125
1-48Seats, restraints and supplemental air bag systems
ZX
Page 56 of 294

THREE-PASSENGER BENCH
SEAT IN THE SECOND ROW
POSITION
Fastening the seat belts
When the three-passenger bench seat is
moved up to the second row position, the
passenger seated near the passenger
side sliding door needs to use the double
window tongue and the standard buckle
only. Because the three-passenger
bench seat is wider and closer to the
passenger side sliding door, the single
window seat belt tongue and the auxiliary
buckle are not necessary.
1. Adjust the seat.2. Slowly pull the seat belt out of the retrac-
tor and insert the tongue into the buckle
until you hear and feel the latch engage.3. Position the passenger side shoulder belt
in the shoulder belt retainer.
WRS0015WRS0052
Seats, restraints and supplemental air bag systems1-49
ZX
Page 66 of 294
INSTALLATION ON SECOND
AND THIRD ROW OUTBOARD
POSITIONS
Front facing
The following instructions apply to second
row bucket seats, the second row bench
seat and the outboard positions of the three-
passenger bench seat.
WARNING
When installing a child restraint in the
two-passenger bench seat, if it is
placed in the seating position next to
the passenger side sliding door, be
sure both the auxiliary buckle and main
buckle are properly fastened. Failure to
do so could increase the chance and/or
severity of injury in an accident.
WARNING
cThe three-point belt in your vehicle
is equipped with locking mode re-
tractor which must be used when
installing a child restraint.
cFailure to use the retractor's locking
mode will result in the child restraint
not being properly secured. The re-
straint could tip over or otherwise be
unsecured and cause injury to the
child in a sudden stop or collision.
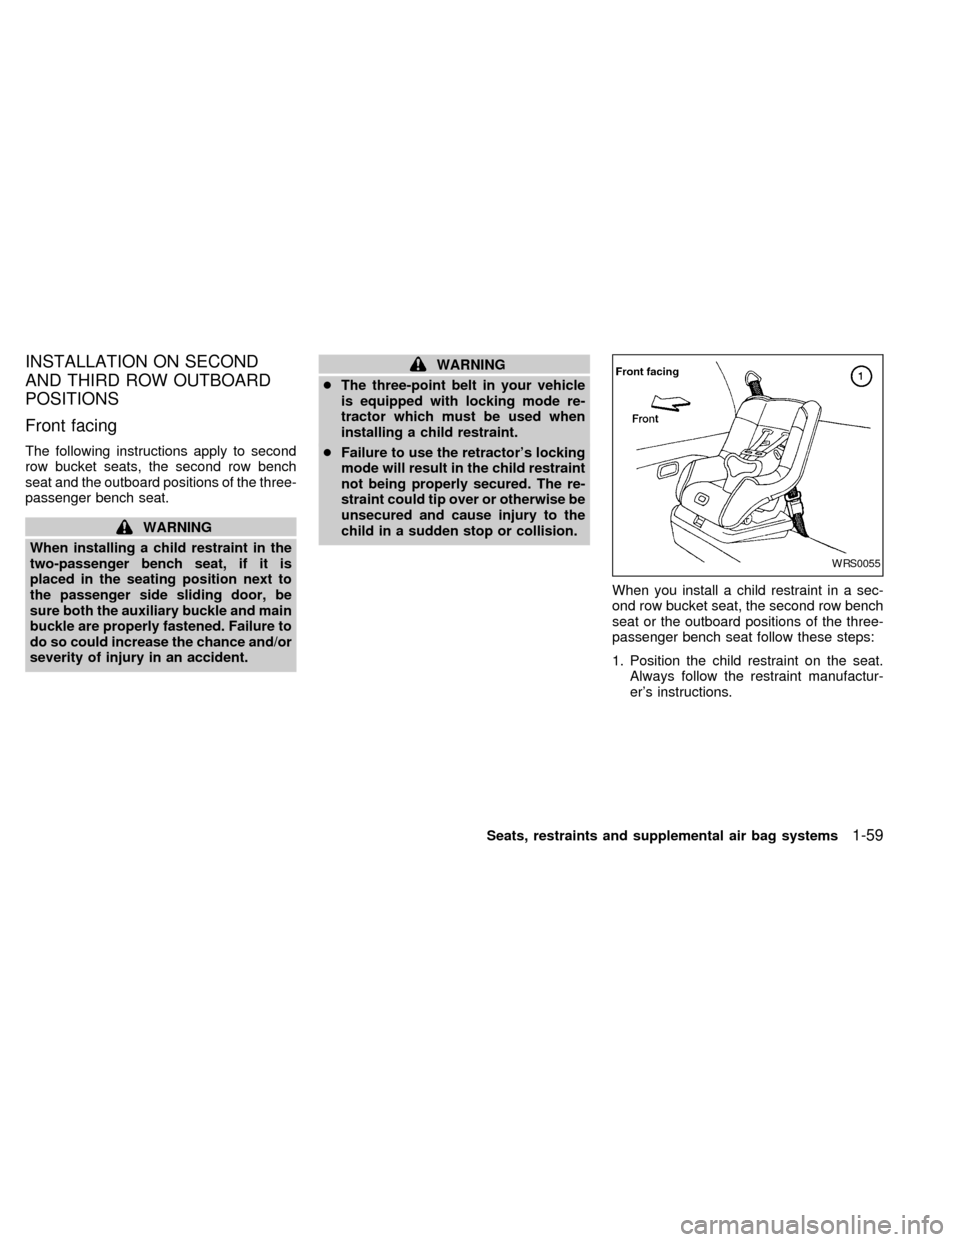
When you install a child restraint in a sec-
ond row bucket seat, the second row bench
seat or the outboard positions of the three-
passenger bench seat follow these steps:
1. Position the child restraint on the seat.
Always follow the restraint manufactur-
er's instructions.
WRS0055
Seats, restraints and supplemental air bag systems1-59
ZX
Page 68 of 294
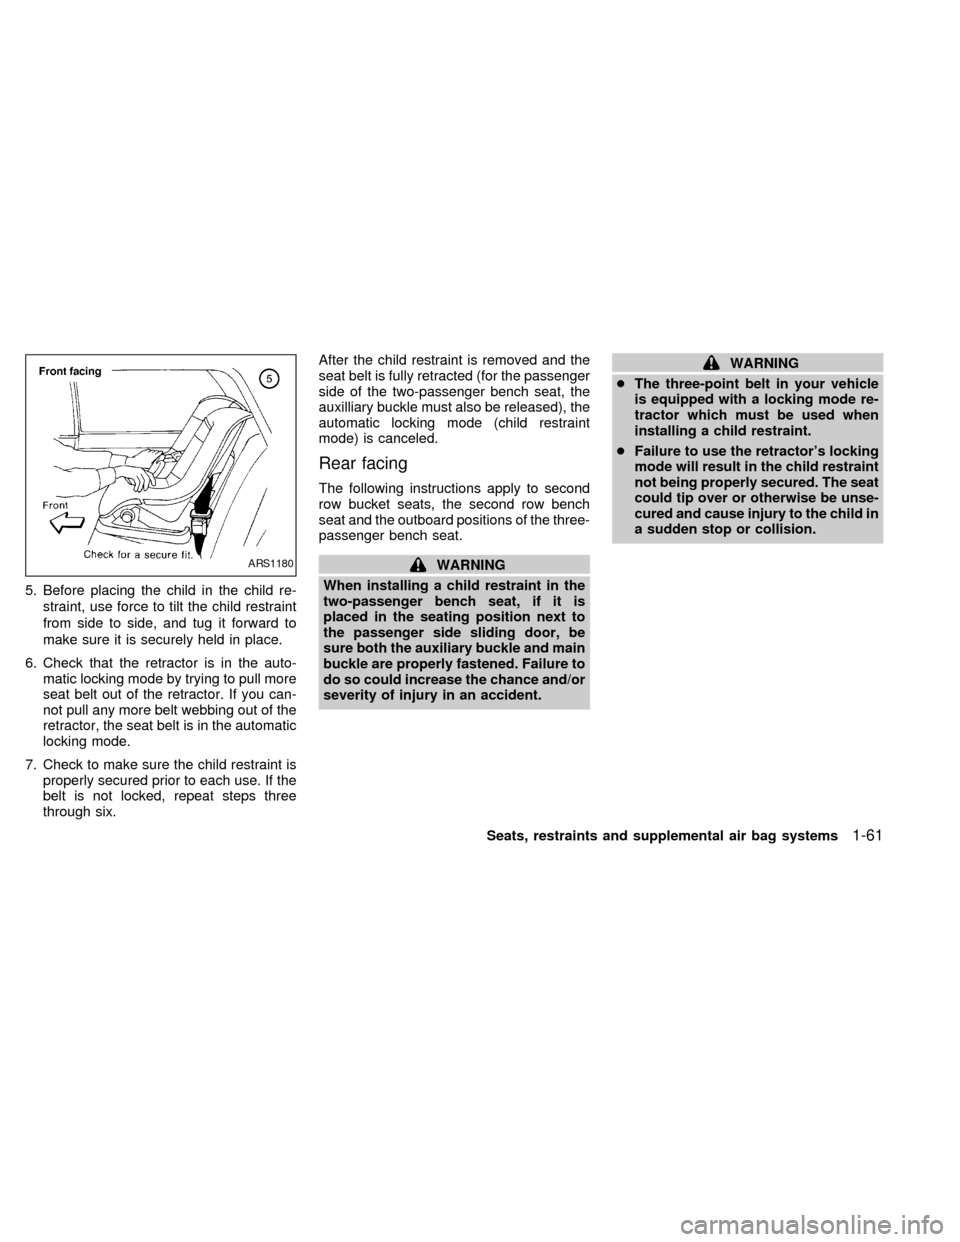
5. Before placing the child in the child re-
straint, use force to tilt the child restraint
from side to side, and tug it forward to
make sure it is securely held in place.
6. Check that the retractor is in the auto-
matic locking mode by trying to pull more
seat belt out of the retractor. If you can-
not pull any more belt webbing out of the
retractor, the seat belt is in the automatic
locking mode.
7. Check to make sure the child restraint is
properly secured prior to each use. If the
belt is not locked, repeat steps three
through six.After the child restraint is removed and the
seat belt is fully retracted (for the passenger
side of the two-passenger bench seat, the
auxilliary buckle must also be released), the
automatic locking mode (child restraint
mode) is canceled.
Rear facing
The following instructions apply to second
row bucket seats, the second row bench
seat and the outboard positions of the three-
passenger bench seat.
WARNING
When installing a child restraint in the
two-passenger bench seat, if it is
placed in the seating position next to
the passenger side sliding door, be
sure both the auxiliary buckle and main
buckle are properly fastened. Failure to
do so could increase the chance and/or
severity of injury in an accident.
WARNING
cThe three-point belt in your vehicle
is equipped with a locking mode re-
tractor which must be used when
installing a child restraint.
cFailure to use the retractor's locking
mode will result in the child restraint
not being properly secured. The seat
could tip over or otherwise be unse-
cured and cause injury to the child in
a sudden stop or collision.
ARS1180
Seats, restraints and supplemental air bag systems1-61
ZX
Page 70 of 294

4. Allow the seat belt to retract. Pull up on
the shoulder belt to remove any slack in
the belt.5. Before placing the child in the child re-
straint, use force to tilt the child restraint
from side to side, and tug it forward to
make sure it is securely held in place.
6. Check that the retractor is in the auto-
matic locking mode by trying to pull more
seat belt out of the retractor. If you can-
not pull any more belt webbing out of the
retractor, the seat belt is in the automatic
locking mode.
7. Check to make sure the child restraint is
properly secured prior to each use. If the
belt is not locked, repeat steps three
through six.After the child restraint is removed and the
seat belt is fully retracted (for the passenger
side of the two-passenger bench seat, the
auxilliary buckle must also be released), the
automatic locking mode (child restraint
mode) is canceled.
ARS1184ARS1185
Seats, restraints and supplemental air bag systems1-63
ZX
Page 183 of 294
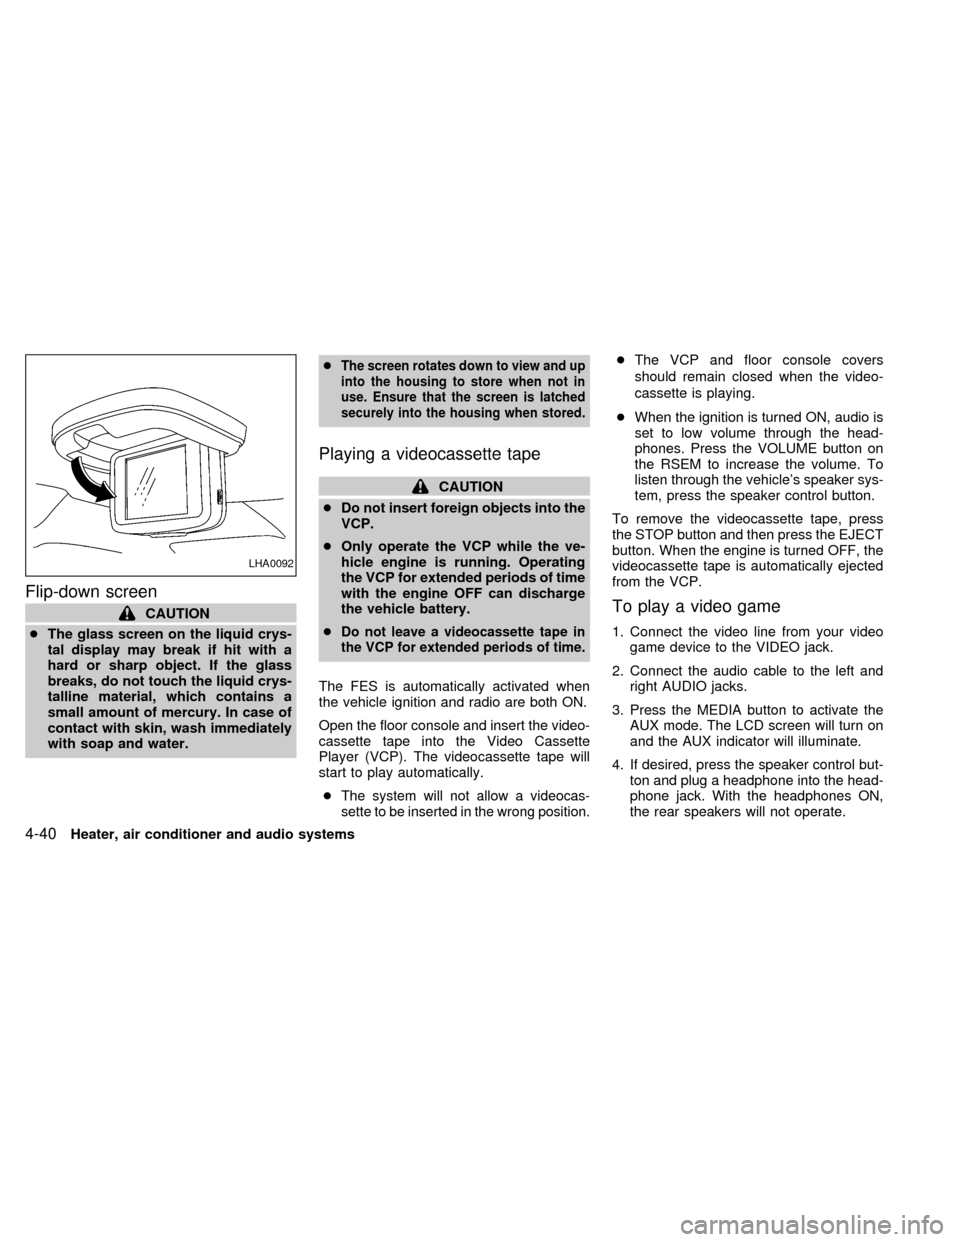
Flip-down screen
CAUTION
cThe glass screen on the liquid crys-
tal display may break if hit with a
hard or sharp object. If the glass
breaks, do not touch the liquid crys-
talline material, which contains a
small amount of mercury. In case of
contact with skin, wash immediately
with soap and water.c
The screen rotates down to view and up
into the housing to store when not in
use. Ensure that the screen is latched
securely into the housing when stored.
Playing a videocassette tape
CAUTION
cDo not insert foreign objects into the
VCP.
cOnly operate the VCP while the ve-
hicle engine is running. Operating
the VCP for extended periods of time
with the engine OFF can discharge
the vehicle battery.
c
Do not leave a videocassette tape in
the VCP for extended periods of time.
The FES is automatically activated when
the vehicle ignition and radio are both ON.
Open the floor console and insert the video-
cassette tape into the Video Cassette
Player (VCP). The videocassette tape will
start to play automatically.
c
The system will not allow a videocas-
sette to be inserted in the wrong position.
cThe VCP and floor console covers
should remain closed when the video-
cassette is playing.
cWhen the ignition is turned ON, audio is
set to low volume through the head-
phones. Press the VOLUME button on
the RSEM to increase the volume. To
listen through the vehicle's speaker sys-
tem, press the speaker control button.
To remove the videocassette tape, press
the STOP button and then press the EJECT
button. When the engine is turned OFF, the
videocassette tape is automatically ejected
from the VCP.
To play a video game
1. Connect the video line from your video
game device to the VIDEO jack.
2. Connect the audio cable to the left and
right AUDIO jacks.
3. Press the MEDIA button to activate the
AUX mode. The LCD screen will turn on
and the AUX indicator will illuminate.
4. If desired, press the speaker control but-
ton and plug a headphone into the head-
phone jack. With the headphones ON,
the rear speakers will not operate.
LHA0092
4-40Heater, air conditioner and audio systems
ZX
Page 185 of 294

and five memory preset buttons to turn OFF
the RSEM.
VOLUME button
The VOLUME button allows the rear pas-
sengers to adjust the headphone volume
level.
Push the1button to increase the volume.
Push the2button to decrease the volume.
MEDIA button
The MEDIA button allows the rear passen-
gers to change between the different media
options. When a source of media is se-
lected, that media selection is backlit.
cAM - AM radio frequency band
cFM1, FM2 - FM radio frequency bands
cTAPE - cassette tape
cCD - single CD player (if so equipped)
cCD DJ - CD changer (if so equipped)
cVCP - video cassette player
cAUX - auxiliary jack input
MEM button
In AM, FM1 or FM2 mode, the MEM button
allows the rear passengers to successively
access memory preset stations 1 through 6.
In CD DJ mode, the MEM button allows the
rear passengers to select other compact
discs in the CD changer. Play will begin with
the first track.
SEEK button
In AM, FM1 or FM2 mode, the SEEK < and
> buttons allow the rear passengers to find
the next radio station up or down the station
band frequency.
In TAPE mode, the SEEK < and > buttons
allow the rear passengers to use Automatic
Music Search (AMS) to find the next or
previous song on the cassette.
In CD mode, the SEEK < and > buttons
allow the rear passengers to find the next or
previous selection on the CD.
In CD DJ mode, the SEEK < and > buttons
allow the rear passengers to find the next or
previous selection on the CD.
Speaker control button
With the speakers ON, rear seat passen-
gers can adjust the audio output to all
system speakers - both front and rear to-
gether (headphones are disabled in this
mode). The rear seat passengers cannot
raise the volume of the system above the
level of the front radio.
With the speakers OFF, the headphones
are enabled. The rear seat passengers
have control over the desired headphone
volume levels.
Headphone jacks
Two headphone jacks are available so two
rear seat passengers may listen to the
audio system.
Headphones are not included with the ve-
hicle. Most portable radio headphones will
work with the rear audio controls.
Auxiliary input jacks
The auxiliary input jacks on the RSEM con-
trol panel accept video and audio connec-
tors for all standard video games. Other
compatible devices such as DVD players,
camcorders and portable CD players can
4-42Heater, air conditioner and audio systems
ZX
Page 186 of 294
also be connected to the auxiliary jacks.
The auxiliary jacks are color coded for iden-
tification purposes.
cYellow - video input
cWhite - left channel audio input
cRed - right channel audio input
DUAL PLAY mode
Dual Play Mode allows the rear seat pas-
sengers to listen to one media source while
the front seat passengers listen to another.
To activate, press the speaker control but-
ton and plug a headphone into the head-
phone jack. With the headphones ON, the
rear speaker will not operate. Select the
desired media and adjust as necessary.
Press the speaker control button again to
operate the rear speakers and disengage
Dual Play Mode.
IN-HOME use
Your AutovisionTFamily Entertainment
System is UL registered for in-home use.
To use the FES system in your home, you
will need:c12V DC power converter rated for 1.5
amps/minute
cPatch cords with RCA style connectors
CARE AND MAINTENANCE
Use a lightly dampened, lint free cloth to
clean the surfaces of your Family Entertain-
ment System. (VCP face, monitor screen,
remote control, etc.)
CAUTION
cDo not use any solvents or cleaning
solutions when cleaning the video
system.
cDo not use excessive force on the
monitor screen.
cAvoid touching or scratching the
monitor screen as it may become
dirty or damaged.
Your Family Entertainment System is com-
patible with any cassette tape bearing the
VHS mark. We recommend storing your
video cassettes in a moisture free, dust free
container.
CAUTION
cDo not attempt to operate the system
in extreme temperature conditions
(below 30É and above 113É Fahren-
heit).
cDo not attempt to operate the system
in extreme humidity conditions (less
than 10% or more than 75%).
Tape head cleaning
Normally the VCP will not require frequent
head cleaning. However, after long periods
of usage dirt can collect on the video heads,
causing the picture to become blurred or
interrupted. In this case, head cleaning may
be required.
To clean the video heads, obtain a head
cleaning tape from your local video store.
Be sure to completely follow the instructions
included with the cleaning tape. Excessive
cleaning can shorten video head life.
Heater, air conditioner and audio systems
4-43
ZX