warning lights NISSAN QUEST 2005 V42 / 3.G User Guide
[x] Cancel search | Manufacturer: NISSAN, Model Year: 2005, Model line: QUEST, Model: NISSAN QUEST 2005 V42 / 3.GPages: 328, PDF Size: 5.75 MB
Page 104 of 328
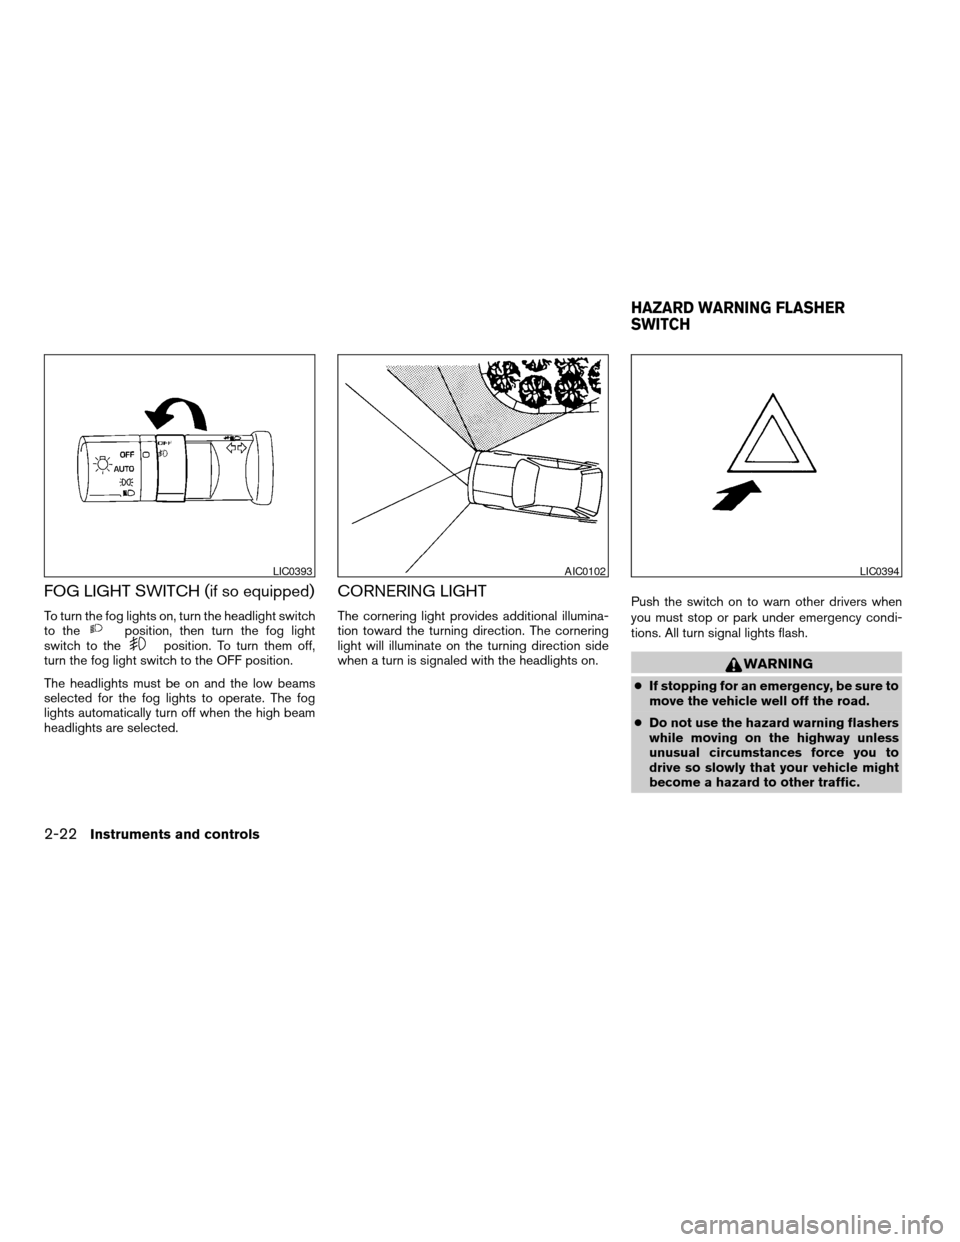
FOG LIGHT SWITCH (if so equipped)
To turn the fog lights on, turn the headlight switch
to theposition, then turn the fog light
switch to theposition. To turn them off,
turn the fog light switch to the OFF position.
The headlights must be on and the low beams
selected for the fog lights to operate. The fog
lights automatically turn off when the high beam
headlights are selected.
CORNERING LIGHT
The cornering light provides additional illumina-
tion toward the turning direction. The cornering
light will illuminate on the turning direction side
when a turn is signaled with the headlights on.Push the switch on to warn other drivers when
you must stop or park under emergency condi-
tions. All turn signal lights flash.
WARNING
cIf stopping for an emergency, be sure to
move the vehicle well off the road.
cDo not use the hazard warning flashers
while moving on the highway unless
unusual circumstances force you to
drive so slowly that your vehicle might
become a hazard to other traffic.
LIC0393AIC0102LIC0394
HAZARD WARNING FLASHER
SWITCH
2-22Instruments and controls
ZREVIEW COPYÐ2005 Quest(van)
Owners ManualÐUSA_English(nna)
07/21/04Ðdebbie
X
Page 105 of 328
cTurn signals do not work when the haz-
ard warning flasher lights are on.
The flashers will operate with the ignition switch
in any position.
Some state laws may prohibit the use of
the hazard warning flasher switch while
driving.
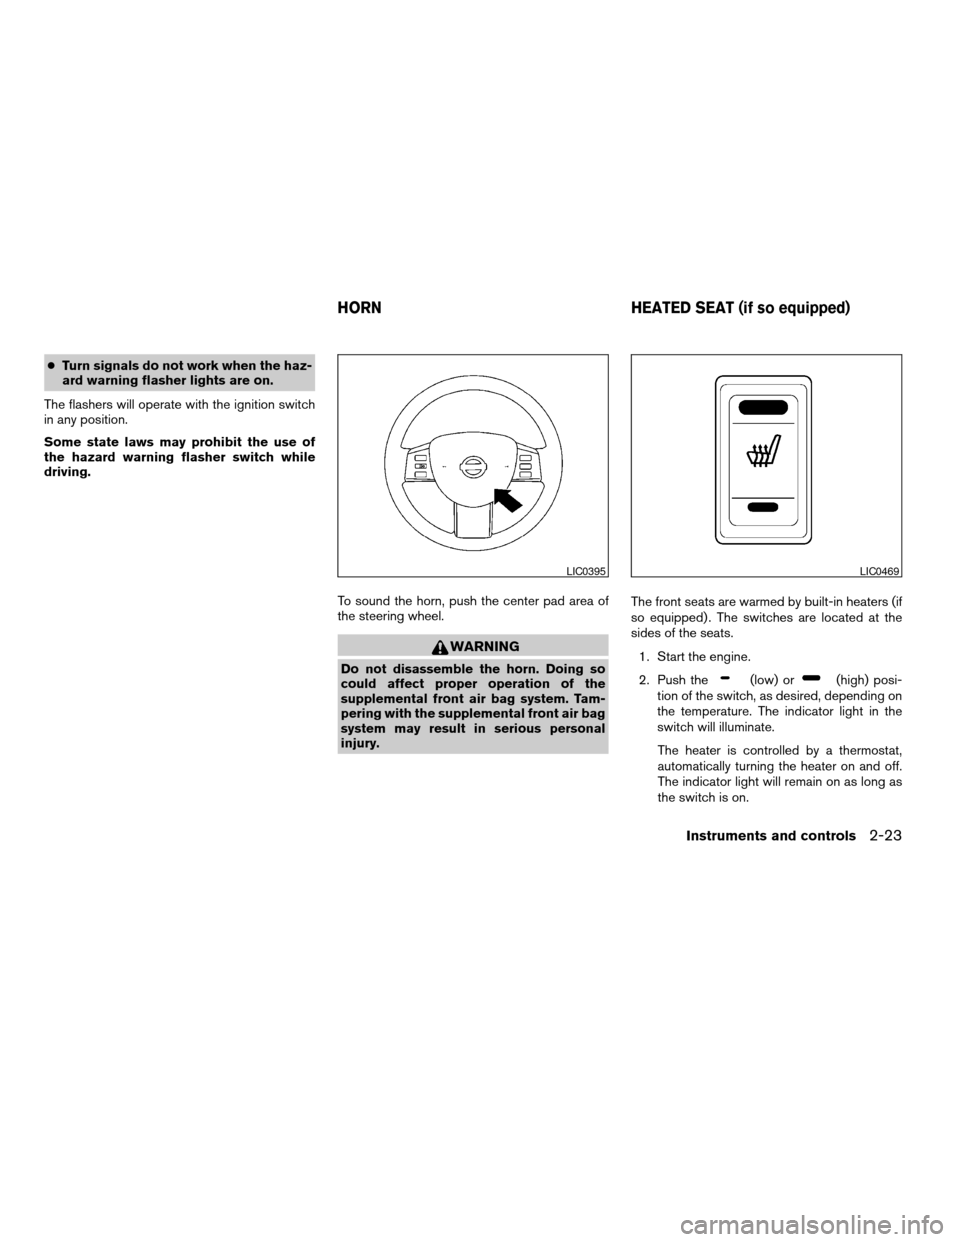
To sound the horn, push the center pad area of
the steering wheel.
WARNING
Do not disassemble the horn. Doing so
could affect proper operation of the
supplemental front air bag system. Tam-
pering with the supplemental front air bag
system may result in serious personal
injury.The front seats are warmed by built-in heaters (if
so equipped) . The switches are located at the
sides of the seats.
1. Start the engine.
2. Push the(low) or(high) posi-
tion of the switch, as desired, depending on
the temperature. The indicator light in the
switch will illuminate.
The heater is controlled by a thermostat,
automatically turning the heater on and off.
The indicator light will remain on as long as
the switch is on.
LIC0395LIC0469
HORN HEATED SEAT (if so equipped)
Instruments and controls2-23
ZREVIEW COPYÐ2005 Quest(van)
Owners ManualÐUSA_English(nna)
07/21/04Ðdebbie
X
Page 140 of 328
CAUTION
Listed below are conditions or occur-
rences which will damage the keyfob:
cDo not allow the keyfob to become wet.
cDo not drop the keyfob.
cDo not strike the keyfob sharply against
another object.
cDo not place the keyfob for an extended
period in an area where temperatures
exceed 140°F (60°C) .
If a keyfob is lost or stolen, NISSAN rec-
ommends erasing the ID code of that key-
fob. This will prevent the keyfob from un-
authorized use to unlock the vehicle. For
information regarding the erasing proce-
dure, please contact a NISSAN dealer.
HOW TO USE REMOTE KEYLESS
ENTRY SYSTEM
Locking doors
1. Close all windows.
2. Remove the key from the ignition switch.
3. Close the hood and all doors.
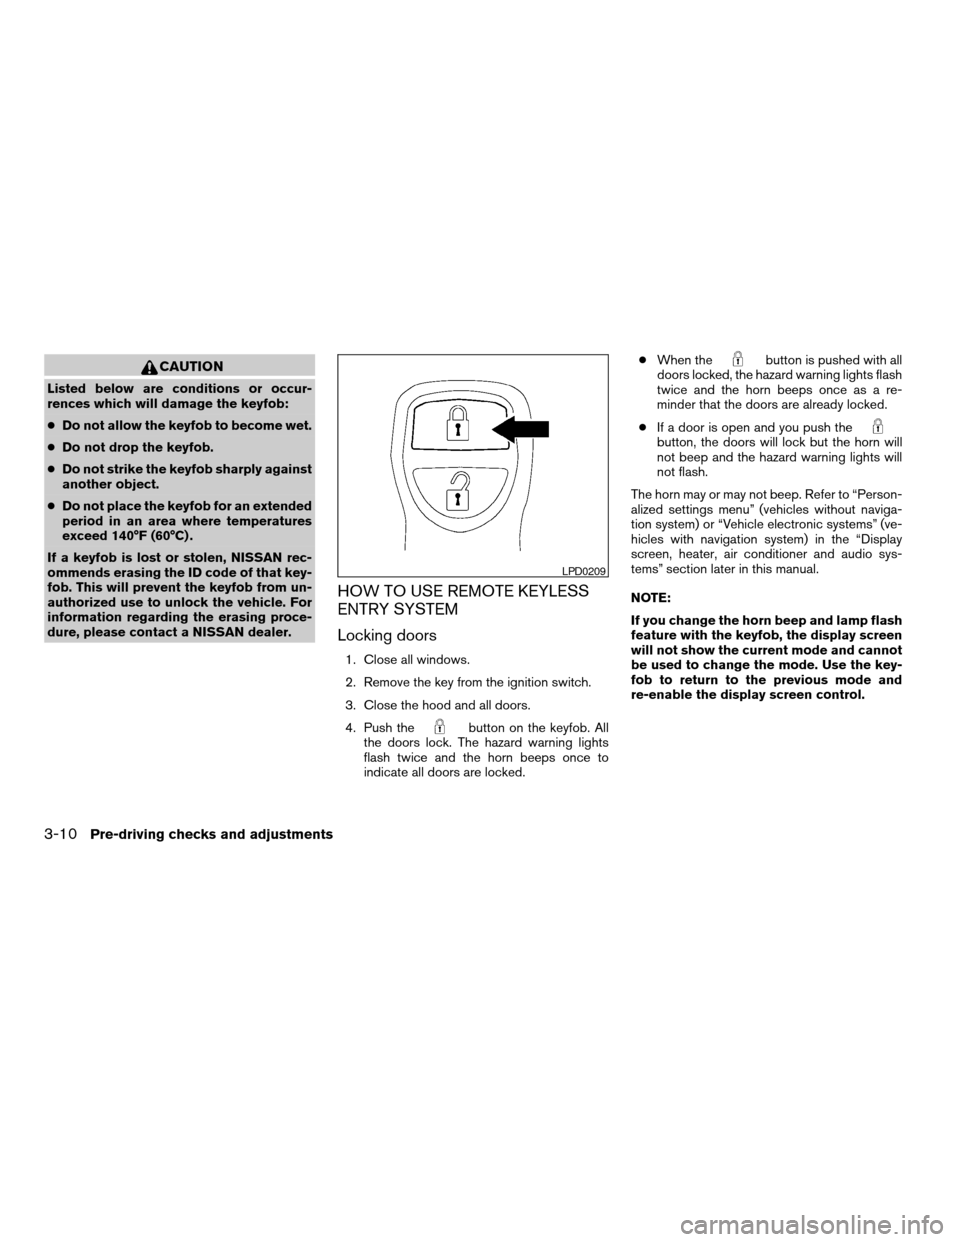
4. Push the
button on the keyfob. All
the doors lock. The hazard warning lights
flash twice and the horn beeps once to
indicate all doors are locked.cWhen the
button is pushed with all
doors locked, the hazard warning lights flash
twice and the horn beeps once as a re-
minder that the doors are already locked.
cIf a door is open and you push the
button, the doors will lock but the horn will
not beep and the hazard warning lights will
not flash.
The horn may or may not beep. Refer to “Person-
alized settings menu” (vehicles without naviga-
tion system) or “Vehicle electronic systems” (ve-
hicles with navigation system) in the “Display
screen, heater, air conditioner and audio sys-
tems” section later in this manual.
NOTE:
If you change the horn beep and lamp flash
feature with the keyfob, the display screen
will not show the current mode and cannot
be used to change the mode. Use the key-
fob to return to the previous mode and
re-enable the display screen control.
LPD0209
3-10Pre-driving checks and adjustments
ZREVIEW COPYÐ2005 Quest(van)
Owners ManualÐUSA_English(nna)
07/21/04Ðdebbie
X
Page 142 of 328

Operating the power sliding door (if so
equipped)
Push and hold the button on the keyfob for about
0.5 second to open or close the power sliding
door.
The door will reverse direction immediately dur-
ing power open or power close if the keyfob
button is pressed. A chime will sound to an-
nounce the reversal.
For more information, see “Operating the power
sliding door” earlier in this section.
Operating the power back door (if so
equipped)
Push and hold the button on the keyfob for about
0.5 second to open or close the back door. The
hazard warning lights flash and a chime sounds
to indicate the power open or power close se-
quence has started.
The door will reverse direction immediately dur-
ing power open or power close if the keyfob
button is pressed. A chime will sound to an-
nounce the reversal.
For more information, see “Back door” later in this
section.
Using the panic alarm
If you are near your vehicle and feel threatened,
you may activate the panic alarm to call attention
by pushing and holding the
button on the
keyfob forlonger than 0.5 second.
The panic alarm and headlights will stay on for 25
seconds.
The panic alarm stops when:
cit has run for 25 seconds, or
cany button is pushed on the keyfob.
LPD0212LPD0213LPD0211
3-12Pre-driving checks and adjustments
ZREVIEW COPYÐ2005 Quest(van)
Owners ManualÐUSA_English(nna)
07/21/04Ðdebbie
X
Page 143 of 328
Using the interior lights
Push thebutton on the keyfob once to turn
on the interior lights and puddle lamps (if so
equipped) .
The interior lights and puddle lamps (if so
equipped) can be turned off without waiting 30
seconds by inserting the key into the ignition,
locking the doors with the keyfob or pushing the
lights on demand switch to the OFF position.
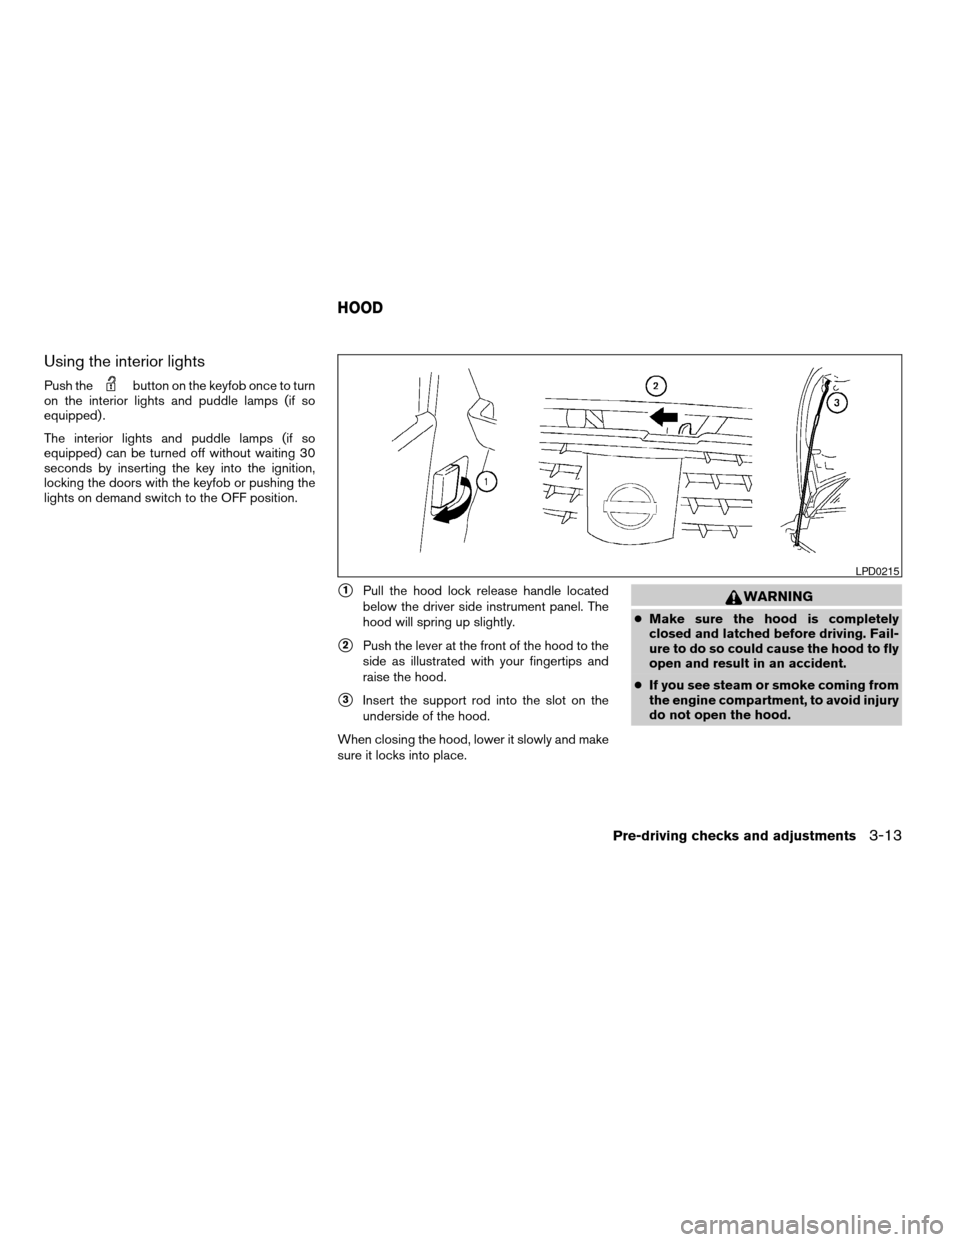
s1Pull the hood lock release handle located
below the driver side instrument panel. The
hood will spring up slightly.
s2Push the lever at the front of the hood to the
side as illustrated with your fingertips and
raise the hood.
s3Insert the support rod into the slot on the
underside of the hood.
When closing the hood, lower it slowly and make
sure it locks into place.
WARNING
cMake sure the hood is completely
closed and latched before driving. Fail-
ure to do so could cause the hood to fly
open and result in an accident.
cIf you see steam or smoke coming from
the engine compartment, to avoid injury
do not open the hood.
LPD0215
HOOD
Pre-driving checks and adjustments3-13
ZREVIEW COPYÐ2005 Quest(van)
Owners ManualÐUSA_English(nna)
07/21/04Ðdebbie
X
Page 145 of 328
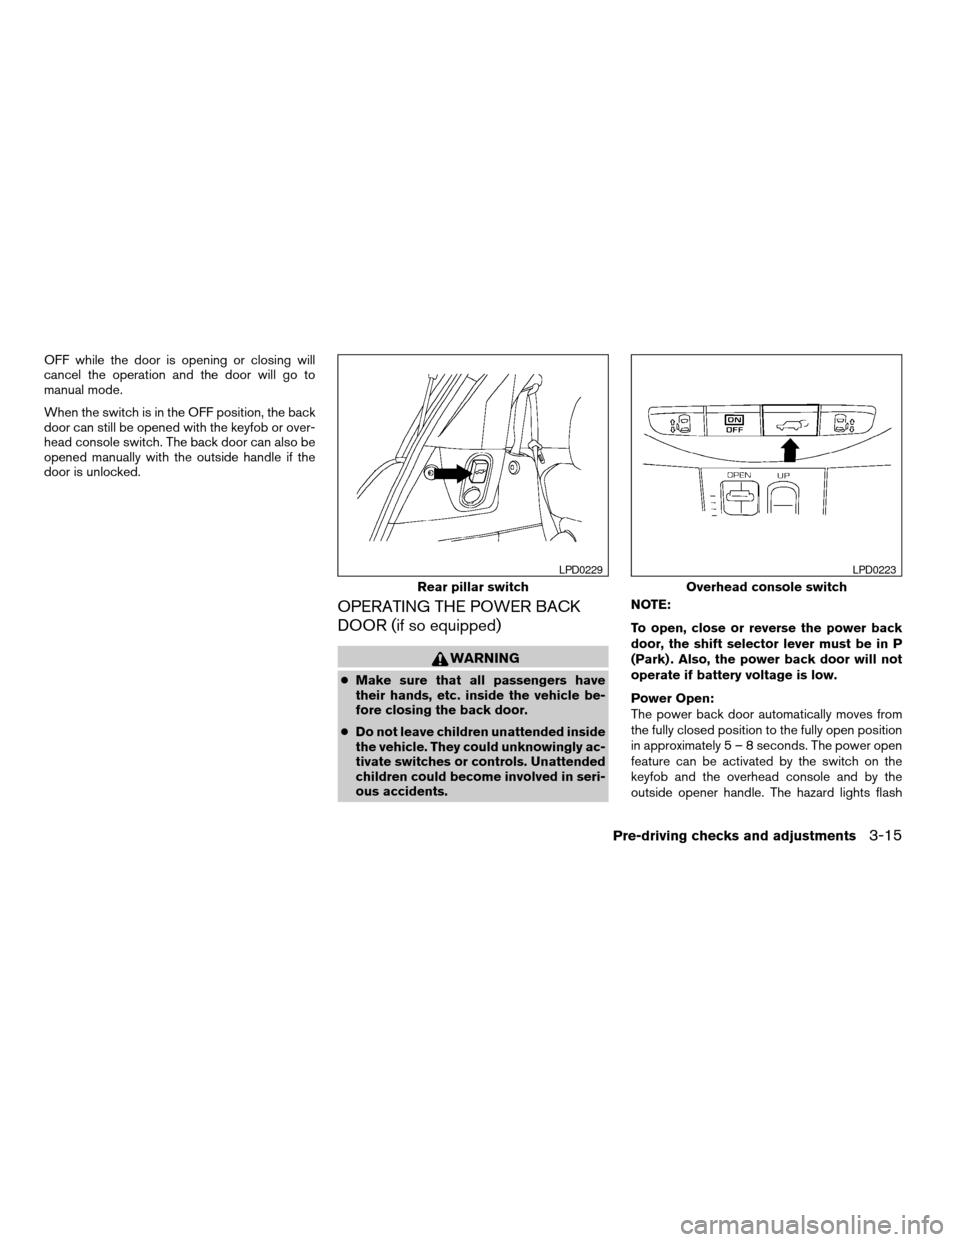
OFF while the door is opening or closing will
cancel the operation and the door will go to
manual mode.
When the switch is in the OFF position, the back
door can still be opened with the keyfob or over-
head console switch. The back door can also be
opened manually with the outside handle if the
door is unlocked.
OPERATING THE POWER BACK
DOOR (if so equipped)
WARNING
cMake sure that all passengers have
their hands, etc. inside the vehicle be-
fore closing the back door.
cDo not leave children unattended inside
the vehicle. They could unknowingly ac-
tivate switches or controls. Unattended
children could become involved in seri-
ous accidents.NOTE:
To open, close or reverse the power back
door, the shift selector lever must be in P
(Park) . Also, the power back door will not
operate if battery voltage is low.
Power Open:
The power back door automatically moves from
the fully closed position to the fully open position
in approximately5–8seconds. The power open
feature can be activated by the switch on the
keyfob and the overhead console and by the
outside opener handle. The hazard lights flash
Rear pillar switch
LPD0229
Overhead console switch
LPD0223
Pre-driving checks and adjustments3-15
ZREVIEW COPYÐ2005 Quest(van)
Owners ManualÐUSA_English(nna)
07/21/04Ðdebbie
X
Page 146 of 328
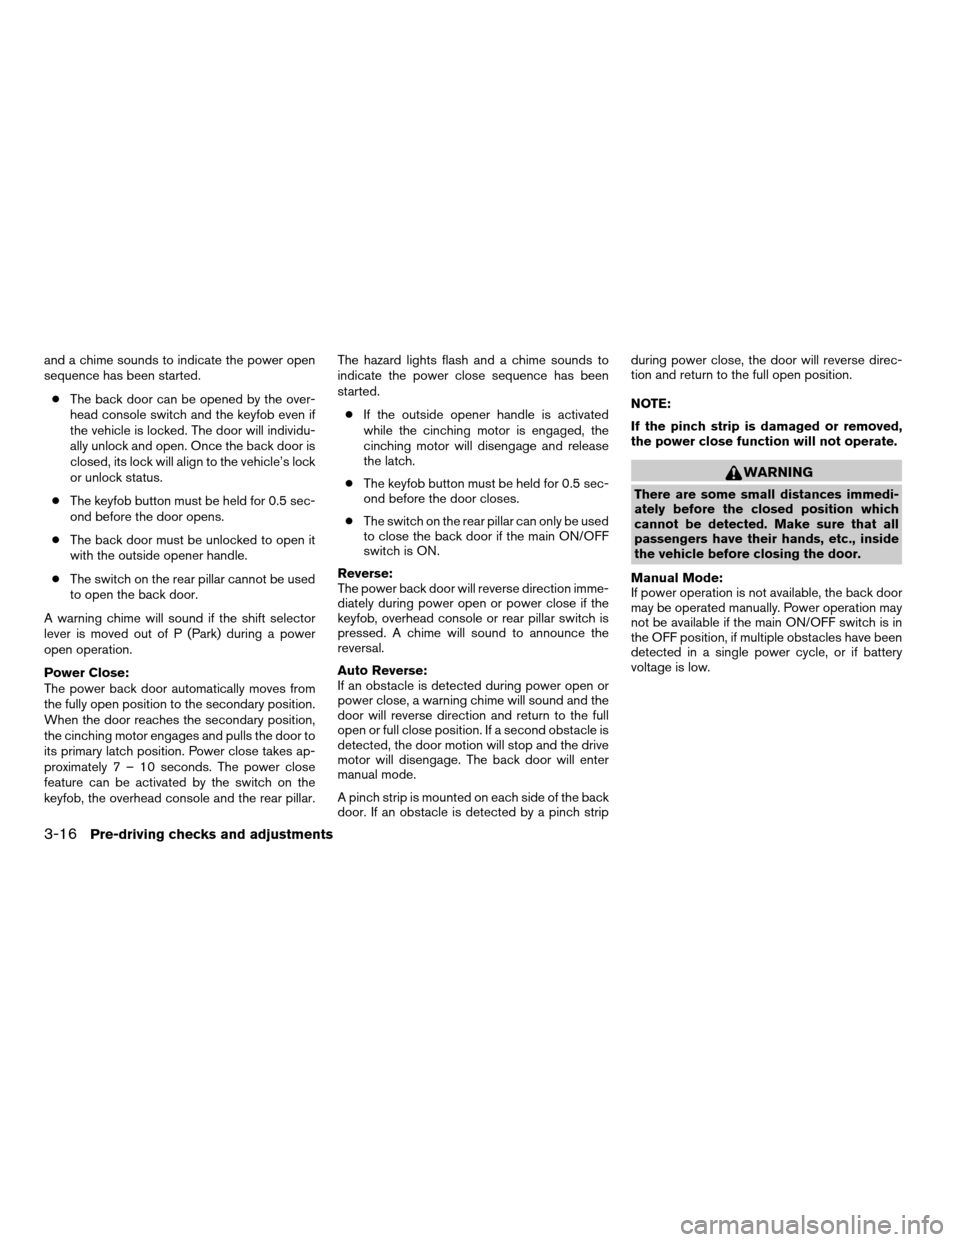
and a chime sounds to indicate the power open
sequence has been started.
cThe back door can be opened by the over-
head console switch and the keyfob even if
the vehicle is locked. The door will individu-
ally unlock and open. Once the back door is
closed, its lock will align to the vehicle’s lock
or unlock status.
cThe keyfob button must be held for 0.5 sec-
ond before the door opens.
cThe back door must be unlocked to open it
with the outside opener handle.
cThe switch on the rear pillar cannot be used
to open the back door.
A warning chime will sound if the shift selector
lever is moved out of P (Park) during a power
open operation.
Power Close:
The power back door automatically moves from
the fully open position to the secondary position.
When the door reaches the secondary position,
the cinching motor engages and pulls the door to
its primary latch position. Power close takes ap-
proximately7–10seconds. The power close
feature can be activated by the switch on the
keyfob, the overhead console and the rear pillar.The hazard lights flash and a chime sounds to
indicate the power close sequence has been
started.
cIf the outside opener handle is activated
while the cinching motor is engaged, the
cinching motor will disengage and release
the latch.
cThe keyfob button must be held for 0.5 sec-
ond before the door closes.
cThe switch on the rear pillar can only be used
to close the back door if the main ON/OFF
switch is ON.
Reverse:
The power back door will reverse direction imme-
diately during power open or power close if the
keyfob, overhead console or rear pillar switch is
pressed. A chime will sound to announce the
reversal.
Auto Reverse:
If an obstacle is detected during power open or
power close, a warning chime will sound and the
door will reverse direction and return to the full
open or full close position. If a second obstacle is
detected, the door motion will stop and the drive
motor will disengage. The back door will enter
manual mode.
A pinch strip is mounted on each side of the back
door. If an obstacle is detected by a pinch stripduring power close, the door will reverse direc-
tion and return to the full open position.
NOTE:
If the pinch strip is damaged or removed,
the power close function will not operate.
WARNING
There are some small distances immedi-
ately before the closed position which
cannot be detected. Make sure that all
passengers have their hands, etc., inside
the vehicle before closing the door.
Manual Mode:
If power operation is not available, the back door
may be operated manually. Power operation may
not be available if the main ON/OFF switch is in
the OFF position, if multiple obstacles have been
detected in a single power cycle, or if battery
voltage is low.
3-16Pre-driving checks and adjustments
ZREVIEW COPYÐ2005 Quest(van)
Owners ManualÐUSA_English(nna)
07/21/04Ðdebbie
X
Page 152 of 328
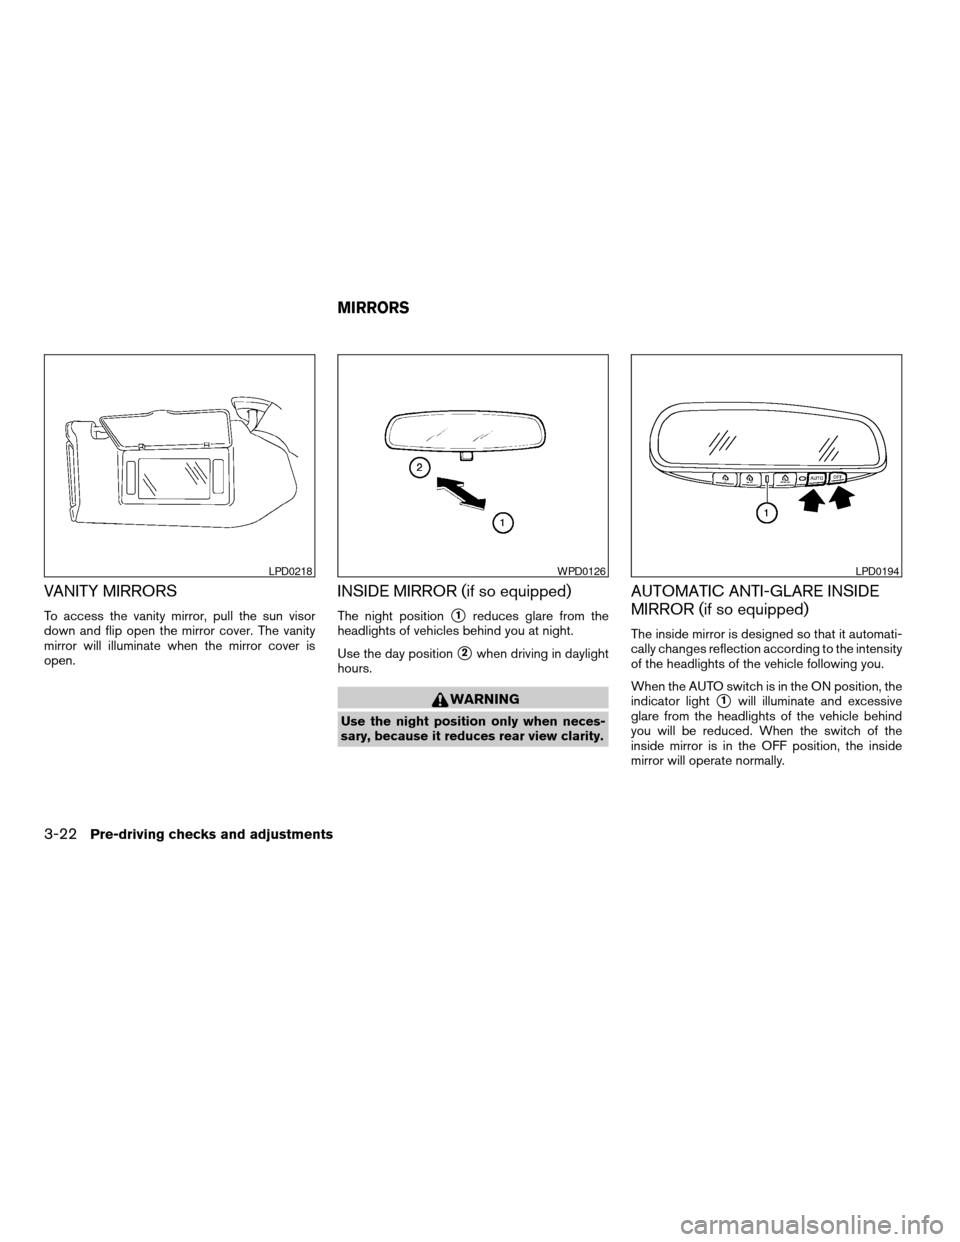
VANITY MIRRORS
To access the vanity mirror, pull the sun visor
down and flip open the mirror cover. The vanity
mirror will illuminate when the mirror cover is
open.
INSIDE MIRROR (if so equipped)
The night positions1reduces glare from the
headlights of vehicles behind you at night.
Use the day position
s2when driving in daylight
hours.
WARNING
Use the night position only when neces-
sary, because it reduces rear view clarity.
AUTOMATIC ANTI-GLARE INSIDE
MIRROR (if so equipped)
The inside mirror is designed so that it automati-
cally changes reflection according to the intensity
of the headlights of the vehicle following you.
When the AUTO switch is in the ON position, the
indicator light
s1will illuminate and excessive
glare from the headlights of the vehicle behind
you will be reduced. When the switch of the
inside mirror is in the OFF position, the inside
mirror will operate normally.
LPD0218WPD0126LPD0194
MIRRORS
3-22Pre-driving checks and adjustments
ZREVIEW COPYÐ2005 Quest(van)
Owners ManualÐUSA_English(nna)
07/21/04Ðdebbie
X
Page 165 of 328
NOTE:
If you change the horn beep or the lamp
flash feature with the keyfob, the mode will
not be changed with the display. Use the
keyfob to return to the previous mode and
re-enable the display control.
Auto relock time:
This option allows you to set the length of time
before the doors lock with the auto re-lock func-
tion.
Auto headlamp sensitivity:
This option allows you to set the sensitivity of the
autolights.
Auto headlamp off delay:
This option allows you to select the length of time
before the autolights turn off.
Speed sensing wiper interval:
This option allows you to turn on or turn off the
driving speed dependent intermittent wiper func-
tion.
Confirm reset settings:
This option allows you to reset all options to their
default settings.BUTTON
To change the display brightness, push
thebutton. Pushing the button again will
change the display to DAY or NIGHT display.
Then, adjust the brightness moving the joystick
right or left.
If no operation is done within 10 seconds, or if the
“PREV”button is pushed, the display will return
to the previous display.
WARNING
cPositioning of the heating or air condi-
tioning controls and display controls
should not be done while driving in or-
der that full attention may be given to
the driving operation.
cDo not disassemble or modify this sys-
tem. If you do, it may result in accidents,
fire, or electrical shock.
cDo not use this system if you notice any
abnormality, such as a frozen screen or
lack of sound. Continued use of the
system may result in accident, fire or
electric shock.cIn case you notice any foreign object in
the system hardware, spill liquid on it,
or notice smoke or smell coming from
it, stop using the system immediately
and contact your nearest NISSAN
dealer. Ignoring such conditions may
lead to accidents, fire or electrical
shock.
Display screen, heater, air conditioner and audio systems4-7
ZREVIEW COPYÐ2005 Quest(van)
Owners ManualÐUSA_English(nna)
07/21/04Ðdebbie
X
Page 215 of 328
CAUTION
cDo not use leaded gasoline. Deposits
from leaded gasoline will seriously re-
duce the three-way catalyst’s ability to
help reduce exhaust pollutants.
cKeep your engine tuned up. Malfunc-
tions in the ignition, fuel injection, or
electrical systems can cause overrich
fuel flow into the three-way catalyst,
causing it to overheat. Do not keep driv-
ing if the engine misfires, or if notice-
able loss of performance or other un-
usual operating conditions are
detected. Have the vehicle inspected
promptly by a NISSAN dealer.
cAvoid driving with an extremely low fuel
level. Running out of fuel could cause
the engine to misfire, damaging the
three-way catalyst.
cDo not race the engine while warming it
up.
cDo not push or tow your vehicle to start
the engine.
LOW TIRE PRESSURE WARNING
SYSTEM
This vehicle is equipped with the low tire pres-
sure warning system. It monitors tire pressure of
all tires except the spare. When the low tire
pressure warning light is lit, one or more of your
tires is significantly under-inflated. The system
also displays pressure of all tires (except the
spare tire) on the display screen by sending a
signal from a sensor that is installed in each
wheel.
The low tire pressure warning system will activate
only when the vehicle is driven at speeds above
20 MPH (32 km/h) . Also, this system may not
detect a sudden drop in tire pressure (for ex-
ample a flat tire while driving) .
Tire pressure rises and falls depending on the
heat caused by the vehicle’s operation and the
outside temperature. Low outside temperature
can lower the temperature of the air inside the tire
which can cause a lower tire inflation pressure.
This may cause the low tire pressure warning
light to illuminate.
If the warning light illuminates in low ambient
temperature as described above, check the tire
pressure for all four tires. Adjust the tire pressure
to the recommended COLD tire pressure shownon the Tire and Loading Information label to turn
the low tire pressure warning light OFF.
Frequently check the tire pressure information
display on the display screen and adjust pressure
of each tire properly. (The order of the tire pres-
sure figures displayed on the screen does not
correspond with the actual order of the tire posi-
tion.) See “Tire pressure information” in the “Dis-
play screen, heater, air conditioner and audio
systems” section for tire pressure monitor. If you
select the tire pressure information in the display
(if so equipped) , the FLAT TIRE warning mes-
sage will be displayed.
Low tire pressure warning
If the vehicle is being driven with low tire pressure
(lower than 28 psi, 193 kPa) , the low tire pres-
sure warning light comes on and the chime
sounds for about 10 seconds.
For additional information regarding the above
warning, see “Warning/indicator lights and au-
dible reminders” in the “Instruments and con-
trols” section.
Starting and driving5-3
ZREVIEW COPYÐ2005 Quest(van)
Owners ManualÐUSA_English(nna)
07/21/04Ðdebbie
X