run flat NISSAN ROGUE 2017 2.G Owners Manual
[x] Cancel search | Manufacturer: NISSAN, Model Year: 2017, Model line: ROGUE, Model: NISSAN ROGUE 2017 2.GPages: 547, PDF Size: 6.47 MB
Page 12 of 547
1. Front view camera (if so equipped)(P. 4-17)
2. Engine hood (P. 3-26)
3. Wiper and washer switch (P. 2-36) Wiper blades (P. 8-16)
4. Windshield (P. 8-16) Windshield-washer fluid (P. 8-10)
5. Power windows (P. 2-62)
6. Door locks (P. 3-5) NISSAN Intelligent Key®
(if so equipped) (P. 3-11)
NISSAN Jackknife key (if so equipped)
(P. 3-7)
Keys (P. 3-2)
7. Mirrors (P. 3-39) Side view camera (if so equipped)
(P. 4-17)
8. Tire pressure (P. 8-29) Flat tire (P. 6-3)
Tire chains (P. 8-29)
9. Fog light switch (if so equipped) (P. 2-39)
Daytime running light system (P. 2-39)
10. Headlight and turn signal switch (P. 2-39)
Replacing bulbs (P. 8-26)
Refer to the page number indicated in pa-
rentheses for operating details.LII2493
EXTERIOR FRONT
Illustrated table of contents0-3
Page 98 of 547
high-speed driving and abrupt braking. For addi-
tional information, refer to “Anti-lock Braking Sys-
tem (ABS) warning light” in this section.
Charge warning light
If this light comes on while the engine is running,
it may indicate the charging system is not func-
tioning properly. Turn the engine off and check
the generator belt. If the belt is loose, broken,
missing, or if the light remains on, have the sys-
tem checked. It is recommended that you visit a
NISSAN dealer for this service.
CAUTION
●Do not ground electrical accessories di-
rectly to the battery terminal. Doing so
will bypass the variable voltage control
system and the vehicle battery may not
charge completely. For additional infor-
mation, refer to “Variable voltage con-
trol system” in the “Do-it-yourself” sec-
tion of this manual.
● Do not continue driving if the generator
belt is loose, broken or missing.
Forward Emergency Braking
(FEB) system warning light (if
so equipped)
This light illuminates when the Forward Emer-
gency Braking system is set to OFF on the meter
display.
If the light illuminates when the Forward Emer-
gency Braking system is on, it may indicate that
the system is unavailable. For additional informa-
tion, refer to “Forward Emergency Braking (FEB)”
in the “Starting and driving” section of this
manual.
Forward Emergency Braking(FEB) with pedestrian
detection system warning light
(if so equipped)
This light comes on when the ignition switch is
placed in the ON position. It turns off after the
engine is started.
This light illuminates when the FEB system is set
to OFF in the vehicle information display.
If the light illuminates when the FEB system is on,
it may indicate that the system is unavailable. For
additional information, refer to “Forward Emer-
gency Braking (FEB) with pedestrian detection”
in the “Starting and driving” section of this
manual.
Low tire pressure warning light
Your vehicle is equipped with a Tire Pressure
Monitoring System (TPMS) that monitors the tire
pressure of all tires except the spare.
The low tire pressure warning light warns of low
tire pressure or indicates that the TPMS is not
functioning properly.
After the ignition switch is placed in the ON
position, this light illuminates for about 1 second
and turns off.
Low tire pressure warning
If the vehicle is being driven with low tire
pressure, the warning light will illuminate.
A “Tire Pressure Low Add Air” warning also
appears in the vehicle information display.
When the low tire pressure warning light
illuminates, you should stop and adjust the
tire pressure of all four tires to the recom-
mended COLD tire pressure shown on the
Tire and Loading Information label located
in the driver’s door opening. The low tire
pressure warning light does not automati-
cally turn off when the tire pressure is ad-
justed. After the tire is inflated to the rec-
ommended pressure, the vehicle must be
driven at speeds above 16 mph (25 km/h) to
activate the TPMS and turn off the low tire
Instruments and controls2-13
Page 117 of 547
all four tires to the recommended COLD tire
pressure shown on the Tire and Loading Informa-
tion label. For additional information, refer to
“Low tire pressure warning light” in this section
and “Tire Pressure Monitoring System (TPMS)”
in the “Starting and driving” section of this
manual.
Flat Tire – Visit dealer (if so equipped)
This warning appears when the low tire pressure
warning light in the meter illuminates and one or
more flat tires are detected while driving. A chime
also sounds for approximately 10 seconds.
Low Oil Pressure Stop Vehicle
This warning appears in the message area of the
vehicle information display if low oil pressure is
detected. This gauge is not designed to indicate
low oil level.The low oil pressure warning is
not designed to indicate a low oil level. Use
the dipstick to check the oil level. For additional
information, refer to “Engine oil” in the “Do-it-
yourself” section of this manual.
AWD Error: See Owner’s Manual (if so
equipped)
This warning appears when the all-wheel drive
system is not functioning properly while the en-
gine is running. AWD High Temp. Stop vehicle (if so
equipped)
This warning may appear while trying to free a
stuck vehicle due to increased oil temperature.
The driving mode may change to 2-Wheel Drive
(2WD) . If this warning is displayed, stop the
vehicle with the engine idling, as soon as it is safe
to do so. Then if the warning turns off, you can
continue driving.
Tire Size Incorrect: See Owner’s Manual
(if so equipped)
This warning may appear if there is a large differ-
ence between the diameters of the front and rear
wheels. Pull off the road in a safe area, with the
engine idling. Check that all the tire sizes are the
same, that the tire pressure is correct and that the
tires are not excessively worn.
Battery Voltage Low Charge Battery
This warning appears when the battery is low and
needs to be charged.
Shipping Mode On Push Storage Fuse
This warning may appear if the extended storage
switch is not pushed in. When this warning ap-
pears, push in the extended storage switch to
turn off the warning. For additional information,
refer to “Extended storage switch” in this section.Power will turn off to save the battery
This warning appears in the message area of the
vehicle information display after a period of time if
the shift lever has not moved from the P (Park)
position.
Power turned off to save the battery
This warning appears after the ignition switch is
automatically turned off to save the battery.
Reminder: Turn OFF Headlights
This warning appears when the headlights are
left in the ON position when exiting the vehicle.
Place the headlight switch in the OFF or AUTO
position. For additional information, refer to
“Headlight and turn signal switch” in this section.
Headlight System Error: See Owner’s
Manual (if so equipped)
This warning illuminates when there is an error
with the system. For additional information, refer
to “Headlight and turn signal switch” in this sec-
tion.
Timer Alert – Time for a driver break?
This indicator appears when the set time is
reached. The time can be set up to six hours. For
additional information on setting the timer, refer
to “Alarm” in this section.
2-32Instruments and controls
Page 129 of 547
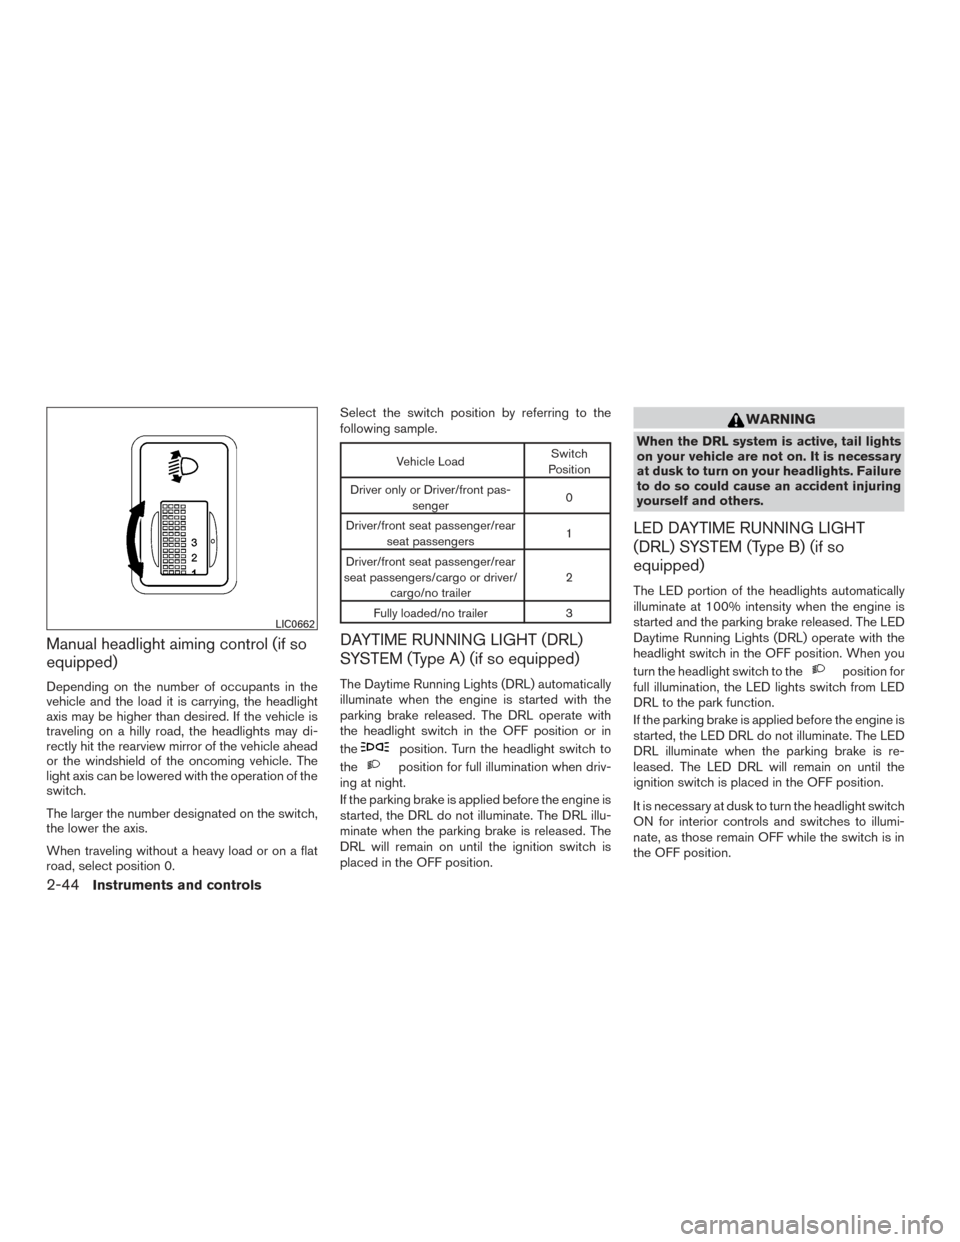
Manual headlight aiming control (if so
equipped)
Depending on the number of occupants in the
vehicle and the load it is carrying, the headlight
axis may be higher than desired. If the vehicle is
traveling on a hilly road, the headlights may di-
rectly hit the rearview mirror of the vehicle ahead
or the windshield of the oncoming vehicle. The
light axis can be lowered with the operation of the
switch.
The larger the number designated on the switch,
the lower the axis.
When traveling without a heavy load or on a flat
road, select position 0.Select the switch position by referring to the
following sample.
Vehicle Load
Switch
Position
Driver only or Driver/front pas- senger 0
Driver/front seat passenger/rear seat passengers 1
Driver/front seat passenger/rear
seat passengers/cargo or driver/ cargo/no trailer 2
Fully loaded/no trailer 3
DAYTIME RUNNING LIGHT (DRL)
SYSTEM (Type A) (if so equipped)
The Daytime Running Lights (DRL) automatically
illuminate when the engine is started with the
parking brake released. The DRL operate with
the headlight switch in the OFF position or in
the
position. Turn the headlight switch to
the
position for full illumination when driv-
ing at night.
If the parking brake is applied before the engine is
started, the DRL do not illuminate. The DRL illu-
minate when the parking brake is released. The
DRL will remain on until the ignition switch is
placed in the OFF position.
WARNING
When the DRL system is active, tail lights
on your vehicle are not on. It is necessary
at dusk to turn on your headlights. Failure
to do so could cause an accident injuring
yourself and others.
LED DAYTIME RUNNING LIGHT
(DRL) SYSTEM (Type B) (if so
equipped)
The LED portion of the headlights automatically
illuminate at 100% intensity when the engine is
started and the parking brake released. The LED
Daytime Running Lights (DRL) operate with the
headlight switch in the OFF position. When you
turn the headlight switch to the
position for
full illumination, the LED lights switch from LED
DRL to the park function.
If the parking brake is applied before the engine is
started, the LED DRL do not illuminate. The LED
DRL illuminate when the parking brake is re-
leased. The LED DRL will remain on until the
ignition switch is placed in the OFF position.
It is necessary at dusk to turn the headlight switch
ON for interior controls and switches to illumi-
nate, as those remain OFF while the switch is in
the OFF position.
LIC0662
2-44Instruments and controls
Page 316 of 547
WARNING
●The exhaust gas and the exhaust sys-
tem are very hot. Keep people, animals
or flammable materials away from the
exhaust system components.
● Do not stop or park the vehicle over
flammable materials such as dry grass,
waste paper or rags. They may ignite
and cause a fire.
CAUTION
● Do not use leaded gasoline. Deposits
from leaded gasoline will seriously re-
duce the three-way catalyst’s ability to
help reduce exhaust pollutants.
● Keep your engine tuned up. Malfunc-
tions in the ignition, fuel injection, or
electrical systems can cause over rich
fuel flow into the three-way catalyst,
causing it to overheat. Do not keep driv-
ing if the engine misfires, or if notice-
able loss of performance or other un-
usual operating conditions are
detected. Have the vehicle inspected
promptly. It is recommended that you
visit a NISSAN dealer for this service. ●
Avoid driving with an extremely low fuel
level. Running out of fuel could cause
the engine to misfire, damaging the
three-way catalyst.
● Do not race the engine while warming it
up.
● Do not push or tow your vehicle to start
the engine.
TIRE PRESSURE MONITORING
SYSTEM (TPMS)
Each tire, including the spare (if provided) ,
should be checked monthly when cold and in-
flated to the inflation pressure recommended by
the vehicle manufacturer on the vehicle placard
or tire inflation pressure label. (If your vehicle has
tires of a different size than the size indicated on
the vehicle placard or tire inflation pressure label,
you should determine the proper tire inflation
pressure for those tires.)
As an added safety feature, your vehicle has been
equipped with a Tire Pressure Monitoring System
(TPMS) that illuminates a low tire pressure telltale
when one or more of your tires is significantly
under-inflated. Accordingly, when the low tire
pressure telltale illuminates, you should stop and
check your tires as soon as possible, and inflate
them to the proper pressure. Driving on a signifi-
cantly under-inflated tire causes the tire to over- heat and can lead to tire failure. Under-inflation
also reduces fuel efficiency and tire tread life, and
may affect the vehicle’s handling and stopping
ability.
Please note that the TPMS is not a substitute for
proper tire maintenance, and it is the driver’s re-
sponsibility to maintain correct tire pressure, even if
under-inflation has not reached the level to trigger
illumination of the TPMS low tire pressure telltale.
Your vehicle has also been equipped with a
TPMS malfunction indicator to indicate when the
system is not operating properly. The TPMS mal-
function indicator is combined with the low tire
pressure telltale. When the system detects a
malfunction, the telltale will flash for approxi-
mately one minute and then remain continuously
illuminated. This sequence will continue upon
subsequent vehicle start-ups as long as the mal-
function exists. When the malfunction indicator is
illuminated, the system may not be able to detect
or signal low tire pressure as intended. TPMS
malfunctions may occur for a variety of reasons,
including the installation of replacement or alter-
nate tires or wheels on the vehicle that prevent
the TPMS from functioning properly. Always
check the TPMS malfunction telltale after replac-
ing one or more tires or wheels on your vehicle to
ensure that the replacement or alternate tires and
wheels allow the TPMS to continue to function
properly.
Starting and driving5-5
Page 329 of 547
●Make sure the area around the vehicle is
clear.
● Check fluid levels such as engine oil, cool-
ant, brake fluid, and windshield-washer fluid
as frequently as possible, or at least when-
ever you refuel.
● Check that all windows and lights are clean.
● Visually inspect tires for their appearance
and condition. Also check tires for proper
inflation.
● Check that all doors are closed.
● Position seat and adjust head
restraints/headrests.
● Adjust inside and outside mirrors.
● Fasten seat belts and ask all passengers to
do likewise.
● Check the operation of warning lights when
the ignition switch is placed in the ON posi-
tion. For additional information, refer to
“Warning lights, indicator lights and audible
reminders” in the “Instruments and controls”
section of this manual. 1. Apply the parking brake.
2. Move the shift lever to P (Park) or N (Neu-
tral) . P (Park) is recommended.
The shift lever cannot be moved out of
P (Park) and into any of the other gear
positions if the ignition key is turned to
the OFF position or if the key is re-
moved from the ignition switch.
The starter is designed not to operate if
the shift lever is in any of the driving
positions.
3. Crank the engine with your foot off the
accelerator pedal by turning the ignition
key to START. Release the key when the
engine starts. If the engine starts, but fails to
run, repeat the above procedure.
● If the engine is very hard to start in ex-
tremely cold weather or when restarting,
depress the accelerator pedal a little (ap-
proximately 1/3 to the floor) and hold it
and then crank the engine. Release the
key and the accelerator pedal when the
engine starts. ●
If the engine is very hard to start because
it is flooded, depress the accelerator
pedal all the way to the floor and hold it.
Crank the engine for five to six seconds.
After cranking the engine, release the ac-
celerator pedal. Crank the engine with
your foot off the accelerator pedal by
turning the ignition key to START. Release
the key when the engine starts. If the
engine starts, but fails to run, repeat the
above procedure.
CAUTION
Do not operate the starter for more than
15 seconds at a time. If the engine does
not start, turn the key off and wait ten
seconds before cranking again, otherwise
the starter could be damaged.
4. Allow the engine to idle for at least 30 sec- onds after starting. Do not race the engine
while warming it up. Drive at moderate
speed for a short distance first, especially in
cold weather.
BEFORE STARTING THE ENGINE STARTING THE ENGINE (models without NISSAN Intelligent Key®
system)
5-18Starting and driving
Page 409 of 547
●Keep your engine tuned up.
● Follow the recommended scheduled main-
tenance.
● Keep the tires inflated to the correct pres-
sure. Low tire pressure increases tire wear
and lowers fuel economy.
● Keep all the wheels in correct alignment.
Improper alignment increases tire wear and
lowers fuel economy.
● Use the recommended viscosity engine oil.
For additional information, refer to “Engine
oil and oil filter recommendations” in the
“Technical and consumer information” sec-
tion of this manual. If any malfunction occurs in the AWD system
while the engine is running, the master warning
light will come on.
The master warning light may illuminate while
trying to free a stuck vehicle due to high pow-
ertrain oil temperature. The driving mode may
change to 2WD. AUTO mode may change to
LOCK mode before the warning light illuminates.
If the master warning light illuminates during op-
eration, stop the vehicle with the engine idling in a
safe place immediately.
Then if the light turns off after a while, you can
continue driving.
A large difference between the diameters of the
front and rear wheels will make the warning light
illuminate. Pull off the road in a safe area and idle
the engine. Check that all tire sizes are the same,
tire pressure is correct, and the tires are not worn.
CAUTION
●
If the warning light remains on after the
above operation, have your vehicle
checked as soon as possible. It is rec-
ommended that you visit a NISSAN
dealer for this service. ●
If the warning light comes on while driv-
ing, there may be a malfunction in the
AWD system.
Reduce the vehicle speed and have your
vehicle checked as soon as possible. It
is recommended that you visit a
NISSAN dealer for this service.
● The powertrain may be damaged if you
continue driving with the warning light
illuminated.
● Never drive on dry, hard surface roads in
the LOCK mode, as this will overload
the powertrain and may cause a serious
malfunction.
WARNING
● For AWD equipped vehicles, do not at-
tempt to raise two wheels off the
ground and shift the transmission to
any drive or reverse position with the
engine running. Doing so may result in
drivetrain damage or unexpected ve-
hicle movement which could result in
serious vehicle damage or personal
injury.
INCREASING FUEL ECONOMY ALL-WHEEL DRIVE (AWD) (if so
equipped)
5-98Starting and driving
Page 424 of 547
6 In case of emergency
Hazard warning flasher switch......................6-2
Emergency engine shut off (Push-button ignition
models only) ......................................6-2
Flat tire ...........................................6-3
Tire Pressure Monitoring System (TPMS) ..........6-3
Run-flat tires (if so equipped) ....................6-4
Changing a flat tire .............................6-4 Jump starting
.................................... 6-11
Push starting ..................................... 6-13
If your vehicle overheats ........................... 6-13
Towing your vehicle ............................... 6-14
Towing recommended by NISSAN ..............6-15
Vehicle recovery (freeing a stuck vehicle) .........6-16
Page 426 of 547
TIRE PRESSURE MONITORING
SYSTEM (TPMS)
This vehicle is equipped with TPMS. It monitors
tire pressure of all tires except the spare. When
the low tire pressure warning light is lit, and the
“Tire Pressure Low — Add Air” (“Tire Pressure
Low — Visit Dealer” for vehicles equipped with
run-flat tires) warning appears in the vehicle in-
formation display, one or more of your tires is
significantly under-inflated. If equipped, the sys-
tem also displays pressure of all tires (except the
spare tire) on the display screen by sending a
signal from a sensor that is installed in each
wheel. If the vehicle is being driven with low tire
pressure, the TPMS will activate and warn you of
it by the low tire pressure warning light. This
system will activate only when the vehicle is
driven at speeds above 16 mph (25 km/h). For
additional information, refer to “Warning lights,
indicator lights and audible reminders” in the
“Instruments and controls” section and “Tire
Pressure Monitoring System (TPMS)” in the
“Starting and driving” section of this manual.
WARNING
●Radio waves could adversely affect
electric medical equipment. Those who
use a pacemaker should contact the
electric medical equipment manufac-
turer for the possible influences before
use.
● If the low tire pressure warning light
illuminates while driving, avoid sudden
steering maneuvers or abrupt braking,
reduce vehicle speed, pull off the road
to a safe location and stop the vehicle
as soon as possible. Driving with under-
inflated tires may permanently damage
the tires and increase the likelihood of
tire failure. Serious vehicle damage
could occur and may lead to an accident
and could result in serious personal in-
jury. Check the tire pressure for all four
tires. Adjust the tire pressure to the
recommended COLD tire pressure
shown on the Tire and Loading Informa-
tion label to turn the low tire pressure
warning light OFF. If the light still illu-
minates while driving after adjusting
the tire pressure, a tire may be flat or
the TPMS may be malfunctioning. If you have a flat tire, replace it with a spare
tire as soon as possible. If no tire is flat
and all tires are properly inflated, have
the vehicle checked. It is recommended
that you visit a NISSAN dealer for this
service.
● Since the spare tire is not equipped with
the TPMS, when mounted or a wheel is
replaced, tire pressure will not be indi-
cated, the TPMS will not function and
the low tire pressure warning light will
flash for approximately 1 minute. The
light will remain on after 1 minute. Have
your tires replaced and/or TPMS sys-
tem reset as soon as possible. It is rec-
ommended that you visit a NISSAN
dealer for these services.
● Replacing tires with those not originally
specified by NISSAN could affect the
proper operation of the TPMS.
● Do not inject any tire liquid or aerosol
tire sealant into the tires, as this may
cause a malfunction of the tire pressure
sensors.
FLAT TIRE
In case of emergency6-3
Page 427 of 547
RUN-FLAT TIRES (if so equipped)
Run-flat tires are those tires that can be used
temporarily if they are punctured. For additional
information, refer to “Run-flat tires” in “Do-it-
yourself” section of this manual.
For additional information, refer to the tire safety
information in the Warranty Information Booklet.
WARNING
●Although you can continue driving with
a punctured run-flat tire, remember that
vehicle handling stability is reduced,
which could lead to an accident and
personal injury. Also, driving a long dis-
tance at high speeds may damage the
tires.
● Do not drive at speeds above 50 mph
(80 km/h) and do not drive more than
approximately 93 miles (150 km) with a
punctured run-flat tire. The actual dis-
tance the vehicle can be driven on a flat
tire depends on outside temperature,
vehicle load, road conditions and other
factors.
● Drive safely at reduced speeds. Avoid
hard cornering or braking, which may
cause you to lose control of the vehicle. ●
If you detect any unusual sounds or
vibrations while driving with a punc-
tured run-flat tire, pull off the road to a
safe location and stop the vehicle as
soon as possible. The tire may be seri-
ously damaged and need to be
replaced.
CAUTION
● Never install tire chains on a punctured
run-flat tire, as this could damage your
vehicle.
● Avoid diving over any projection or pot-
hole, as the clearance between the ve-
hicle and the ground is smaller than
normal.
● Do not enter an automated car wash
with a punctured run-flat tire.
● Have the punctured tire inspected by a
NISSAN dealer or other authorized re-
pair shop. Replace the tire as soon as
possible if the tire is seriously
damaged.
CHANGING A FLAT TIRE
If you have a flat tire, follow the instructions be-
low:
Stopping the vehicle
1. Safely move the vehicle off the road and away from traffic.
2. Turn on the hazard warning flashers.
3. Park on a level surface and apply the parking brake. Move the shift lever to P (Park) .
4. Turn off the engine.
5. Raise the hood to warn other traffic and to signal professional road assistance person-
nel that you need assistance.
6. Have all passengers get out of the vehicle and stand in a safe place, away from traffic
and clear of the vehicle.
6-4In case of emergency