center console NISSAN ROGUE HYBRID 2017 2.G Owners Manual
[x] Cancel search | Manufacturer: NISSAN, Model Year: 2017, Model line: ROGUE HYBRID, Model: NISSAN ROGUE HYBRID 2017 2.GPages: 520
Page 32 of 520
1. Glove box (P. 2-49)
2. Map lights (P. 2-59)
3. Power panoramic moonroof(if so equipped) (P. 2-57)
4. Console box (P. 2-49)
5. Luggage hooks (P. 2-49)
6. Center armrest (2nd row) (P. 1-2)
7. Cup holders (P. 2-49)
8. Sun visors (P. 3-35)
Refer to the page number indicated in pa-
rentheses for operating details.
LII2518
PASSENGER COMPARTMENT
Illustrated table of contents0-5
Page 86 of 520
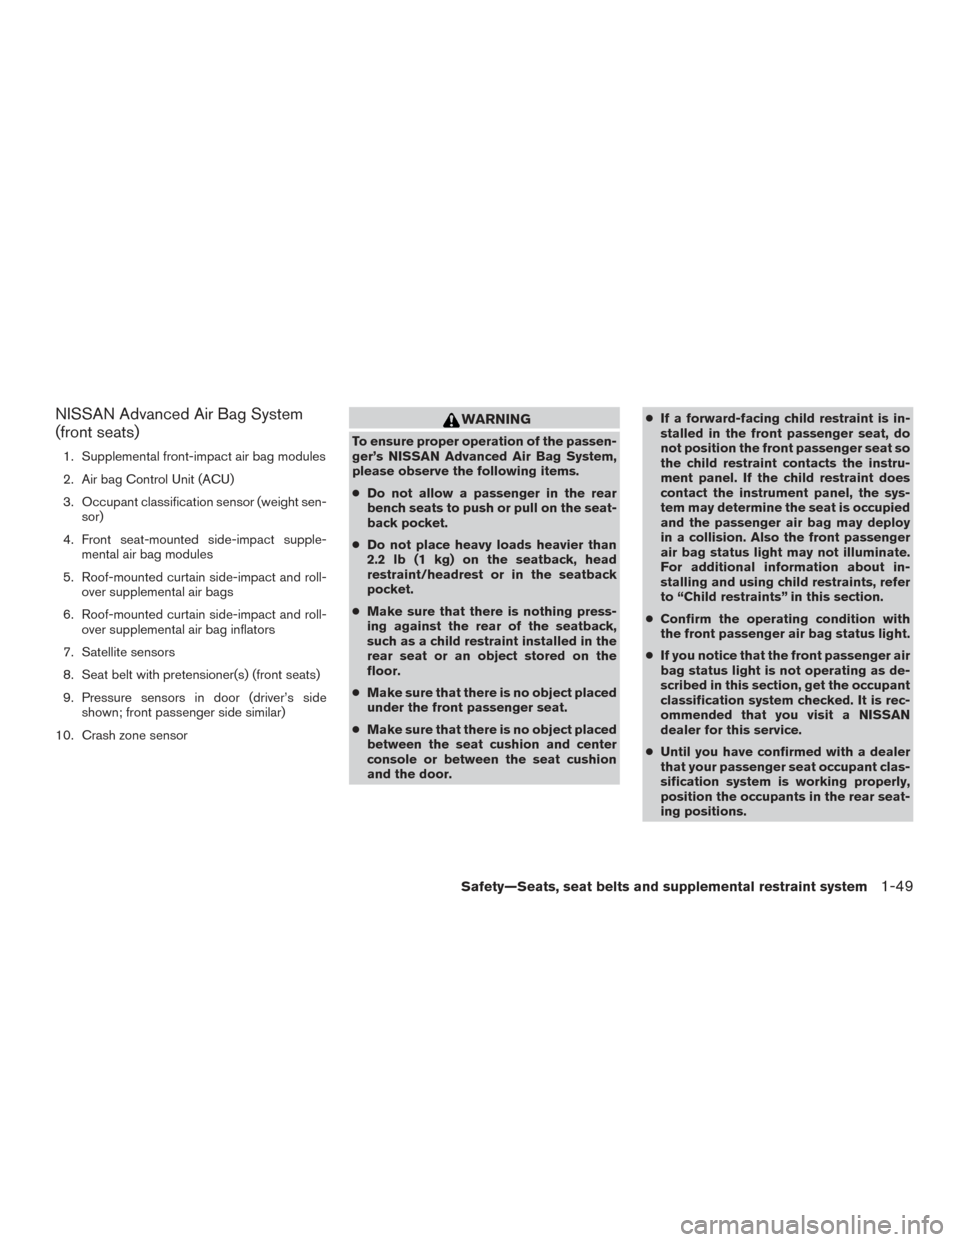
NISSAN Advanced Air Bag System
(front seats)
1. Supplemental front-impact air bag modules
2. Air bag Control Unit (ACU)
3. Occupant classification sensor (weight sen-sor)
4. Front seat-mounted side-impact supple- mental air bag modules
5. Roof-mounted curtain side-impact and roll- over supplemental air bags
6. Roof-mounted curtain side-impact and roll- over supplemental air bag inflators
7. Satellite sensors
8. Seat belt with pretensioner(s) (front seats)
9. Pressure sensors in door (driver’s side shown; front passenger side similar)
10. Crash zone sensor
WARNING
To ensure proper operation of the passen-
ger’s NISSAN Advanced Air Bag System,
please observe the following items.
● Do not allow a passenger in the rear
bench seats to push or pull on the seat-
back pocket.
● Do not place heavy loads heavier than
2.2 lb (1 kg) on the seatback, head
restraint/headrest or in the seatback
pocket.
● Make sure that there is nothing press-
ing against the rear of the seatback,
such as a child restraint installed in the
rear seat or an object stored on the
floor.
● Make sure that there is no object placed
under the front passenger seat.
● Make sure that there is no object placed
between the seat cushion and center
console or between the seat cushion
and the door. ●
If a forward-facing child restraint is in-
stalled in the front passenger seat, do
not position the front passenger seat so
the child restraint contacts the instru-
ment panel. If the child restraint does
contact the instrument panel, the sys-
tem may determine the seat is occupied
and the passenger air bag may deploy
in a collision. Also the front passenger
air bag status light may not illuminate.
For additional information about in-
stalling and using child restraints, refer
to “Child restraints” in this section.
● Confirm the operating condition with
the front passenger air bag status light.
● If you notice that the front passenger air
bag status light is not operating as de-
scribed in this section, get the occupant
classification system checked. It is rec-
ommended that you visit a NISSAN
dealer for this service.
● Until you have confirmed with a dealer
that your passenger seat occupant clas-
sification system is working properly,
position the occupants in the rear seat-
ing positions.
Safety—Seats, seat belts and supplemental restraint system1-49
Page 91 of 520
2. Make sure there are no objects on your lap.
3. Fasten the seat belt as outlined in the “Seatbelts” section of this manual. Front passen-
ger seat belt buckle status is monitored by
the occupant classification system, and is
used as an input to determine occupancy
status. So, it is highly recommended that the
front passenger fasten their seat belt.
4. Remain in this position for 30 seconds al- lowing the system to classify the front pas-
senger before the vehicle is put into motion.
5. Ensure proper classification by checking the front passenger air bag status light.
NOTE:
This vehicle’s occupant classification sen-
sor system generally keeps the classifica-
tion locked during driving, so it is important
that you confirm that the front passenger is
properly classified prior to driving. How-
ever, the occupant classification sensor
may recalculate the weight of the occupant
under some conditions (both while driving
and when stopped) , so front passenger
seat occupants should continue to remain
seated as outlined above. Troubleshooting
If you think the front passenger air bag status light
is incorrect:
1. If the light is ON with an adult occupying the front passenger seat:
● Occupant is a small adult — the air bag light
is functioning as intended. The front passen-
ger air bag is suppressed.
However, if the occupant is not a small adult, then
this may be due to the following conditions that
may be interfering with the weight sensors: ● Occupant is not sitting upright, leaning
against the seatback, and centered on the
seat cushion with his/her feet comfortably
extended to the floor.
● A child restraint or other object pressing
against the rear of the seatback.
● A rear passenger pushing or pulling on the
back of the front passenger seat.
● Forcing the front seat or seatback against an
object on the seat or floor behind it.
● An object placed under the front passenger
seat.
● An object placed between the seat cushion
and center console or between the seat
cushion and the door. If the vehicle is moving, please come to a stop
when it is safe to do so. Check and correct any of
the above conditions. Restart the vehicle and
wait 1 minute.
NOTE:
A system check will be performed during
which the front passenger air bag status
light will remain lit for about 7 seconds
initially.
If the light is still ON after this, the person should
be advised not to ride in the front passenger seat
and the vehicle should be checked as soon as
possible. It is recommended that you visit a
NISSAN dealer for this service.
2. If the light is OFF with a small adult, child or child restraint occupying the front passen-
ger seat.
This may be due to the following conditions
that may be interfering with the weight sen-
sors:
● Small adult or child is not sitting upright,
leaning against the seatback, and centered
on the seat cushion with his/her feet com-
fortably extended to the floor.
● The child restraint is not properly installed,
as outlined in the “Child restraints” section of
this manual.
1-54Safety—Seats, seat belts and supplemental restraint system
Page 92 of 520
●An object weighing over 2.2 lbs (1 kg) hang-
ing on the seat or placed in the seatback
pocket.
● A child restraint or other object pressing
against the rear of the seatback.
● A rear passenger pushing or pulling on the
back of the front passenger seat.
● Forcing the front seat or seatback against an
object on the seat or floor behind it.
● An object placed under the front passenger
seat.
● An object placed between the seat cushion
and center console.
If the vehicle is moving, please come to a stop
when it is safe to do so. Check and correct any of
the above conditions. Restart the vehicle and
wait 1 minute.
NOTE:
A system check will be performed during
which the front passenger air bag status
light will remain lit for about 7 seconds
initially. If the light is still OFF after this, the small adult,
child or child restraint should be repositioned in
the rear seat and the vehicle should be checked
as soon as possible. It is recommended that you
visit a NISSAN dealer for this service.
3. If the light is OFF with no front passenger and no objects on the front passenger seat,
the vehicle should be checked. It is recom-
mended that you visit a NISSAN dealer as
soon as possible.
Other supplemental front-impact air bag
precautions
WARNING
● Do not place any objects on the steering
wheel pad or on the instrument panel.
Also, do not place any objects between
any occupant and the steering wheel or
instrument panel. Such objects may be-
come dangerous projectiles and cause
injury if the front air bags inflate.
● Immediately after inflation, several
front air bag system components will be
hot. Do not touch them; you may se-
verely burn yourself. ●
No unauthorized changes should be
made to any components or wiring of
the supplemental air bag system. This is
to prevent accidental inflation of the
supplemental air bag or damage to the
supplemental air bag system.
● Do not make unauthorized changes to
your vehicle’s electrical system, sus-
pension system or front end structure.
This could affect proper operation of
the front air bag system.
● Tampering with the front air bag system
may result in serious personal injury.
Tampering includes changes to the
steering wheel and the instrument
panel assembly by placing material
over the steering wheel pad and above
the instrument panel or by installing
additional trim material around the air
bag system.
● Removing or modifying the front pas-
senger seat may affect the function of
the air bag and result in serious per-
sonal injury.
Safety—Seats, seat belts and supplemental restraint system1-55
Page 145 of 520
The all-wheel drive (AWD) lock switch is located
on the instrument panel. The AWD LOCK indica-
tor light will illuminate when the switch is turned
on. For additional information, refer to “Warning
lights, indicator lights and audible reminders” in
this section and “AWD Lock Switch Operations”
in the “Starting and driving” section of this
manual.
Each time you push the switch, the AWD mode
will switch: AUTO→LOCK→AUTO. The E-call (SOS) system switch is used in com-
bination with a NissanConnectSMServices sub-
scription to call for assistance in case of an
emergency.
Pushing the switch will (with a paid subscription)
reach a Response Specialist that will provide
assistance based on the situation described by
the vehicle’s occupant. For additional informa-
tion, or to enroll your vehicle, refer to
www.NissanUSA.com/connect,
www.Nissan.ca/NissanConnect, or
www.Nissan.ca/NissanConnect/fr or call
855–426–6628.12V OUTLETS
The power outlets are for powering electrical
accessories such as cellular telephones. They
are rated at 12 volt, 120W (10A) maximum.
The front and center console power outlets are
powered only when the ignition switch is in the
ON position.
LIC2645LIC3357
Instrument Panel
LIC2615
ALL-WHEEL DRIVE (AWD) LOCK
SWITCH (if so equipped) E-CALL (SOS) SWITCH (if so
equipped)POWER OUTLETS
2-46Instruments and controls
Page 146 of 520
NOTE:● When the ignition switch is in the OFF posi-
tion, the front and center console power
outlets stop delivering power one minute
after the door is opened and stays open.
● If the door remains closed after the ignition is
placed in the OFF position, the front and
center console power outlets continue to
deliver power until the accessory power
timer has elapsed.
● The cargo area power outlet(s) continues to
deliver power normally.
CAUTION
●The outlet and plug may be hot during
or immediately after use.
● Only certain power outlets are designed
for use with a cigarette lighter unit. Do
not use any other power outlet for an
accessory lighter. It is recommended
that you visit a NISSAN dealer for addi-
tional information.
● Do not use with accessories that exceed
a 12 volt, 120W (10A) power draw. ●
Do not use double adapters or more
than one electrical accessory.
● Use power outlets with the engine run-
ning to avoid discharging the vehicle’s
12–volt battery.
● Avoid using power outlets when the air
conditioner, headlights or rear window
defroster is on.
● Before inserting or disconnecting a
plug, be sure the electrical accessory
being used is turned off.
Center Console
LIC2616
Cargo Area
LIC2617
Instruments and controls2-47
Page 261 of 520
CAUTION
●To avoid damage and loss of function
when using a USB device, note the fol-
lowing precautions.
● Do not force the USB device into the
USB port. Inserting the USB device
tilted or up-side-down into the port may
damage the port. Make sure that the
USB device is connected correctly into
the USB port.
● Do not grab the USB port cover (if so
equipped) when pulling the USB device
out of the port. This could damage the
port and the cover.
● Do not leave the USB cable in a place
where it can be pulled unintentionally.
Pulling the cable may damage the port.
Refer to your device manufacturer’s owner infor-
mation regarding the proper use and care of the
device.
The USB port is located on the center console
beneath the heater and air conditioner controls.
Insert the USB device into the connection port.
When a compatible storage device is plugged
into the connection port, compatible audio files
on the storage device can be played through the vehicle’s audio system. The port is illuminated for
better visibility when the headlight switch is in the
ON position.
Audio file operation
MEDIA button
Place the ignition switch in the ON position and
press the MEDIA button to switch to the USB
input mode. If a CD is playing or another audio
source is plugged in through the AUX IN jack
located in the center console, the MEDIA button
toggles between the three sources.
Play information
Information about the audio files being played
can be displayed on the display screen of the
vehicle’s audio system. Depending on how the
audio files are encoded, information such as
Folder, Song and Artist will be displayed.
The track number and number of total tracks in
the folder are displayed on the screen as well.
SEEK/CAT (Reverse or
Fast Forward) buttons
Press and hold the SEEK/CAT buttons
orfor 1.5 seconds while an audio file on
the USB device is playing to reverse or fast
forward the track being played. The track plays at
an increased speed while reversing or fast for- warding. When the button is released, the audio
file returns to normal play speed.
SEEK/CAT buttons
Press the SEEK/CAT button
while an au-
dio file on the USB device is playing to return to
the beginning of the current track. Press the
SEEK/CAT button
several times to skip
backward several tracks.
Press the SEEK/CAT button
while an au-
dio file on the USB device is playing to advance
one track. Press the SEEK/CAT button
several times to skip forward several tracks. If the
last track in a folder on the USB device is
skipped, the first track of the next folder is played.
RDM (random) button
When the RDM (random) button is pressed while
an audio file on the USB device is playing, the
play pattern can be changed as follows:
All Random →1 Folder Random →OFF
All Random: all tracks on the USB device will be
played randomly.
1 Folder Random: all tracks in the current folder
will be played randomly.
OFF: No random play pattern is applied. The
indicator on the display will turn off.
4-58Monitor, climate, audio, phone and voice recognition systems
Page 262 of 520
The current play pattern of the USB device is
displayed on the screen unless no pattern is
applied.
RPT (repeat) button
When the RPT (repeat) button is pressed while
an audio file on the USB device is playing, the
play pattern can be changed as follows:
1 Folder Repeat→1 Track Repeat →OFF
1 Track Repeat: the current track will be re-
peated.
1 Folder Repeat: the current folder will be re-
peated.
OFF: No repeat play pattern is applied. The indi-
cator on the display will turn off.
The current play pattern of the USB device is
displayed on the screen unless no pattern is
applied.
TUNE/SCROLL knob
If there are multiple folders with audio files on the
USB device, turn the TUNE/SCROLL knob to
change folders. Turn the knob to the left to skip
back a folder. Turn the knob to the right to skip
ahead a folder. If there is only one folder of audio
files on the USB device, turning the
TUNE/SCROLL knob in either direction will re-
turn to the first track on the USB device.
USB (Universal Serial Bus)
CONNECTION PORT (models with
Navigation System) (if so equipped)
Connecting a device to the USB
Connection Port
WARNING
Do not connect, disconnect, or operate the
USB device while driving. Doing so can be
a distraction. If distracted you could lose
control of your vehicle and cause an acci-
dent or serious injury.
CAUTION
● To avoid damage and loss of function
when using a USB device, note the fol-
lowing precautions.
● Do not force the USB device into the
USB port. Inserting the USB device
tilted or up-side-down into the port may
damage the port. Make sure that the
USB device is connected correctly into
the USB port.
● Do not grab the USB port cover (if so
equipped) when pulling the USB device
out of the port. This could damage the
port and the cover.
● Do not leave the USB cable in a place
where it can be pulled unintentionally.
Pulling the cable may damage the port.
For additional information, refer to your device
manufacturer’s owner information regarding the
proper use and care of the device.
The USB port is located on the center console
beneath the heater and air conditioner controls.
Insert the USB device into the connection port.
When a compatible storage device is plugged
into the connection port, compatible audio files
on the storage device can be played through the
vehicle’s audio system.
LHA2929
Monitor, climate, audio, phone and voice recognition systems4-59
Page 264 of 520
iPod®* PLAYER OPERATION
WITHOUT NAVIGATION SYSTEM (if
so equipped)
Connecting iPod®
WARNING
Do not connect, disconnect, or operate the
USB device while driving. Doing so can be
a distraction. If distracted you could lose
control of your vehicle and cause an acci-
dent or serious injury.
CAUTION
●Do not force the USB device into the
USB port. Inserting the USB device
tilted or up-side-down into the port may
damage the port. Make sure that the
USB device is connected correctly into
the USB port.
● Do not grab the USB port cover (if so
equipped) when pulling the USB device
out of the port. This could damage the
port and the cover.
● Do not leave the USB cable in a place
where it can be pulled unintentionally.
Pulling the cable may damage the port.
For additional information, refer to your device
manufacturer’s owner information regarding the
proper use and care of the device.
To connect an iPod® to the vehicle so that the
iPod® can be controlled with the audio system
controls and display screen, use the USB con-
nection port located on the center console below
the heater and air conditioner controls. Connect
the iPod®-specific end of the cable to the iPod®
and the USB end of the cable to the USB con-
nection port on the vehicle. If your iPod® sup-
ports charging via a USB connection, its battery
will be charged while connected to the vehicle
with the ignition switch in the ON position. The port is illuminated for better visibility when the
headlight switch is in the ON position.
While connected to the vehicle, the iPod® can
only be operated by the vehicle audio controls.
To disconnect the iPod® from the vehicle, re-
move the USB end of the cable from the USB
connection port on the vehicle, then remove the
cable from the iPod®.
* iPod® is a trademark of Apple Inc., registered in
the U.S. and other countries.
Compatibility
The following models are compatible:
● iPod® Classic - 5th Generation (firmware
version 1.3.0 or later)
● iPod® Classic - 6th Generation (firmware
version 2.0.1 or later)
● iPod® Classic - 7th Generation (firmware
version 2.0.4 or later)
● iPod® nano - 1st generation (firmware ver-
sion 1.3.1 or later)
● iPod® nano - 2nd generation (firmware ver-
sion 1.1.3 or later)
● iPod® nano - 3rd generation (firmware ver-
sion 1.1.3 or later)LHA2929
Monitor, climate, audio, phone and voice recognition systems4-61
Page 266 of 520
iPod®* PLAYER OPERATION WITH
NAVIGATION SYSTEM (if so
equipped)
Connecting iPod®
WARNING
Do not connect, disconnect, or operate the
USB device while driving. Doing so can be
a distraction. If distracted you could lose
control of your vehicle and cause an acci-
dent or serious injury.
CAUTION
●Do not force the USB device into the
USB port. Inserting the USB device
tilted or up-side-down into the port may
damage the port. Make sure that the
USB device is connected correctly into
the USB port.
● Do not grab the USB port cover (if so
equipped) when pulling the USB device
out of the port. This could damage the
port and the cover.
● Do not leave the USB cable in a place
where it can be pulled unintentionally.
Pulling the cable may damage the port.
For additional information, refer to your device
manufacturer’s owner information regarding the
proper use and care of the device.
To connect an iPod® to the vehicle so that the
iPod® can be controlled with the audio system
controls and display screen, use the USB con-
nection port located on the center console below
the heater and air conditioner controls. Connect
the iPod®-specific end of the cable to the iPod®
and the USB end of the cable to the USB con-
nection port on the vehicle. If your iPod® sup-
ports charging via a USB connection, its battery
will be charged while connected to the vehicle
with the ignition switch in the ON position. The port is illuminated for better visibility when the
headlight switch is in the ON position.
While connected to the vehicle, the iPod® can
only be operated by the vehicle audio controls.
To disconnect the iPod® from the vehicle, re-
move the USB end of the cable from the USB
connection port on the vehicle, then remove the
cable from the iPod®.
* iPod® is a trademark of Apple Inc., registered in
the U.S. and other countries.
Compatibility
The following models are compatible:
● iPod® Classic 5th generation (firmware ver-
sion 1.3.0 or later)
● iPod® Classic 6th generation (firmware ver-
sion 2.0.1 or later)
● iPod® Classic 7th generation (firmware ver-
sion 2.0.4 or later)
● iPod® Touch 2nd generation (firmware ver-
sion 4.2.1 or later)*
● iPod® Touch 3rd generation (firmware ver-
sion 5.1 or later)
● iPod® Touch 4th generation (firmware ver-
sion 5.1 or later)LHA2929
Monitor, climate, audio, phone and voice recognition systems4-63