engine oil NISSAN ROGUE SPORT 2017 Owners Manual
[x] Cancel search | Manufacturer: NISSAN, Model Year: 2017, Model line: ROGUE SPORT, Model: NISSAN ROGUE SPORT 2017Pages: 512, PDF Size: 3.33 MB
Page 18 of 512

JVC1070X
MR20DD ENGINE MODEL
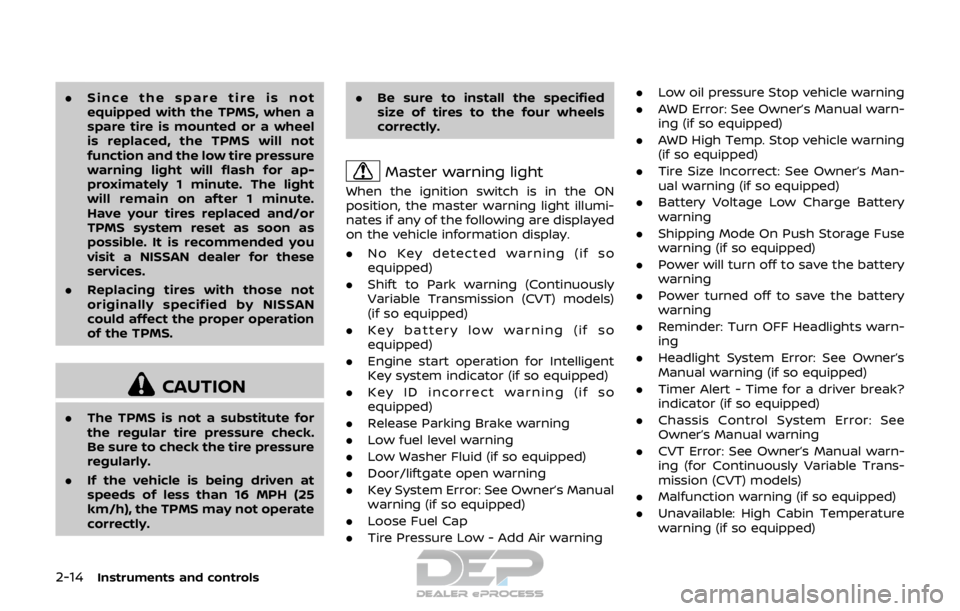
1. Engine coolant reservoir (P.8-5)
2. Engine oil filler cap (P.8-6)
3. Brake and clutch* fluid reservoir (P.8-9)
4. Air cleaner (P.8-15)
5. Window washer fluid reservoir (P.8-10)
6. Drive belt (P.8-13)7. Engine oil dipstick (P.8-6)
8. Battery (P.8-11)
9. Fuse/fusible link box (P.8-18)
*: For Manual Transmission (MT) Model
Illustrated table of contents0-9
ENGINE COMPARTMENT
Page 91 of 512

2-14Instruments and controls
.Since the spare tire is not
equipped with the TPMS, when a
spare tire is mounted or a wheel
is replaced, the TPMS will not
function and the low tire pressure
warning light will flash for ap-
proximately 1 minute. The light
will remain on after 1 minute.
Have your tires replaced and/or
TPMS system reset as soon as
possible. It is recommended you
visit a NISSAN dealer for these
services.
. Replacing tires with those not
originally specified by NISSAN
could affect the proper operation
of the TPMS.
CAUTION
.The TPMS is not a substitute for
the regular tire pressure check.
Be sure to check the tire pressure
regularly.
. If the vehicle is being driven at
speeds of less than 16 MPH (25
km/h), the TPMS may not operate
correctly. .
Be sure to install the specified
size of tires to the four wheels
correctly.
Master warning light
When the ignition switch is in the ON
position, the master warning light illumi-
nates if any of the following are displayed
on the vehicle information display.
.No Key detected warning (if so
equipped)
. Shift to Park warning (Continuously
Variable Transmission (CVT) models)
(if so equipped)
. Key battery low warning (if so
equipped)
. Engine start operation for Intelligent
Key system indicator (if so equipped)
. Key ID incorrect warning (if so
equipped)
. Release Parking Brake warning
. Low fuel level warning
. Low Washer Fluid (if so equipped)
. Door/liftgate open warning
. Key System Error: See Owner’s Manual
warning (if so equipped)
. Loose Fuel Cap
. Tire Pressure Low - Add Air warning .
Low oil pressure Stop vehicle warning
. AWD Error: See Owner’s Manual warn-
ing (if so equipped)
. AWD High Temp. Stop vehicle warning
(if so equipped)
. Tire Size Incorrect: See Owner’s Man-
ual warning (if so equipped)
. Battery Voltage Low Charge Battery
warning
. Shipping Mode On Push Storage Fuse
warning (if so equipped)
. Power will turn off to save the battery
warning
. Power turned off to save the battery
warning
. Reminder: Turn OFF Headlights warn-
ing
. Headlight System Error: See Owner’s
Manual warning (if so equipped)
. Timer Alert - Time for a driver break?
indicator (if so equipped)
. Chassis Control System Error: See
Owner’s Manual warning
. CVT Error: See Owner’s Manual warn-
ing (for Continuously Variable Trans-
mission (CVT) models)
. Malfunction warning (if so equipped)
. Unavailable: High Cabin Temperature
warning (if so equipped)
Page 100 of 512

is pushed, only the corresponding
door is unlocked. All the doors can
be unlocked if the door handle re-
quest switch is pushed again within 1
minute. When this item is turned to off,
all the doors will be unlocked when
the door handle request switch is
pushed once. From the “Locking”
menu, select “Selective Unlock”. Use
the OK
to activate or deactivate this
function.
. Auto Door Unlock
The “Auto Door Unlock” feature allows
the customer to customize the auto
door unlock options.
— Ignition OFF
— Shift to Park (for Continuously Vari-
able Transmission (CVT) models)
— Off
. Answer Bk. Horn (if so equipped)
When the answer back horn is on, the
horn will chirp and the hazard indica-
tors will flash twice when locking the
vehicle with the Intelligent Key or
remote keyless entry function.
Wipers:
. Speed Dependent
The “Speed Dependent” feature can be
activated or deactivated. From the
“Wipers” menu, select “Speed Depen-
dent”. Use the OK
to turn this feature ON or OFF.
. Reverse Link
The “Reverse Link” wiper feature can
be set to be ON or OFF. From the
“Wipers” menu, select “Reverse Link”.
Use the OK
to turn this feature ON
or OFF.
. Drip wipe
The “Drip wipe” feature can be set to
be ON or OFF. From the “Wipers” menu,
select “Drip wipe”. Use the OK
to turn
this feature ON or OFF.
Remote start (if so equipped):
The “Remote start” feature allows user to
turn the remote engine start on or off.
When turned on, the engine can be
restarted remotely. For additional infor-
mation, refer to “Remote engine start”
(P.3-22).
JVI1670X
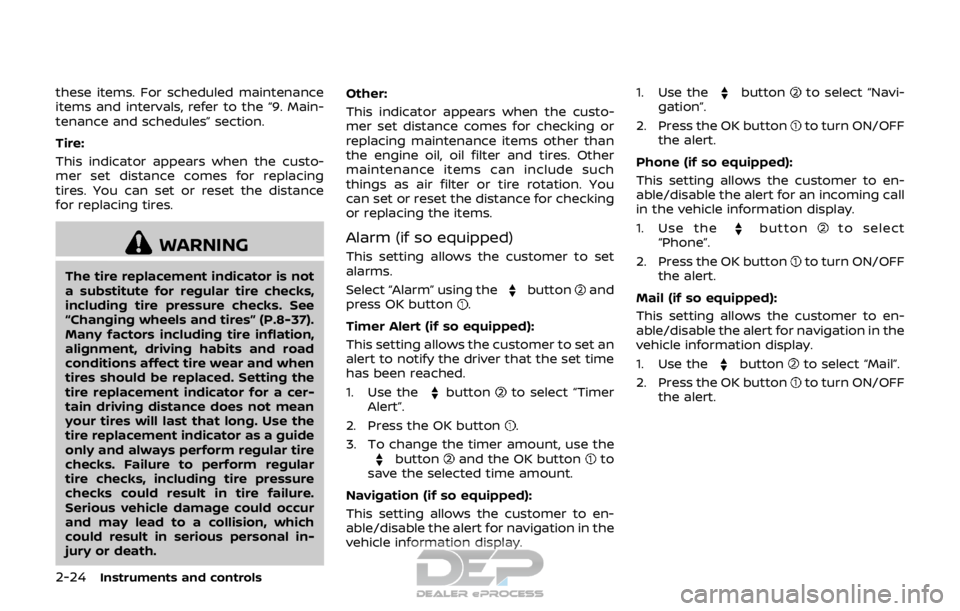
1. Oil and Filter
2. Tire
3. Other
Maintenance
The maintenance mode allows you to set
alerts for the reminding of maintenance
intervals. To change an item:
Select “Maintenance” using the
switchand press OK.
Oil and Filter:
This indicator appears when the custo-
mer set distance comes for changing the
engine oil and filter. You can set or reset
the distance for checking or replacing
Instruments and controls2-23
Page 101 of 512

2-24Instruments and controls
these items. For scheduled maintenance
items and intervals, refer to the “9. Main-
tenance and schedules” section.
Tire:
This indicator appears when the custo-
mer set distance comes for replacing
tires. You can set or reset the distance
for replacing tires.
WARNING
The tire replacement indicator is not
a substitute for regular tire checks,
including tire pressure checks. See
“Changing wheels and tires” (P.8-37).
Many factors including tire inflation,
alignment, driving habits and road
conditions affect tire wear and when
tires should be replaced. Setting the
tire replacement indicator for a cer-
tain driving distance does not mean
your tires will last that long. Use the
tire replacement indicator as a guide
only and always perform regular tire
checks. Failure to perform regular
tire checks, including tire pressure
checks could result in tire failure.
Serious vehicle damage could occur
and may lead to a collision, which
could result in serious personal in-
jury or death.Other:
This indicator appears when the custo-
mer set distance comes for checking or
replacing maintenance items other than
the engine oil, oil filter and tires. Other
maintenance items can include such
things as air filter or tire rotation. You
can set or reset the distance for checking
or replacing the items.
Alarm (if so equipped)
This setting allows the customer to set
alarms.
Select “Alarm” using the
buttonand
press OK button.
Timer Alert (if so equipped):
This setting allows the customer to set an
alert to notify the driver that the set time
has been reached.
1. Use the
buttonto select “Timer
Alert”.
2. Press the OK button
.
3. To change the timer amount, use the
buttonand the OK buttonto
save the selected time amount.
Navigation (if so equipped):
This setting allows the customer to en-
able/disable the alert for navigation in the
vehicle information display. 1. Use the
buttonto select “Navi-
gation”.
2. Press the OK button
to turn ON/OFF
the alert.
Phone (if so equipped):
This setting allows the customer to en-
able/disable the alert for an incoming call
in the vehicle information display.
1. Use the
buttonto select
“Phone”.
2. Press the OK button
to turn ON/OFF
the alert.
Mail (if so equipped):
This setting allows the customer to en-
able/disable the alert for navigation in the
vehicle information display.
1. Use the
buttonto select “Mail”.
2. Press the OK button
to turn ON/OFF
the alert.
Page 106 of 512

9. Low fuel level warning
This warning appears when the fuel level
in the fuel tank is getting low. Refuel as
soon as it is convenient, preferably before
the fuel gauge reaches 0 (Empty). There
will be a small reserve of fuel in the tank
when the fuel gauge needle reaches 0
(Empty).
10. Low Washer Fluid warning (if so
equipped)
This warning appears when the window
washer fluid is at a low level. Add window
washer fluid as necessary. For additional
information, refer to “Window washer
fluid” (P.8-10).
11. Door/liftgate open warning
This warning appears if any of the doors
and/or the liftgate are open or not closed
securely. The vehicle icon indicates which
door or the liftgate is open on the display.
12. Key System Error: See Owner’s
Manual warning (if so equipped)
This warning appears if there is a mal-
function in the Intelligent Key system.
If this warning appears while the engine is
stopped, the engine cannot be started. If
this warning appears while the engine is
running, the vehicle can be driven. How-
ever, it is recommended that you visit aNISSAN dealer for repair as soon as
possible.
13. Loose Fuel Cap warning
This warning appears when the fuel-filler
cap is not tightened correctly after the
vehicle has been refueled. For additional
information, refer to “Fuel-filler cap” (P.3-
27).
14. Tire Pressure Low — Add Air
warning
This warning appears when the low tire
pressure warning light in the meter
illuminates and low tire pressure is de-
tected. The warning appears each time
the ignition switch is placed in the ON
position as long as the low tire pressure
warning light remains illuminated. If this
warning appears, stop the vehicle and
adjust the pressure to the recommended
COLD tire pressure shown on the Tire and
Loading Information label. (See “Low tire
pressure warning light” (P.2-13) and “Tire
Pressure Monitoring System (TPMS)” (P.5-
5).)
15. Low Oil Pressure Stop Vehicle
warning
This warning appears if low engine oil
pressure is detected. If the warning ap-
pears during normal driving, pull off the
road in a safe area and stop the engine
immediately. It is recommended that you
call a NISSAN dealer.
The low oil pressure warning is not
designed to indicate a low oil level. Use
the dipstick to check the oil level. (See
“Engine oil” (P.8-6).)
CAUTION
Running the engine with the engine
oil pressure warning displayed could
cause serious damage to the engine.
16. AWD Error: See Owner’s Manual
warning (if so equipped)
This warning appears when the All-Wheel
Drive (AWD) system is not functioning
properly while the engine is running.
Reduce vehicle speed and have the sys-
tem checked. It is recommended that you
visit a NISSAN dealer for this service. See
“Intelligent 4x4” (P.5-100).
Instruments and controls2-29
Page 107 of 512

2-30Instruments and controls
17. AWD High Temp. Stop vehicle
warning (if so equipped)
This warning may appear while trying to
free a stuck vehicle due to increased oil
temperature. The driving mode may
change to Two-Wheel Drive (2WD). If this
warning is displayed, stop the vehicle with
the engine idling, as soon as it is safe to
do so. Then if the warning turns off, you
can continue driving. See “Intelligent 4x4”
(P.5-100).
18. Tire Size Incorrect: See Owner’s
Manual warning (if so equipped)
This warning may appear if there is a
large difference between the diameters of
the front and rear wheels and tires. Pull
off the road in a safe area, with the engine
idling. Check that all the tire sizes are the
same, that the tire pressure is correct and
that the tires are not excessively worn.
See “Intelligent 4x4” (P.5-100).
19. Battery Voltage Low Charge
Battery warning
This warning appears when the battery
voltage is low and the battery needs to be
charged.
20. Shipping Mode On Push Sto-
rage Fuse warning (if so equipped)
This warning may appear if the extended
storage fuse switch is not pushed in
(switched on). When this warning ap-
pears, push in (switch on) the extended
storage fuse switch to turn off the warn-
ing. For more information, see “Extended
storage fuse switch” (P.8-21).
21. Power will turn off to save the
battery warning
This warning appears after the ignition
switch is in the ON position for a certain
period of time.
22. Power turned off to save the
battery warning
This warning appears after the ignition
switch is automatically turned OFF to
save the battery.
23. Reminder: Turn OFF Headlights
warning
This warning appears when the driver
side door is opened with the headlight
switch is left ON and the ignition switch is
placed in the OFF or LOCK position. Place
the headlight switch in OFF or AUTO (if so
equipped) position. For additional infor-
mation, see “Headlight and turn signal
switch” (P.2-43).
24. Headlight System Error: See
Owner’s Manual warning (if so
equipped)
This warning appears if the LED head-
lights are malfunctioning. Have the sys-
tem checked. It is recommended that you
visit a NISSAN dealer for this service.
25. Timer Alert — Time for a driver
break? indicator
This indicator appears when the set “Time
for a driver break?” indicator activates.
You can set the time for up to 6 hours.
26. Chassis Control System Error:
See Owner’s Manual warning
This warning appears if the chassis con-
trol module detects an error in the
chassis control system. Have the system
checked. It is recommended that you visit
a NISSAN dealer for this service. (See
“Chassis control” (P.5-110).)
27. Cruise control indicator (if so
equipped)
This indicator shows the cruise control
system status. The status is shown by the
color.
See “Cruise control” (P.5-60) for details.
Page 302 of 512

JVS0404X
INTELLIGENT KEY BATTERY DIS-
CHARGE
If the battery of the Intelligent Key is
discharged, or environmental conditions
interfere with the Intelligent Key opera-
tion, start the engine according to the
following procedure:
1. Move the shift lever to the P (Park)position (for CVT models) or the shift
lever to the N (Neutral) position (for MT
models).
2. Firmly apply the foot brake.
3. Touch the ignition switch with the Intelligent Key as illustrated. (A chime
will sound.) 4. Push the ignition switch while depres-
sing the brake pedal within 10 sec-
onds after the chime sounds. The
engine will start.
After step 3 is performed, when the
ignition switch is pushed without depres-
sing the brake pedal, the ignition switch
position will change to ACC.
NOTE:
. When the ignition switch is pushed
to the ON position or the engine is
started by the above procedures, the
“Key Battery Low” warning appears
(on the Vehicle information display)
even if the Intelligent Key is inside
the vehicle. This is not a malfunction.
To turn off the warning, touch the
ignition switch with the Intelligent
Key again.
. If the “Key Battery Low” warning
appears (on the Vehicle information
display), replace the battery as soon
as possible. (See “Intelligent Key
battery replacement” (P.8-23).) .
Make sure the area around the vehicle
is clear.
. Check fluid levels such as engine oil,
coolant, brake fluid, and window
washer fluid as frequently as possible,
or at least whenever you refuel.
. Check that all windows and lights are
clean.
. Visually inspect tires for their appear-
ance and condition. Also check tires
for proper inflation.
. Lock all doors.
. Position seat and adjust head re-
straints.
. Adjust inside and outside mirrors.
. Fasten seat belts and ask all passen-
gers to do likewise.
. Check the operation of warning lights
when the ignition switch is placed in
the ON position. (See “Warning lights,
indicator lights and audible remin-
ders” (P.2-10).)
Starting and driving5-17
BEFORE STARTING THE ENGINE
Page 309 of 512

5-24Starting and driving
place and allow the transmission to
return to normal operation, or have it
repaired if necessary.
Adaptive Shift Control (ASC)
The Adaptive Shift Control automatically
operates when the transmission is in the
“D” (Drive) position and selects an appro-
priate gear depending on the road con-
ditions such as uphill or downhill.
Control on uphill and curving roads:
A low gear is maintained that suits the
degree of the slope to allow smooth
driving with a small number of shifts.
Control on downhill roads:
The Adaptive Shift Control shifts to a low
gear that suits the degree of the slope
when the accelerator pedal is depressed,
and uses the engine braking to help
driving in the downhill.
Control on winding roads:
A low gear is maintained on continuous
curves that involve repeated acceleration
and deceleration, so that smooth accel-
eration is available instantly when the
accelerator pedal is depressed.NOTE:
.
Adaptive Shift Control may not op-
erate when the transmission oil
temperature is low immediately
after the start of driving or when it
is very hot.
. During some driving situations, hard
braking for example, the Adaptive
Shift Control may automatically op-
erate. The transmission may auto-
matically shift to a lower gear for
engine braking. This increases en-
gine speed but not vehicle speed.
Vehicle speed is controlled by the
accelerator pedal when the vehicle
is in the Adaptive Shift Control
mode.
. When the Adaptive Shift Control
operates, the transmission some-
times maintains a lower gear for a
longer period of time than when
Adaptive Shift Control is not operat-
ing. Engine speed will be higher for a
specific vehicle speed while Adap-
tive Shift Control is operating than
when Adaptive Shift Control is not
operating.
JVS0392X
Shift lock release
If the battery charge is low or discharged,
the shift lever may not be moved from the
P (Park) position even with the brake
pedal depressed and the shift lever but-
ton pushed.
To move the shift lever, perform the
following procedure:
1. Place the ignition switch in the OFF or
LOCK position.
2. Apply the parking brake.
3. Remove the shift lock release cover (shown in the illustration above) using
a suitable tool.
Page 385 of 512

5-100Starting and driving
7. Avoid idling..Shutting off your engine when safefor stops exceeding 30-60 seconds
saves fuel and reduces emissions.
8. Buy an automated pass for toll roads.
.Automated passes permit drivers to use special lanes to maintain cruis-
ing speed through the toll and
avoid stopping and starting.
9. Winter warm up.
.Limit idling time to minimize impact to fuel economy.
.Vehicles typically need no morethan 30 seconds of idling at start-
up to effectively circulate the en-
gine oil before driving.
.Your vehicle will reach its ideal
operating temperature more
quickly while driving versus idling.
10. Keeping your vehicle cool.
.Park your vehicle in a covered parking area or in the shade when-
ever possible.
.When entering a hot vehicle, open- ing the windows will help to reduce
the inside temperature faster, re-
sulting in reduced demand on your
A/C system. .
Keep your engine tuned up.
. Follow the recommended scheduled
maintenance.
. Keep the tires inflated to the correct
pressure. Low tire pressure increases
tire wear and lowers fuel economy.
. Keep the wheels in correct alignment.
Improper alignment increases tire
wear and lowers fuel economy.
. Use the recommended viscosity en-
gine oil. (See “Engine oil and oil filter
recommendation” (P.10-5).) If any malfunction occurs in the Intelligent
4x4 system while the engine is running,
warning messages appear in the vehicle
information display.
INCREASING FUEL ECONOMY INTELLIGENT 4X4 (if so equipped)
Page 386 of 512

JVS1120X
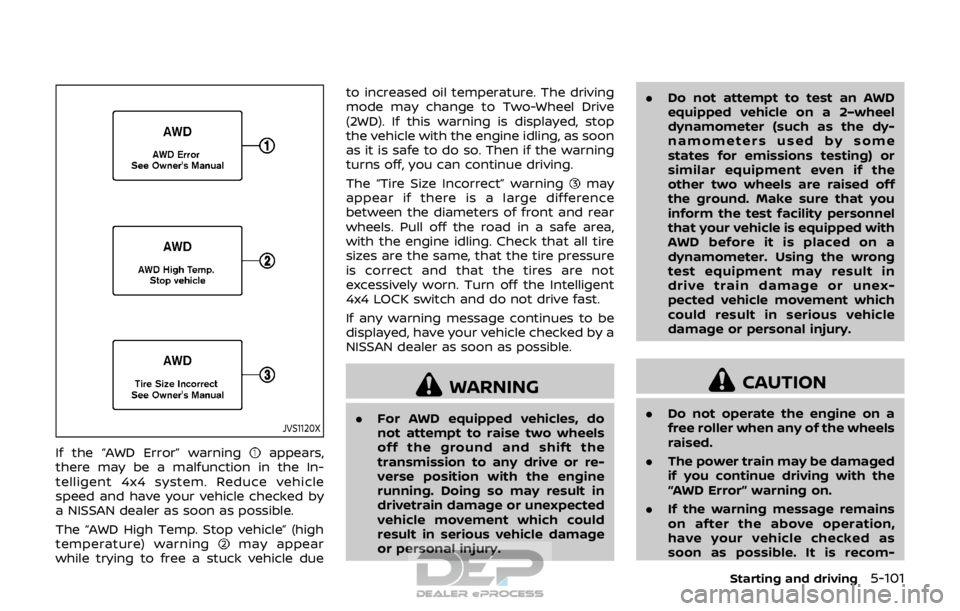
If the “AWD Error” warningappears,
there may be a malfunction in the In-
telligent 4x4 system. Reduce vehicle
speed and have your vehicle checked by
a NISSAN dealer as soon as possible.
The “AWD High Temp. Stop vehicle” (high
temperature) warning
may appear
while trying to free a stuck vehicle due to increased oil temperature. The driving
mode may change to Two-Wheel Drive
(2WD). If this warning is displayed, stop
the vehicle with the engine idling, as soon
as it is safe to do so. Then if the warning
turns off, you can continue driving.
The “Tire Size Incorrect” warning
may
appear if there is a large difference
between the diameters of front and rear
wheels. Pull off the road in a safe area,
with the engine idling. Check that all tire
sizes are the same, that the tire pressure
is correct and that the tires are not
excessively worn. Turn off the Intelligent
4x4 LOCK switch and do not drive fast.
If any warning message continues to be
displayed, have your vehicle checked by a
NISSAN dealer as soon as possible.
WARNING
. For AWD equipped vehicles, do
not attempt to raise two wheels
off the ground and shift the
transmission to any drive or re-
verse position with the engine
running. Doing so may result in
drivetrain damage or unexpected
vehicle movement which could
result in serious vehicle damage
or personal injury. .
Do not attempt to test an AWD
equipped vehicle on a 2–wheel
dynamometer (such as the dy-
namometers used by some
states for emissions testing) or
similar equipment even if the
other two wheels are raised off
the ground. Make sure that you
inform the test facility personnel
that your vehicle is equipped with
AWD before it is placed on a
dynamometer. Using the wrong
test equipment may result in
drive train damage or unex-
pected vehicle movement which
could result in serious vehicle
damage or personal injury.
CAUTION
.Do not operate the engine on a
free roller when any of the wheels
raised.
. The power train may be damaged
if you continue driving with the
“AWD Error” warning on.
. If the warning message remains
on after the above operation,
have your vehicle checked as
soon as possible. It is recom-
Starting and driving5-101