maintenance NISSAN ROGUE SPORT 2020 Owners Manual
[x] Cancel search | Manufacturer: NISSAN, Model Year: 2020, Model line: ROGUE SPORT, Model: NISSAN ROGUE SPORT 2020Pages: 492, PDF Size: 2.02 MB
Page 1 of 492
2020 ROGUE SPORT
OWNER’S MANUAL
and MAINTENANCE INFORMATION
For your safety, read carefully and keep in this vehicle.
Page 2 of 492
WARNING
Operating, servicing and main-
taining a passenger vehicle or
off-highway motor vehicle can
expose you to chemicals in-
cluding engine exhaust, carbon
monoxide, phthalates, and
lead, which are known to the
State of California to cause
cancer and birth defects or
other reproductive harm. To
minimize exposure, avoid
breathing exhaust, do not idle
the engine except as neces-
sary, service your vehicle in a
well-ventilated area and wear
gloves or wash your hands
frequently when servicing your
vehicle. For more information
go to www.P65Warnings.ca.
gov/passenger-vehicle.
This manual was prepared to help you
understand the operation and mainte-
nance of your vehicle so that you may
enjoy many miles of driving pleasure.
Please read through this manual before
operating your vehicle.
A separate Warranty Information Book-
let explains details about the warranties
covering your vehicle. Additionally, a
separate Customer Care/Lemon Law
Booklet (U.S. only) will explain how to
resolve any concerns you may have
with your vehicle, as well as clarify your
rights under your state’s lemon law.
In addition to factory installed options,
your vehicle may also be equipped with
additional accessories installed by NISSAN
or by your NISSAN dealer prior to delivery.
It is important that you familiarize your-
self with all disclosures, warnings, cau-
tions and instructions concerning proper
use of such accessories prior to operating
the vehicle and/or accessory. It is recom-
mended you see a NISSAN dealer for
details concerning the particular acces-
sories with which your vehicle is
equipped.
Your NISSAN dealer knows your vehicle
best. When you require any service or
have any questions, we will be glad to
assist you with the extensive resources
available to us.READ FIRST — THEN DRIVE SAFELY
Before driving your vehicle, read your
Owner’s Manual carefully. This will ensure
familiarity with controls and maintenance
requirements, assisting you in the safe
operation of your vehicle.
WARNING
IMPORTANT SAFETY INFORMATION
REMINDERS!
Follow these important driving rules
to help ensure a safe and comforta-
ble trip for you and your passengers!
.NEVER drive under the influence
of alcohol or drugs.
. ALWAYS observe posted speed
limits and never drive too fast
for conditions.
. ALWAYS give your full attention to
driving and avoid using vehicle
features or taking other actions
that could distract you.
. ALWAYS use your seat belts and
appropriate child restraint sys-
tems. Pre-teen children should
be seated in the rear seat.
. ALWAYS provide information
about the proper use of vehicle
CALIFORNIA PROPOSITION
65 WARNINGForeword
Page 7 of 492

Illustrated table of contents0
Safety — Seats, seat belts and supplemental restraint
system1
Instruments and controls
Pre-driving checks and adjustments
Monitor, heater, air conditioner, audio and phone
systems
Starting and driving
In case of emergency
Appearance and care
Do-it-yourself
Maintenance and schedules
Technical and consumer information
2
3
4
5
6
7
8
9
10
Table of
Contents
Index11
Page 19 of 492

1 Safety — Seats, seat belts and supple-mental restraint system
Seats ........................................................................\
............................... 1-3
Front seats ........................................................................\
.......... 1-4
Rear seats ........................................................................\
............ 1-7
Armrest (if so equipped) ................................................... 1-8
Head restraints/headrests .................................................... 1-8 Adjustable head
restraint/headrest components ................................ 1-9
Non-adjustable head
restraint/headrest components ................................ 1-9
Remove ........................................................................\
............... 1-10
Install ........................................................................\
..................... 1-10
Adjust ........................................................................\
.................... 1-10
Seat belts ........................................................................\
................. 1-12
Precautions on seat belt usage .............................. 1-12
Seat belt warning light and chime ....................... 1-14
Pregnant women ................................................................ 1-15
Injured persons ..................................................................... 1-15
Three-point type seat belt with retractor ...... 1-15
Seat belt extenders ........................................................... 1-18
Seat belt maintenance ................................................... 1-18
Child safety ........................................................................\
............. 1-19 Infants ........................................................................\
.................. 1-19
Small children ........................................................................\
1-20
Larger children ...................................................................... 1-20 Child restraints ........................................................................\
... 1-21
Precautions on child restraints ............................. 1-22
Lower Anchors and Tethers for CHildren
(LATCH) system .................................................................. 1-24
Rear-facing child restraint installation
using LATCH ........................................................................\
. 1-26
Rear-facing child restraint installation
using the seat belts ........................................................ 1-28
Forward-facing child restraint installation
using LATCH ........................................................................\
. 1-31
Forward-facing child restraint installation
using the seat belts ........................................................ 1-34
Booster seats ....................................................................... 1-38
Supplemental Restraint System (SRS) ..................... 1-42 Precautions on SRS ........................................................ 1-42
NISSAN Advanced Air Bag System
(front seats) ........................................................................\
... 1-48
Driver and passenger supplemental knee
air bag ........................................................................\
............... 1-57
Front and rear outboard seat-mounted
side-impact supplemental air bag and
roof-mounted curtain side-impact and
rollover supplemental air bag systems .......... 1-59
Seat belts with pretensioners (front and
rear outboard seats) ...................................................... 1-61
Page 36 of 492
1-18Safety — Seats, seat belts and supplemental restraint system
shoulder belt may vary depending on the
model.
WARNING
.After adjustment, release the ad-
justment button and try to move
the shoulder belt anchor up and
down to make sure it is securely
fixed in position.
. The shoulder belt anchor height
should be adjusted to the posi-
tion best for you. Failure to do so
may reduce the effectiveness of
the entire restraint system and
increase the chance or severity of
injury in an accident.
SEAT BELT EXTENDERS
If, because of body size or driving position,
it is not possible to properly fit the lap/
shoulder belt and fasten it, an extender
that is compatible with the installed seat
belts is available that can be purchased.
The extender adds approximately 8 in
(200 mm) of length and may be used for
either the driver or front passenger seat-
ing position. It is recommended you visit a
NISSAN dealer for assistance with pur-
chasing an extender if an extender is
required.
WARNING
.It is recommended that only
NISSAN seat belt extenders, made
by the same company which
made the original equipment seat
belts, be used with NISSAN seat
belts.
. Adults and children who can use
the standard seat belt should not
use an extender. Such unneces-
sary use could result in serious
personal injury in the event of an
accident.
. Never use seat belt extenders to
install child restraints. If the child
restraint is not secured properly,
the child could be seriously in-
jured or killed in a collision or a
sudden stop.
SEAT BELT MAINTENANCE
.To clean the seat belt webbing, apply
a mild soap solution or any solution
recommended for cleaning upholstery
or carpets. Then wipe with a cloth and
allow the seat belts to dry in the
shade. Do not allow the seat belts to
retract until they are completely dry. .
If dirt builds up in the shoulder belt
guide of the seat belt anchors, the
seat belts may retract slowly. Wipe the
shoulder belt guide with a clean, dry
cloth.
. Periodically check to see that the
seat belt and the metal components,
such as buckles, tongues, retractors,
flexible wires and anchors, work prop-
erly. If loose parts, deterioration, cuts
or other damage on the webbing is
found, the entire seat belt assembly
should be replaced.
Page 81 of 492
.The supplemental air bag warning
light remains on after approximately
7 seconds.
. The supplemental air bag warning
light flashes intermittently.
. The supplemental air bag warning
light does not come on at all.
Under these conditions, the air bag and/
or pretensioner systems may not operate
properly. They must be checked and
repaired. It is recommended you visit a
NISSAN dealer for this service.
WARNING
If the supplemental air bag warning
light is on, it could mean that the
front air bag, knee air bag, side air
bag, curtain air bag and/or preten-
sioner systems will not operate in an
accident. To help avoid injury to
yourself or others, have your vehicle
checked as soon as possible. It is
recommended you visit a NISSAN
dealer for this service.
REPAIR AND REPLACEMENT PRO-
CEDURE
The front air bags, knee air bags, side air
bags, curtain air bags and pretensioners
are designed to activate on a one-time-
only basis. As a reminder, unless it is
damaged, the supplemental air bag
warning light will remain illuminated after
inflation has occurred. These systems
should be repaired and/or replaced as
soon as possible. It is recommended you
visit a NISSAN dealer for this service.
When maintenance work is required on
the vehicle, the front air bags, knee air
bags, side air bags, curtain air bags and
pretensioners and related parts should be
pointed out to the person performing the
maintenance. The ignition switch should
always be in the LOCK position when
working under the hood or inside the
vehicle.
WARNING
. Once a front air bag, knee air bag,
side air bag or curtain air bag has
inflated, the air bag module will
not function again and must be
replaced. Additionally, the acti-
vated pretensioners must also
be replaced. The air bag module and pretensioner should be re-
placed. It is recommended you
visit a NISSAN dealer for this
service. However, the air bag
modules and pretensioner sys-
tem cannot be repaired.
. The front air bag, knee air bag,
side air bag and curtain air bag
systems, and pretensioner sys-
tem should be inspected if there
is any damage to the front end or
side portion of the vehicle. It is
recommended you visit a NISSAN
dealer for this service.
. If you need to dispose of a sup-
plemental air bag or pretensioner
or scrap the vehicle, it is recom-
mended you visit a NISSAN deal-
er. Correct supplemental air bag
and pretensioner system dispo-
sal procedures are set forth in the
appropriate NISSAN Service Man-
ual. Incorrect disposal procedures
could cause personal injury.
. If there is an impact to your
vehicle from any direction, your
Occupant Classification Sensor
(OCS) should be checked to verify
it is still functioning correctly. It is
recommended that you visit a
NISSAN dealer for this service.
The OCS should be checked even
Safety — Seats, seat belts and supplemental restraint system1-63
Page 99 of 492
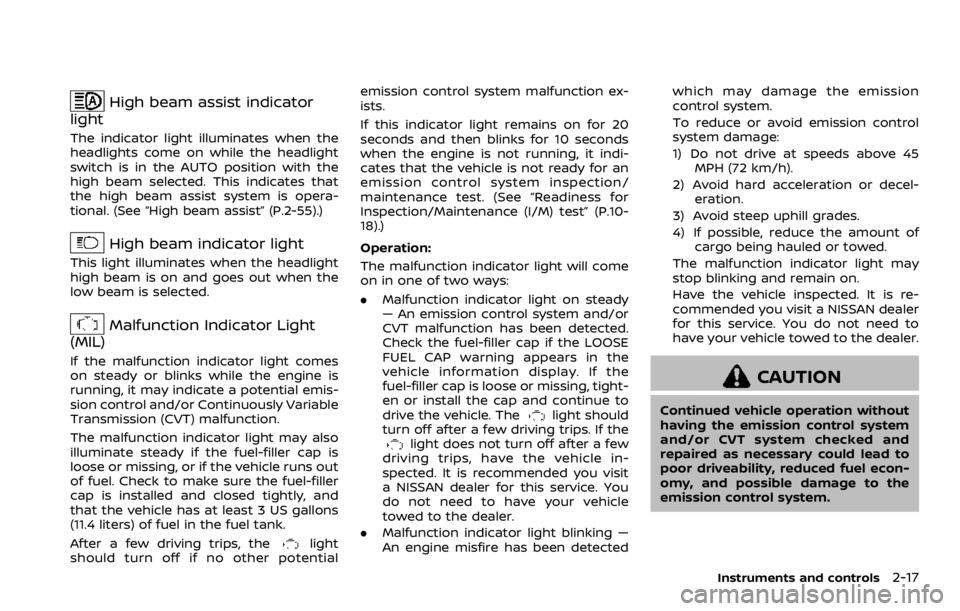
High beam assist indicator
light
The indicator light illuminates when the
headlights come on while the headlight
switch is in the AUTO position with the
high beam selected. This indicates that
the high beam assist system is opera-
tional. (See “High beam assist” (P.2-55).)
High beam indicator light
This light illuminates when the headlight
high beam is on and goes out when the
low beam is selected.
Malfunction Indicator Light
(MIL)
If the malfunction indicator light comes
on steady or blinks while the engine is
running, it may indicate a potential emis-
sion control and/or Continuously Variable
Transmission (CVT) malfunction.
The malfunction indicator light may also
illuminate steady if the fuel-filler cap is
loose or missing, or if the vehicle runs out
of fuel. Check to make sure the fuel-filler
cap is installed and closed tightly, and
that the vehicle has at least 3 US gallons
(11.4 liters) of fuel in the fuel tank.
After a few driving trips, the
light
should turn off if no other potential emission control system malfunction ex-
ists.
If this indicator light remains on for 20
seconds and then blinks for 10 seconds
when the engine is not running, it indi-
cates that the vehicle is not ready for an
emission control system inspection/
maintenance test. (See “Readiness for
Inspection/Maintenance (I/M) test” (P.10-
18).)
Operation:
The malfunction indicator light will come
on in one of two ways:
.
Malfunction indicator light on steady
— An emission control system and/or
CVT malfunction has been detected.
Check the fuel-filler cap if the LOOSE
FUEL CAP warning appears in the
vehicle information display. If the
fuel-filler cap is loose or missing, tight-
en or install the cap and continue to
drive the vehicle. The
light should
turn off after a few driving trips. If the
light does not turn off after a few
driving trips, have the vehicle in-
spected. It is recommended you visit
a NISSAN dealer for this service. You
do not need to have your vehicle
towed to the dealer.
. Malfunction indicator light blinking —
An engine misfire has been detected which may damage the emission
control system.
To reduce or avoid emission control
system damage:
1) Do not drive at speeds above 45
MPH (72 km/h).
2) Avoid hard acceleration or decel- eration.
3) Avoid steep uphill grades.
4) If possible, reduce the amount of cargo being hauled or towed.
The malfunction indicator light may
stop blinking and remain on.
Have the vehicle inspected. It is re-
commended you visit a NISSAN dealer
for this service. You do not need to
have your vehicle towed to the dealer.
CAUTION
Continued vehicle operation without
having the emission control system
and/or CVT system checked and
repaired as necessary could lead to
poor driveability, reduced fuel econ-
omy, and possible damage to the
emission control system.
Instruments and controls2-17
Page 102 of 492

2-20Instruments and controls
JVI1566X
HOW TO USE THE VEHICLE INFOR-
MATION DISPLAY
The vehicle information display can be
changed using the buttons OK,,, andlocated on the
steering wheel.
OK - change or select an item in the
vehicle information display
- navigate through the items in vehi-
cle information display
- go back to the previous menu- change from one display screen
to the next (i.e. trip, Fuel economy)
STARTUP DISPLAY
When the ignition switch is placed in the
ON position, the vehicle information dis-
play may display the following screens if
the vehicle is equipped with them:
. Home
. Drive Computer — Average Speed-Trip
(Distance & Time)-Fuel Economy
. Compass or Navigation
. Audio
. ProPILOT Assist
. Driving Aids
. Tire Pressures
. 4x4–i
. Chassis Control
. Warnings
. Settings
Warnings will only display if there are any
present. For more information on warn-
ings and indicators, see “Vehicle informa-
tion display warnings and indicators” (P.2-
31).
To control what items display in the
vehicle information display, see “Settings”
(P.2-20).
SETTINGS
The setting mode allows you to change
the information displayed in the vehicle
information display:
. Driver Assistance
. Clock
. Meter Settings
. Vehicle Settings
. Maintenance
. Alarm (if so equipped)
. Tire Pressures
. Unit
. Language
. Factory Reset
Driver Assistance
To change the status, warnings or turn on
or off any of the systems/warnings dis-
played in the “Driver Assistance” menu,
use the
buttonsto select and the
OKto change a menu item:
. Driving Aids
. Parking Aids (if so equipped)
. Chassis Control (if so equipped)
. Driver Attention (if so equipped)
. Speed Limit Sign (if so equipped)
Driving Aids:
To change the status, warnings or turn on
or off any of the systems/warnings dis-
Page 107 of 492
Maintenance
The maintenance mode allows you to set
alerts for the reminding of maintenance
intervals. To change an item:
Select “Maintenance” using the
switchand press OK.
Oil and Filter:
This indicator appears when the custo-
mer set distance comes for changing the
engine oil and filter. You can set or reset
the distance for checking or replacing
these items. For scheduled maintenance
items and intervals, refer to the “9. Main-
tenance and schedules” section.
Tire:
This indicator appears when the custo-
mer set distance comes for replacing
tires. You can set or reset the distance
for replacing tires.
WARNING
The tire replacement indicator is not
a substitute for regular tire checks,
including tire pressure checks. See
“Changing wheels and tires” (P.8-37).
Many factors including tire inflation,
alignment, driving habits and road
conditions affect tire wear and when
tires should be replaced. Setting the tire replacement indicator for a cer-
tain driving distance does not mean
your tires will last that long. Use the
tire replacement indicator as a guide
only and always perform regular tire
checks. Failure to perform regular
tire checks, including tire pressure
checks could result in tire failure.
Serious vehicle damage could occur
and may lead to a collision, which
could result in serious personal in-
jury or death.
Other:
This indicator appears when the custo-
mer set distance comes for checking or
replacing maintenance items other than
the engine oil, oil filter and tires. Other
maintenance items can include such
things as air filter or tire rotation. You
can set or reset the distance for checking
or replacing the items.
Alarm (if so equipped)
This setting allows the customer to set
alarms.
Select “Alarm” using the
buttonand
press OK button.
Timer Alert (if so equipped):
This setting allows the customer to set an
alert to notify the driver that the set time
has been reached.
1. Use the
buttonto select “Timer
Alert”.
2. Press the OK button
.
3. To change the timer amount, use the
buttonand the OK buttonto
save the selected time amount.
Navigation (if so equipped):
This setting allows the customer to en-
able/disable the alert for navigation in the
vehicle information display.
1. Use the
buttonto select “Navi-
gation”.
2. Press the OK button
to turn ON/OFF
the alert.
Phone (if so equipped):
This setting allows the customer to en-
able/disable the alert for an incoming call
in the vehicle information display.
Instruments and controls2-25
Page 128 of 492

2-46Instruments and controls
System temporarily unavailable
If the vehicle is parked in direct sunlight
under high temperature conditions (over
approximately 40°C (104°F) and then
started, the TSR system may be deacti-
vated automatically. The “Unavailable
high cabin temperature” warning mes-
sage will appear in the vehicle informa-
tion display.
Action to take:
When the interior temperature is reduced,
the TSR system will resume operating
automatically.
System Malfunction
If the TSR system malfunctions it will be
turned off automatically and the TSR
"Malfunction" warning message will ap-
pear in the vehicle information display.
Action to take:
If the TSR "Malfunction" warning mes-
sage appears, pull off the road at a safe
location and stop the vehicle. Turn the
engine off and restart the engine. If the
TSR "Malfunction" message continues to
appear, have the system checked by a
NISSAN dealer.
Maintenance
The TSR uses the same multi-sensing
front camera unit that is used by the
Lane Departure Warning (LDW) system,
located in front of the interior rearview
mirror. For maintenance of the camera,
see “System maintenance” (P.5-39).
JVI1587X
Your vehicle has two types of security
systems, as follows:
.Vehicle security system
. NISSAN Vehicle Immobilizer System
The security condition will be shown by
the security indicator light.
VEHICLE SECURITY SYSTEM
The vehicle security system provides
visual and audio alarm signals if someone
opens the doors, hood (if so equipped)
and liftgate when the system is armed. It
is not, however, a motion detection type
system that activates when a vehicle is
moved or when a vibration occurs.
The system helps deter vehicle theft but
SECURITY SYSTEMS