NISSAN SENTRA 1996 B14 / 4.G Owner's Guide
Manufacturer: NISSAN, Model Year: 1996, Model line: SENTRA, Model: NISSAN SENTRA 1996 B14 / 4.GPages: 191, PDF Size: 1.43 MB
Page 31 of 191

Replace the two batteries as follows:
1. Remove the screw and open the lid.
2. Replace the batteries with new ones.
Insert the batteries as illustrated above.Recommended batteries: Sanyo CR2016
or equivalent.
3. Close the lid securely and install the
screw.
4. Press the
button, then thebuttontwo or three times to check the multi-
remote controller operation.
If the batteries are removed for any rea-
son other than replacement, perform
step 4 above.
cAn improperly disposed battery can
hurt the environment. Always confirm
local regulations for battery disposal.
cThe multi-remote controller is water-
resistant; however, if it does get wet,
immediately wipe completely dry.
cThe operational range of the multi-
remote controller extends to approxi-
mately 49 ft (15 m) from the vehicle.
This range may vary with conditions.
FCC Notice:
This device complies with FCC rules part
15. Operation is subject to the following
two conditions: (1) This device may not
cause harmful interference and (2) This
device must accept any interference that
may be received, including interference
that may cause undesired operation.
The transmitter has been tested and
complies with FCC and DOC/MDC rules.
Changes or modifications not expressly
APD0623
BATTERY REPLACEMENT
2-6
ZX
Page 32 of 191

approved by the party responsible for
compliance could void the user's author-
ity to operate the device.
CHILD SAFETY REAR DOOR
LOCK (4-door only)
Child safety locks help prevent doors from
being opened accidentally, especially when
small children are in the vehicle.
The child safety lock levers are located on
the edge of the rear doors. When the lever is
in the lock position, the rear door can be
opened only from the outside.
PD1161M
2-7
ZX
Page 33 of 191

1. Pull the hood lock release handles1
located below the instrument panel. The
hood springs up slightly.
2. Pull up on the lever
s2at the front of the
hood with your fingertips and raise the
hood.3. Insert the support rod into the slot
marked with the arrow on the underside
of the hood.
4. When closing the hood, reset the support
rod to its original position, lower the hood
to approximately 12 inches above the
latch and release it. This allows proper
engagement of the hood latch.
SPA0004APD0618
HOOD RELEASE
2-8
ZX
Page 34 of 191
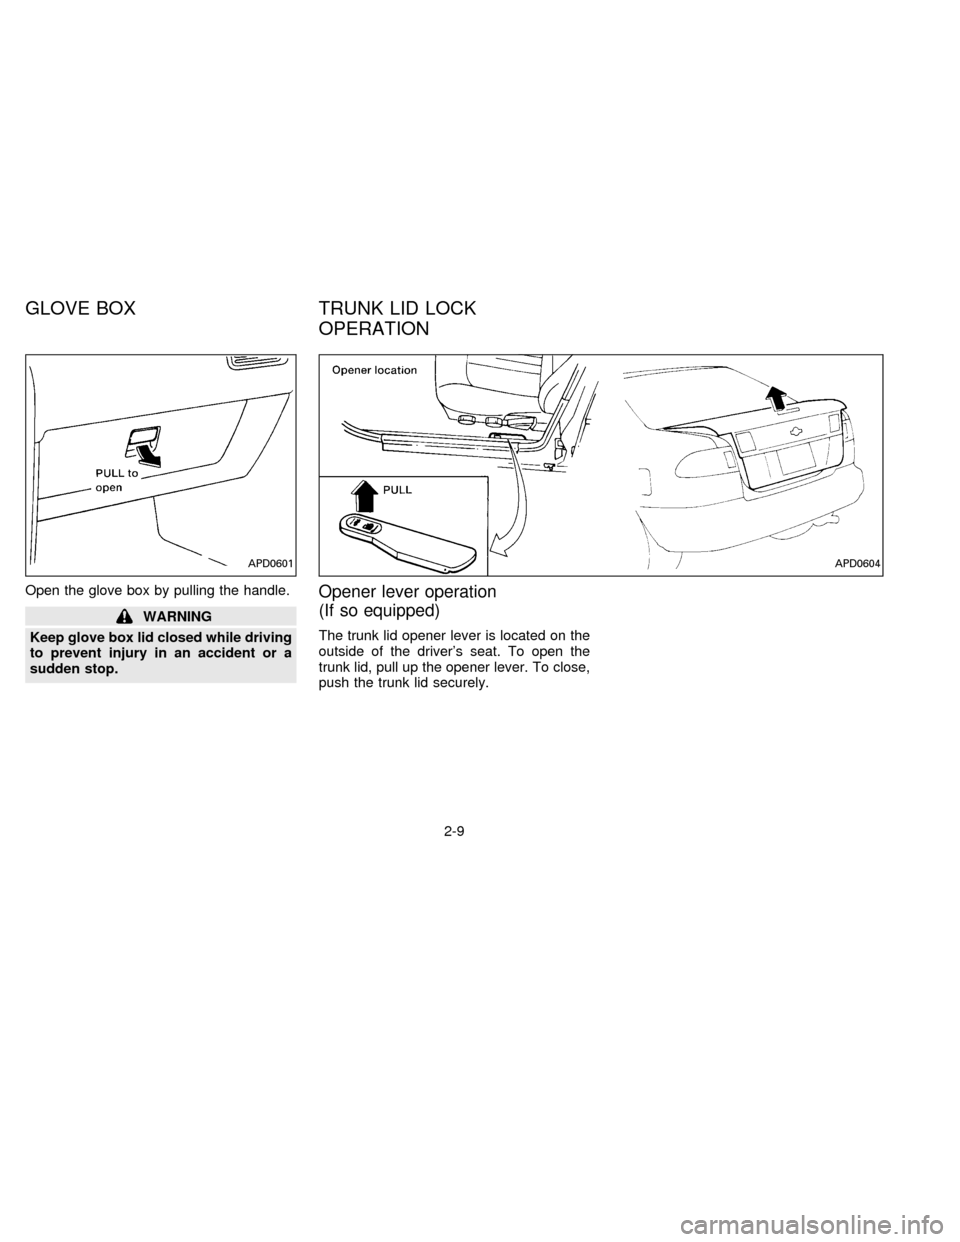
Open the glove box by pulling the handle.
WARNING
Keep glove box lid closed while driving
to prevent injury in an accident or a
sudden stop.
Opener lever operation
(If so equipped)
The trunk lid opener lever is located on the
outside of the driver's seat. To open the
trunk lid, pull up the opener lever. To close,
push the trunk lid securely.
APD0601APD0604
GLOVE BOX TRUNK LID LOCK
OPERATION
2-9
ZX
Page 35 of 191

Key operation
To open the trunk lid from outside the
vehicle, turn the key clockwise. To close,
lower and push the trunk lid down securely.
WARNING
Do not drive with the trunk lid open.
This could allow dangerous exhaust
gases to be drawn into the vehicle.
OPENER CANCEL LEVER FOR
TRUNK LID
When the lever is in the CANCEL (down)
position, the trunk lid cannot be opened with
the trunk lid opener lever. It can be opened
only with the key.
APD0605PD1168M
2-10
ZX
Page 36 of 191
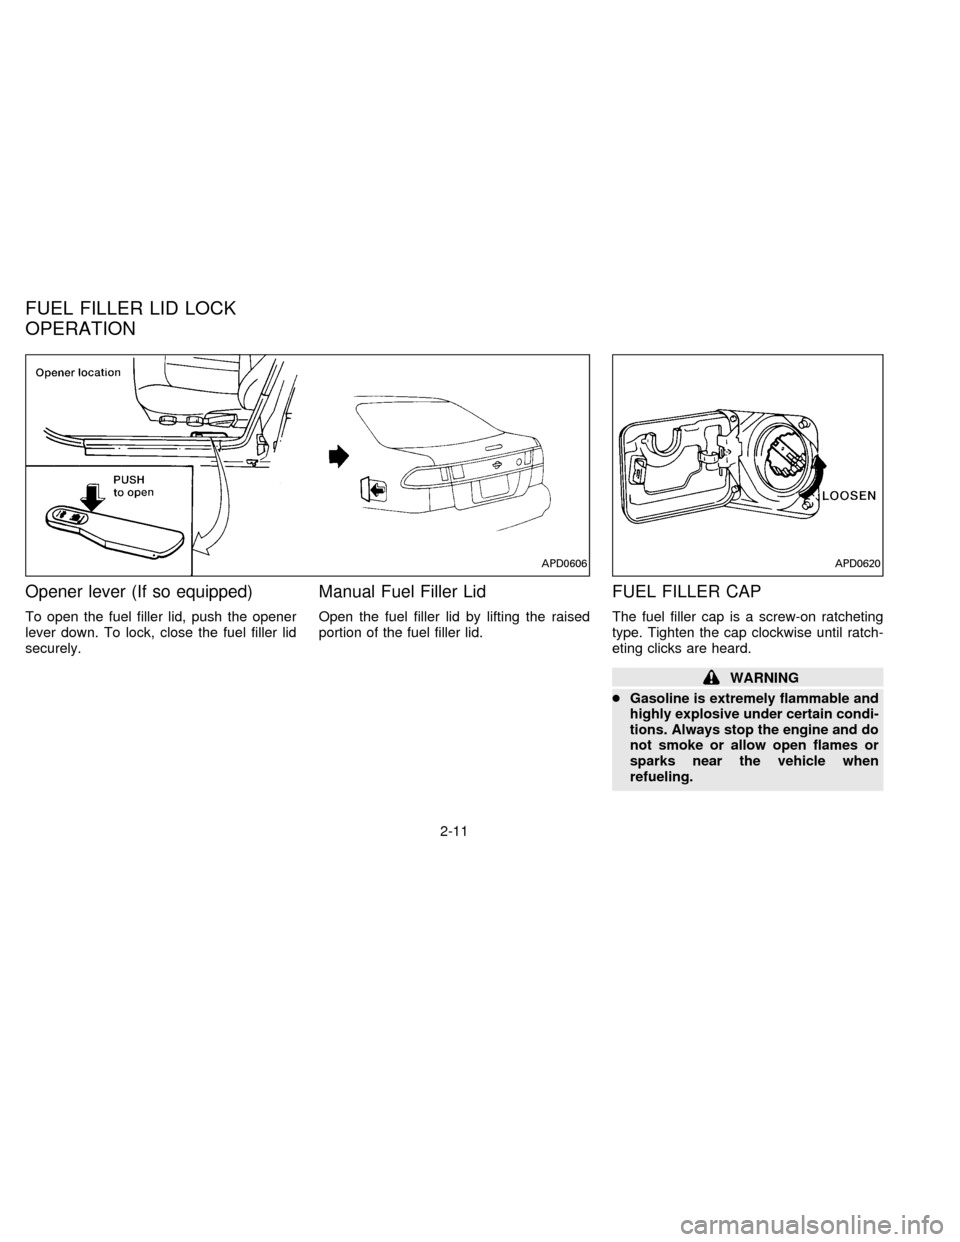
Opener lever (If so equipped)
To open the fuel filler lid, push the opener
lever down. To lock, close the fuel filler lid
securely.
Manual Fuel Filler Lid
Open the fuel filler lid by lifting the raised
portion of the fuel filler lid.
FUEL FILLER CAP
The fuel filler cap is a screw-on ratcheting
type. Tighten the cap clockwise until ratch-
eting clicks are heard.
WARNING
cGasoline is extremely flammable and
highly explosive under certain condi-
tions. Always stop the engine and do
not smoke or allow open flames or
sparks near the vehicle when
refueling.
APD0606APD0620
FUEL FILLER LID LOCK
OPERATION
2-11
ZX
Page 37 of 191
cFuel may be under pressure. Turn the
cap one-half turn and wait for any
``hissing'' sound to stop to prevent
fuel from spraying out and possibly
causing personal injury. Then re-
move the cap.
cUse only a genuine NISSAN fuel filler
cap as a replacement. It has a built-in
safety valve needed for proper opera-
tion of the fuel system and emission
control system. An incorrect cap can
result in a serious malfunction and
possible injury.
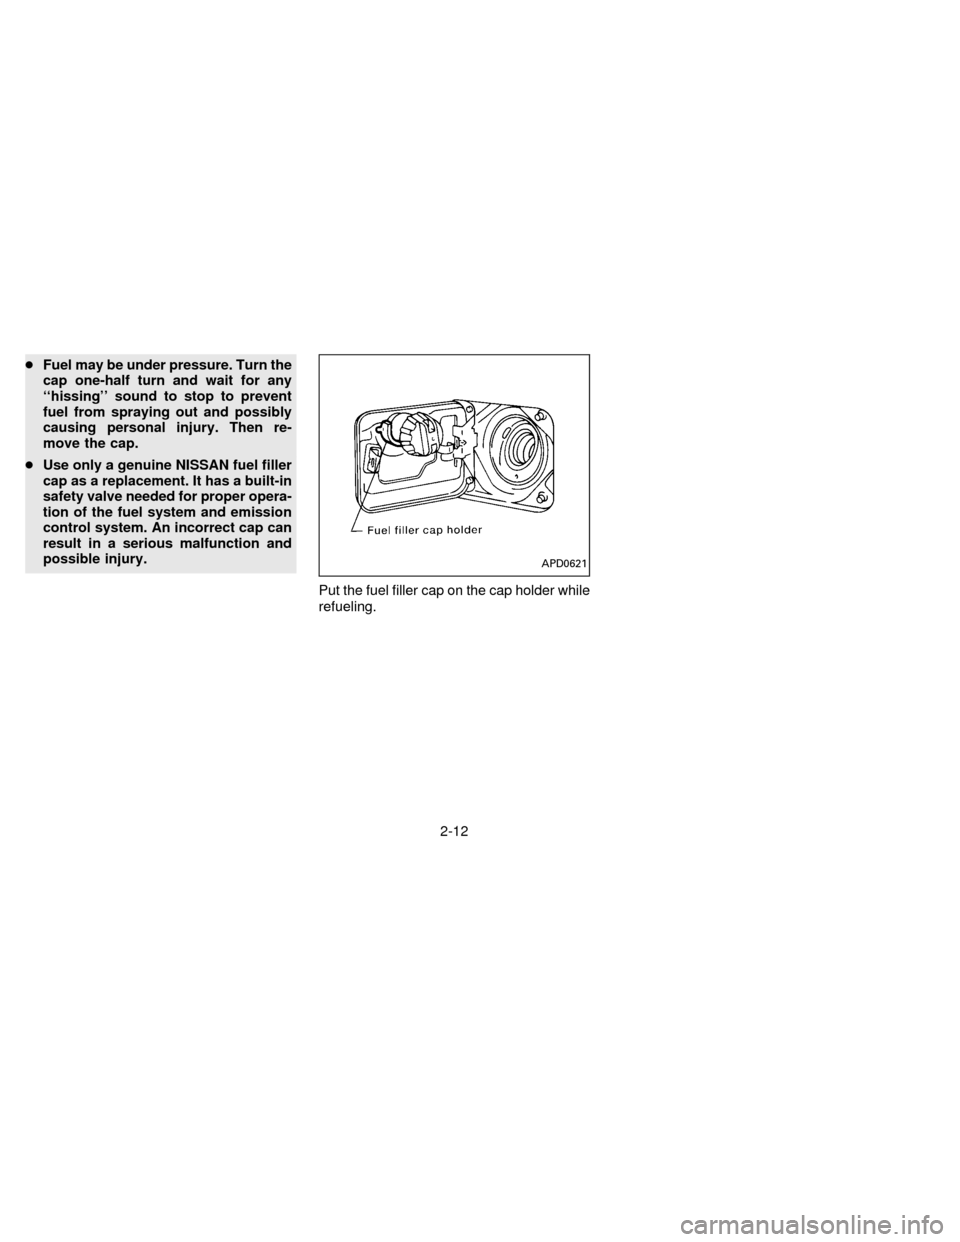
Put the fuel filler cap on the cap holder while
refueling.
APD0621
2-12
ZX
Page 38 of 191
SEAT ADJUSTMENT
WARNING
cDo not adjust the driver's seat while
driving. The seat may move suddenly
and could cause loss of control of the
vehicle.
cAfter adjustment, gently rock in the
seat to make sure it is securely
locked.
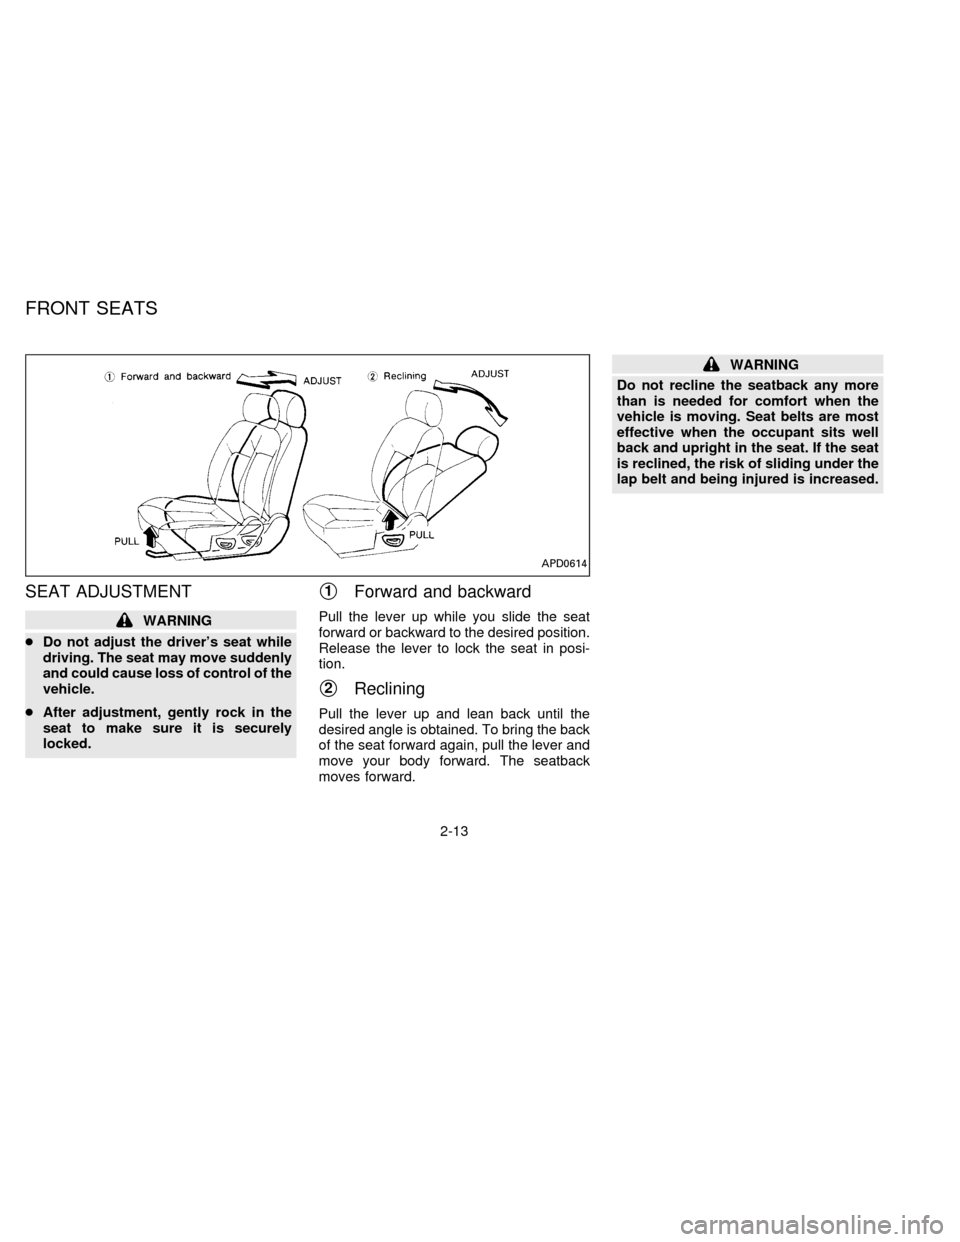
s1Forward and backward
Pull the lever up while you slide the seat
forward or backward to the desired position.
Release the lever to lock the seat in posi-
tion.
s2Reclining
Pull the lever up and lean back until the
desired angle is obtained. To bring the back
of the seat forward again, pull the lever and
move your body forward. The seatback
moves forward.
WARNING
Do not recline the seatback any more
than is needed for comfort when the
vehicle is moving. Seat belts are most
effective when the occupant sits well
back and upright in the seat. If the seat
is reclined, the risk of sliding under the
lap belt and being injured is increased.
APD0614
FRONT SEATS
2-13
ZX
Page 39 of 191
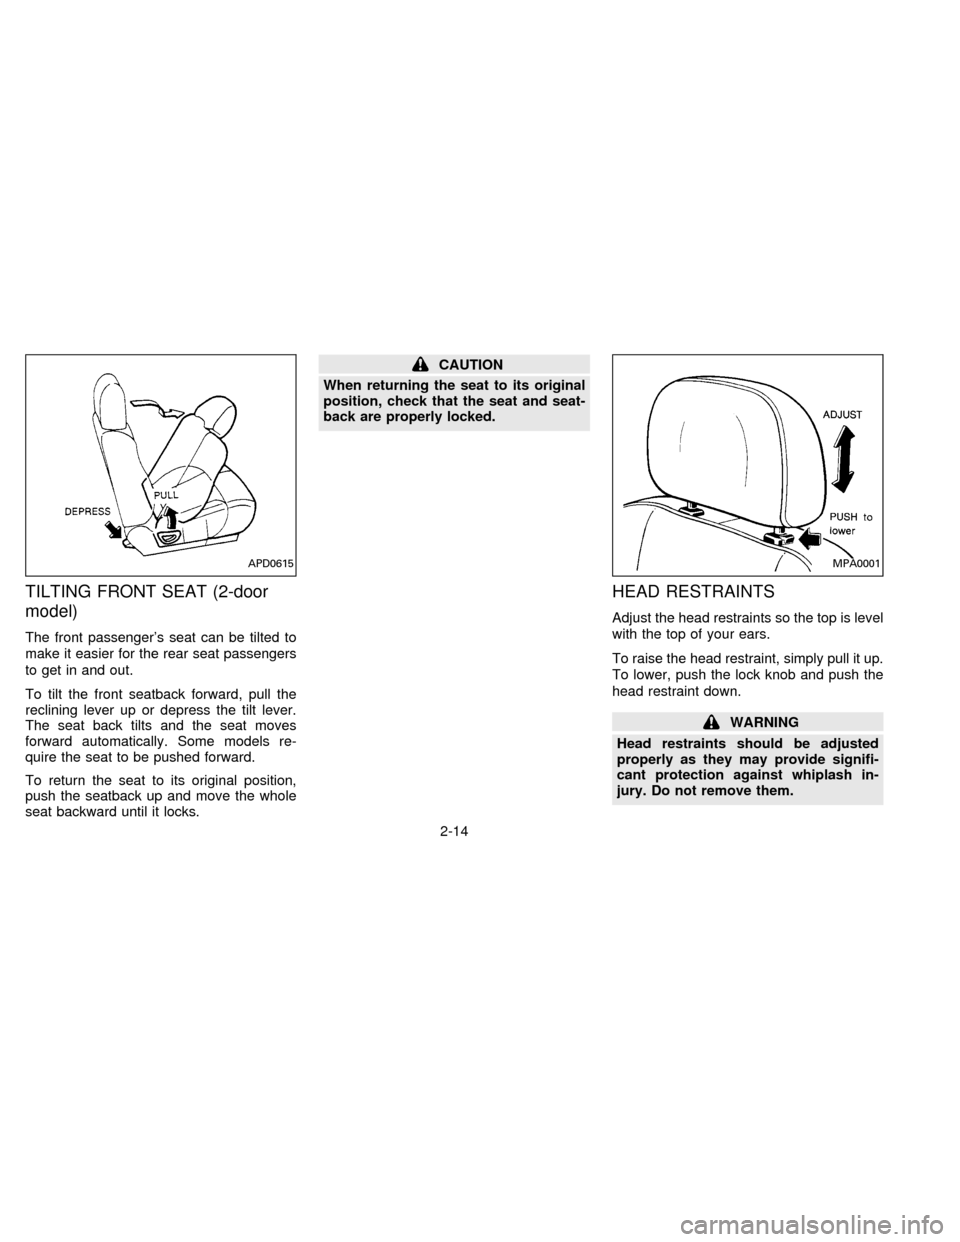
TILTING FRONT SEAT (2-door
model)
The front passenger's seat can be tilted to
make it easier for the rear seat passengers
to get in and out.
To tilt the front seatback forward, pull the
reclining lever up or depress the tilt lever.
The seat back tilts and the seat moves
forward automatically. Some models re-
quire the seat to be pushed forward.
To return the seat to its original position,
push the seatback up and move the whole
seat backward until it locks.
CAUTION
When returning the seat to its original
position, check that the seat and seat-
back are properly locked.
HEAD RESTRAINTS
Adjust the head restraints so the top is level
with the top of your ears.
To raise the head restraint, simply pull it up.
To lower, push the lock knob and push the
head restraint down.
WARNING
Head restraints should be adjusted
properly as they may provide signifi-
cant protection against whiplash in-
jury. Do not remove them.
APD0615MPA0001
2-14
ZX
Page 40 of 191
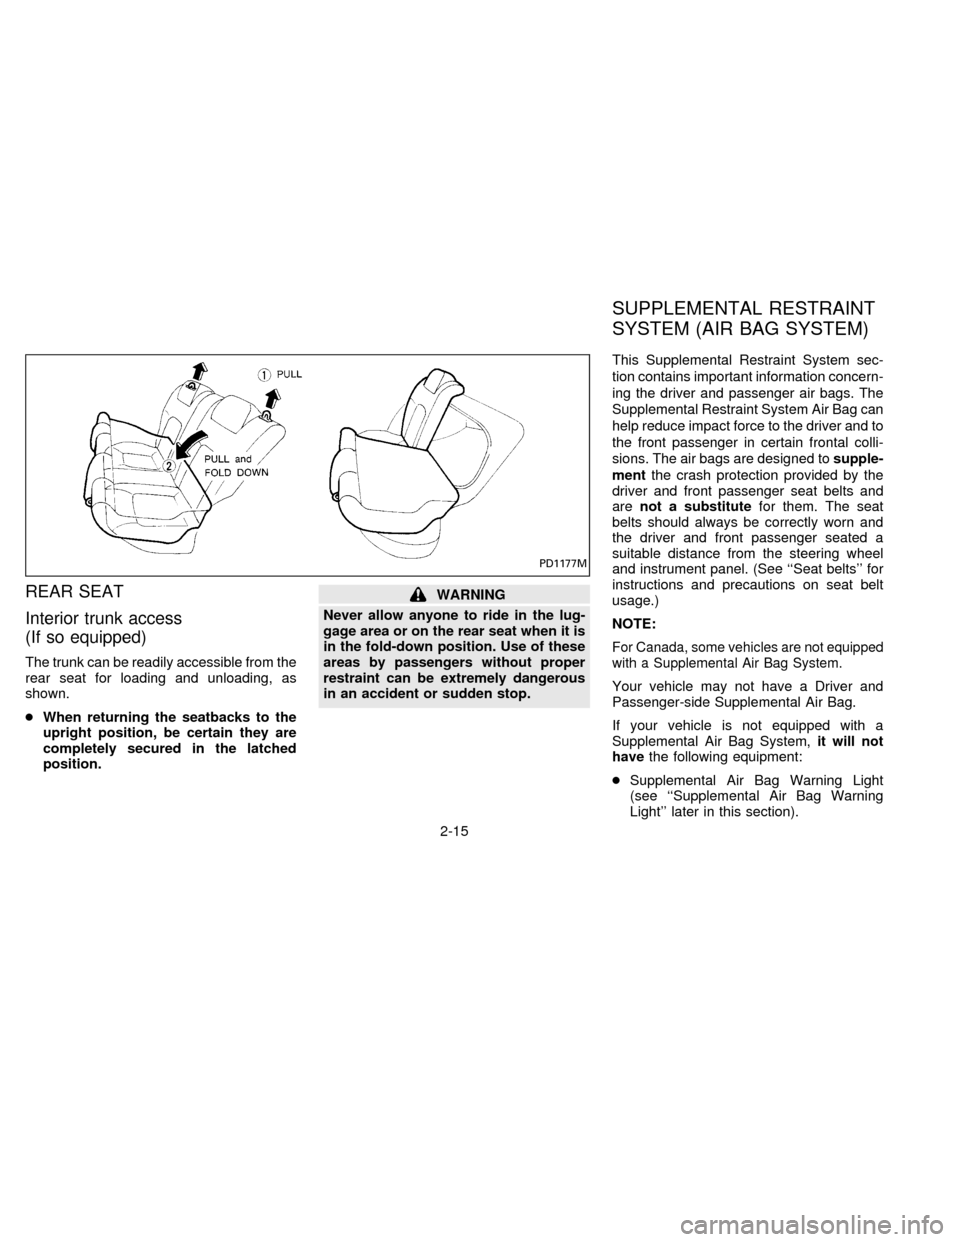
REAR SEAT
Interior trunk access
(If so equipped)
The trunk can be readily accessible from the
rear seat for loading and unloading, as
shown.
cWhen returning the seatbacks to the
upright position, be certain they are
completely secured in the latched
position.
WARNING
Never allow anyone to ride in the lug-
gage area or on the rear seat when it is
in the fold-down position. Use of these
areas by passengers without proper
restraint can be extremely dangerous
in an accident or sudden stop.This Supplemental Restraint System sec-
tion contains important information concern-
ing the driver and passenger air bags. The
Supplemental Restraint System Air Bag can
help reduce impact force to the driver and to
the front passenger in certain frontal colli-
sions. The air bags are designed tosupple-
mentthe crash protection provided by the
driver and front passenger seat belts and
arenot a substitutefor them. The seat
belts should always be correctly worn and
the driver and front passenger seated a
suitable distance from the steering wheel
and instrument panel. (See ``Seat belts'' for
instructions and precautions on seat belt
usage.)
NOTE:
For Canada, some vehicles are not equipped
with a Supplemental Air Bag System.
Your vehicle may not have a Driver and
Passenger-side Supplemental Air Bag.
If your vehicle is not equipped with a
Supplemental Air Bag System,it will not
havethe following equipment:
cSupplemental Air Bag Warning Light
(see ``Supplemental Air Bag Warning
Light'' later in this section).
PD1177M
SUPPLEMENTAL RESTRAINT
SYSTEM (AIR BAG SYSTEM)
2-15
ZX