ECU NISSAN SENTRA 1997 B14 / 4.G Owners Manual
[x] Cancel search | Manufacturer: NISSAN, Model Year: 1997, Model line: SENTRA, Model: NISSAN SENTRA 1997 B14 / 4.GPages: 194, PDF Size: 1.62 MB
Page 14 of 194
charging system. Turn the engine off and
check the generator belt. If the belt is loose,
broken, or missing, or if the light remains on,
see your NISSAN dealer immediately.
CAUTION
Do not continue driving if the generator
belt is loose, broken or missing.
Low fuel warning light
(if so equipped)
This light comes on when the fuel in the tank
is getting low. Refuel as soon as it is con-
venient, preferably before the fuel gauge
reaches E.
There should be a small reserve of fuel
remaining in the tank when the fuel gauge
reaches E.
Door ajar warning light
(if so equipped)
This light comes on when any of the doors
are not closed securely while the ignition
key is ON.
Seat belt warning light and
chime
The light and chime remind you to fasten
seat belts. The light illuminates whenever
the ignition key is turned to ON, and re-
mains illuminated until the driver's seat belt
is fastened. At the same time, the chime
sounds for about seven seconds unless the
driver's seat belt is securely fastened.
Refer to ªSeat beltsº in the ªPre-driving
checks and adjustmentsº section for pre-
cautions on seat belt usage.
Supplemental air bag
warning light
(if so equipped)
When the ignition key is in the ON or START
position, the supplemental air bag warning
light illuminates for about 7 seconds and
then turns off. This means the system is
operational.
If any of the following conditions occur, the
supplemental air bag system needs servic-
ing and your vehicle must be taken to your
nearest authorized NISSAN dealer:
1. The supplemental air bag warning lightdoes not come on and remain on for 7
seconds and then go off as described
above.
2. The supplemental air bag warning light
flashes intermittently or remains on.
3. The supplemental air bag warning light
does not come on at all.
Unless checked and repaired, the Supple-
mental Restraint System (Supplemental air
bag system) may not function properly. For
additional details see ``Supplemental Re-
straint System'' in the ``Pre-driving checks
and adjustments'' section.
WARNING
If the supplemental air bag warning
light is on, it could mean that the
supplemental air bag system will not
operate in an accident.
Low washer fluid warning
light (for Canada)
This light comes on when the washer fluid is
at a low level. Add washer fluid as necessary.
See the ``Do-it-yourself operations'' section.
1-6
ZX
Page 17 of 194

The theft warning system provides visual
and audio alarm signals if parts of the
vehicle are disturbed.
How to activate the theft warning
system
1. Close all windows.
2. Remove the key from the ignition switch.
3. Close all doors, hood and trunk lid. Lock
all doors by pressing the
buttonon the
multi-remote controller.At this time,
the turn signal lights blink twice, indicat-
ing all doors are locked.The system can be activated even if the
windows are open.
4. Confirm that the SECURITY indicator
light in the instrument cluster illuminates.
The SECURITY light stays on for about
30 seconds and then begins to flash
once every three seconds. The system is
now activated.
c
If the key is turned slowly when lock-
ing the door, the system may not acti-
vate. Furthermore, if the key is turned
excessively to the unlock position, the
system may be deactivated when the
key is removed. If the indicator light
fails to glow for 30 seconds, unlock
the door once and lock it again.
cEven when the driver and/or passen-
gers are in the vehicle, the system will
activate with all doors, hood, trunk lid
and back door locked and ignition key
off. Turn the ignition key to ACC or ON
to turn the system off.
The theft warning system is NOT activated if
one of the following occurs:
cThe door is unlocked or the ignition key is
turned to the ACC or ON position duringthe 30 seconds in which the SECURITY
light stays on.
cThe SECURITY light blinks at a steady
1/2 second on - 1/2 second off rate
because a door, the trunk, or the hood is
open and the key is not in the ACC or ON
position. When the ignition key is turned
to the ACC or ON position, the SECU-
RITY light turns off.
Theft warning system operation
The theft warning system emits the follow-
ing alarm:
cThe headlights blink and the horn sounds
intermittently. In addition, the starter mo-
tor does not operate.
cThe alarm automatically turns off after 2
to 3 minutes. However, the alarm reacti-
vates if the vehicle is tampered with
again. The alarm can be shut off by
unlocking a door or trunk lid with the key
or by pressing the
buttonon the
multi-remote controller.
The alarm is activated by:
copening the door or trunk lid without
using the key (even if the door is un-
IC0005
THEFT WARNING
(if so equipped)
1-9
ZX
Page 33 of 194

waiting for 30 seconds by inserting the key
into the ignition or by locking the doors with
the multi-remote controller.
Using the panic alarm
If you are near your vehicle and feel threat-
ened, you may activate the alarm to call
attention as follows:
1. Push the
button on the remote con-
troller forlonger than 1.5 seconds.
2. The theft warning alarm and headlights
stay on for 30 seconds.
3. The alarm stops when any of the key
functions are used. For example, when
the
or thebutton is pushed, or the
button is pushed for longer than 1.5
seconds on the multi-remote controller,
the panic alarm function is cancelled.
Replace the battery in the multi-remote con-
troller as follows:
1. Open the lid using a coin.
2. Replace the battery with a new one.
Insert the battery as illustrated above.Recommended battery: Sanyo CR2025
or equivalent.
3.
Close the lid securely.
4. Press thebutton, then thebutton
two or three times to check the multi-
remote controller operation.
APD1004
BATTERY REPLACEMENT
2-5
ZX
Page 36 of 194
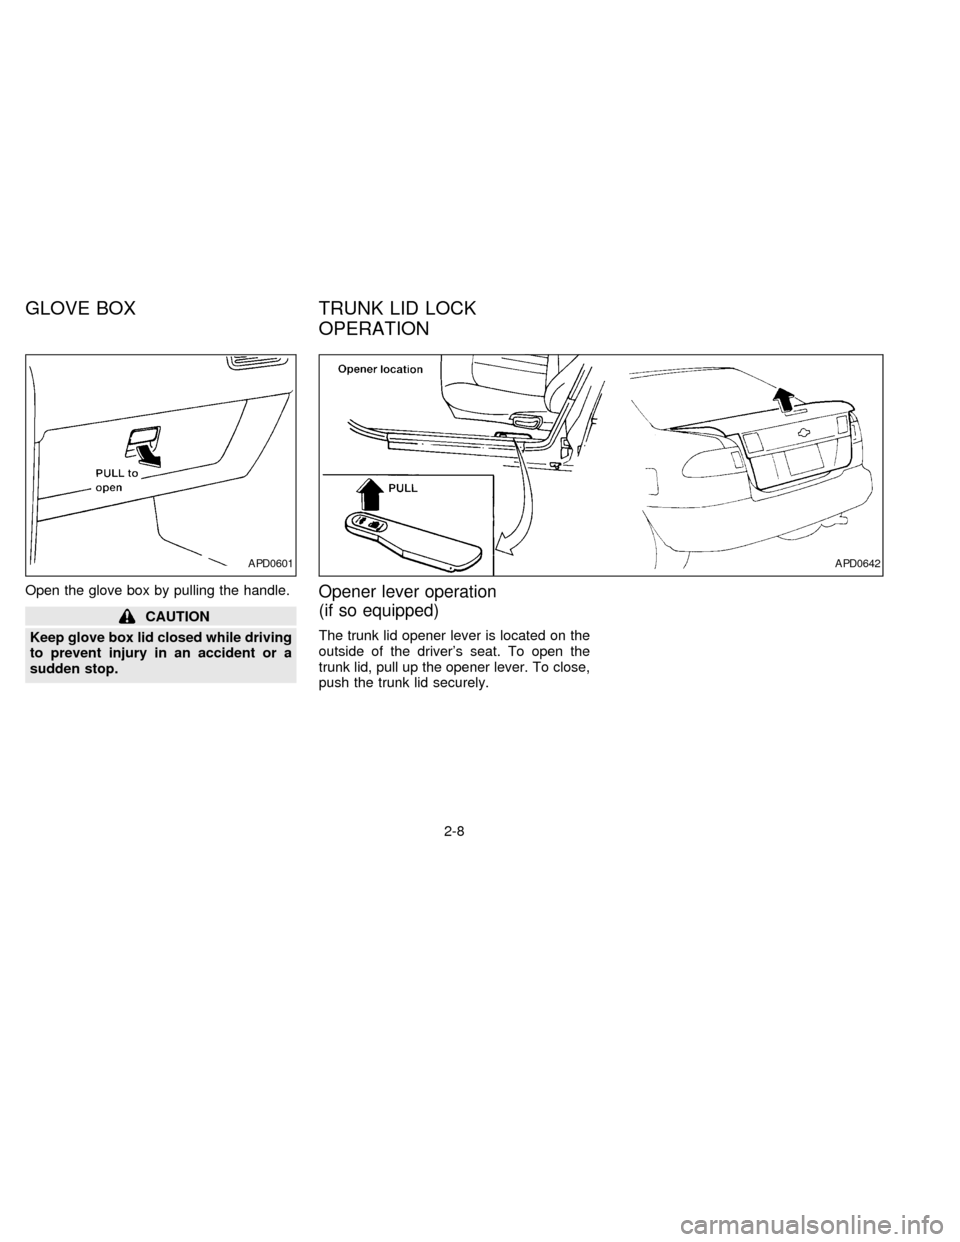
Open the glove box by pulling the handle.
CAUTION
Keep glove box lid closed while driving
to prevent injury in an accident or a
sudden stop.
Opener lever operation
(if so equipped)
The trunk lid opener lever is located on the
outside of the driver's seat. To open the
trunk lid, pull up the opener lever. To close,
push the trunk lid securely.
APD0601APD0642
GLOVE BOX TRUNK LID LOCK
OPERATION
2-8
ZX
Page 37 of 194
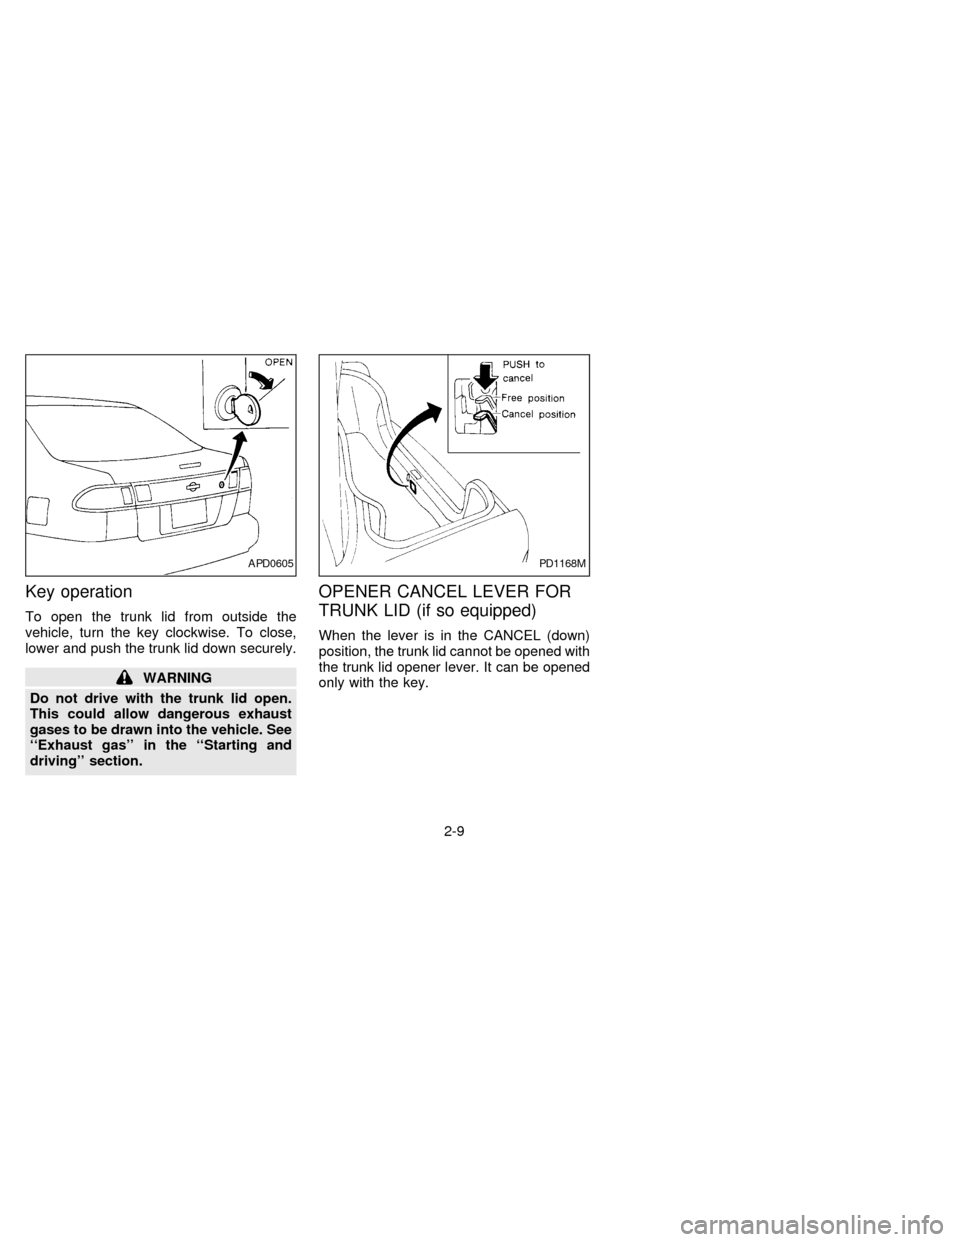
Key operation
To open the trunk lid from outside the
vehicle, turn the key clockwise. To close,
lower and push the trunk lid down securely.
WARNING
Do not drive with the trunk lid open.
This could allow dangerous exhaust
gases to be drawn into the vehicle. See
``Exhaust gas'' in the ``Starting and
driving'' section.
OPENER CANCEL LEVER FOR
TRUNK LID (if so equipped)
When the lever is in the CANCEL (down)
position, the trunk lid cannot be opened with
the trunk lid opener lever. It can be opened
only with the key.
APD0605PD1168M
2-9
ZX
Page 38 of 194

Opener lever (if so equipped)
To open the fuel filler lid, push the opener
lever down. To lock, close the fuel filler lid
securely.
Manual Fuel Filler Lid
Open the fuel filler lid by lifting the raised
portion of the fuel filler lid.
FUEL FILLER CAP
The fuel filler cap is a screw-on ratcheting
type. Tighten the cap clockwise until ratch-
eting clicks are heard.
If the fuel filler cap is not tightened properly,
the malfunction indicator light (MIL) may
come on.
APD0643APD0620
FUEL FILLER LID LOCK
OPERATION
2-10
ZX
Page 40 of 194
SEAT ADJUSTMENT
WARNING
cDo not adjust the driver's seat while
driving. The seat may move sud-
denly and could cause loss of con-
trol of the vehicle.
cAfter adjustment, gently rock in the
seat to make sure it is securely
locked.
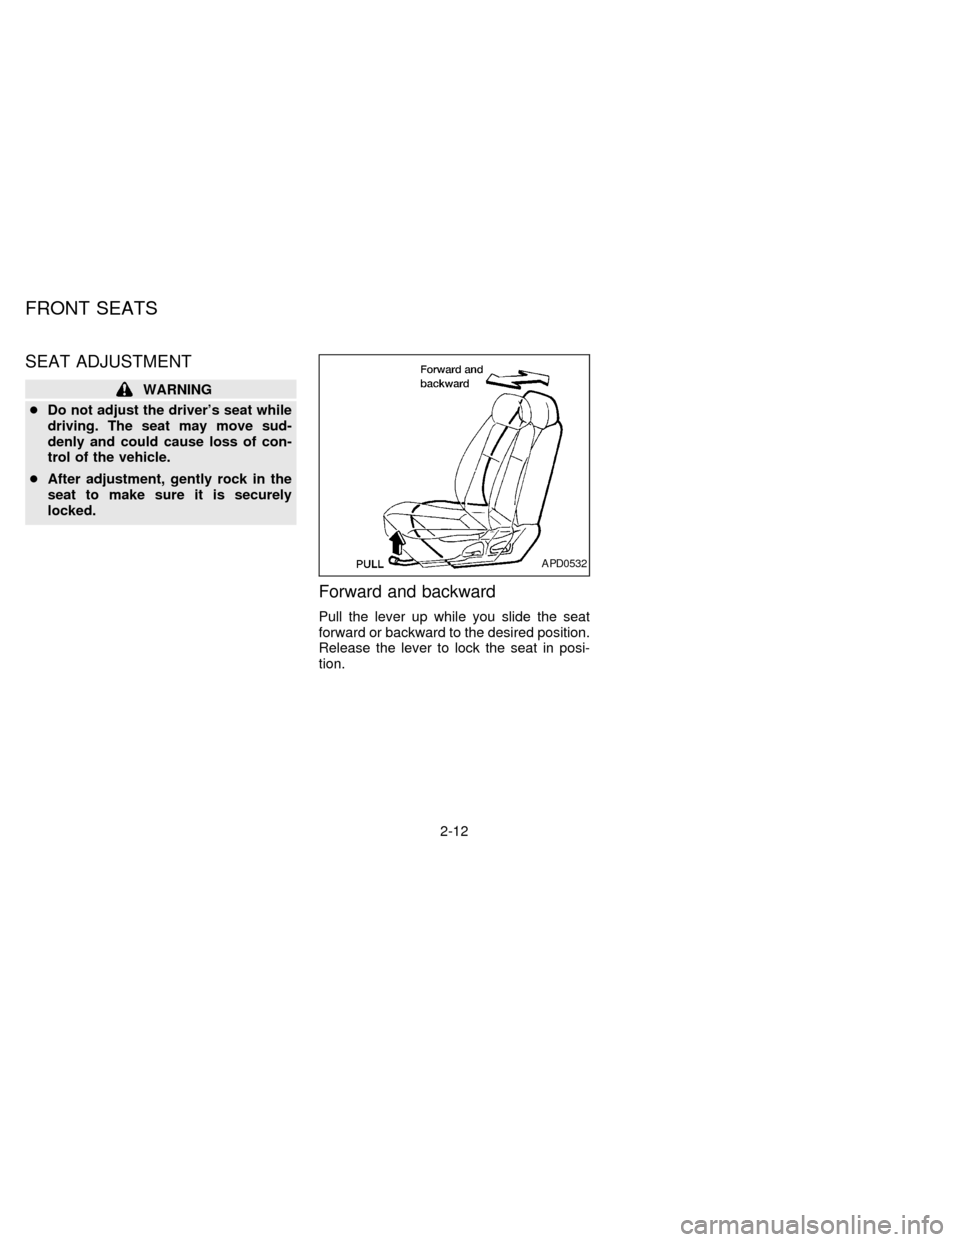
Forward and backward
Pull the lever up while you slide the seat
forward or backward to the desired position.
Release the lever to lock the seat in posi-
tion.
APD0532
FRONT SEATS
2-12
ZX
Page 43 of 194
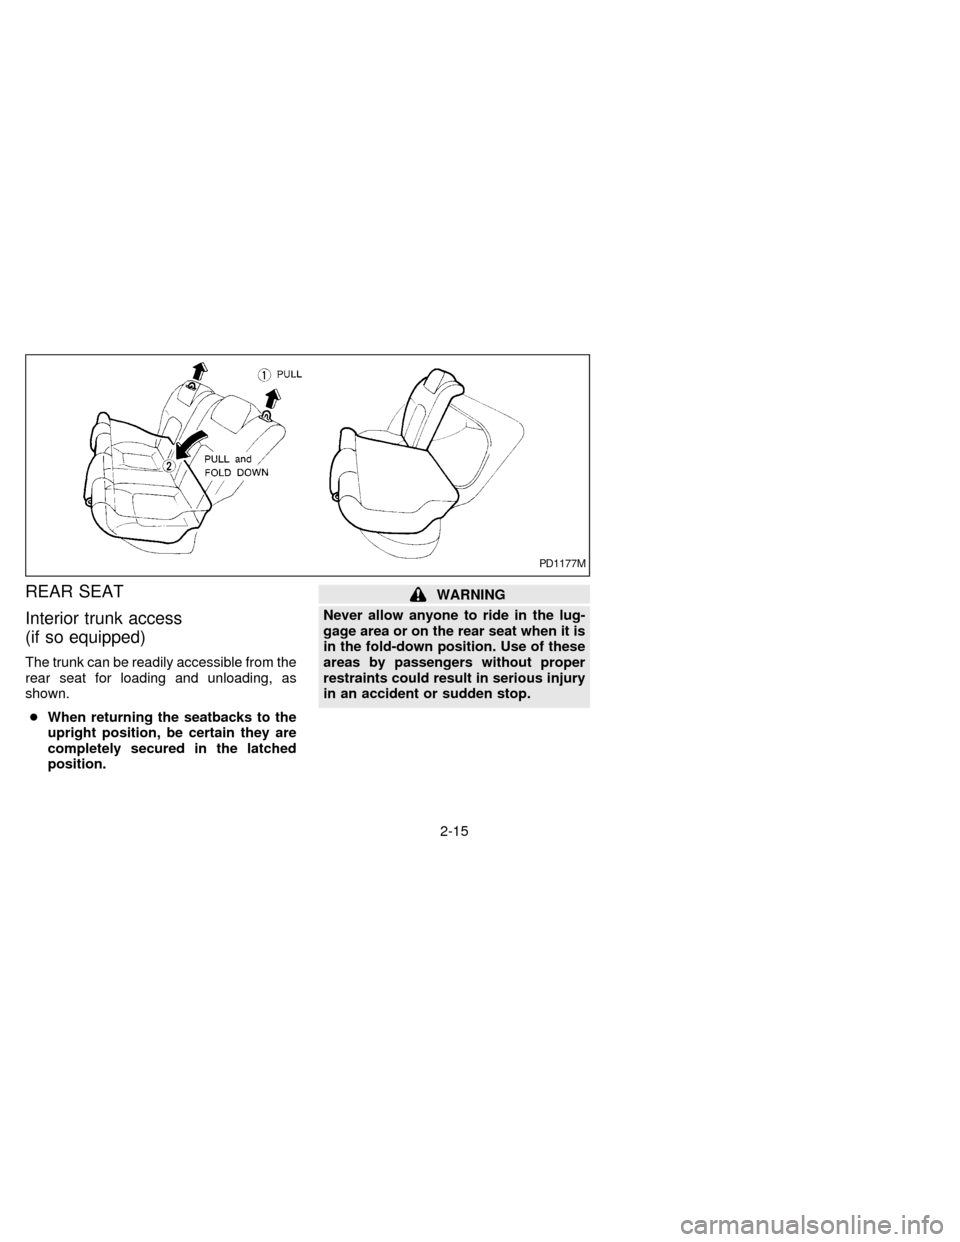
REAR SEAT
Interior trunk access
(if so equipped)
The trunk can be readily accessible from the
rear seat for loading and unloading, as
shown.
cWhen returning the seatbacks to the
upright position, be certain they are
completely secured in the latched
position.
WARNING
Never allow anyone to ride in the lug-
gage area or on the rear seat when it is
in the fold-down position. Use of these
areas by passengers without proper
restraints could result in serious injury
in an accident or sudden stop.
PD1177M
2-15
ZX
Page 56 of 194
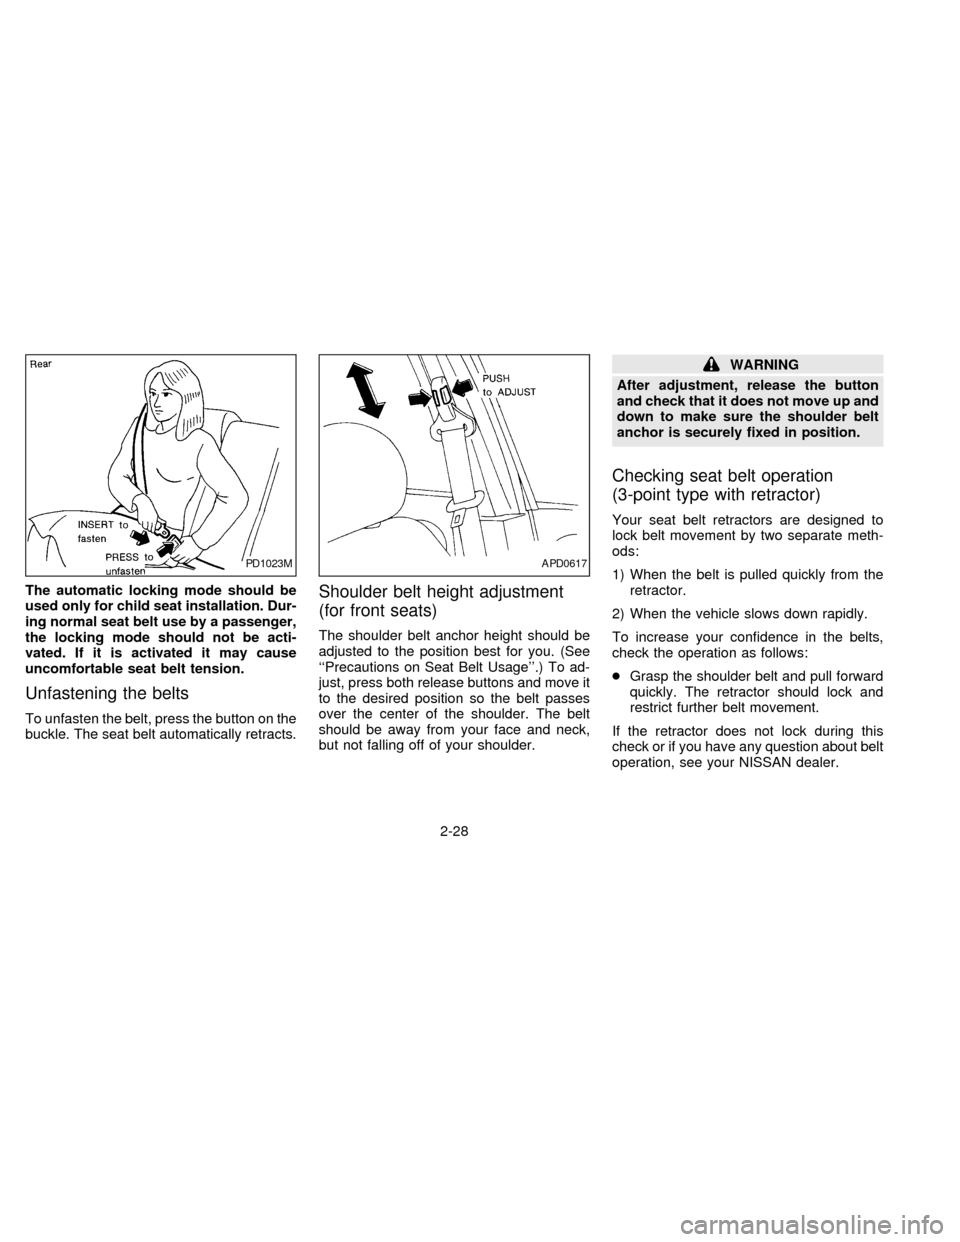
The automatic locking mode should be
used only for child seat installation. Dur-
ing normal seat belt use by a passenger,
the locking mode should not be acti-
vated. If it is activated it may cause
uncomfortable seat belt tension.
Unfastening the belts
To unfasten the belt, press the button on the
buckle. The seat belt automatically retracts.
Shoulder belt height adjustment
(for front seats)
The shoulder belt anchor height should be
adjusted to the position best for you. (See
``Precautions on Seat Belt Usage''.) To ad-
just, press both release buttons and move it
to the desired position so the belt passes
over the center of the shoulder. The belt
should be away from your face and neck,
but not falling off of your shoulder.
WARNING
After adjustment, release the button
and check that it does not move up and
down to make sure the shoulder belt
anchor is securely fixed in position.
Checking seat belt operation
(3-point type with retractor)
Your seat belt retractors are designed to
lock belt movement by two separate meth-
ods:
1) When the belt is pulled quickly from the
retractor.
2) When the vehicle slows down rapidly.
To increase your confidence in the belts,
check the operation as follows:
cGrasp the shoulder belt and pull forward
quickly. The retractor should lock and
restrict further belt movement.
If the retractor does not lock during this
check or if you have any question about belt
operation, see your NISSAN dealer.
PD1023MAPD0617
2-28
ZX
Page 60 of 194
cAfter attaching the child restraint,
test it before you place the child in it.
Tilt it from side to side. Try to tug it
forward and check to see if the belt
holds the restraint in place. If the
restraint is not secure, tighten the
belt as necessary, or put the restraint
in another seat and test it again.
cFor a front facing child restraint, if
the seat position where it is installed
has a 3-point type lap/shoulder belt,
check to make sure the shoulder belt
does not go in front of the child's
face or neck. If it does, put the shoul-
der belt behind the child restraint.
c
When your child restraint is not in
use, keep it secured with a seat belt to
prevent it from being thrown around
in case of a sudden stop or accident.
CAUTION
Remember that a child restraint left in a
closed vehicle can become very hot.
Check the seating surface and buckles
before placing your child in the child
restraint.
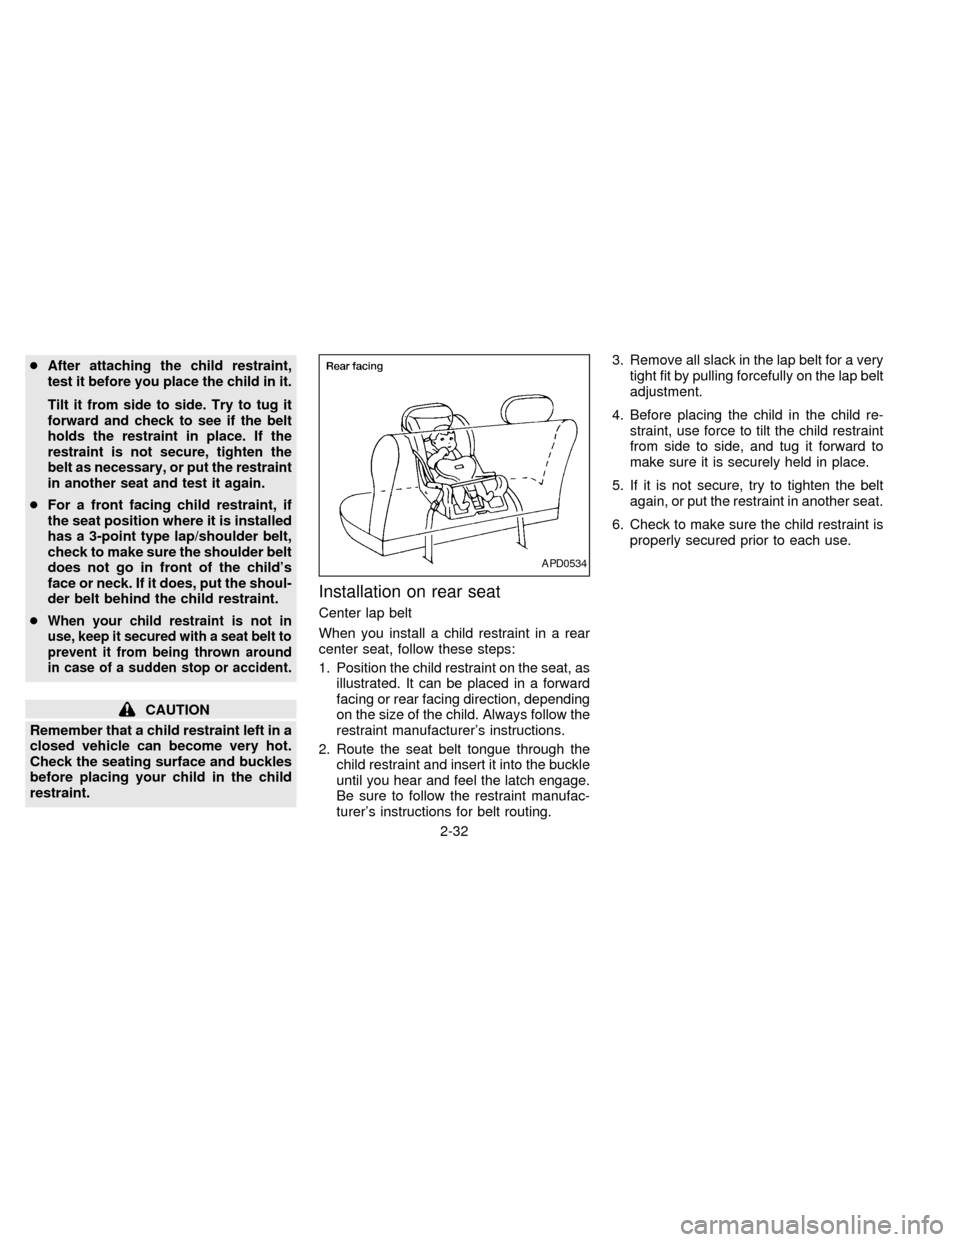
Installation on rear seat
Center lap belt
When you install a child restraint in a rear
center seat, follow these steps:
1. Position the child restraint on the seat, as
illustrated. It can be placed in a forward
facing or rear facing direction, depending
on the size of the child. Always follow the
restraint manufacturer's instructions.
2. Route the seat belt tongue through the
child restraint and insert it into the buckle
until you hear and feel the latch engage.
Be sure to follow the restraint manufac-
turer's instructions for belt routing.3. Remove all slack in the lap belt for a very
tight fit by pulling forcefully on the lap belt
adjustment.
4. Before placing the child in the child re-
straint, use force to tilt the child restraint
from side to side, and tug it forward to
make sure it is securely held in place.
5. If it is not secure, try to tighten the belt
again, or put the restraint in another seat.
6. Check to make sure the child restraint is
properly secured prior to each use.
APD0534
2-32
ZX