Hose NISSAN SENTRA 1997 B14 / 4.G Owners Manual
[x] Cancel search | Manufacturer: NISSAN, Model Year: 1997, Model line: SENTRA, Model: NISSAN SENTRA 1997 B14 / 4.GPages: 194, PDF Size: 1.62 MB
Page 1 of 194
Foreword
Welcome to the growing family of new NISSAN owners. This vehicle is delivered to you with confidence. It was produced using the latest
techniques and strict quality control.
This manual was prepared to help you understand the operation and maintenance of your vehicle so that you may enjoy many miles of
driving pleasure. Please read through this manual before operating your vehicle.
A separate Warranty Information and Maintenance Log Booklet explains details about the warranties covering your vehicle and vehicle
maintenance schedules.
Your NISSAN dealer knows your vehicle best. When you require any service or have any questions, he will be glad to assist you with the
extensive resources available to him.
WARNING
IMPORTANT SAFETY INFORMATION
REMINDERS FOR SAFETY!
Follow these five important driving rules to help ensure a safe
and complete trip for you and your passengers!
cNEVER drive under the influence of alcohol or drugs.
cALWAYS observe posted speed limits and never drive too
fast for conditions.
cALWAYS use your seat belts and appropriate child restraint
systems.
cALWAYS provide information about the proper use of
vehicle safety features to all occupants of the vehicle.
cALWAYS review this Owner's Manual for important safety
information.
1996 NISSAN NORTH AMERICA, INC.
TORRANCE, CALIFORNIA
All rights reserved. No part of this Owner's Manual may be reproduced
or stored in a retrieval system, or transmitted in any form, or by any
means, electronic, mechanical, photocopying, recording or otherwise,
without the prior written permission of Nissan North America, Inc.
NOTES ON THE INFORMATION CONTAINED IN
THIS OWNER'S MANUAL
This Owner's Manual contains descriptions and operating in-
structions for all systems, features and optional equipment that
might appear in any model of this vehicle built for any destina-
tion in North America, including the continental United States,
Canada and Hawaii. Therefore, you may very well find informa-
tion in this manual that does not apply to your vehicle.
MODIFICATION OF YOUR VEHICLE
This vehicle should not be modified. Modification could affect
its performance, safety or durability, and may even violate
governmental regulations. In addition, damage or perfor-
mance problems resulting from modifications may not be
covered under NISSAN warranties.
All information, specifications and illustrations in this manual are
those in effect at the time of printing. NISSAN reserves the right to
change specifications or design without notice and without obligation.
The inside pages of this manual contain
a minimum of 50% recycled fibers,
including 10% post-consumer fibers.
Page 48 of 194
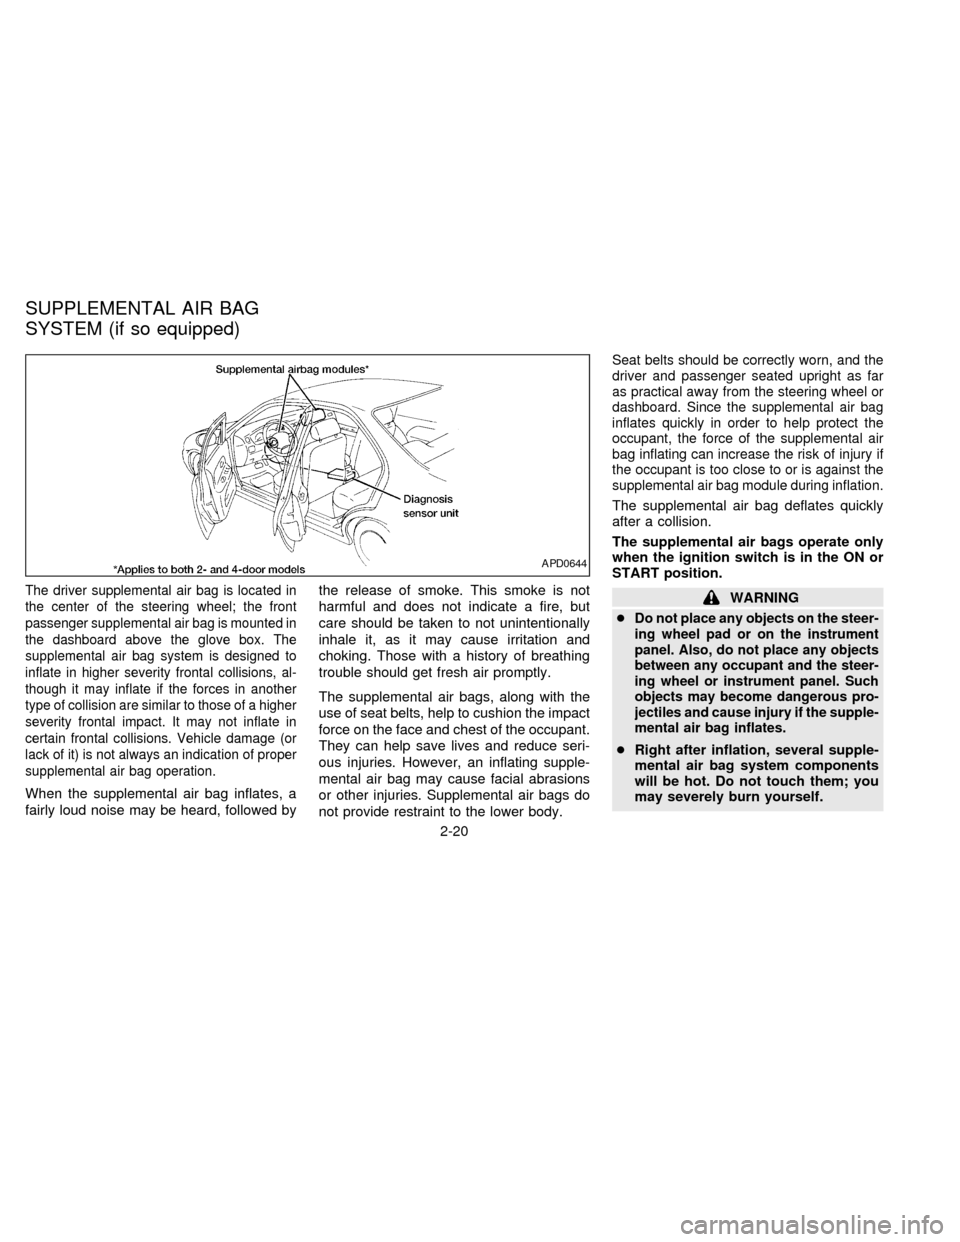
The driver supplemental air bag is located in
the center of the steering wheel; the front
passenger supplemental air bag is mounted in
the dashboard above the glove box. The
supplemental air bag system is designed to
inflate in higher severity frontal collisions, al-
though it may inflate if the forces in another
type of collision are similar to those of a higher
severity frontal impact. It may not inflate in
certain frontal collisions. Vehicle damage (or
lack of it) is not always an indication of proper
supplemental air bag operation.
When the supplemental air bag inflates, a
fairly loud noise may be heard, followed bythe release of smoke. This smoke is not
harmful and does not indicate a fire, but
care should be taken to not unintentionally
inhale it, as it may cause irritation and
choking. Those with a history of breathing
trouble should get fresh air promptly.
The supplemental air bags, along with the
use of seat belts, help to cushion the impact
force on the face and chest of the occupant.
They can help save lives and reduce seri-
ous injuries. However, an inflating supple-
mental air bag may cause facial abrasions
or other injuries. Supplemental air bags do
not provide restraint to the lower body.
Seat belts should be correctly worn, and the
driver and passenger seated upright as far
as practical away from the steering wheel or
dashboard. Since the supplemental air bag
inflates quickly in order to help protect the
occupant, the force of the supplemental air
bag inflating can increase the risk of injury if
the occupant is too close to or is against the
supplemental air bag module during inflation.
The supplemental air bag deflates quickly
after a collision.
The supplemental air bags operate only
when the ignition switch is in the ON or
START position.
WARNING
c
Do not place any objects on the steer-
ing wheel pad or on the instrument
panel. Also, do not place any objects
between any occupant and the steer-
ing wheel or instrument panel. Such
objects may become dangerous pro-
jectiles and cause injury if the supple-
mental air bag inflates.
cRight after inflation, several supple-
mental air bag system components
will be hot. Do not touch them; you
may severely burn yourself.
APD0644
SUPPLEMENTAL AIR BAG
SYSTEM (if so equipped)
2-20
ZX
Page 63 of 194
To install the anchor bracket, a metric bolt of
the dimensions listed below must be used.
Bolt diameter: 8.0 mm
Bolt length: more than 1.18 in (30 mm)
Thread pitch: 1.25 mm
The top strap should be secured to the
attaching bolt which provides the straightest
installation of the top strap.
WARNING
Child restraint anchor points are de-
signed to withstand only those loads
imposed by correctly fitted child re-
straints. Under no circumstances are
they to be used for adult seat belts or
harnesses.
Anchor point locations
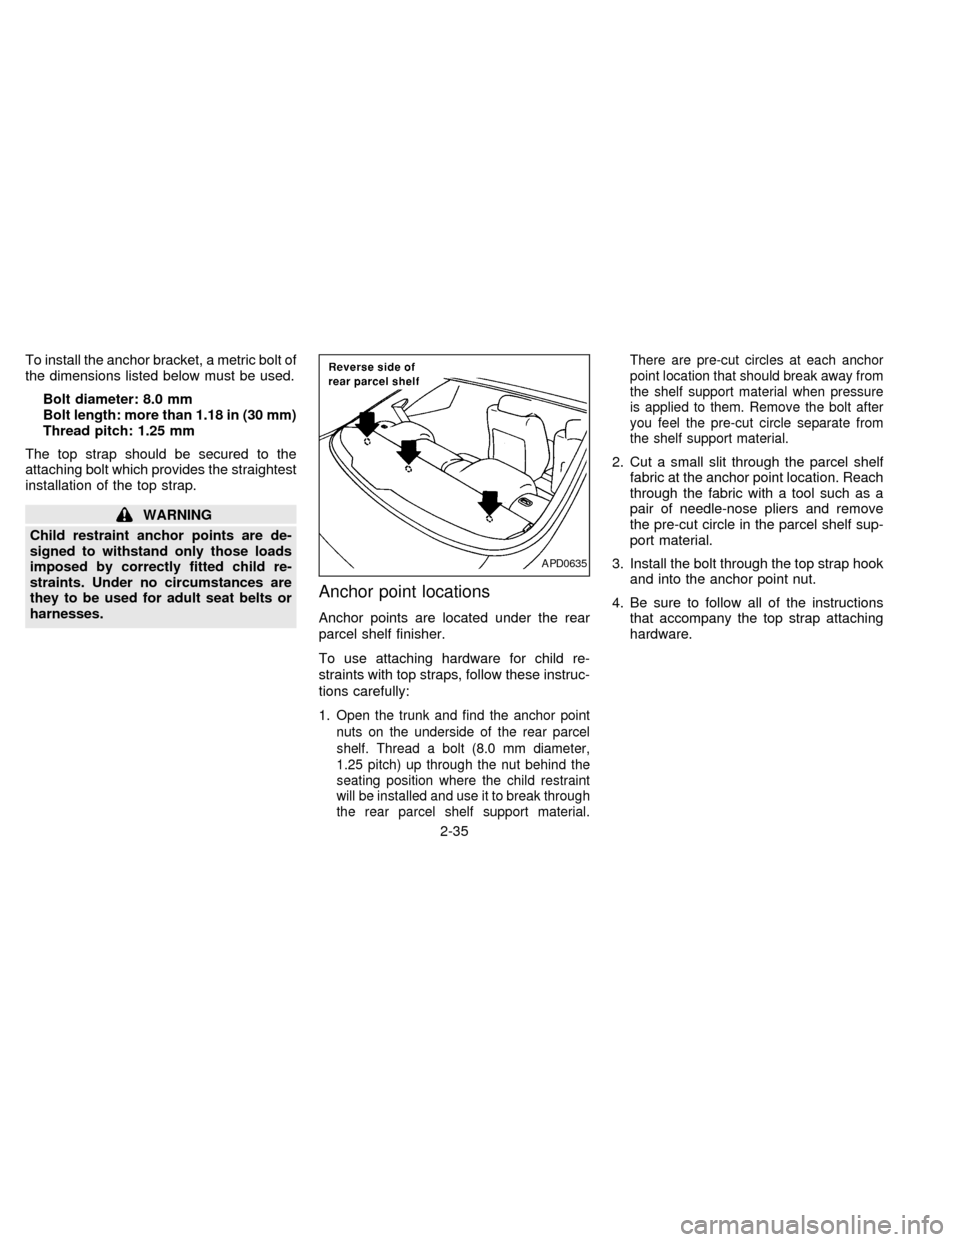
Anchor points are located under the rear
parcel shelf finisher.
To use attaching hardware for child re-
straints with top straps, follow these instruc-
tions carefully:
1.
Open the trunk and find the anchor point
nuts on the underside of the rear parcel
shelf. Thread a bolt (8.0 mm diameter,
1.25 pitch) up through the nut behind the
seating position where the child restraint
will be installed and use it to break through
the rear parcel shelf support material.There are pre-cut circles at each anchor
point location that should break away from
the shelf support material when pressure
is applied to them. Remove the bolt after
you feel the pre-cut circle separate from
the shelf support material.
2. Cut a small slit through the parcel shelf
fabric at the anchor point location. Reach
through the fabric with a tool such as a
pair of needle-nose pliers and remove
the pre-cut circle in the parcel shelf sup-
port material.
3. Install the bolt through the top strap hook
and into the anchor point nut.
4. Be sure to follow all of the instructions
that accompany the top strap attaching
hardware.
APD0635
2-35
ZX
Page 72 of 194

Air recirculation button
(if so equipped)
NOTE:
The air recirculation feature is available
only on those vehicles equipped with air
conditioning.
OFF position (indicator light OFF):
Outside air is drawn into the passenger
compartment and distributed through the
selected outlets.
Use the OFF position for normal heater or
air conditioner operation.
ON position (indicator light ON):
Interior air is recirculated inside the vehicle.
Depress the air recirculation button to acti-
vate the recirculation function when driving
on a dusty road or to avoid traffic fumes.
The air recirculation function is also used to
improve A/C performance during extremely
hot or humid conditions.
Air conditioner button
(if so equipped)
Start the engine, move the fan control dial to
the desired (1 to 4) position, and push the
air conditioner button to turn on the air
conditioner. The indicator light comes on
when the air conditioner is on. To turn off the
air conditioner, push the button again.
The air conditioner cooling function op-
erates only when the engine is running.
HEATER OPERATION
Heating
This mode is used to direct hot air mainly
from the floor outlets. A small amount of air
also flows from the defrost vents.
1. Push the air recirculation button (if so
equipped) to the OFF position for normal
heating.
2. Move the air control dial to the
po-
sition.
3. Move the fan control dial to the desired
position.
4. Move the temperature control dial to thedesired position between the middle and
the hot position.
Ventilation
This mode directs outside air from the side
and center vents.
1. Push the air recirculation button (if so
equipped) to the OFF position.
2. Move the air control dial to the
po-
sition.
3. Move the fan control dial to the desired
position.
4. Move the temperature control dial to the
desired position.
Defrosting or defogging
This mode is used to defrost/defog the
windows.
1. Push the air recirculation button (if so
equipped) to the OFF position.
2. Move the air control dial to the
po-
sition.
3. Move the fan control dial to the desired
position.
4. Move the temperature control dial to the
3-4
ZX
Page 114 of 194
If your vehicle is overheating (indicated by
an extremely high temperature gauge read-
ing), or if you feel a lack of engine power,
detect abnormal noise, etc., take the follow-
ing steps:
WARNING
cDo not continue to drive if your ve-
hicle overheats. Doing so could
cause a vehicle fire.
cTo avoid the danger of being
scalded, never remove the radiator
cap while the engine is still hot.
When the radiator cap is removed,
pressurized hot water will spurt out,
possibly causing serious injury.
cDo not open the hood if steam is
coming out.
1. Move the vehicle safely off the road,
apply the parking brake and move the
gearshift lever to Neutral (automatic
transmission to P).
Do not stop the engine.
2. Turn off the air conditioner. Open all the
windows, move the heater or air condi-
tioner temperature control to maximum
hot and fan control to high speed.3. If engine overheating is caused by climb-
ing a long hill on a hot day, run the engine
at a fast idle (approximately 1,500 rpm)
until the temperature gauge indication
returns to normal.
4. Get out of the vehicle. Look and listen for
steam or coolant escaping from the ra-
diator before opening the hood. Wait until
no steam or coolant can be seen before
proceeding.
5. Open the engine hood.
WARNING
If steam or water is coming from the
engine, stand clear to prevent getting
burned.
6. Visually check drive belts for damage or
looseness. Also check if the cooling fan
is running. The radiator hoses and radia-
tor should not leak water. If coolant is
leaking, the water pump belt is missing or
loose, or the cooling fan does not run,
stop the engine.
WARNING
Be careful not to allow your hands, hair,
jewelry or clothing to come into contact
with, or to get caught in, the running
fan, belts, or fan motor. The fan motor
can start at any time when the coolant
temperature is high.
7. After the engine cools down, check the
coolant level in the reservoir tank with the
engine running. Add coolant to the res-
ervoir tank if necessary. Have your ve-
hicle repaired at the nearest NISSAN
dealer.
IF YOUR VEHICLE
OVERHEATS
5-10
ZX
Page 121 of 194
Floor mats
The use of genuine NISSAN floor mats can
extend the life of your vehicle carpet and
make it easier to clean the interior.No
matter what mats are used, be sure they
are fitted for your vehicle and are prop-
erly positioned in the footwell to prevent
interference with pedal operation.Mats
should be maintained with regular cleaning
and replaced if they become excessively
worn.
Seat belts
The seat belts can be cleaned by wiping
them with a sponge dampened in a mild
soap solution. Allow the belts to dry com-
pletely before using them.
WARNING
Do not allow wet belts to roll up in the
retractor. NEVER use bleach, dye, or
chemical solvents since these may se-
verely weaken the seat belt webbing.
Most common factors contributing
to vehicle corrosion:
1. The accumulation of moisture-retaining
dirt and debris in body panel sections,
cavities, and other areas.
2. Damage to paint and other protective
coatings caused by gravel and stone
chips or minor traffic accidents.
Environmental factors influence the
rate of corrosion:
Moisture
Accumulation of sand, dirt and water on the
vehicle body underside can accelerate cor-
rosion. Wet floor coverings will not dry com-
pletely inside the vehicle, and should be
removed for drying to avoid floor panel
corrosion.
Relative humidity
Corrosion will be accelerated:
cin areas of high relative humidity.
cespecially in those areas where the tem-
peratures stay above freezing.
cwhere atmospheric pollution exists.cwhere road salt is used.
Temperature
A temperature increase accelerates the rate
of corrosion to those parts which are not
well ventilated.
Air pollution
Industrial pollution, the presence of salt in
the air in coastal areas, or heavy road salt
use accelerates the corrosion process.
Road salt also accelerates the disintegra-
tion of paint surfaces.To protect your vehicle from
corrosion:
cWash and wax your vehicle often to keep
the vehicle clean.
cAlways check for minor damage to the
paint and repair it as soon as possible.
cKeep drain holes at the bottom of the
doors open to avoid water accumulation.
cCheck the underbody for accumulation of
sand, dirt or salt. If present, wash with
water as soon as possible.
CORROSION PROTECTION
6-5
ZX
Page 122 of 194
CAUTION
cNEVER remove dirt, sand or other
debris from the passenger compart-
ment by washing it out with a hose.
Remove dirt with a vacuum cleaner
or broom.
cNever allow water or other liquids to
come in contact with electronic com-
ponents inside the vehicle as this
may damage them.
6-6
ZX
Page 124 of 194
When performing any inspection or mainte-
nance work on your vehicle, always take
care to prevent serious accidental injury to
yourself or damage to the vehicle. The
following are general precautions which
should be closely observed.
WARNING
cPark the vehicle on a level surface,
apply the parking brake securely and
block the wheels to prevent the ve-
hicle from moving. For a manual
transmission, move the gearshift
control lever to Neutral (N). For an
automatic transmission, move the
shift lever to P (Park).
cBe sure the ignition key is OFF when
performing any parts replacement or
repairs.
cBe sure to turn the ignition key to the
OFF or LOCK position. When the
ignition key is in the ON or ACC
position, the cooling fan may start to
operate suddenly even when the en-
gine is not running.cIf you must work with the engine
running, keep your hands, clothing,
hair and tools away from moving
fans, belts and any other moving
parts.
cIt is advisable to remove ties and any
jewelry, such as rings, watches, etc.,
before working on your vehicle.
cIf you must run the engine in an
enclosed space such as a garage, be
sure there is proper ventilation for
exhaust gases.
cNever get under the vehicle while it
is supported only by a jack. If it is
necessary to work under the vehicle,
support it with safety stands.
cKeep smoking materials, flame and
sparks away from fuel and battery.
cOn gasoline engine models with the
Multiport Fuel Injection (MFI) sys-
tem, the fuel filter or fuel lines
should be serviced by a NISSAN
dealer because the fuel lines are
under high pressure even when the
engine is off.
CAUTION
cDo not work under the hood while
the engine is hot. Turn the engine off
and wait until it cools down.
cNever connect or disconnect either
the battery or any transistorized
component connector while the igni-
tion is ON.
c
Avoid contact with used motor oil.
Improperly disposed motor oil and/or
other vehicle fluids can hurt the en-
vironment. Always conform to local
regulations for disposal of vehicle
fluid.
This ``Do-it-yourself operations'' section
gives instructions regarding only those
items which are relatively easy for an owner
to perform.
You should be aware that incomplete or
improper servicing may result in operating
difficulties or excessive emissions, and
could affect your warranty coverage.If in
doubt about any servicing, have it done
by your NISSAN dealer.
MAINTENANCE
PRECAUTIONS
7-2
ZX
Page 156 of 194
WARNING
cAfter rotating the tires, adjust the tire
pressure.
cRetighten the wheel nuts after the
wheels have been run for the first
600 miles (1,000 km) (also in cases of
a flat tire, etc.).
cDo not include the T-type spare tire
in the tire rotation.
Tire wear and damage
WARNING
c
Tires should be periodically inspected
for wear, cracking, bulging, or objects
caught in the tread. If excessive wear,
cracks, bulging, or deep cuts are
found, the tire should be replaced.
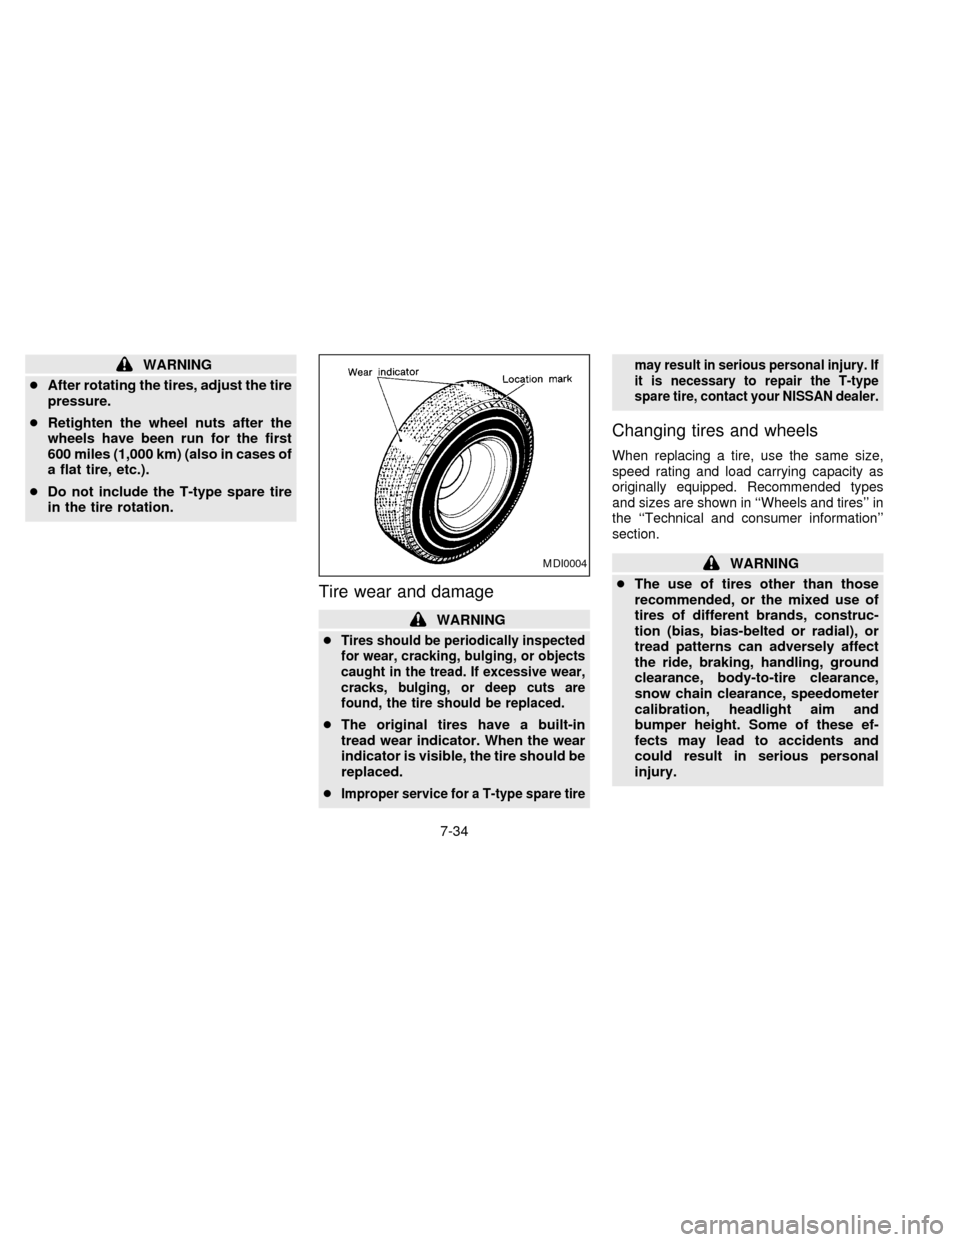
cThe original tires have a built-in
tread wear indicator. When the wear
indicator is visible, the tire should be
replaced.
c
Improper service for a T-type spare tiremay result in serious personal injury. If
it is necessary to repair the T-type
spare tire, contact your NISSAN dealer.
Changing tires and wheels
When replacing a tire, use the same size,
speed rating and load carrying capacity as
originally equipped. Recommended types
and sizes are shown in ``Wheels and tires'' in
the ``Technical and consumer information''
section.
WARNING
cThe use of tires other than those
recommended, or the mixed use of
tires of different brands, construc-
tion (bias, bias-belted or radial), or
tread patterns can adversely affect
the ride, braking, handling, ground
clearance, body-to-tire clearance,
snow chain clearance, speedometer
calibration, headlight aim and
bumper height. Some of these ef-
fects may lead to accidents and
could result in serious personal
injury.MDI0004
7-34
ZX
Page 160 of 194

Your new NISSAN has been designed to
have minimum maintenance requirements
with longer service intervals to save you
both time and money. However, some day-
to-day and regular maintenance is essential
to maintain your NISSAN's good mechani-
cal condition, as well as its emission and
engine performance.
It is the owner's responsibility to make sure
the specified periodic maintenance, as well
as general maintenance, is performed.
As the vehicle owner, you are the only one
who can ensure that your vehicle receives
the proper maintenance care. You are a
vital link in the maintenance chain.
General maintenance
General maintenance includes those items
which should be checked during normal
day-to-day operation of the vehicle. They
are essential if your vehicle is to continue to
operate properly. It is your responsibility to
perform these procedures regularly as
prescribed.
These checks or inspections can be done
by yourself, a qualified technician or, if you
prefer, your NISSAN dealer.
Periodic maintenance
The maintenance items listed in this part are
required to be serviced at regular intervals.
However, under severe driving conditions,
additional or more frequent maintenance is
required.
Where to go for service
If maintenance service is required or your
vehicle appears to malfunction, have the
systems checked and tuned by an autho-
rized NISSAN dealer.
NISSAN technicians are well-trained spe-
cialists and are kept up to date with the
latest service information through technical
bulletins, service tips, and in-dealership
training programs. They are completely
qualified to work on NISSAN's vehiclesbe-
forethey work on your vehicle, rather than
after they have worked on it.
You can be confident that your NISSAN
dealer's service department performs the
best job to meet the maintenance require-
ments on your vehicle Ð in a reliable and
economical way.
During the normal day-to-day operation of the
vehicle, general maintenance should be per-
formed regularly as prescribed in this section.
If you detect any unusual sounds, vibrations
or smells, be sure to check for the cause or
have your NISSAN dealer do it promptly. In
addition, you should notify your NISSAN
dealer if you think repairs are required.
When performing any checks or maintenance
work, closely observe the precautions in the
``Do-it-yourself operations'' section.
OUTSIDE THE VEHICLE
The maintenance items listed here should
be performed from time to time, unless
otherwise specified.
Additional information on the following
items with ``*'' is found in the ``Do-it-
yourself operations'' section.
Tires* ÐCheck the pressure with a gauge
periodically when at a service station, in-
cluding the spare, and adjust to the speci-
fied pressure if necessary. Check carefully
for damage, cuts or excessive wear.
Wheel nuts* ÐWhen checking the tires,
make sure no nuts are missing, and check
for any loose nuts. Tighten if necessary.
GENERAL MAINTENANCE
8-2
ZX