brake pads NISSAN SENTRA 1997 B14 / 4.G Owners Manual
[x] Cancel search | Manufacturer: NISSAN, Model Year: 1997, Model line: SENTRA, Model: NISSAN SENTRA 1997 B14 / 4.GPages: 194, PDF Size: 1.62 MB
Page 16 of 194
Key reminder chime
A chime sounds if the driver side door is
opened while the key is left in the ignition
switch. Remove the key and take it with you
when leaving the vehicle.
Light reminder chime
A chime sounds when the driver side door is
opened if the headlights or parking lights
are on (ignition switch is turned off).
Turn the headlight control switch off before
you leave the vehicle.
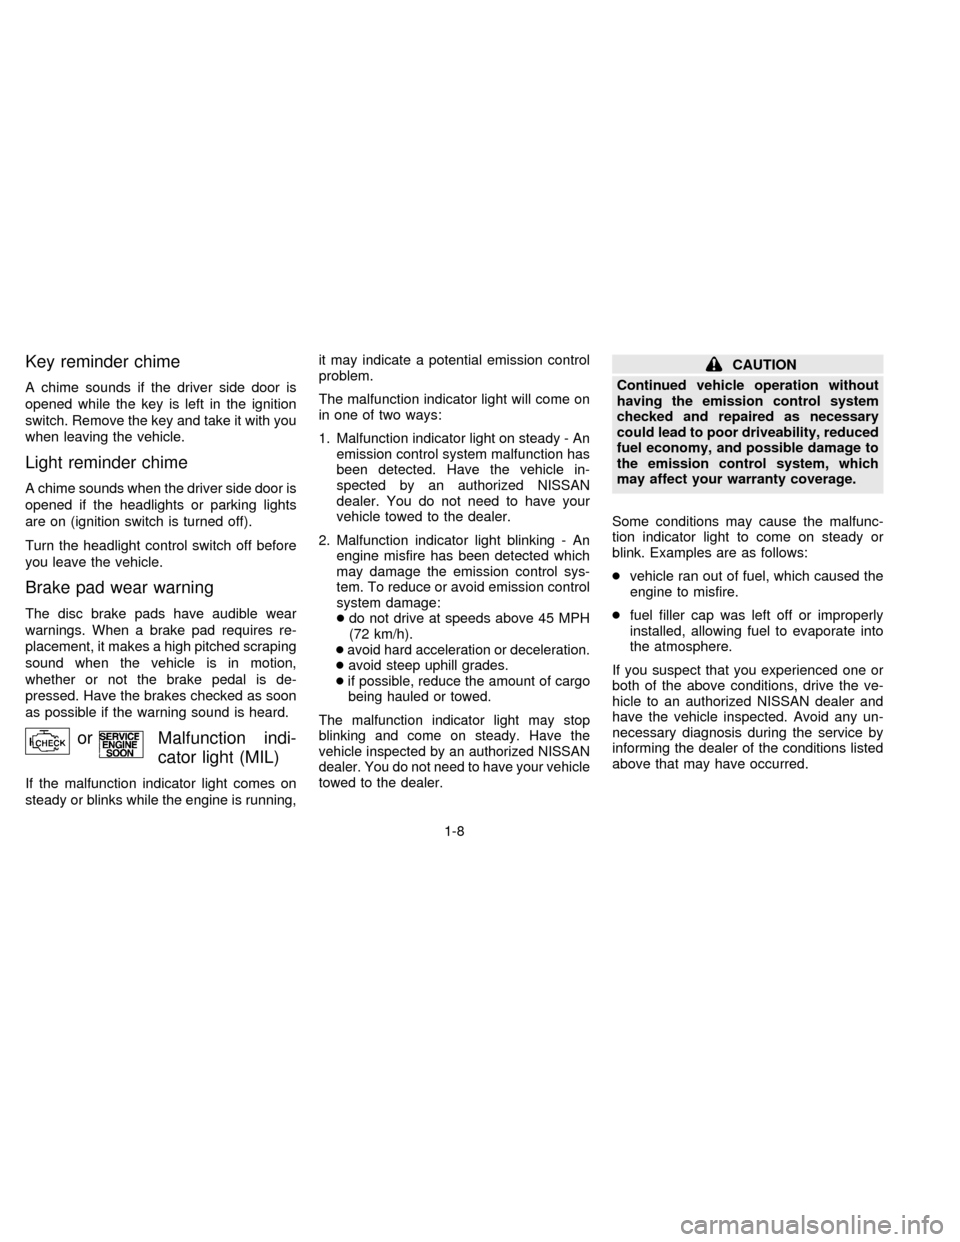
Brake pad wear warning
The disc brake pads have audible wear
warnings. When a brake pad requires re-
placement, it makes a high pitched scraping
sound when the vehicle is in motion,
whether or not the brake pedal is de-
pressed. Have the brakes checked as soon
as possible if the warning sound is heard.
orMalfunction indi-
cator light (MIL)
If the malfunction indicator light comes on
steady or blinks while the engine is running,it may indicate a potential emission control
problem.
The malfunction indicator light will come on
in one of two ways:
1. Malfunction indicator light on steady - An
emission control system malfunction has
been detected. Have the vehicle in-
spected by an authorized NISSAN
dealer. You do not need to have your
vehicle towed to the dealer.
2. Malfunction indicator light blinking - An
engine misfire has been detected which
may damage the emission control sys-
tem. To reduce or avoid emission control
system damage:
cdo not drive at speeds above 45 MPH
(72 km/h).
c
avoid hard acceleration or deceleration.
cavoid steep uphill grades.
cif possible, reduce the amount of cargo
being hauled or towed.
The malfunction indicator light may stop
blinking and come on steady. Have the
vehicle inspected by an authorized NISSAN
dealer. You do not need to have your vehicle
towed to the dealer.
CAUTION
Continued vehicle operation without
having the emission control system
checked and repaired as necessary
could lead to poor driveability, reduced
fuel economy, and possible damage to
the emission control system, which
may affect your warranty coverage.
Some conditions may cause the malfunc-
tion indicator light to come on steady or
blink. Examples are as follows:
cvehicle ran out of fuel, which caused the
engine to misfire.
cfuel filler cap was left off or improperly
installed, allowing fuel to evaporate into
the atmosphere.
If you suspect that you experienced one or
both of the above conditions, drive the ve-
hicle to an authorized NISSAN dealer and
have the vehicle inspected. Avoid any un-
necessary diagnosis during the service by
informing the dealer of the conditions listed
above that may have occurred.
1-8
ZX
Page 101 of 194
The brake system has two separate hy-
draulic circuits. If one circuit develops a
problem, you will still have braking at
two wheels.
Vacuum assisted brakes
The brake booster aids braking by using
engine vacuum. If the engine stops, you can
stop the vehicle by depressing the brake
pedal. However, greater foot pressure on
the brake pedal will be required to stop the
vehicle and the stopping distance will be
longer.
Wet brakes
When the vehicle is washed or driven
through water, the brakes may get wet. As a
result, your braking distance will be longer
and the vehicle may pull to one side during
braking.
To dry brakes, drive the vehicle at a safe
speed while lightly pressing the brake pedal
to heat-up the brakes. Do this until the
brakes return to normal. Avoid driving the
vehicle at high speeds until the brakes
function correctly.
Using the brakes
Avoid resting your foot on the brake pedalwhile driving. This overheats the brakes,
increases wear on the brake linings and
pads, and reduces gas mileage.
To help save the brakes and to prevent the
brakes from overheating, reduce speed and
downshift to a lower gear before going down
a slope or long grade. Overheated brakes
may reduce braking performance and could
result in loss of vehicle control.
WARNING
While driving on a slippery surface, be
careful when braking, accelerating or
downshifting. Abrupt braking or accel-
erating could cause the wheels to skid
and result in an accident.The anti-lock brake system controls the
brakes at each wheel so the wheels do not
lock when braking abruptly or when braking
on slippery surfaces. The system detects
the rotation speed at each wheel and varies
the brake fluid pressure to prevent each
wheel from locking and sliding. By prevent-
ing wheel lockup, the system helps the
driver maintain steering control and helps to
minimize swerving and spinning on slippery
surfaces.
Using the System
Depress the brake pedal and hold it down.
WARNING
Do not pump the brake pedal. Doing so
may result in increased stopping dis-
tances.
Normal operation
The anti-lock brake system does not oper-
ate at speeds below 3 to 6 MPH (5 to 10
km/h) to completely stop the vehicle. (The
speeds vary according to road conditions.)
When the anti-lock system senses that one
or more wheels are close to locking up, the
actuator (under the hood) rapidly applies
BRAKE SYSTEM ANTI-LOCK BRAKE SYSTEM
(ABS) (if so equipped)
4-17
ZX
Page 144 of 194
normal, it may be due to a lack of adjust-
ment of the rear drum brakes. Apply the
parking brake several times.
WARNING
See your NISSAN dealer and have it
checked if the brake pedal height does
not return to normal.
Brake pad wear indicators
The disc brake pads on your vehicle have
audible wear indicators. When a brake pad
requires replacement, it makes a high
pitched scraping or screeching sound when
the vehicle is in motion whether or not the
brake pedal is depressed. Have the brakes
checked as soon as possible if the wear
indicator sound is heard.
Under some driving or climate conditions,
occasional brake squeak, squeal or other
noise may be heard. Occasional brake
noise during light to moderate stops is nor-
mal and does not affect the function or
performance of the brake system.
The rear drum brakes (if so equipped) do
not have audible wear indicators. Should
you ever hear an unusually loud noise fromthe rear drum brakes, have them inspected
as soon as possible by your NISSAN
dealer.
Proper brake inspection intervals should
be followed.For more information regard-
ing brake inspections, see the appropriate
maintenance schedule information in the
``Maintenance Schedule'' section of this
manual.Check the brake booster function as fol-
lows:
1. With the engine off, press and release
the brake pedal several times. When
brake pedal movement (distance of
travel) remains the same from one pedal
application to the next, continue on to the
next step.
2. While depressing the brake pedal, start
the engine. The pedal height should drop
a little.
3. With the brake pedal depressed, stop the
engine. Keeping the pedal depressed for
about 30 seconds, the pedal height
should not change.
4. Run the engine for one minute without
depressing the brake pedal, then turn it
off. Depress the brake pedal several
times. The pedal travel distance will de-
crease gradually with each depression
as the vacuum is released from the
booster.
If the brakes do not operate properly, see
your NISSAN dealer.
BRAKE BOOSTER
7-22
ZX
Page 165 of 194
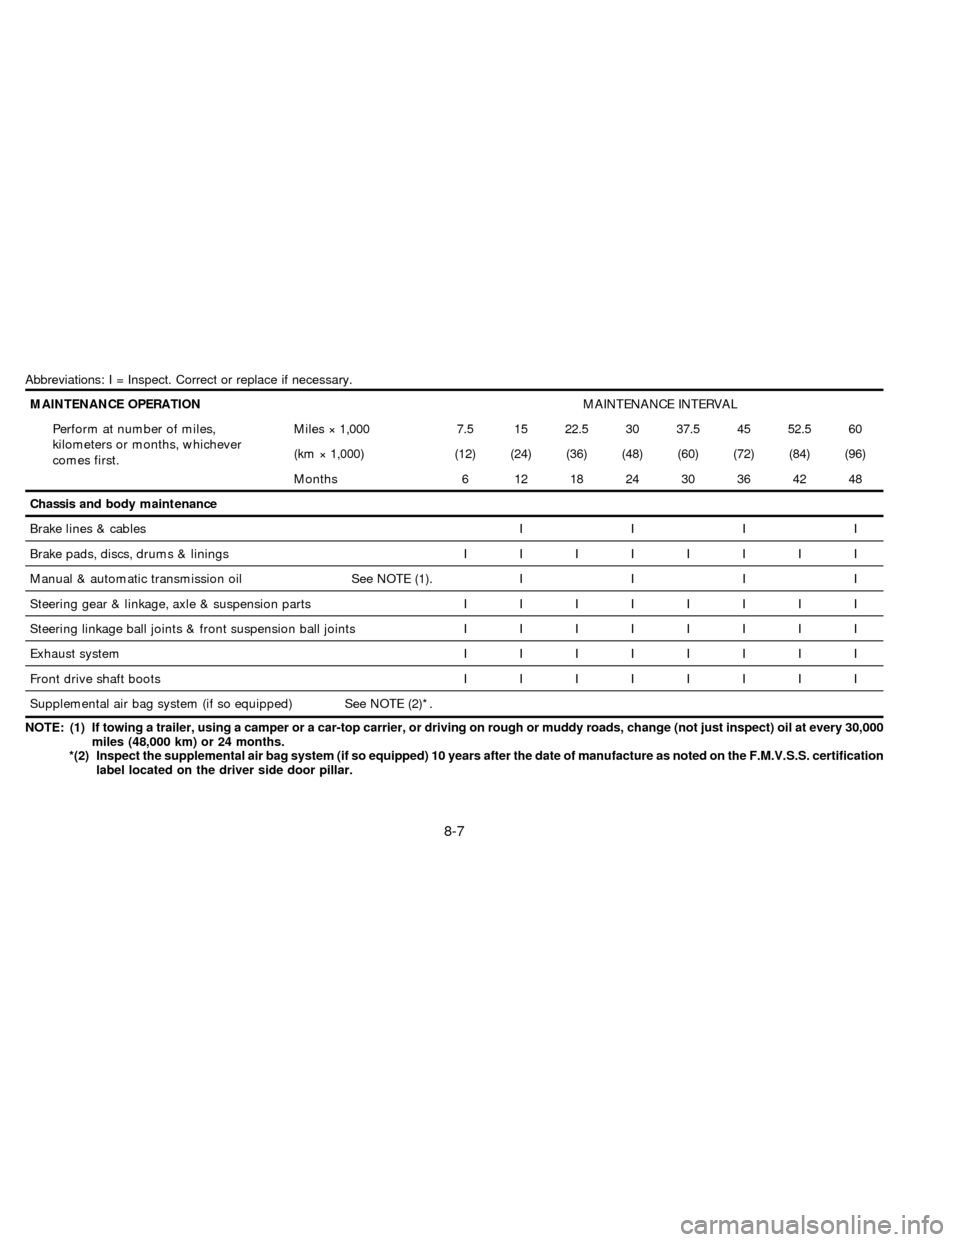
Abbreviations: I = Inspect. Correct or replace if necessary.
MAINTENANCE OPERATIONMAINTENANCE INTERVAL
Perform at number of miles,
kilometers or months, whichever
comes first.Miles ý 1,000 7.5 15 22.5 30 37.5 45 52.5 60
(km ý 1,000) (12) (24) (36) (48) (60) (72) (84) (96)
Months 6 12 18 24 30 36 42 48
Chassis and body maintenance
Brake lines & cablesIIII
Brake pads, discs, drums & liningsIIIIIIII
Manual & automatic transmission oil See NOTE (1).IIII
Steering gear & linkage, axle & suspension partsIIIIIIII
Steering linkage ball joints & front suspension ball jointsIIIIIIII
Exhaust systemIIIIIIII
Front drive shaft bootsIIIIIIII
Supplemental air bag system (if so equipped) See NOTE (2)*.
NOTE: (1) If towing a trailer, using a camper or a car-top carrier, or driving on rough or muddy roads, change (not just inspect) oil at every 30,000
miles (48,000 km) or 24 months.
*(2) Inspect the supplemental air bag system (if so equipped) 10 years after the date of manufacture as noted on the F.M.V.S.S. certification
label located on the driver side door pillar.
8-7
ZX
Page 167 of 194
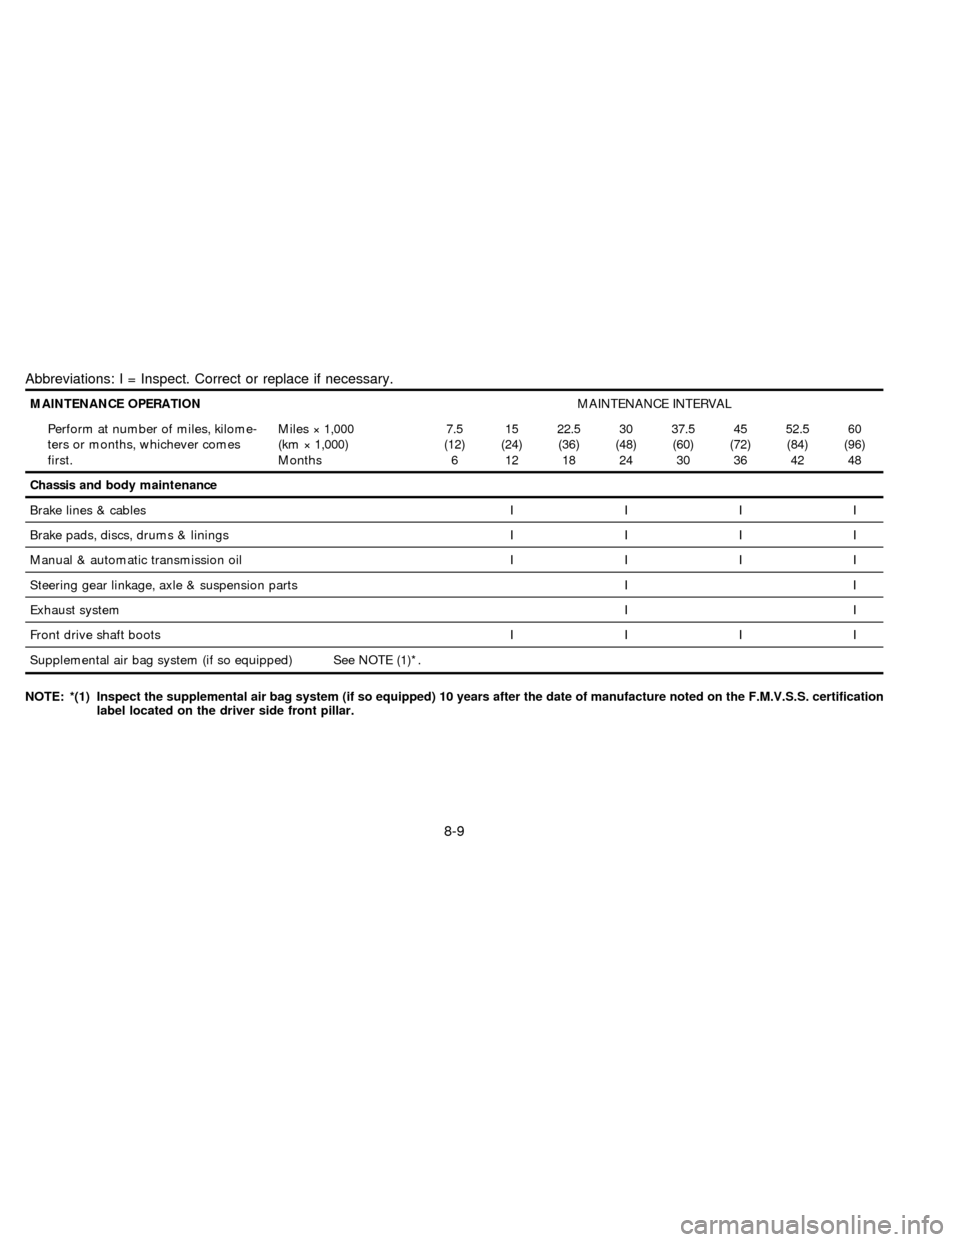
Abbreviations: I = Inspect. Correct or replace if necessary.
MAINTENANCE OPERATIONMAINTENANCE INTERVAL
Perform at number of miles, kilome-
ters or months, whichever comes
first.Miles ý 1,000
(km ý 1,000)
Months7.5
(12)
615
(24)
1222.5
(36)
1830
(48)
2437.5
(60)
3045
(72)
3652.5
(84)
4260
(96)
48
Chassis and body maintenance
Brake lines & cablesIIII
Brake pads, discs, drums & liningsIIII
Manual & automatic transmission oilIIII
Steering gear linkage, axle & suspension parts I I
Exhaust systemII
Front drive shaft bootsIIII
Supplemental air bag system (if so equipped) See NOTE (1)*.
NOTE: *(1) Inspect the supplemental air bag system (if so equipped) 10 years after the date of manufacture noted on the F.M.V.S.S. certification
label located on the driver side front pillar.
8-9
ZX
Page 168 of 194

Additional information on the following
items with ``*'' is found in the ``Do-it-
yourself operations'' section.
Emission control system
maintenance
Drive belts* ÐCheck drive belts for wear,
fraying or cracking and also for proper tension.
Replace the drive belts if found damaged.
Air cleaner filter ÐUnder normal driving
conditions, the air cleaner filter should be
replaced in accordance with the maintenance
schedule. However, driving the vehicle in
dusty areas may cause more rapid clogging
of the element. Consequently, the element
may have to be replaced more frequently.
Vapor lines ÐCheck vapor lines and con-
nections for failure or looseness. If leaks are
found, replace them.
Fuel lines ÐCheck the fuel hoses, piping
and connections for leaks, looseness or
deterioration. Replace any parts if they are
damaged.
Fuel filter ÐIf the vehicle is operated under
extremely adverse weather conditions or in
areas where ambient temperatures are ei-
ther extremely low or extremely high, thefilter might become clogged. In such an
event, replace the filter immediately.
Engine coolant* ÐDrain and flush the
cooling system.
Engine oil & oil filter* ÐUnder normal
driving conditions, the engine oil and oil filter
should be replaced in accordance with the
maintenance schedule. However, under se-
vere driving conditions, they may have to be
replaced more frequently.
Spark plugs* ÐReplace with new plugs
having the correct heat range.
Intake & exhaust valve clearance Ð
Check and adjust the valve clearance.
Chassis and body maintenance
Brake lines & cables ÐCheck the brake
lines and hoses (including brake booster
vacuum hoses, connections & check valve)
and parking brake cables for proper attach-
ment, leaks, cracks, chafing, abrasion, de-
terioration, etc.
Brake pads, discs, drums & linings Ð
Check these and the other neighboring brake
components for wear, deterioration and
leaks. Under severe driving conditions, they
may have to be inspected more frequently.
Manual & automatic transmission fluid*
ÐCheck the fluid level and visually inspect
for signs of leakage.
Under severe driving conditions, the fluid
should be replaced at the specified interval.
Steering gear & linkage, axle & suspen-
sion parts, and drive shaft boots Ð
Check for damage, looseness and leakage
of oil or grease. Under severe driving con-
ditions, more frequent inspection should be
performed.
Steering linkage ball joints & front sus-
pension ball joints ÐCheck the ball joints
for damage, looseness and grease leakage.
Exhaust system ÐVisually check the ex-
haust pipes, muffler, and hangers for proper
attachment, leaks, cracks, chafing, abra-
sion, deterioration, etc. Under severe
driving conditions, inspection should be per-
formed more frequently.
Supplemental air bag system (if so
equipped) ÐCheck the supplemental air
bag system components for proper attach-
ment, damage, deformities, cracks, rust,
etc. Work around and on the supplemental
air bag system should be done by an autho-
rized NISSAN dealer.
EXPLANATION OF
MAINTENANCE ITEMS
8-10
ZX