climate settings NISSAN SENTRA 2014 B17 / 7.G Quick Reference Guide
[x] Cancel search | Manufacturer: NISSAN, Model Year: 2014, Model line: SENTRA, Model: NISSAN SENTRA 2014 B17 / 7.GPages: 24, PDF Size: 3.14 MB
Page 7 of 24

5
CLOCK SET/ADJUSTMENT
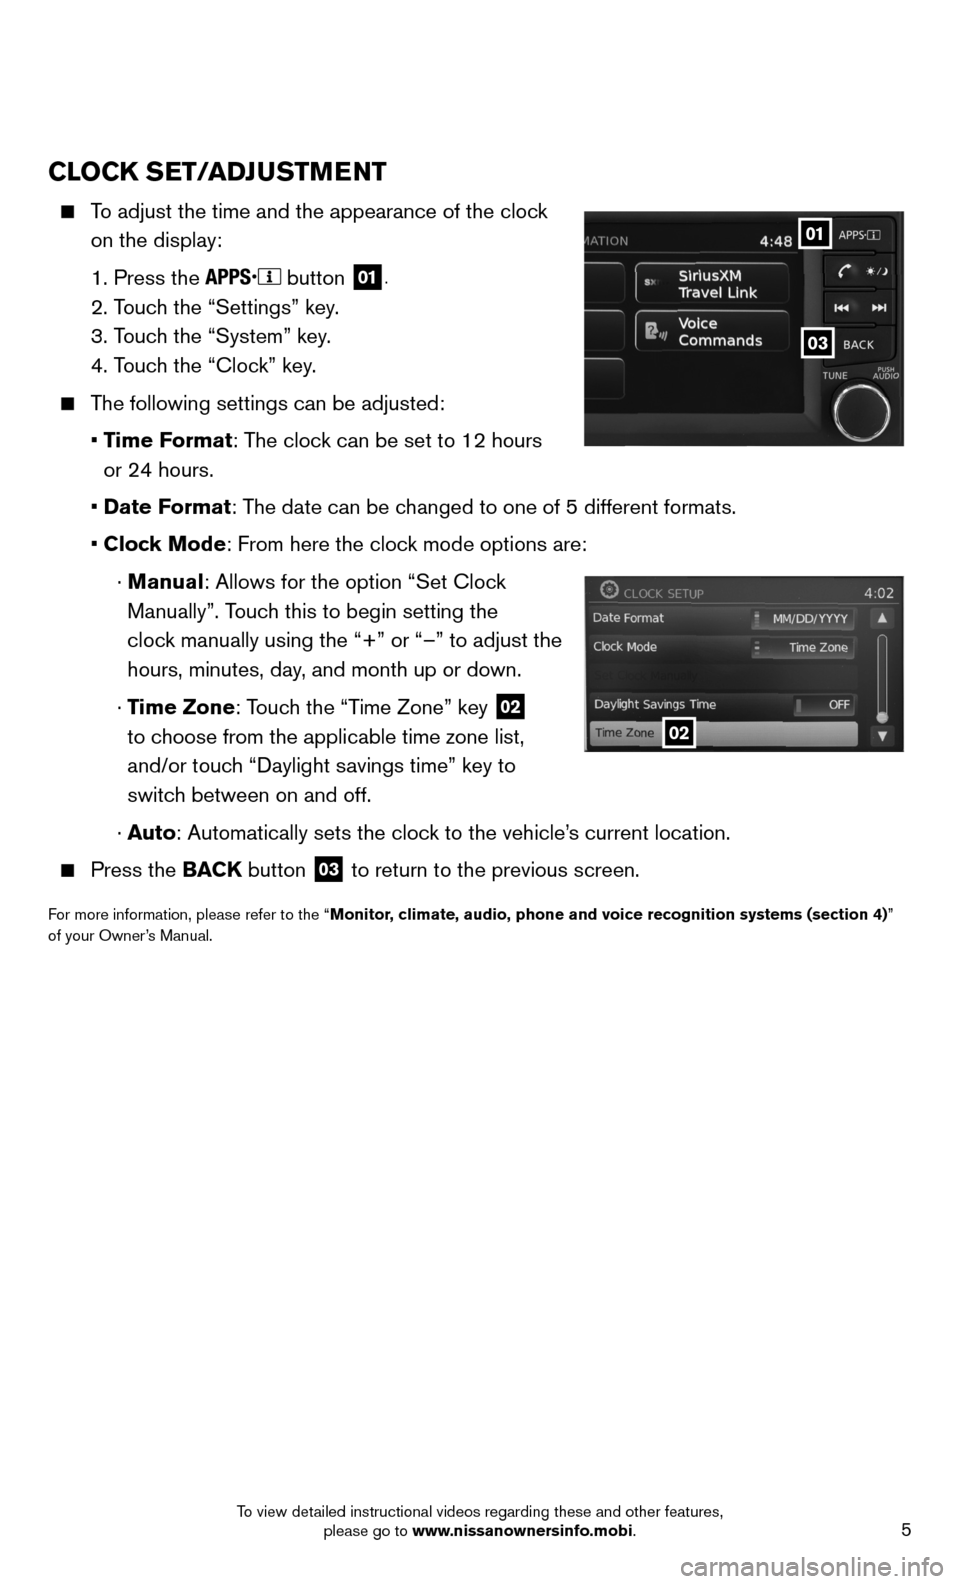
To adjust the time and the appearance of the clock
on the display:
1. Press the
button 01.
2. Touch the “Settings” key.
3. Touch the “System” key.
4. Touch the “Clock” key.
The following settings can be adjusted:
• Time Format: The clock can be set to 12 hours
or 24 hours.
• Date Format: The date can be changed to one of 5 different formats.
• Clock Mode: From here the clock mode options are:
· Manual: Allows for the option “Set Clock
Manually”. Touch this to begin setting the
clock manually using the “+” or “–” to adjust the
hours, minutes, day, and month up or down.
· Time Zone: Touch the “Time Zone” key
02
to choose from the applicable time zone list,
and/or touch “Daylight savings time” key to
switch between on and off.
· Auto: Automatically sets the clock to the vehicle’s current location.
Press the BACK button 03 to return to the previous screen.
For more information, please refer to the “Monitor, climate, audio, phone and voice recognition systems (section 4)”
of your Owner’s Manual.
03
01
02
To view detailed instructional videos regarding these and other features, please go to www.nissanownersinfo.mobi.
Page 12 of 24

10
FIRST DRIVE FEATURES
0102
03
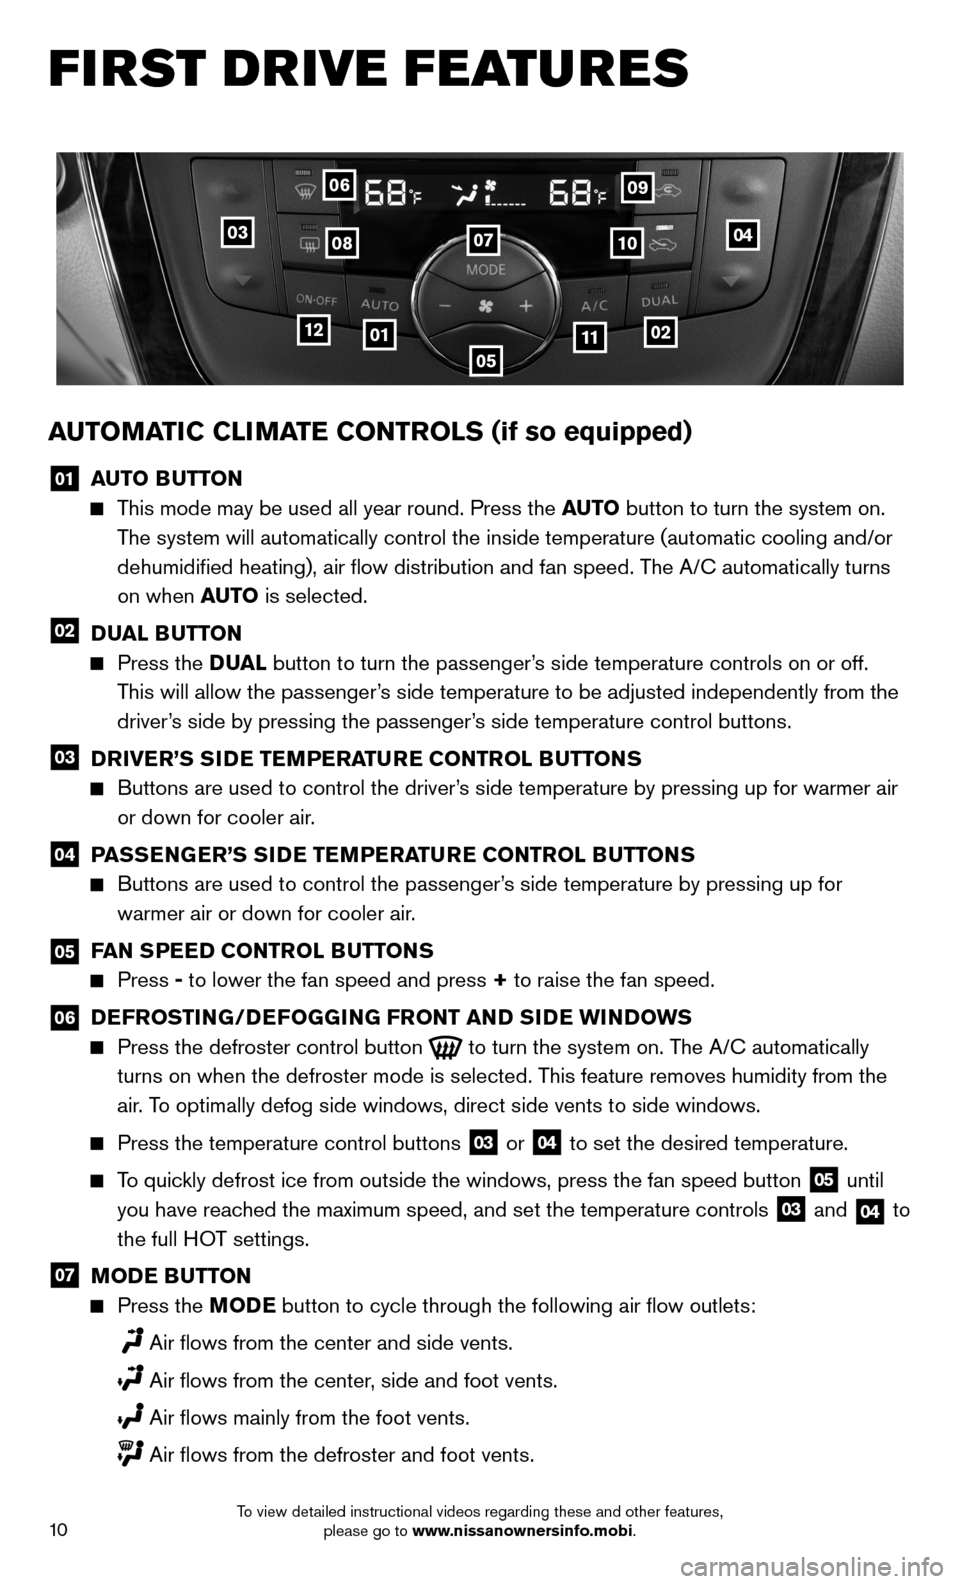
AUTOMATIC CLIMATE CONTROLS (if so equipped)
01 AUTO BUTTON
This mode may be used all year round. Press the AUTO button to turn the system on.
The system will automatically control the inside temperature (automatic \
cooling and/or
dehumidified heating), air flow distribution and fan speed. The A/C automatically turns
on when AUTO is selected.
02 DUAL BUTTON
Press the DUAL button to turn the passenger’s side temperature controls on or off.
This will allow the passenger’s side temperature to be adjusted independently from the
driver’s side by pressing the passenger’s side temperature control buttons.
03 DRIVER’S SIDE TEMPERATURE CONTROL BUTTONS
Buttons are used to control the driver’s side temperature by pressing up for warmer air
or down for cooler air.
04 PASSENGER’S SIDE TEMPERATURE CONTROL BUTTONS
Buttons are used to control the passenger’s side temperature by pressing up for
warmer air or down for cooler air.
05 FAN SPEED CONTROL BUTTONS
Press - to lower the fan speed and press + to raise the fan speed.
06 DEFROSTING/DEFOGGING FRONT AND SIDE WINDOWS
Press the defroster control button to turn the system on. The A/C automatically
turns on when the defroster mode is selected. This feature removes humidity from the
air. To optimally defog side windows, direct side vents to side windows.
Press the temperature control buttons
03 or 04 to set the desired temperature.
To quickly defrost ice from outside the windows, press the fan speed button
05 until
you have reached the maximum speed, and set the temperature controls
03 and 04 to
the full HOT settings.
07 MODE BUTTON
Press the MODE button to cycle through the following air flow outlets:
Air flows from the center and side vents.
Air flows from the center, side and foot vents.
Air flows mainly from the foot vents.
Air flows from the defroster and foot vents.
05
04
06
0708
09
10
1112
To view detailed instructional videos regarding these and other features, please go to www.nissanownersinfo.mobi.
Page 14 of 24

12
FIRST DRIVE FEATURES
02 TUNE KNOB
To manually tune the radio, turn the TUNE knob left or right.
Press the AUDIO BUTTON to go to the audio settings screen.
03
SEEK/CATEGORY BUTTONS
To tune and stop at the previous or next broadcasting station, press the seek buttons
or .
For satellite radio, to switch to the first channel of the previous or next
category, press the seek buttons
or .
To change tracks on a CD, press the seek buttons or .
When the seek buttons or are pressed and held while a CD is playing,
the CD will rewind or fast forward. When the button is released, the CD will play
at normal speed.
04 STATION SELECT KEYS
Twelve stations can be set for the FM band, six for the AM band and eighteen for
satellite radio.
To store a station in a preset, first select a radio band by pressing the FM•AM
05 or
SXM button 06, then tune to the desired FM, AM or XM satellite radio station.
Now select and hold the desired station memory key (1-6) until the preset number is
updated on the display and a beep is heard. Programing is now complete. \
To retrieve a previously set station, select the radio band where the preset was stored
then press the corresponding station memory key (1-6).
For more information, refer to the “Monitor, climate, audio, phone and voice recognition systems (section 4)” of your
Owner’s Manual.
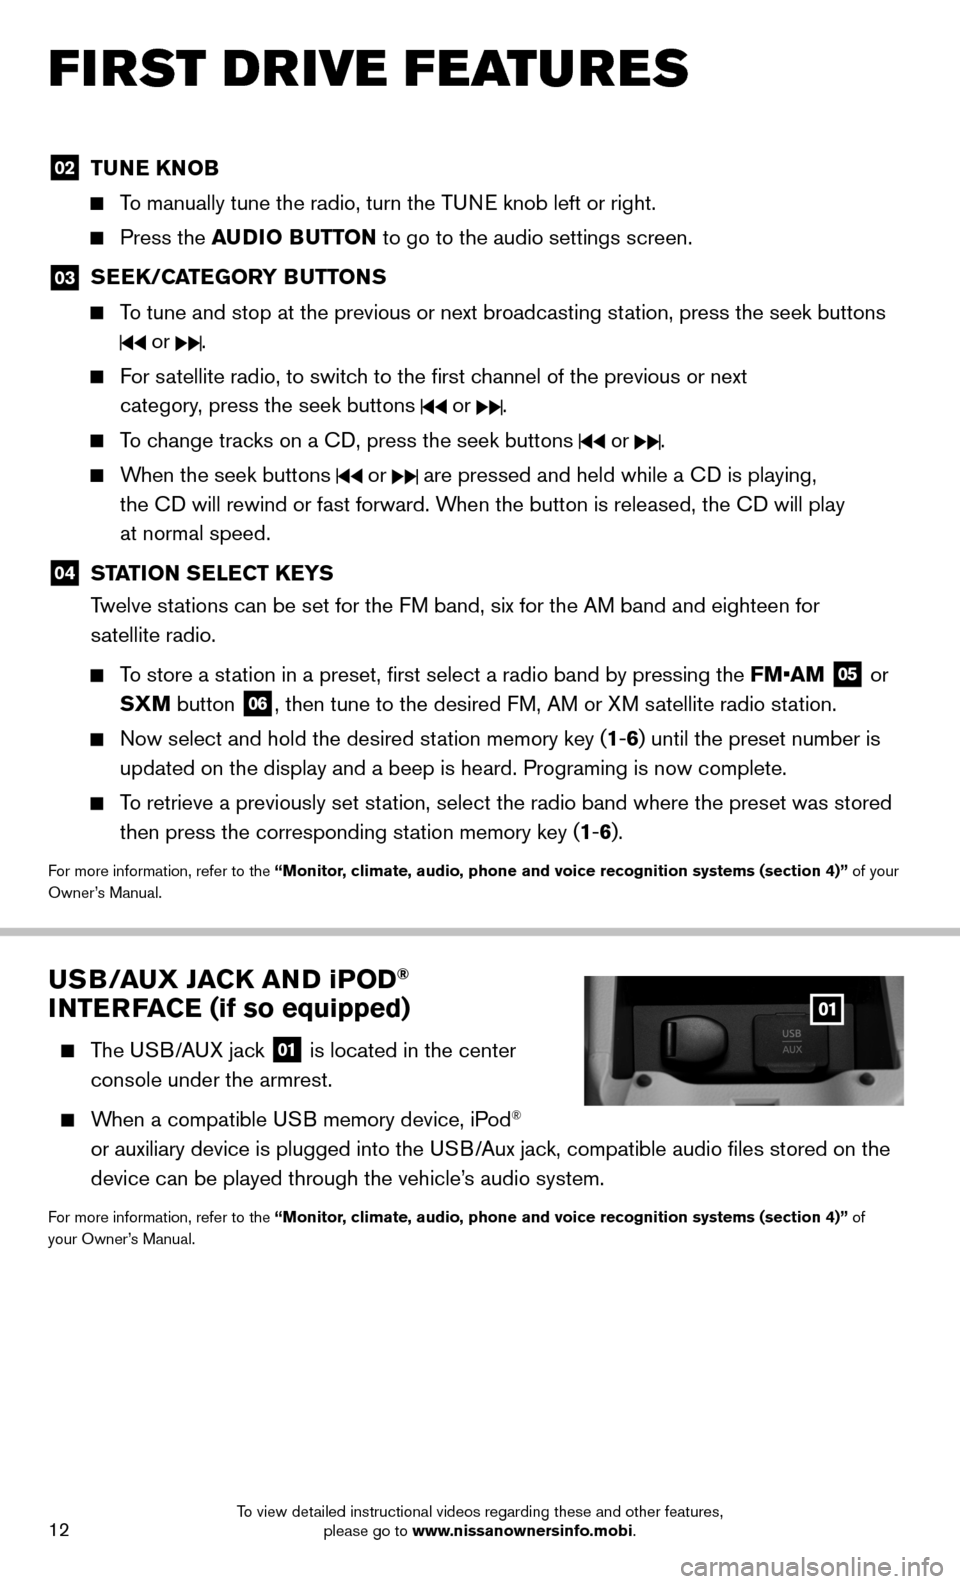
USB/AUX JACK AND iP OD®
INTERFACE (if so equipped)
The USB/AUX jack
01 is located in the center
console under the armrest.
When a compatible USB memory device, iPod®
or auxiliary device is plugged into the USB/Aux jack, compatible audio files stored on the
device can be played through the vehicle’s audio system.
For more information, refer to the “Monitor, climate, audio, phone and voice recognition systems (section 4)” of
your Owner’s Manual.
To view detailed instructional videos regarding these and other features, please go to www.nissanownersinfo.mobi.