parking brake NISSAN SENTRA 2014 B17 / 7.G Quick Reference Guide
[x] Cancel search | Manufacturer: NISSAN, Model Year: 2014, Model line: SENTRA, Model: NISSAN SENTRA 2014 B17 / 7.GPages: 24, PDF Size: 3.14 MB
Page 5 of 24

3
TIRE PRESSURE MONITORING SYSTEM (TPMS) WITH
EASY FILL TIRE ALERT (if so equipped)
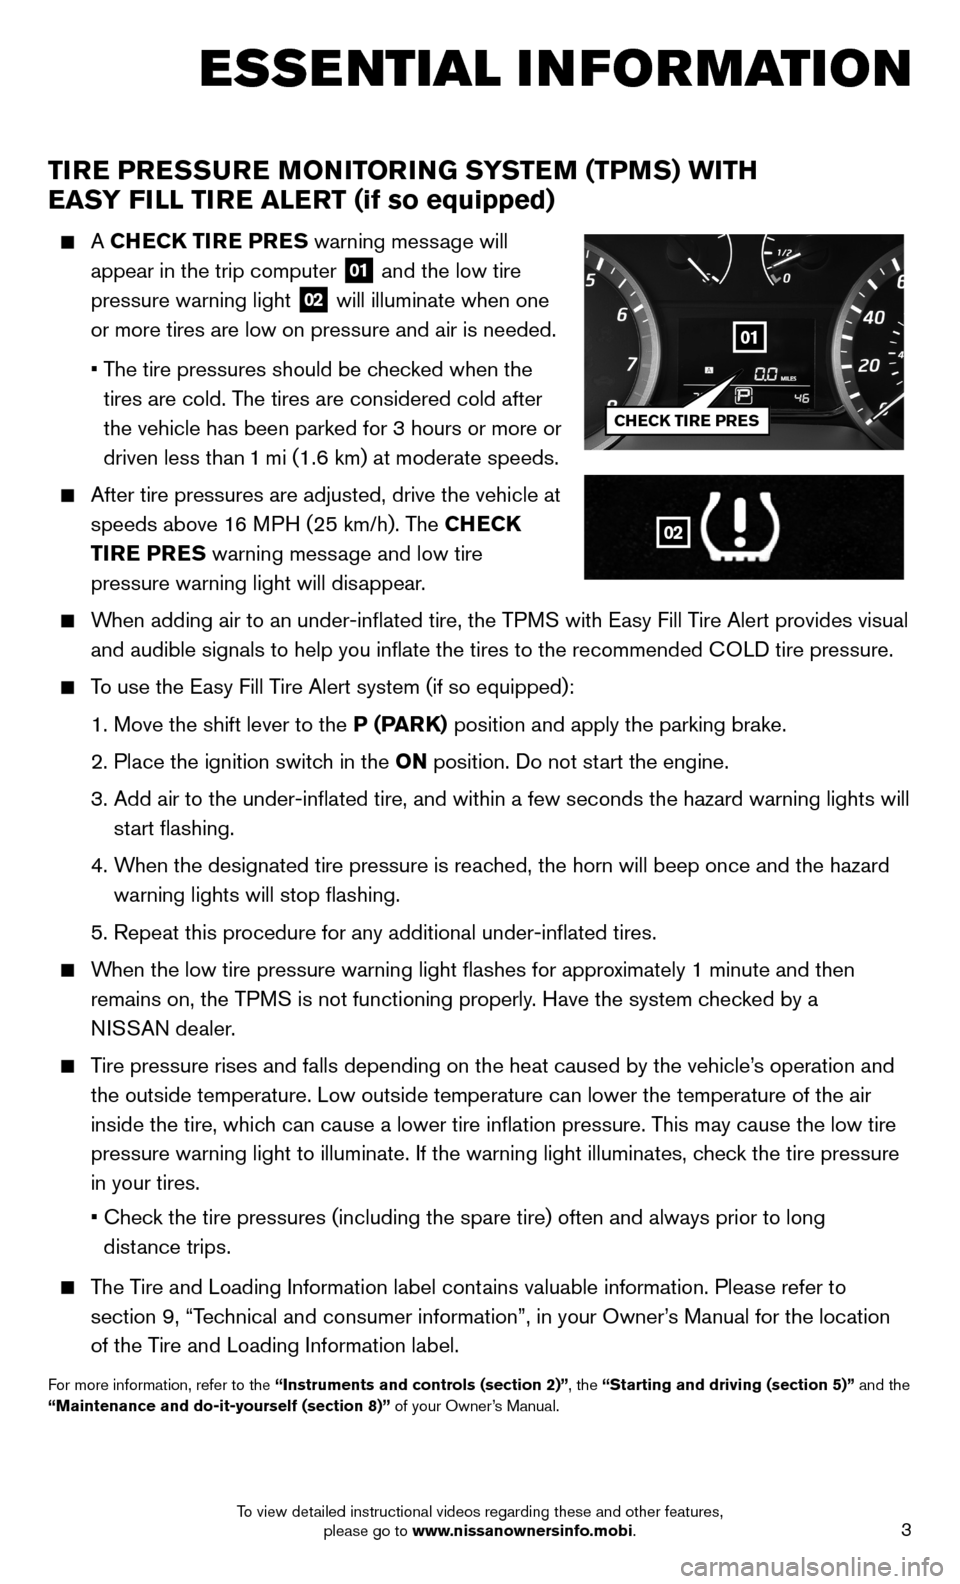
A CHECK TIRE PRES warning message will
appear in the trip computer
01 and the low tire
pressure warning light 02 will illuminate when one
or more tires are low on pressure and air is needed.
• The tire pressures should be checked when the
tires are cold. The tires are considered cold after
the vehicle has been parked for 3 hours or more or
driven less than 1 mi (1.6 km) at moderate speeds.
After tire pressures are adjusted, drive the vehicle at
speeds above 16 MPH (25 km/h). The CHECK
TIRE PRES warning message and low tire
pressure warning light will disappear.
When adding air to an under-inflated tire, the TPMS with Easy Fill Tire Alert provides visual
and audible signals to help you inflate the tires to the recommended C\
OLD tire pressure.
To use the Easy Fill Tire Alert system (if so equipped):
1. Move the shift lever to the P (PARK) position and apply the parking brake.
2. Place the ignition switch in the ON position. Do not start the engine.
3. Add air to the under-inflated tire, and within a few seconds the hazar\
d warning lights will
start flashing.
4. When the designated tire pressure is reached, the horn will beep once and the hazard
warning lights will stop flashing.
5. Repeat this procedure for any additional under-inflated tires.
When the low tire pressure warning light
flashes for approximately 1 minute and then
remains on, the TPMS is not functioning properly. Have the system checked by a
NISSAN dealer.
Tire pressure rises and falls depending on the heat caused by the vehicle\
’s operation and
the outside temperature. Low outside temperature can lower the temperatu\
re of the air
inside the tire, which can cause a lower tire inflation pressure. This may cause the low tire
pressure warning light to illuminate. If the warning light illuminates, \
check the tire pressure
in your tires.
• Check the tire pressures (including the spare tire) often and always prior\
to long
distance trips.
The Tire and Loading Information label contains valuable information. Please refer to
section 9, “Technical and consumer information”, in your Owner’s Manual for the location
of the Tire and Loading Information label.
For more information, refer to the “Instruments and controls (section 2)”, the “Starting and driving (section 5)” and the
“Maintenance and do-it-yourself (section 8)” of your Owner’s Manual.
ESSE NTIAL I N FOR MATION
02
01
CHECK TIRE PRES
To view detailed instructional videos regarding these and other features, please go to www.nissanownersinfo.mobi.
Page 10 of 24

8
FIRST DRIVE FEATURES
TURNING THE ENGINE OFF
For a Continuously Variable Transmission, apply the brake pedal, move the shift lever to the
P (PARK) position, apply the parking brake and press the ignition switch.
For a manual transmission, apply the brake pedal, place the vehicle in 1s\
t gear, apply the
parking brake and push the ignition switch.
For more information, refer to the “Starting and driving (section 5)” of your Owner’s Manual.
HEADLIGHT CONTROL SWITCH
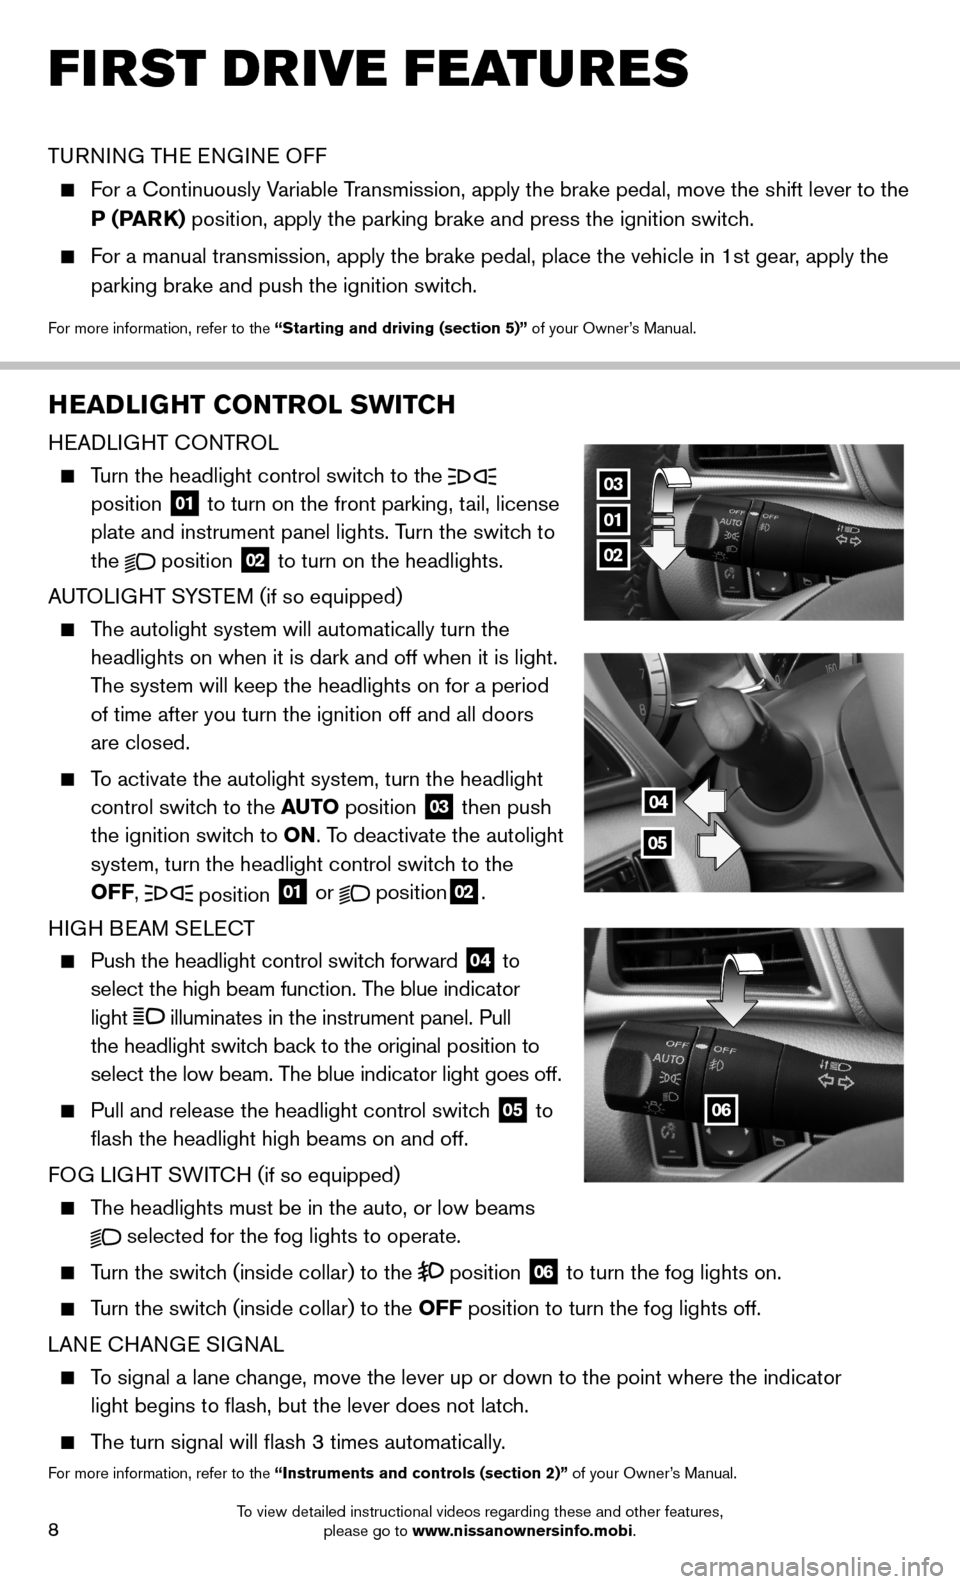
HEADLIGHT CONTROL
Turn the headlight control switch to the
position 01 to turn on the front parking, tail, license
plate and instrument panel lights. Turn the switch to
the
position
02 to turn on the headlights.
AUTOLIGHT SYSTEM (if so equipped)
The autolight system will automatically turn the
headlights on when it is dark and off when it is light.
The system will keep the headlights on for a period
of time after you turn the ignition off and all doors
are closed.
To activate the autolight system, turn the headlight
control switch to the AUTO position
03 then push
the ignition switch to ON. To deactivate the autolight
system, turn the headlight control switch to the
OFF,
position 01 or position02.
HIGH BEAM SELECT
Push the headlight control switch forward
04 to
select the high beam function. The blue indicator
light
illuminates in the instrument panel. Pull
the headlight switch back to the original position to
select the low beam. The blue indicator light goes off.
Pull and release the headlight control switch
05 to
flash the headlight high beams on and off.
FOG LIGHT SWITCH (if so equipped)
The headlights must be in the auto, or low beams
selected for the fog lights to operate.
Turn the switch (inside collar) to the position
06 to turn the fog lights on.
Turn the switch (inside collar)
to the OFF position to turn the fog lights off.
LANE CHANGE SIGNAL
To signal a lane change, move the lever up or down to the point where the indicator
light begins to flash, but the lever does not latch.
The turn signal will flash 3 times automatically.
For more information, refer to the “Instruments and controls (section 2)” of your Owner’s Manual.
01
02
03
06
04
05
To view detailed instructional videos regarding these and other features, please go to www.nissanownersinfo.mobi.