display NISSAN SENTRA 2023 Owners Manual
[x] Cancel search | Manufacturer: NISSAN, Model Year: 2023, Model line: SENTRA, Model: NISSAN SENTRA 2023Pages: 556, PDF Size: 6.11 MB
Page 14 of 556
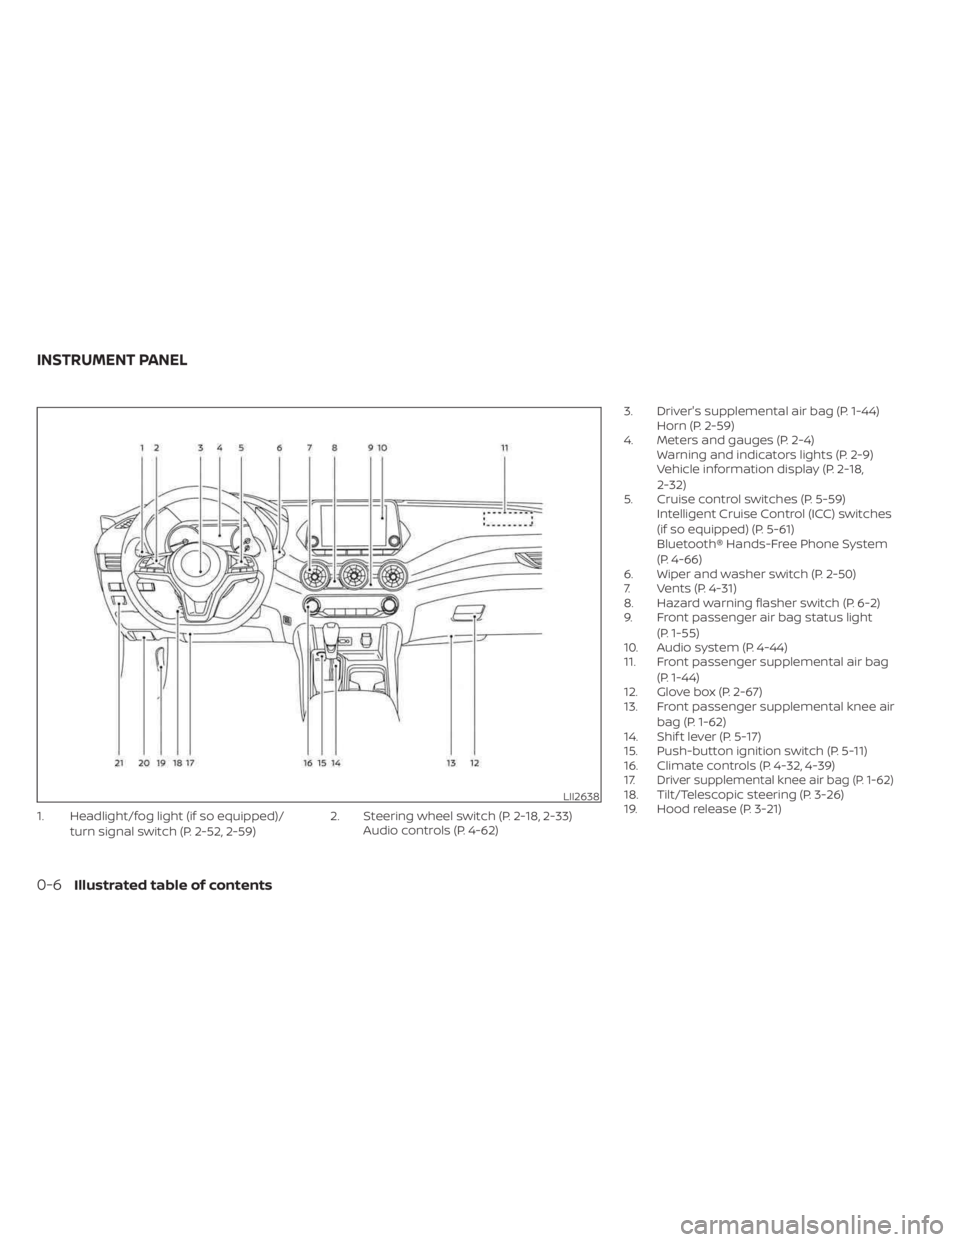
1. Headlight/fog light (if so equipped)/turn signal switch (P. 2-52, 2-59) 2. Steering wheel switch (P. 2-18, 2-33)
Audio controls (P. 4-62) 3. Driver's supplemental air bag (P. 1-44)
Horn (P. 2-59)
4. Meters and gauges (P. 2-4) Warning and indicators lights (P. 2-9)
Vehicle information display (P. 2-18,
2-32)
5. Cruise control switches (P. 5-59) Intelligent Cruise Control (ICC) switches
(if so equipped) (P. 5-61)
Bluetooth® Hands-Free Phone System
(P. 4-66)
6. Wiper and washer switch (P. 2-50)
7. Vents (P. 4-31)
8. Hazard warning flasher switch (P. 6-2)
9. Front passenger air bag status light
(P. 1-55)
10. Audio system (P. 4-44)
11. Front passenger supplemental air bag
(P. 1-44)
12. Glove box (P. 2-67)
13. Front passenger supplemental knee air
bag (P. 1-62)
14. Shif t lever (P. 5-17)
15. Push-button ignition switch (P. 5-11)
16. Climate controls (P. 4-32, 4-39)
17.
Driver supplemental knee air bag (P. 1-62)18. Tilt/Telescopic steering (P. 3-26)
19. Hood release (P. 3-21)LII2638
INSTRUMENT PANEL
0-6Illustrated table of contents
Page 33 of 556
SEAT BELT WARNING LIGHT AND
CHIME
The driver and front passenger seat is
equipped with an enhanced seat belt re-
minder function. If your vehicle is equipped
with an enhanced seat belt reminder func-
tion, a visual and audible alert will operate if
a driver or front passenger seat belt is un-
buckled at speeds of approximately 9 mph
(15 km/h) or more under the following con-
ditions:
• If the driver seat belt is not fastened.• The front passenger’s seat belt is not fas-
tened and the seat is occupied by a pas-
senger for 7 seconds af ter the ignition
switch is placed in the ON position.
• The front passenger’s seat belt is not fas- tened and objects or external force on
the passenger seat change the seat belt
reminder classification to Occupied.
The seat belt warning light will flash under
the conditions shown above until the nec-
essary seat belt is securely fastened.
A warning chime will sound for approxi-
mately 90 seconds or until one of the fol-
lowing conditions is met:
• The unbuckled front occupant’s seat belt is securely fastened.
• The seat belt reminder function in the front passenger seat no longer detects
that the front passenger seat is occupied.
• The ignition is turned off or the vehicle is placed in P (Park).
The below situations could result in the
seat belt reminder light being illuminated
and the chime sounding, even with no oc-
cupant present in the passenger seat:
• Heavy objects placed on the seat.
• Someone pushing or pulling on the front passenger seat. • An object placed under the front passen-
ger seat.
• An object placed between the seat cush- ion and center console or between the
seat cushion and the door.
• An object hanging on the seat or placed in the seatback pocket.
• A child restraint or other object pressing against the rear of the seatback.
NOTE:
The rear seats are equipped with a seat
belt warning message in the vehicle in-
formation display.
For additional information, see “Vehicle in-
formation display 4.2 inch (11 cm) TYPE A”
(P. 2-18) or “Vehicle information display
7 inch (18 cm) TYPE B” (P. 2-32).
PREGNANT WOMEN
NISSAN recommends that pregnant
women use seat belts. The seat belt should
be worn snug and always position the lap
belt as low as possible around the hips, not
the waist. Place the shoulder belt over your
shoulder and across your chest. Never run
the lap/shoulder belt over your abdominal
area. Contact your doctor for specific
recommendations.
LRS0786
Safety-Seats, seat belts and supplemental restraint system1-15
Page 83 of 556
The supplemental air bag warning lightis used to indicate malfunctions in the
pretensioner system. For additional infor-
mation, see "Supplemental air bag warning
light" (P. 1-65). If the operation of the supple-
mental air bag warning light indicates
there is a malfunction, have the system
checked. It is recommended that you visit a
NISSAN dealer for this service.
When selling your vehicle, we request that
you inform the buyer about the preten-
sioner system and guide the buyer to
the appropriate sections in this Owner's
Manual.
SUPPLEMENTAL AIR BAG WARNING
LABELS
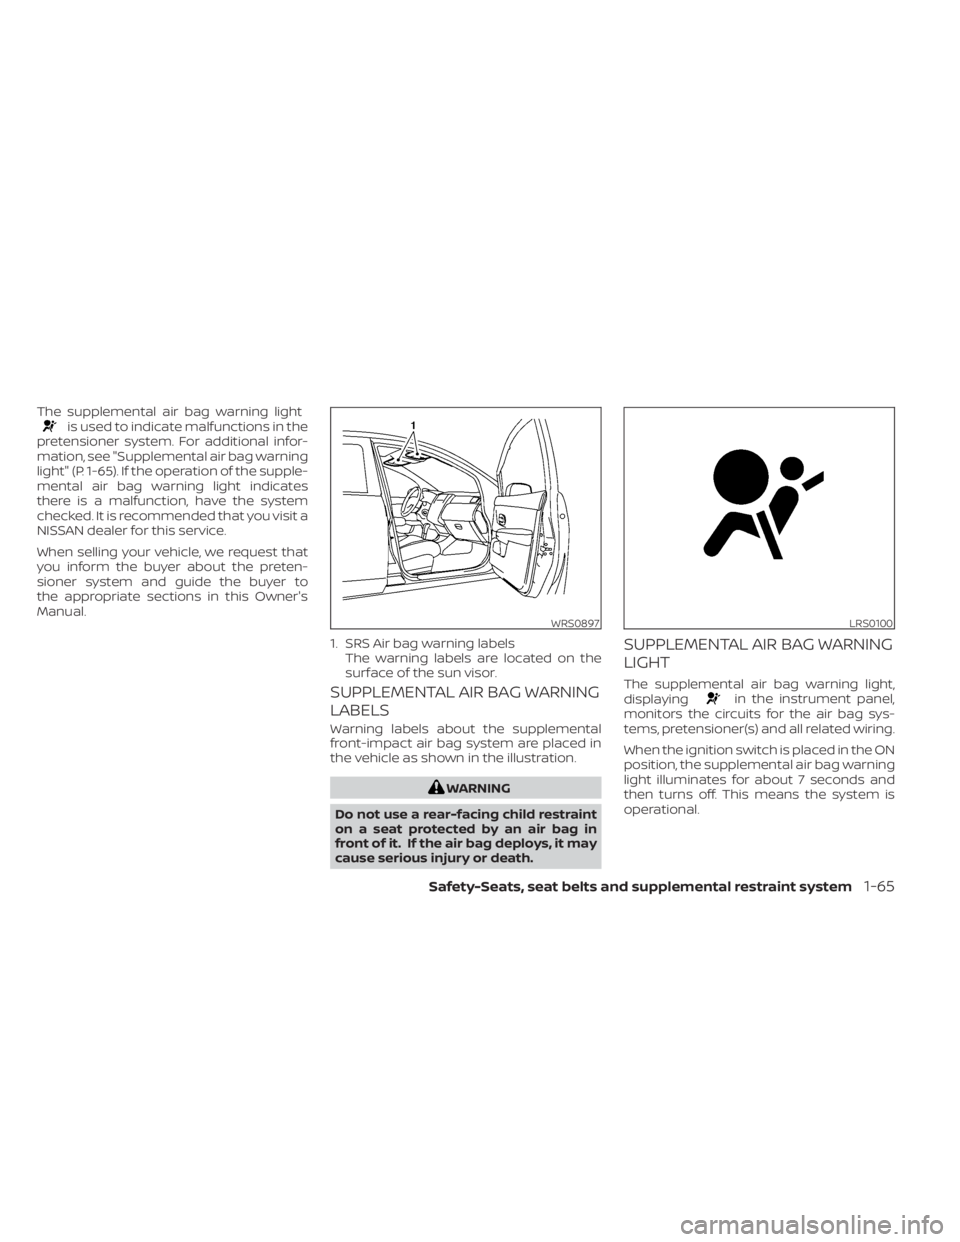
Warning labels about the supplemental
front-impact air bag system are placed in
the vehicle as shown in the illustration.
WARNING
Do not use a rear-facing child restraint
on a seat protected by an air bag in
front of it. If the air bag deploys, it may
cause serious injury or death.
SUPPLEMENTAL AIR BAG WARNING
LIGHT
The supplemental air bag warning light,
displayingin the instrument panel,
monitors the circuits for the air bag sys-
tems, pretensioner(s) and all related wiring.
When the ignition switch is placed in the ON
position, the supplemental air bag warning
light illuminates for about 7 seconds and
then turns off. This means the system is
operational.
WRS0897
1. SRS Air bag warning labels The warning labels are located on the
surface of the sun visor.
LRS0100
Safety-Seats, seat belts and supplemental restraint system1-65
Page 86 of 556
2 Instruments and controls
Instrument panel................................2-2
Meters and gauges .............................2-4
Speedometer and odometer .................2-4
Tachometer ..................................2-6
Engine coolant temperature gauge ..........2-6
Fuel gauge ................................... 2-7
Distance To Empty (DTE) .....................2-8
Warning lights, indicator lights and audible
reminders .......................................2-9
Checking lights .............................. 2-10
Warning/Indicator lights (red) ...............2-10
Warning/Indicator lights (yellow) ............2-12
Warning/Indicator lights (other) .............2-16
Audible reminders ........................... 2-17
Vehicle information display 4.2 inch (11 cm)
TYPE A (if so equipped) ......................... 2-18
How to use the vehicle information
display ...................................... 2-18
Startup display .............................. 2-18
Settings ..................................... 2-19
Vehicle information display warnings
and indicators ............................... 2-26
Vehicle information display– 7 inch (18 cm)
Type B (if so equipped) ......................... 2-32
How to use the vehicle information
display ...................................... 2-33
Startup display .............................. 2-33Resetting the drive computer
...............2-34
Settings ..................................... 2-34
Vehicle information display warnings
and indicators ............................... 2-41
Security systems ............................... 2-48
Vehicle security system (if so equipped) .....2-48
NISSAN Vehicle Immobilizer System .........2-49
Wiper and washer switch .......................2-50
Switch operation ............................ 2-50
Rear window and outside mirror
(if so equipped) defroster switch ...............2-51
Headlight and turn signal switch ...............2-52
Headlight control switch ....................2-52
LED Daytime Running Lights (DRL)
system (if so equipped) ......................2-57
Instrument brightness control ..............2-58
Turn signal switch ........................... 2-58
Fog light switch (if so equipped) .............2-59
Horn ........................................... 2-59
He
ated seat switches (if so equipped) ..........2-60
Heated steering wheel switch (if so equipped) . . . 2-61
Emergency call (SOS) button (if so equipped) . . . 2-62
Rear Door Alert ................................. 2-62
Power outlet ................................... 2-64
USB/iPod® charging port (if so equipped) .......2-64
Extended storage switch .......................2-65
Page 88 of 556
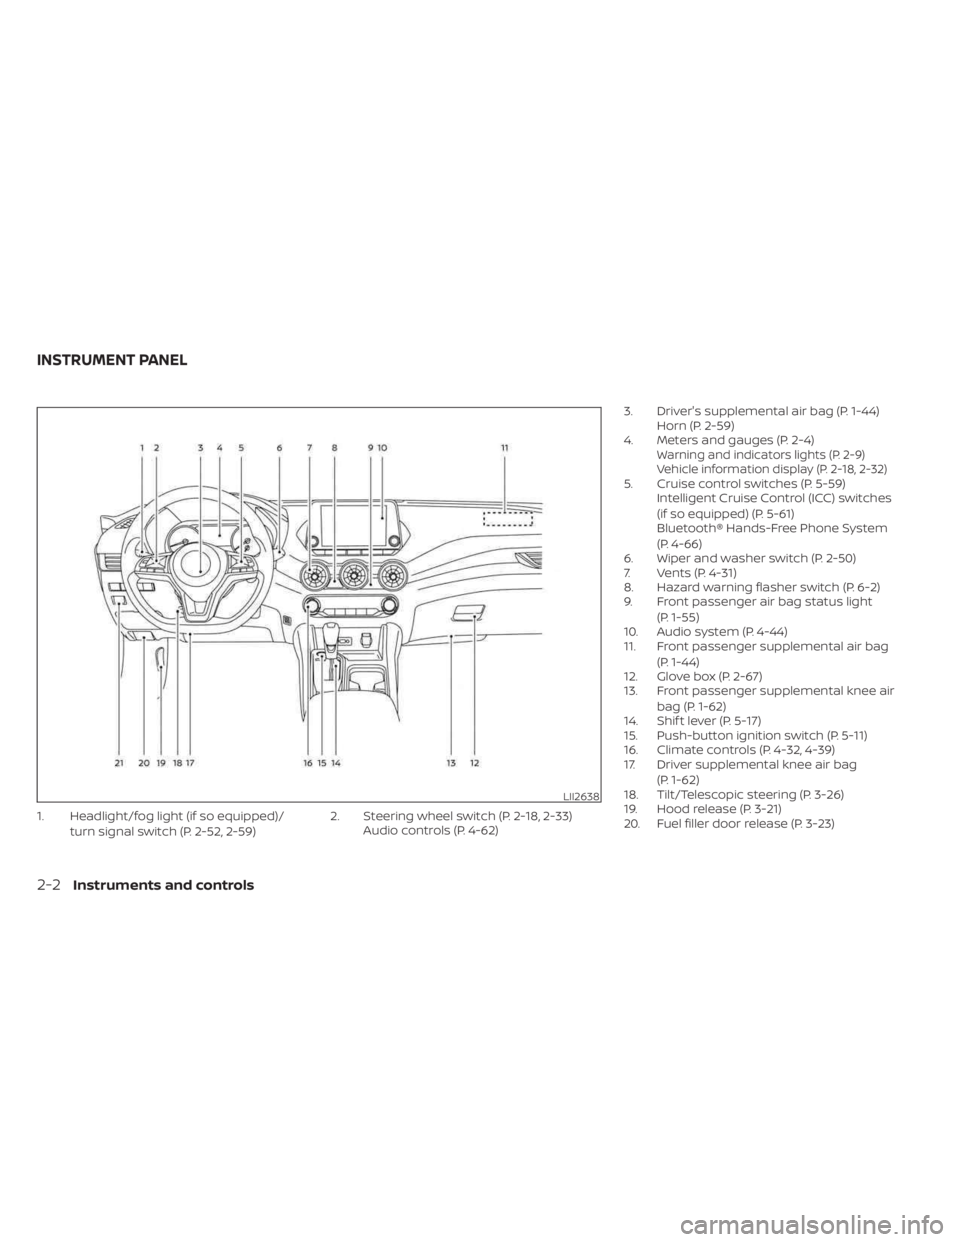
1. Headlight/fog light (if so equipped)/turn signal switch (P. 2-52, 2-59) 2. Steering wheel switch (P. 2-18, 2-33)
Audio controls (P. 4-62) 3. Driver's supplemental air bag (P. 1-44)
Horn (P. 2-59)
4. Meters and gauges (P. 2-4)
Warning and indicators lights (P. 2-9)
Vehicle information display (P. 2-18, 2-32)
5. Cruise control switches (P. 5-59) Intelligent Cruise Control (ICC) switches
(if so equipped) (P. 5-61)
Bluetooth® Hands-Free Phone System
(P. 4-66)
6. Wiper and washer switch (P. 2-50)
7. Vents (P. 4-31)
8. Hazard warning flasher switch (P. 6-2)
9. Front passenger air bag status light
(P. 1-55)
10. Audio system (P. 4-44)
11. Front passenger supplemental air bag
(P. 1-44)
12. Glove box (P. 2-67)
13. Front passenger supplemental knee air
bag (P. 1-62)
14. Shif t lever (P. 5-17)
15. Push-button ignition switch (P. 5-11)
16. Climate controls (P. 4-32, 4-39)
17. Driver supplemental knee air bag
(P. 1-62)
18. Tilt/Telescopic steering (P. 3-26)
19. Hood release (P. 3-21)
20. Fuel filler door release (P. 3-23)
LII2638
INSTRUMENT PANEL
2-2Instruments and controls
Page 90 of 556
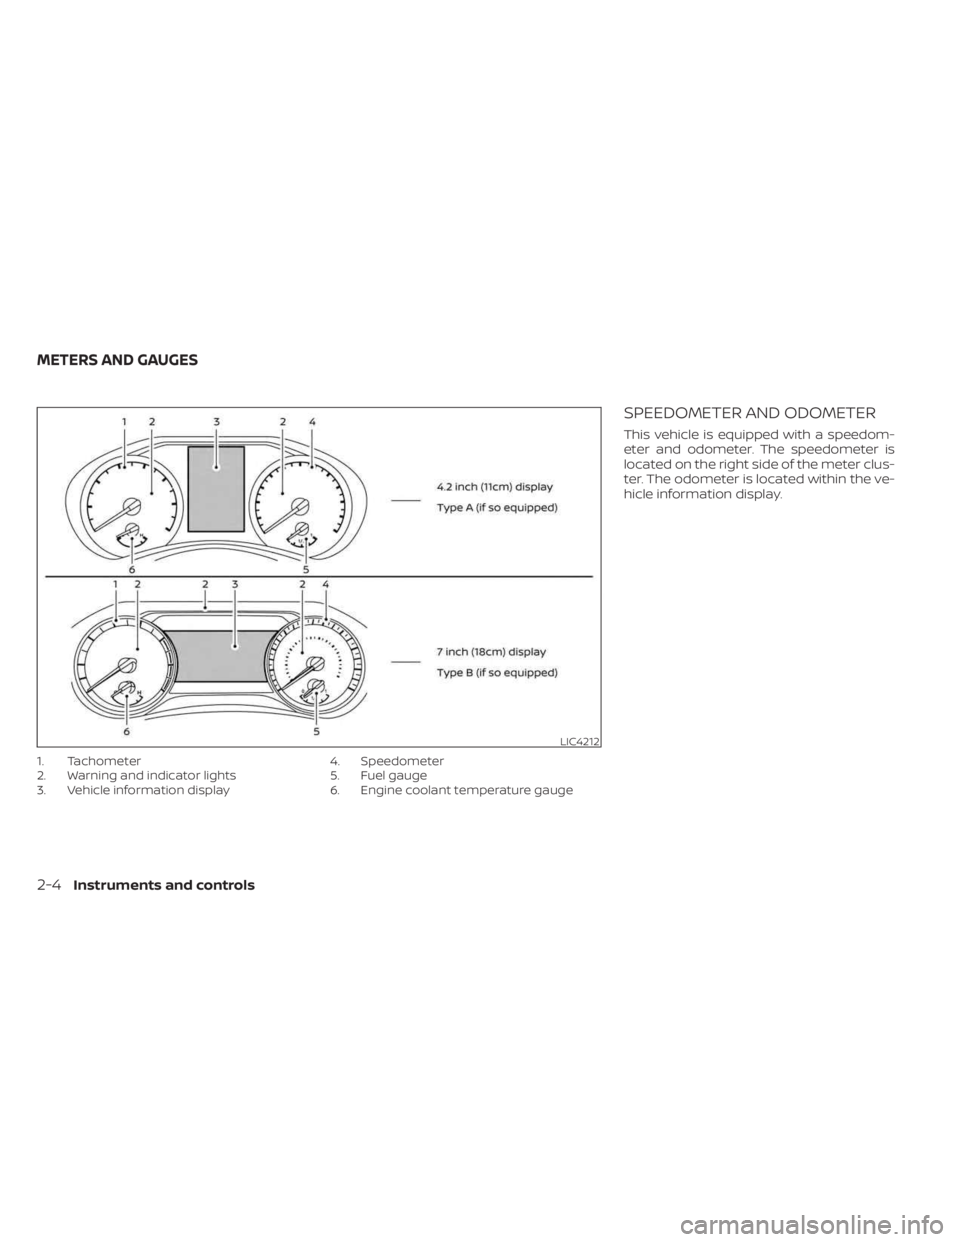
1. Tachometer
2. Warning and indicator lights
3. Vehicle information display4. Speedometer
5. Fuel gauge
6. Engine coolant temperature gauge
SPEEDOMETER AND ODOMETER
This vehicle is equipped with a speedom-
eter and odometer. The speedometer is
located on the right side of the meter clus-
ter. The odometer is located within the ve-
hicle information display.
LIC4212
METERS AND GAUGES
2-4Instruments and controls
Page 91 of 556
Speedometer
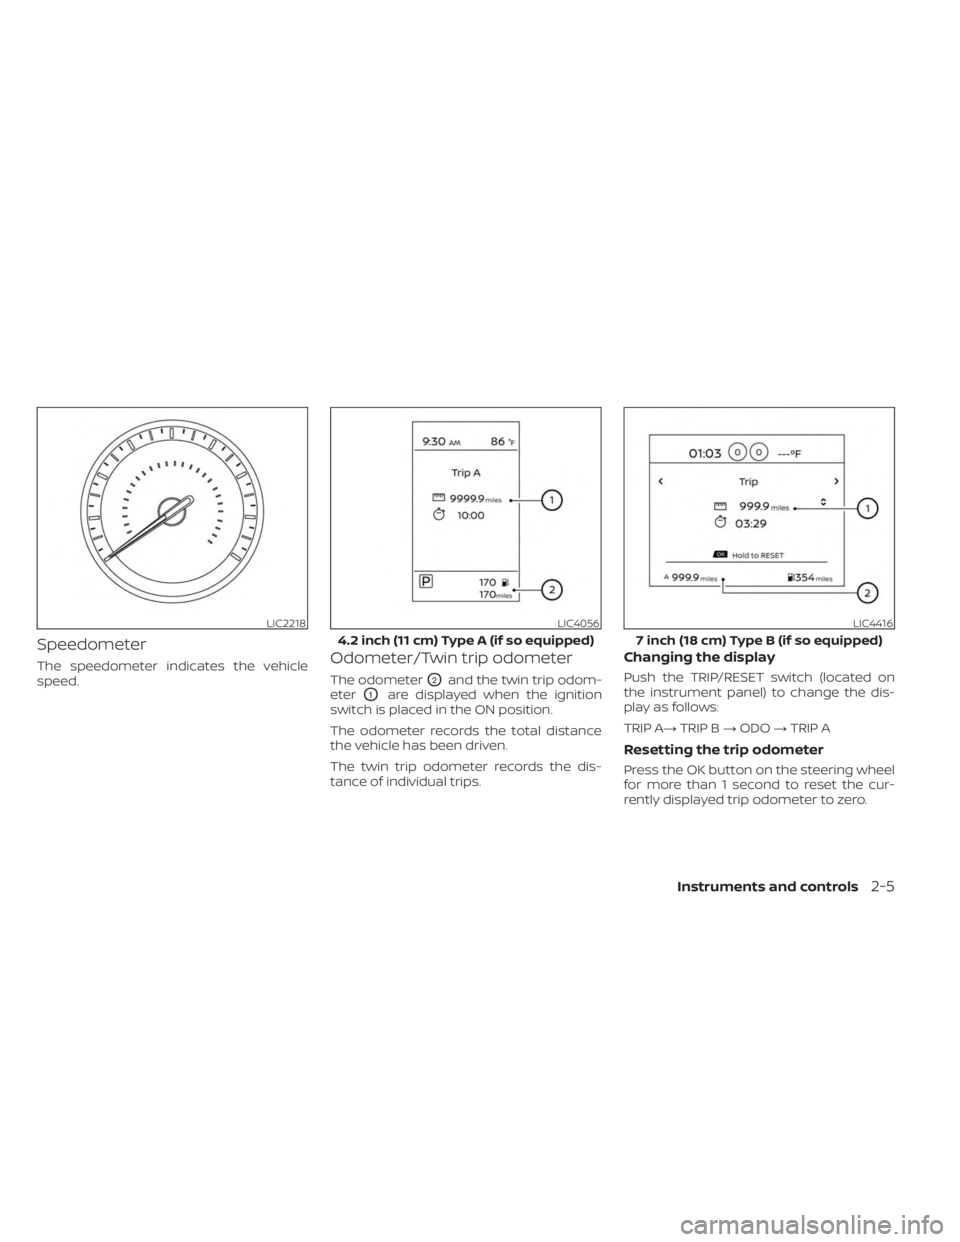
The speedometer indicates the vehicle
speed.Odometer/Twin trip odometer
The odometerO2and the twin trip odom-
eter
O1are displayed when the ignition
switch is placed in the ON position.
The odometer records the total distance
the vehicle has been driven.
The twin trip odometer records the dis-
tance of individual trips.
Changing the display
Push the TRIP/RESET switch (located on
the instrument panel) to change the dis-
play as follows:
TRIP A→ TRIP B→ODO →TRIP A
Resetting the trip odometer
Press the OK button on the steering wheel
for more than 1 second to reset the cur-
rently displayed trip odometer to zero.
LIC2218LIC4056
4.2 inch (11 cm) Type A (if so equipped)
LIC4416
7 inch (18 cm) Type B (if so equipped)
Instruments and controls2-5
Page 94 of 556
DISTANCE TO EMPTY (DTE)
Displays the estimated distance the vehicle
can be driven before refueling. The value is
calculated based on recent fuel economy,
the amount of fuel remaining in the fuel tank,
and the actual fuel consumption.
Changes in driving patterns or conditions
can cause the DTE value to vary. As a result,
the value displayed may differ from the ac-
tual distance that can be driven.
DTE display will change to “---” when the
fuel level in the tank is getting low, prior to
the fuel gauge reaching 0 (Empty).
NOTE:
• The DTE value af ter refill is estimatedbased on recent fuel economy and
amount of fuel added.
• If a small amount of fuel is added, or the ignition is on during refueling, the
display may not be updated.
• Conditions that affect the fuel economy will also affect the estimated
DTE value (city/highway driving, idle
time, remote start time, terrain, sea-
sonal weather, added vehicle weight,
added deflectors, roof racks, etc.).
2-8Instruments and controls
Page 96 of 556
CHECKING LIGHTS
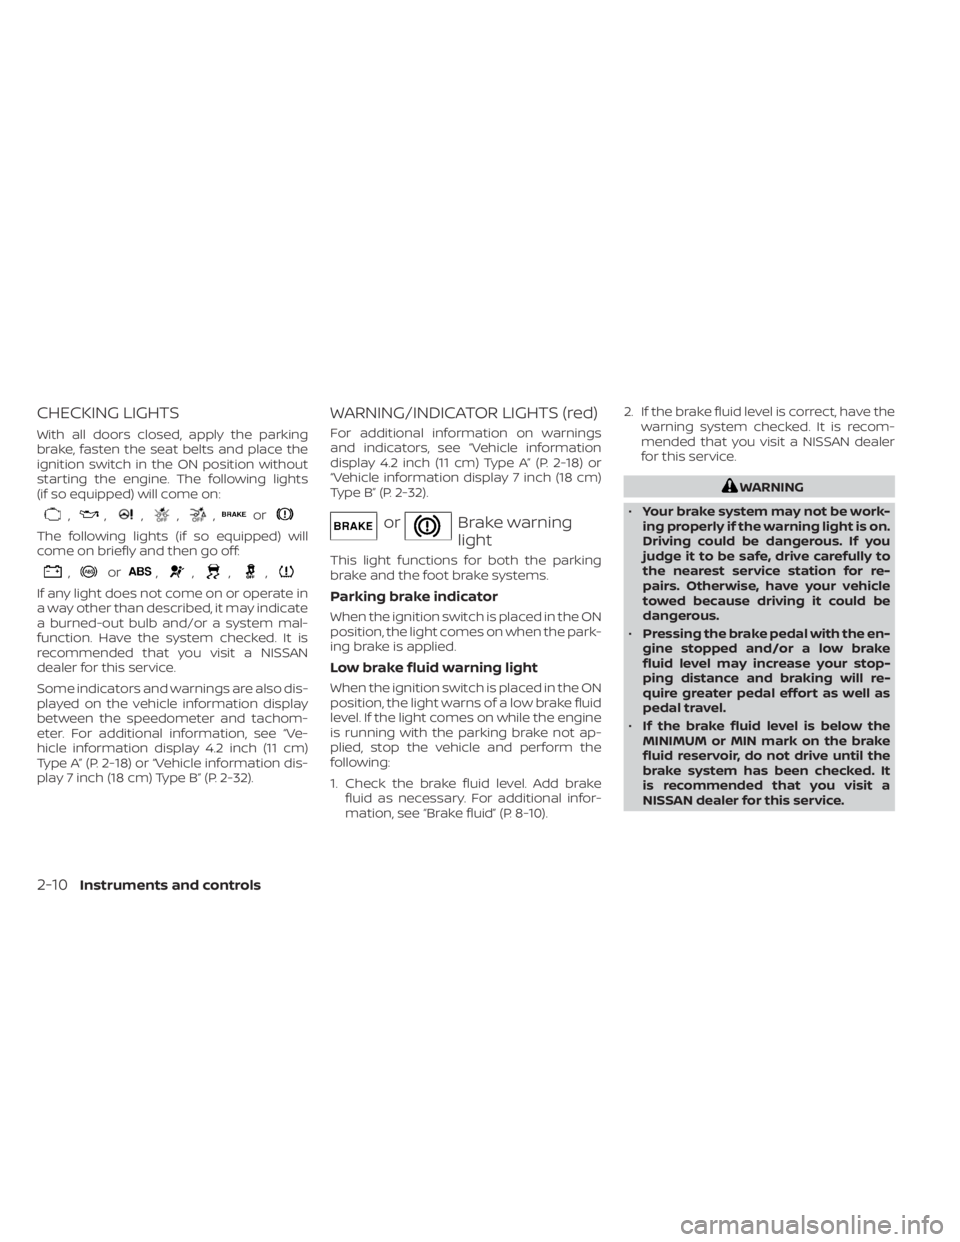
With all doors closed, apply the parking
brake, fasten the seat belts and place the
ignition switch in the ON position without
starting the engine. The following lights
(if so equipped) will come on:
,,,,,or
The following lights (if so equipped) will
come on briefly and then go off:
,or,,,,
If any light does not come on or operate in
a way other than described, it may indicate
a burned-out bulb and/or a system mal-
function. Have the system checked. It is
recommended that you visit a NISSAN
dealer for this service.
Some indicators and warnings are also dis-
played on the vehicle information display
between the speedometer and tachom-
eter. For additional information, see “Ve-
hicle information display 4.2 inch (11 cm)
Type A” (P. 2-18) or “Vehicle information dis-
play 7 inch (18 cm) Type B” (P. 2-32).
WARNING/INDICATOR LIGHTS (red)
For additional information on warnings
and indicators, see “Vehicle information
display 4.2 inch (11 cm) Type A” (P. 2-18) or
“Vehicle information display 7 inch (18 cm)
Type B” (P. 2-32).
orBrake warning
light
This light functions for both the parking
brake and the foot brake systems.
Parking brake indicator
When the ignition switch is placed in the ON
position, the light comes on when the park-
ing brake is applied.
Low brake fluid warning light
When the ignition switch is placed in the ON
position, the light warns of a low brake fluid
level. If the light comes on while the engine
is running with the parking brake not ap-
plied, stop the vehicle and perform the
following:
1. Check the brake fluid level. Add brakefluid as necessary. For additional infor-
mation, see “Brake fluid” (P. 8-10). 2. If the brake fluid level is correct, have the
warning system checked. It is recom-
mended that you visit a NISSAN dealer
for this service.
WARNING
• Your brake system may not be work-
ing properly if the warning light is on.
Driving could be dangerous. If you
judge it to be safe, drive carefully to
the nearest service station for re-
pairs. Otherwise, have your vehicle
towed because driving it could be
dangerous.
• Pressing the brake pedal with the en-
gine stopped and/or a low brake
fluid level may increase your stop-
ping distance and braking will re-
quire greater pedal effort as well as
pedal travel.
• If the brake fluid level is below the
MINIMUM or MIN mark on the brake
fluid reservoir, do not drive until the
brake system has been checked. It
is recommended that you visit a
NISSAN dealer for this service.
2-10Instruments and controls
Page 97 of 556
Charge warning light
If this light comes on while the engine is
running, it may indicate the charging sys-
tem is not functioning properly. Turn the
engine off and check the generator belt. If
the belt is loose, broken, missing, or if the
light remains on, have your vehicle serviced
immediately. It is recommended that you
visit a NISSAN dealer for this service.
CAUTION
Do not continue driving if the generator
belt is loose, broken or missing.
Engine oil pressure
warning light
This light warns of low engine oil pressure.
If the light flickers or comes on during nor-
mal driving, pull off the road in a safe area,
stop the engine immediatelyand call a
NISSAN dealer or other authorized repair
shop.
The engine oil pressure warning light is
not designed to indicate a low oil level.
Use the dipstick to check the oil level. For
additional information, see “Engine oil”
(P. 8-6 ).
CAUTION
Running the engine with the engine oil
pressure warning light on could cause
serious damage to the engine almost
immediately. Such damage is not cov-
ered by warranty. Turn off the engine as
soon as it is safe to do so.
Malfunction Indicator Light
(MIL)
If this indicator light comes on steady or
blinks while the engine is running, it may
indicate a potential emission control
malfunction.
The MIL may also come on steady if the
fuel-filler cap is loose or missing, or if the
vehicle runs out of fuel. Check to make sure
the fuel-filler cap is installed and closed
tightly, and that the vehicle has at least
3 gallons (11.4 liters) of fuel in the fuel tank.
Af ter a few driving trips, the
light
should turn off if no other potential emis-
sion control system malfunction exists.
If this indicator light comes on steady for 20
seconds and then blinks for 10 seconds
when the engine is not running, it indicates
that the vehicle is not ready for an emission
control system inspection/maintenance test. For additional information, see “Readi-
ness for Inspection/Maintenance (I/M) test”
(P. 10-24).
Operation
The MIL will come on in one of two ways:
• MIL on steady — An emission control sys-
tem malfunction has been detected.
Check the fuel-filler cap if the Loose Fuel
Cap warning appears in the vehicle infor-
mation display. If the fuel-filler cap is loose
or missing, tighten or install the cap and
continue to drive the vehicle. The
light should turn off af ter a few driving
trips. If thelight does not turn off
af ter a few driving trips, have the vehicle
inspected. It is recommended that you
visit a NISSAN dealer for this service. You
do not need to have your vehicle towed
to the dealer.
• MIL blinking — An engine misfire has been detected which may damage the emis-
sion control system. To reduce or avoid
emission control system damage:– do not drive at speeds above 45 mph (72 km/h).
–
avoid hard acceleration or deceleration.– avoid steep uphill grades.
– if possible, reduce the amount of cargo being hauled or towed.
Instruments and controls2-11