heater NISSAN TEANA 2003 Service Manual
[x] Cancel search | Manufacturer: NISSAN, Model Year: 2003, Model line: TEANA, Model: NISSAN TEANA 2003Pages: 3502, PDF Size: 74.56 MB
Page 3358 of 3502
SE-102
FRONT SEAT
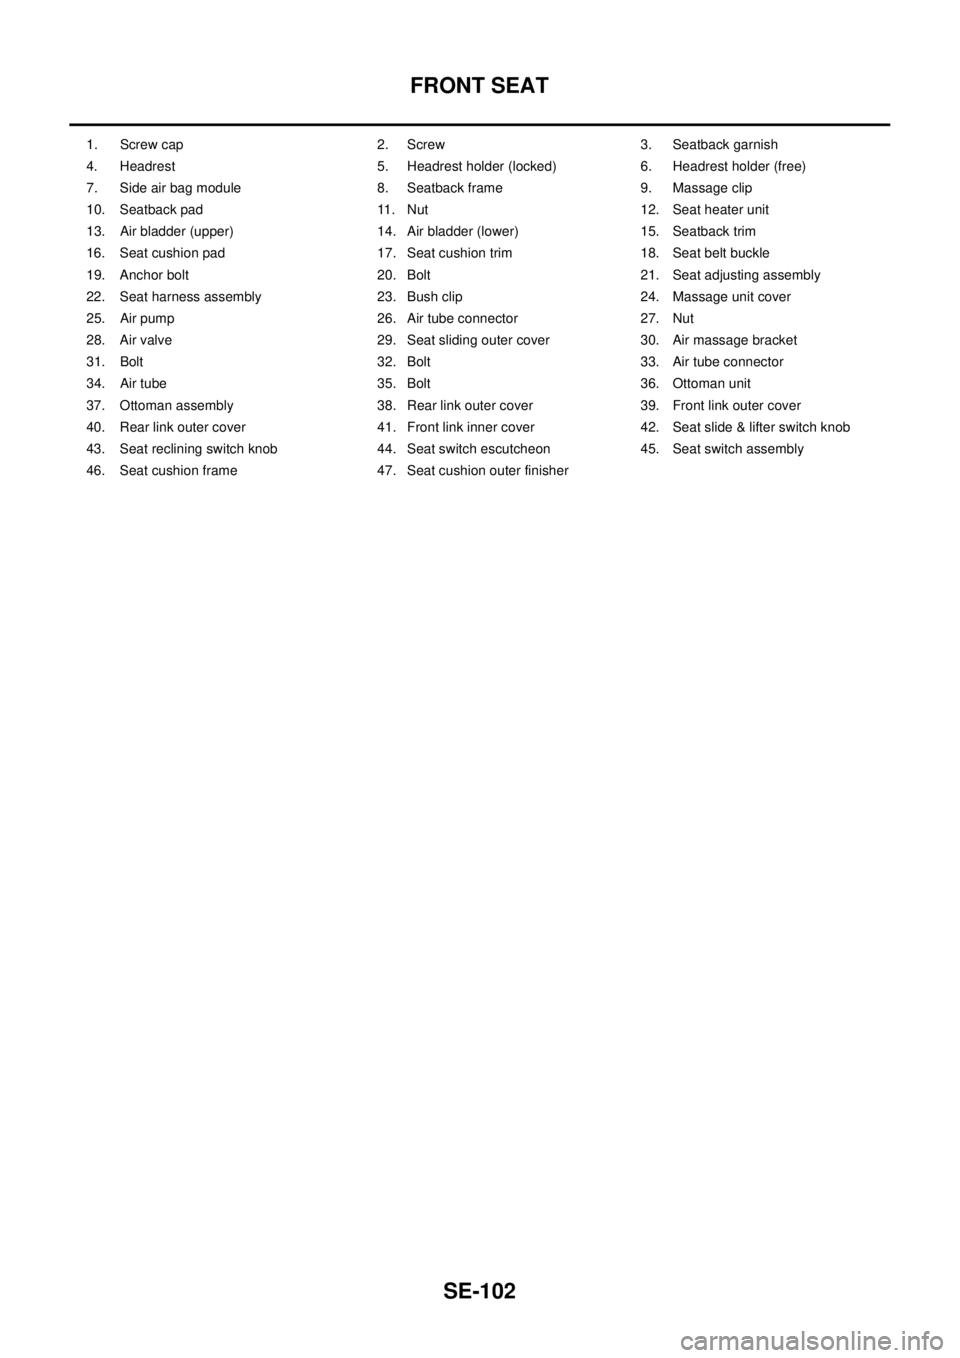
1. Screw cap 2. Screw 3. Seatback garnish
4. Headrest 5. Headrest holder (locked) 6. Headrest holder (free)
7. Side air bag module 8. Seatback frame 9. Massage clip
10. Seatback pad 11. Nut 12. Seat heater unit
13. Air bladder (upper) 14. Air bladder (lower) 15. Seatback trim
16. Seat cushion pad 17. Seat cushion trim 18. Seat belt buckle
19. Anchor bolt 20. Bolt 21. Seat adjusting assembly
22. Seat harness assembly 23. Bush clip 24. Massage unit cover
25. Air pump 26. Air tube connector 27. Nut
28. Air valve 29. Seat sliding outer cover 30. Air massage bracket
31. Bolt 32. Bolt 33. Air tube connector
34. Air tube 35. Bolt 36. Ottoman unit
37. Ottoman assembly 38. Rear link outer cover 39. Front link outer cover
40. Rear link outer cover 41. Front link inner cover 42. Seat slide & lifter switch knob
43. Seat reclining switch knob 44. Seat switch escutcheon 45. Seat switch assembly
46. Seat cushion frame 47. Seat cushion outer finisher
Page 3364 of 3502
SE-108
FRONT SEAT
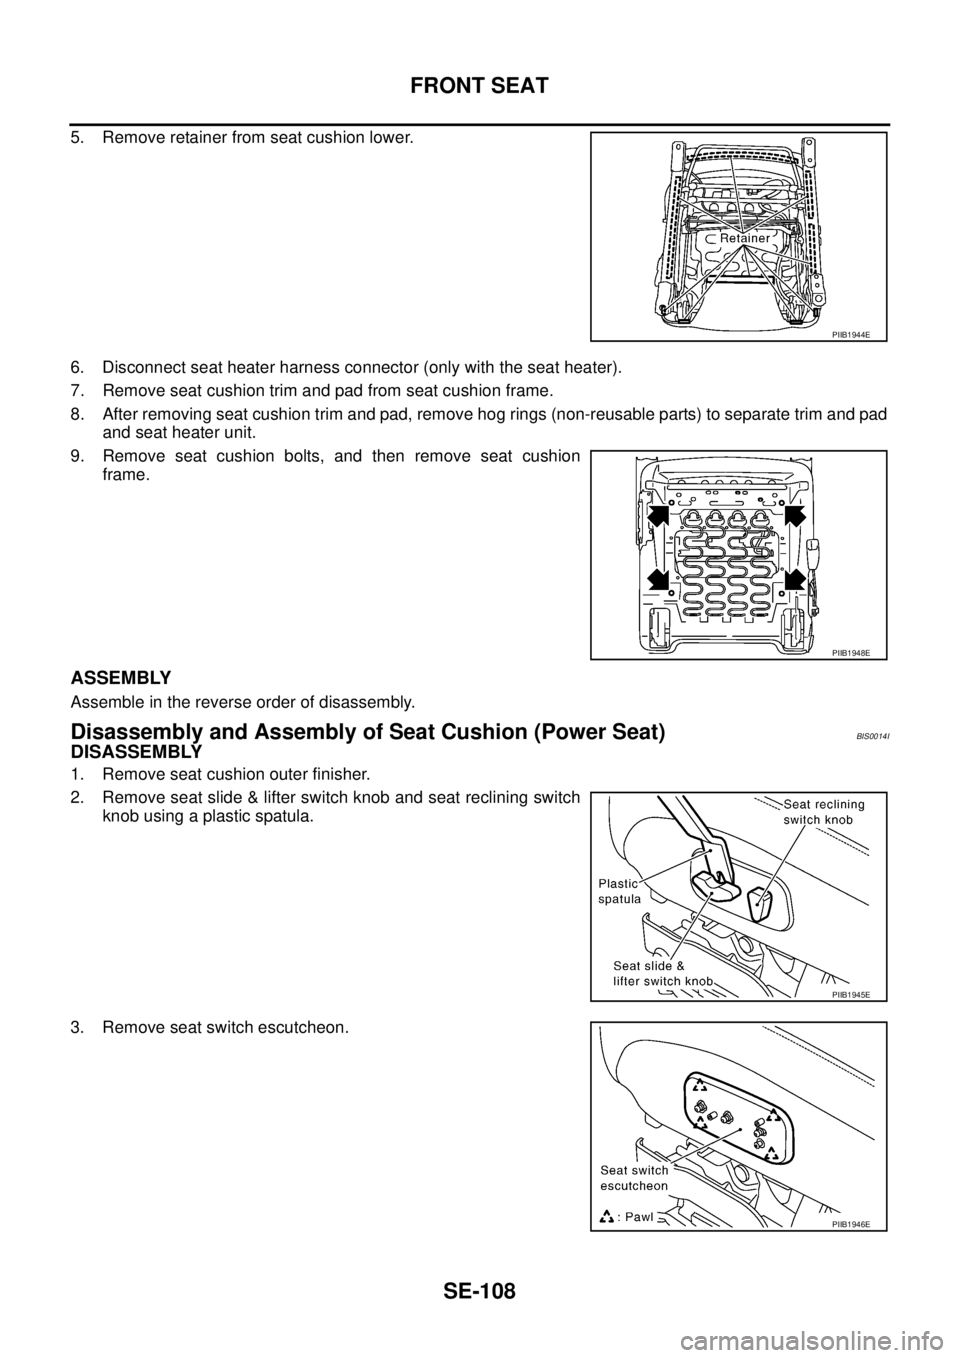
5. Remove retainer from seat cushion lower.
6. Disconnect seat heater harness connector (only with the seat heater).
7. Remove seat cushion trim and pad from seat cushion frame.
8. After removing seat cushion trim and pad, remove hog rings (non-reusable parts) to separate trim and pad
and seat heater unit.
9. Remove seat cushion bolts, and then remove seat cushion
frame.
ASSEMBLY
Assemble in the reverse order of disassembly.
Disassembly and Assembly of Seat Cushion (Power Seat)BIS0014I
DISASSEMBLY
1. Remove seat cushion outer finisher.
2. Remove seat slide & lifter switch knob and seat reclining switch
knob using a plastic spatula.
3. Remove seat switch escutcheon.
PIIB1944E
PIIB1948E
PIIB1945E
PIIB1946E
Page 3365 of 3502
FRONT SEAT
SE-109
C
D
E
F
G
H
J
K
L
MA
B
SE
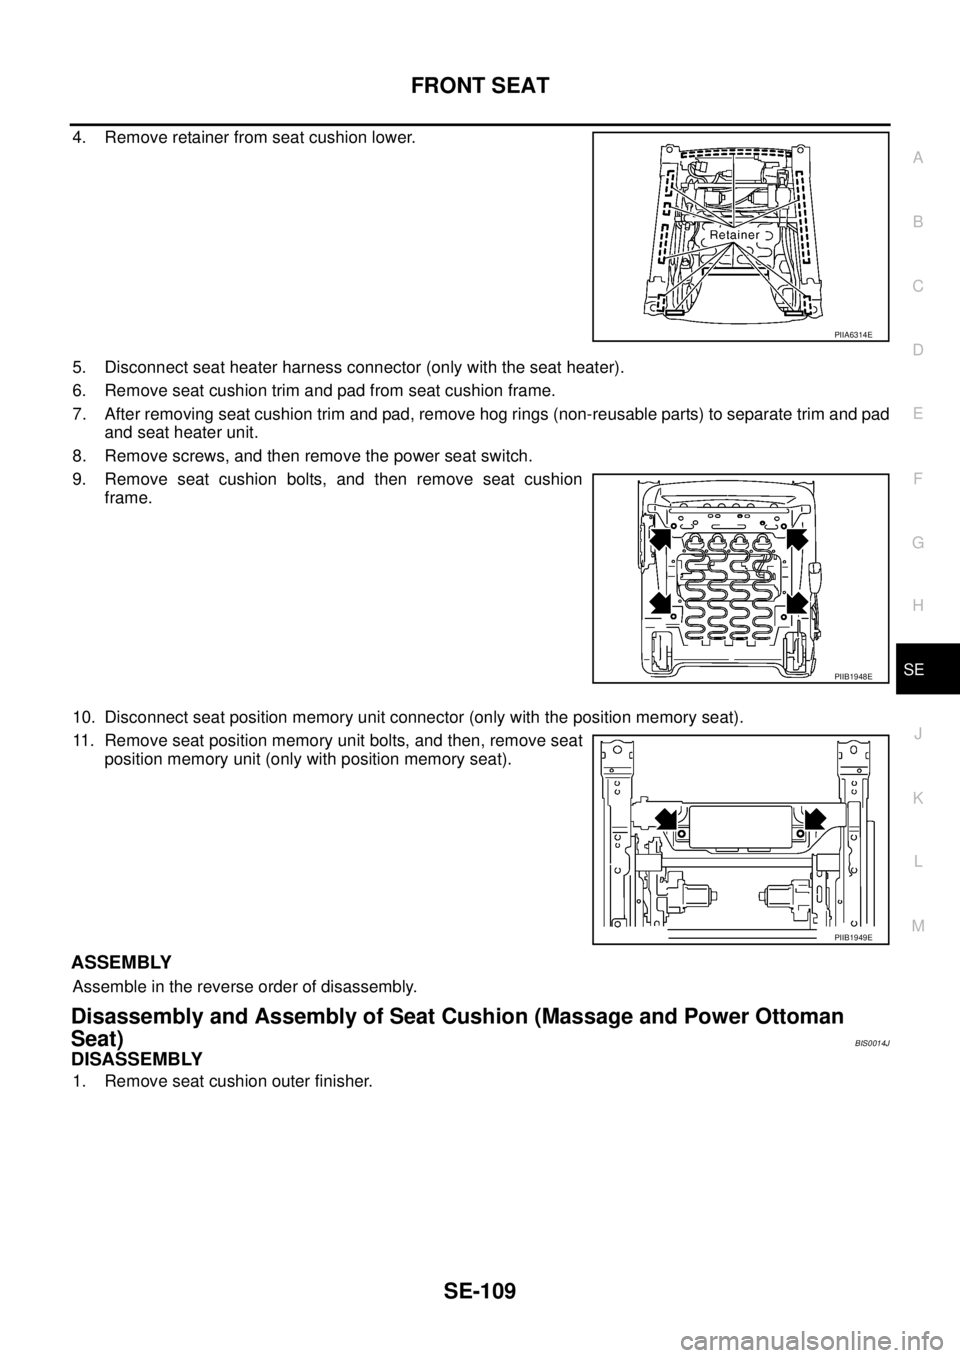
4. Remove retainer from seat cushion lower.
5. Disconnect seat heater harness connector (only with the seat heater).
6. Remove seat cushion trim and pad from seat cushion frame.
7. After removing seat cushion trim and pad, remove hog rings (non-reusable parts) to separate trim and pad
and seat heater unit.
8. Remove screws, and then remove the power seat switch.
9. Remove seat cushion bolts, and then remove seat cushion
frame.
10. Disconnect seat position memory unit connector (only with the position memory seat).
11. Remove seat position memory unit bolts, and then, remove seat
position memory unit (only with position memory seat).
ASSEMBLY
Assemble in the reverse order of disassembly.
Disassembly and Assembly of Seat Cushion (Massage and Power Ottoman
Seat)
BIS0014J
DISASSEMBLY
1. Remove seat cushion outer finisher.
PIIA6314E
PIIB1948E
PIIB1949E
Page 3366 of 3502
SE-110
FRONT SEAT
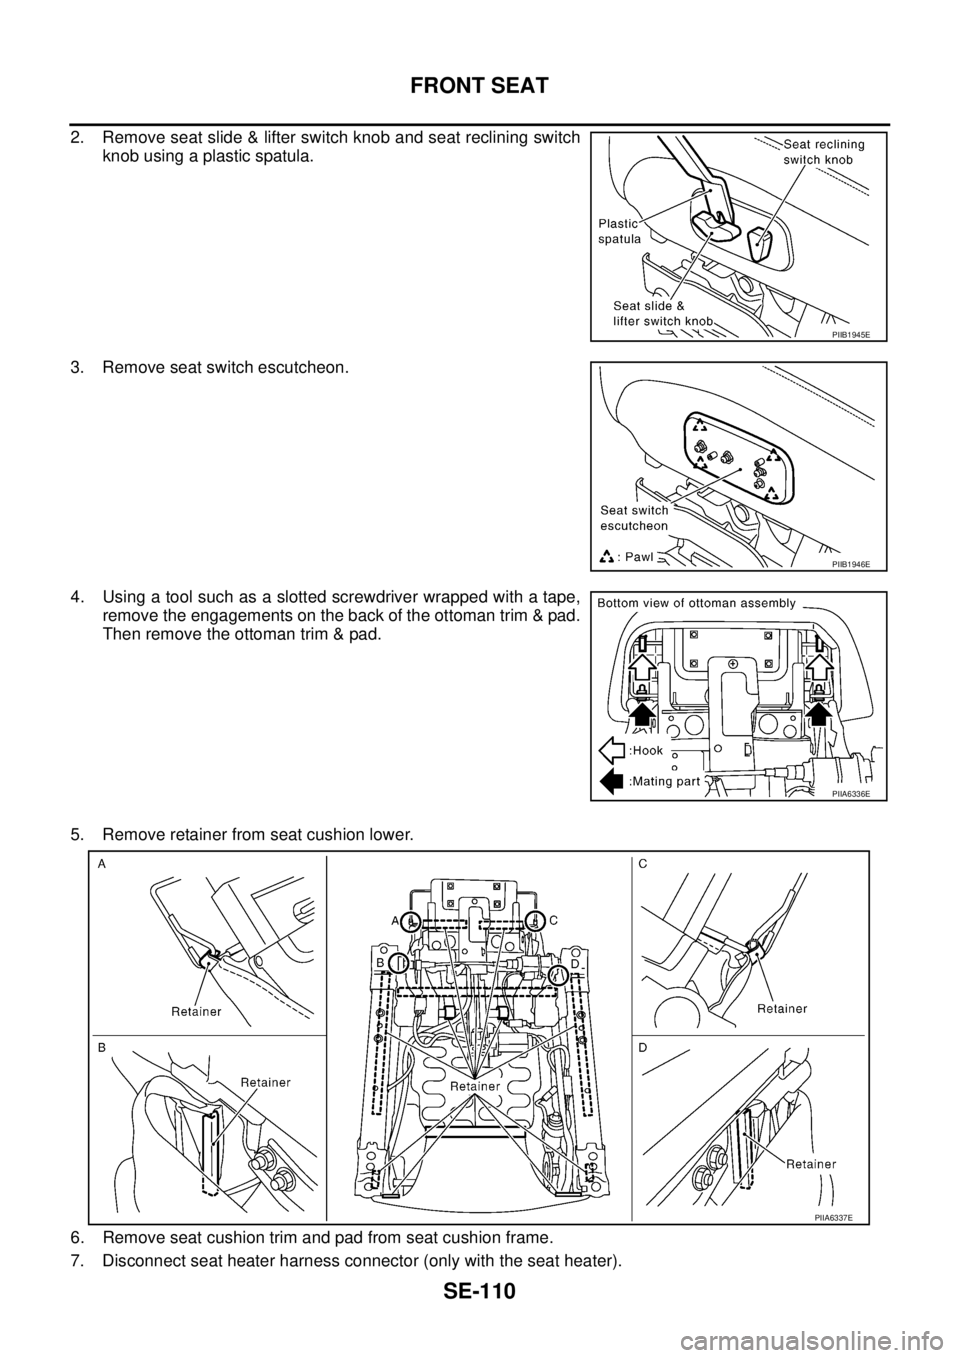
2. Remove seat slide & lifter switch knob and seat reclining switch
knob using a plastic spatula.
3. Remove seat switch escutcheon.
4. Using a tool such as a slotted screwdriver wrapped with a tape,
remove the engagements on the back of the ottoman trim & pad.
Then remove the ottoman trim & pad.
5. Remove retainer from seat cushion lower.
6. Remove seat cushion trim and pad from seat cushion frame.
7. Disconnect seat heater harness connector (only with the seat heater).
PIIB1945E
PIIB1946E
PIIA6336E
PIIA6337E
Page 3367 of 3502
FRONT SEAT
SE-111
C
D
E
F
G
H
J
K
L
MA
B
SE
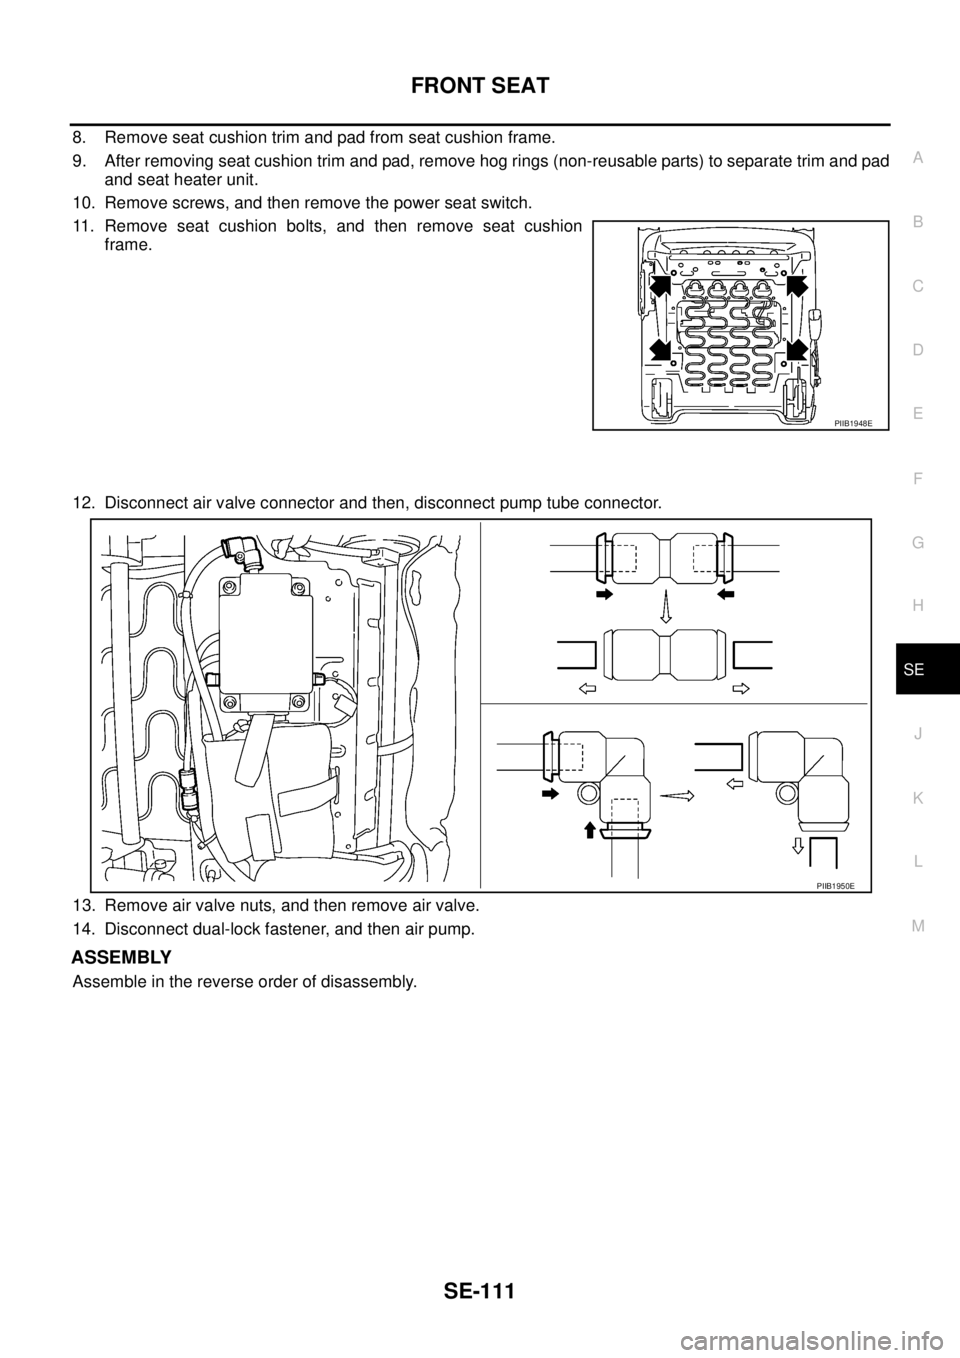
8. Remove seat cushion trim and pad from seat cushion frame.
9. After removing seat cushion trim and pad, remove hog rings (non-reusable parts) to separate trim and pad
and seat heater unit.
10. Remove screws, and then remove the power seat switch.
11. Remove seat cushion bolts, and then remove seat cushion
frame.
12. Disconnect air valve connector and then, disconnect pump tube connector.
13. Remove air valve nuts, and then remove air valve.
14. Disconnect dual-lock fastener, and then air pump.
ASSEMBLY
Assemble in the reverse order of disassembly.
PIIB1948E
PIIB1950E
Page 3371 of 3502

REAR SEAT
SE-115
C
D
E
F
G
H
J
K
L
MA
B
SE
1. Seatback mat 2. Head rest 3. Head rest holder (free)
4. Head rest holder (locked) 5. Seatback trim (LH) 6. Seatback trim (RH)
7. Seatback pad 8. Bolt 9. Seatback under trim
10. Seatback under pad 11. Seat cushion trim 12. Seat cushion pad
13. Seat heater unit 14. Armrest 15. Armrest screw
16. Bush 17. Bolt 18. Armrest bracket
19. Cup holder 20. Heater switch (RH) 21. Seat switch
22. Heater switch (LH) 23. Audio switch 24. Armrest lid
25. Screw 26. Seatback screen 27. Seatback center bracket
28. Bolt 29. Nut 30. Heater control unit
Page 3372 of 3502

SE-116
REAR SEAT
Removal and Installation of Seat CushionBIS0014N
REMOVAL
1. Pull plastic hook LH/RH on seat cushion bottom, and then pull seat cushion up and remove it.
2. Disconnect seat heater harness connector (only with the seat heater).
3. Remove seat cushion assembly from the vehicle.
CAUTION:
When removing and installing, use shop cloths to protect parts from damage.
INSTALLATION
Install in the reverse order of removal.
Disassembly and Assembly of Seat CushionBIS0014O
DISASSEMBLY
Remove hog rings (non-reusable parts) to separate the trim and pad and seat heater unit.
ASSEMBLY
Assembly in the reverse order of disassembly.
1. Wire 2. Cushion hook 3. Plastic hook
PIIB1951E
Page 3374 of 3502

SE-118
REAR SEAT
Disassembly and Assembly of Seatback (Headrest Fixed Type and Headrest
Removed and Installed Type)
BIS0014Q
DISASSEMBLY
1. Remove headrest (headrest removed and installed type seat only).
2. Remove headrest holder (headrest removed and installed type
seat only).
CAUTION:
Before installing headrest holder, check its orientation
(front/rear and right/left).
3. Remove clip, and then remove seatback mat (only with the seat heater).
4. Release armrest and remove seat back center bracket bolts,
and then remove seatback center bracket (headrest removed
and installed type seat only).
5. Remove seatback screen screws, and then remove seatback
screen.
6. Remove armrest bolts, and then remove armrest assembly from
seatback assembly.
7. Remove hog rings (non-reusable parts), and then remove seatback mat from seatback assembly. (With-
out seat heater.)
8. Remove hog rings (non-reusable parts) to separate the seatback trim and pad.
9. Remove heater control unit nuts, and then remove heater control unit (only with the seat heater).
ASSEMBLY
Assemble in the reverse order of disassembly.
PIIA1158E
PIIA6238E
PIIA6239E