horn NISSAN TITAN 2017 2.G Owners Manual
[x] Cancel search | Manufacturer: NISSAN, Model Year: 2017, Model line: TITAN, Model: NISSAN TITAN 2017 2.GPages: 671, PDF Size: 7.96 MB
Page 15 of 671
1. Vents (P. 4-32)
2. Turn signal switch (P. 2-57)Wiper and washer switch (P. 2-49)
3. Steering wheel switch for audio control
(P. 4-82)
Bluetooth® Hands-Free Phone System
(P. 4-82)
Vehicle information display controls
(P. 2-32)
4. Driver supplemental air bag (P. 1-51) Horn (P. 2-58)
5. Meters and gauges (P. 2-6) Warning and indicator lights (P. 2-21)
6. Cruise control main/set switches
(P. 5-40)
7. Shift lever (P. 5-16) Tow mode switch (P. 2-68)
8. Audio controls (P. 4-46)
9. Center display (P. 4-4)
10. Climate controls (P. 4-33)
11. Front passenger supplemental air bag
(P. 1-51)
12. Glove box (P. 2-74)
13. Front passenger air bag status light
(if so equipped) (P. 1-51)
14. Power outlet (P. 2-69)
LII2352
INSTRUMENT PANEL
0-6Illustrated table of contents
Page 104 of 671
2 Instruments and controls
Instrument panel...................................2-4
Meters and gauges ................................2-6
Speedometer and odometer .....................2-7
Tachometer ....................................2-9
Engine coolant temperature gauge ...............2-9
Fuel gauge ................................... 2-10
Auxiliary gauges (if so equipped) ................2-11
Diesel Exhaust Fluid (DEF) Level
(if so equipped) ............................... 2-12
Off-road monitor (if so equipped) ................2-13
Trip computer (if so equipped) ..................2-13
Compass (if so equipped) ......................... 2-18
Warning lights, indicator lights and audible
reminders ........................................ 2-21
Checking lights ............................... 2-22
Warning lights ................................ 2-22
Indicator lights ................................ 2-29
Audible reminders ............................. 2-31
Vehicle information display (if so equipped) ..........2-32
How to use the vehicle information display .......2-32
Startup display ................................ 2-33
Settings ...................................... 2-33
Vehicle information display warnings and
indicators ..................................... 2-41Diesel warnings and indicators
(if so equipped)
............................... 2-46
Security systems ................................. 2-47
Vehicle security system ......................... 2-47
NISSAN vehicle immobilizer system .............2-48
Wiper and washer switch ......................... 2-49
Switch operation .............................. 2-49
Rain-sensing auto wiper system
(if so equipped) ............................... 2-51
Rear window and/or outside mirror defroster switch
(if so equipped) .................................. 2-52
Headlight switch ................................. 2-53
Headlight control switch ........................ 2-53
Daytime running light system
(if so equipped) ............................... 2-56
Instrument brightness control ...................2-56
Turn signal switch ................................ 2-57
T
urn signal .................................... 2-57
Lane change signal ............................ 2-57
Fog light switch (if so equipped) ...................2-57
Horn ............................................ 2-58
Cargo lamp switch ................................ 2-58
Climate controlled seat switches (if so equipped) ....2-58
Heated seat switches (if so equipped) ..............2-60
Page 107 of 671
1. Vents (P. 4-32)
2. Turn signal switch (P. 2-57)Wiper and washer switch (P. 2-49)
3. Steering wheel switch for audio control
(P. 4-82)
Bluetooth® Hands-Free Phone System
(P. 4-82)
Vehicle information display controls
(P. 2-32)
4. Driver supplemental air bag (P. 1-51) Horn (P. 2-58)
5. Meters and gauges (P. 2-6) Warning and indicator lights (P. 2-21)
6. Cruise control main/set switches
(P. 5-40)
7. Shift lever (P. 5-16) Tow mode switch (P. 2-68)
8. Audio controls (P. 4-46)
9. Center display (P. 4-4)
10. Climate controls (P. 4-33)
11. Front passenger supplemental air bag
(P. 1-51)
12. Glove box (P. 2-74)
13. Front passenger air bag status light
(if so equipped) (P. 1-51)
14. Power outlet (P. 2-69)
LII2352
INSTRUMENT PANEL
2-4Instruments and controls
Page 139 of 671
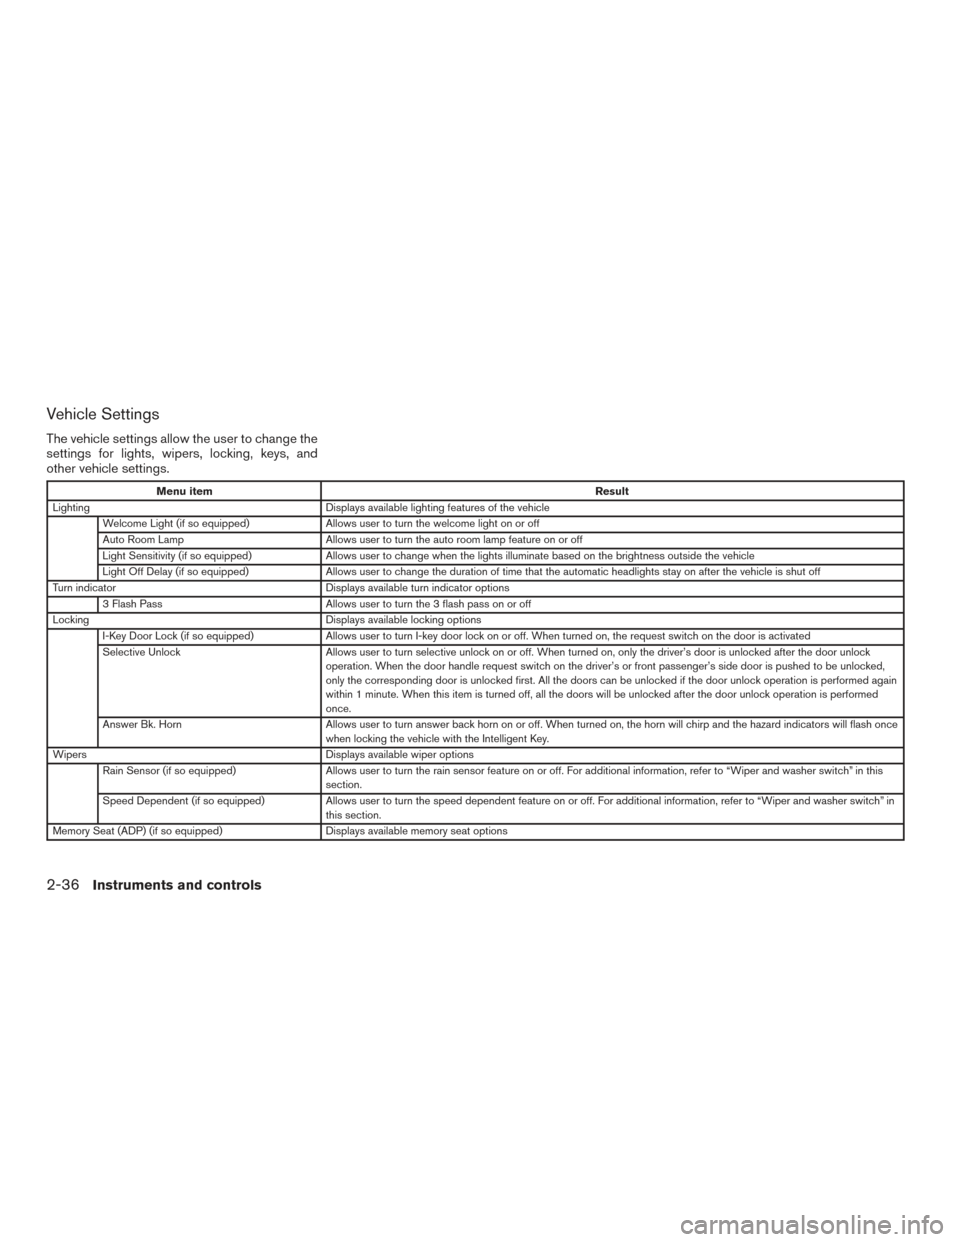
Vehicle Settings
The vehicle settings allow the user to change the
settings for lights, wipers, locking, keys, and
other vehicle settings.
Menu itemResult
Lighting Displays available lighting features of the vehicle
Welcome Light (if so equipped) Allows user to turn the welcome light on or off
Auto Room Lamp Allows user to turn the auto room lamp feature on or off
Light Sensitivity (if so equipped) Allows user to change when the lights illuminate based on the brightness outside the vehicle
Light Off Delay (if so equipped) Allows user to change the duration of time that the automatic headlights stay on after the vehicle is shut off
Turn indicator Displays available turn indicator options
3 Flash Pass Allows user to turn the 3 flash pass on or off
Locking Displays available locking options
I-Key Door Lock (if so equipped) Allows user to turn I-key door lock on or off. When turned on, the request switch on the door is activated
Selective Unlock Allows user to turn selective unlock on or off. When turned on, only the driver’s door is unlocked after the door unlock
operation. When the door handle request switch on the driver’s or front passenger’s side door is pushed to be unlocked,
only the corresponding door is unlocked first. All the doors can be unlocked if the door unlock operation is performed again
within 1 minute. When this item is turned off, all the doors will be unlocked after the door unlock operation is performed
once.
Answer Bk. Horn Allows user to turn answer back horn on or off. When turned on, the horn will chirp and the hazard indicators will flash once
when locking the vehicle with the Intelligent Key.
Wipers Displays available wiper options
Rain Sensor (if so equipped) Allows user to turn the rain sensor feature on or off. For additional information, refer to “Wiper and washer switch” in thi s
section.
Speed Dependent (if so equipped) Allows user to turn the speed dependent feature on or off. For additional information, refer to “Wiper and washer switch” in
this section.
Memory Seat (ADP) (if so equipped) Displays available memory seat options
2-36Instruments and controls
Page 151 of 671
Vehicle security system activation
The vehicle security system will give the following
alarm:● The headlights blink and the horn sounds
intermittently.
● The alarm automatically turns off after a pe-
riod of time. However, the alarm reactivates if
the vehicle is tampered with again. The alarm
can be shut off by unlocking the driver’s door
with the key or by pressing the
button
on the key fob.
The alarm is activated by:
● Opening a door without using the key or key
fob (even if the door is unlocked by using the
inside lock knob or the power door lock
switch) .
How to stop an activated alarm
The alarm stops only by unlocking the driver’s
door with the key or by pressing the
button
on the key fob.
NISSAN VEHICLE IMMOBILIZER
SYSTEM
The NISSAN Vehicle Immobilizer System will not
allow the engine to start without the use of a
registered key.
If the engine fails to start using a registered key
(for example, when interference is caused by
another registered key, an automated toll road
device or automatic payment device on the key
ring) , restart the engine using the following pro-
cedures:
1. Leave the ignition switch placed in the ON position for approximately 5 seconds.
2. Place the ignition switch in the OFF or LOCK position and wait approximately
10 seconds.
3. Repeat steps 1 and 2.
4. Restart the engine while holding the device (which may have caused the interference)
separate from the registered key.
If the no start condition re-occurs, NISSAN rec-
ommends placing the registered key on a sepa-
rate key ring to avoid interference from other
devices. FCC Notice:
For USA:
This device complies with part 15 of the
FCC Rules. Operation is subject to the fol-
lowing two conditions: (1) This device may
not cause harmful interference, and (2) this
device must accept any interference re-
ceived, including interference that may
cause undesired operation.
NOTE:
Changes or modifications not expressly ap-
proved by the party responsible for compli-
ance could void the user’s authority to op-
erate the equipment.
For Canada:
This device complies with Industry Canada
licence-exempt RSS standard(s) . Opera-
tion is subject to the following two condi-
tions: (1) this device may not cause inter-
ference, and (2) this device must accept any
interference, including interference that
may cause undesired operation of the de-
vice.
2-48Instruments and controls
Page 161 of 671
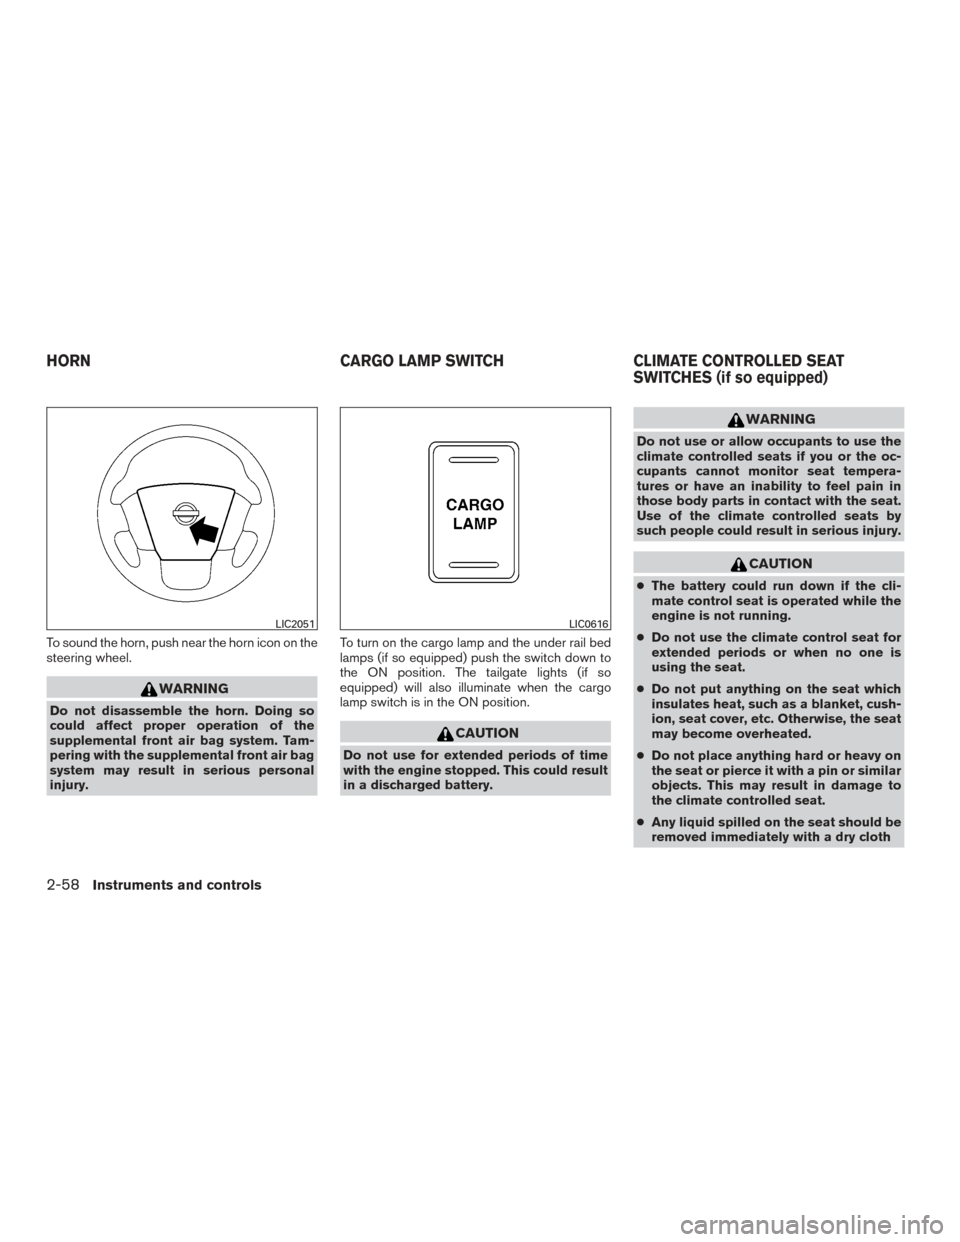
To sound the horn, push near the horn icon on the
steering wheel.
WARNING
Do not disassemble the horn. Doing so
could affect proper operation of the
supplemental front air bag system. Tam-
pering with the supplemental front air bag
system may result in serious personal
injury.To turn on the cargo lamp and the under rail bed
lamps (if so equipped) push the switch down to
the ON position. The tailgate lights (if so
equipped) will also illuminate when the cargo
lamp switch is in the ON position.
CAUTION
Do not use for extended periods of time
with the engine stopped. This could result
in a discharged battery.
WARNING
Do not use or allow occupants to use the
climate controlled seats if you or the oc-
cupants cannot monitor seat tempera-
tures or have an inability to feel pain in
those body parts in contact with the seat.
Use of the climate controlled seats by
such people could result in serious injury.
CAUTION
●
The battery could run down if the cli-
mate control seat is operated while the
engine is not running.
● Do not use the climate control seat for
extended periods or when no one is
using the seat.
● Do not put anything on the seat which
insulates heat, such as a blanket, cush-
ion, seat cover, etc. Otherwise, the seat
may become overheated.
● Do not place anything hard or heavy on
the seat or pierce it with a pin or similar
objects. This may result in damage to
the climate controlled seat.
● Any liquid spilled on the seat should be
removed immediately with a dry cloth
LIC2051LIC0616
HORN CARGO LAMP SWITCHCLIMATE CONTROLLED SEAT
SWITCHES (if so equipped)
2-58Instruments and controls
Page 210 of 671
HOW TO USE THE REMOTE
KEYLESS ENTRY FUNCTION
The remote keyless entry function can operate all
door locks using the remote keyless function of
the Intelligent Key. The remote keyless function
can operate at a distance of 33 ft (10 m) away
from the vehicle. The operating distance de-
pends upon the conditions around the vehicle.
The remote keyless entry function will not func-
tion under the following conditions:● When the Intelligent Key is not within the
operational range.
● When the Intelligent Key battery is dis-
charged.
CAUTION
When locking the doors using the Intelli-
gent Key, be sure not to leave the key in
the vehicle.
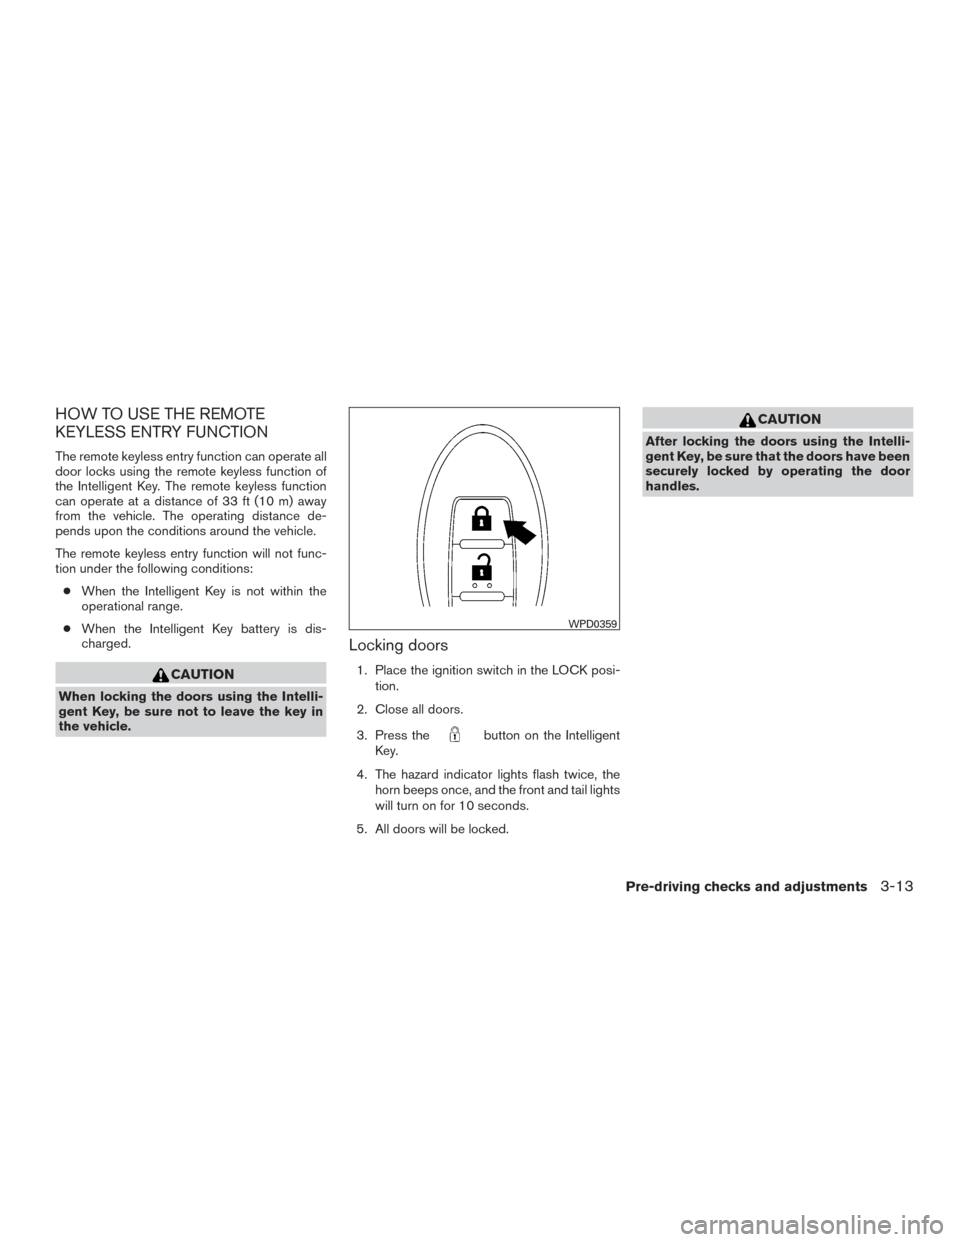
Locking doors
1. Place the ignition switch in the LOCK posi-
tion.
2. Close all doors.
3. Press the
button on the Intelligent
Key.
4. The hazard indicator lights flash twice, the horn beeps once, and the front and tail lights
will turn on for 10 seconds.
5. All doors will be locked.
CAUTION
After locking the doors using the Intelli-
gent Key, be sure that the doors have been
securely locked by operating the door
handles.
WPD0359
Pre-driving checks and adjustments3-13
Page 213 of 671
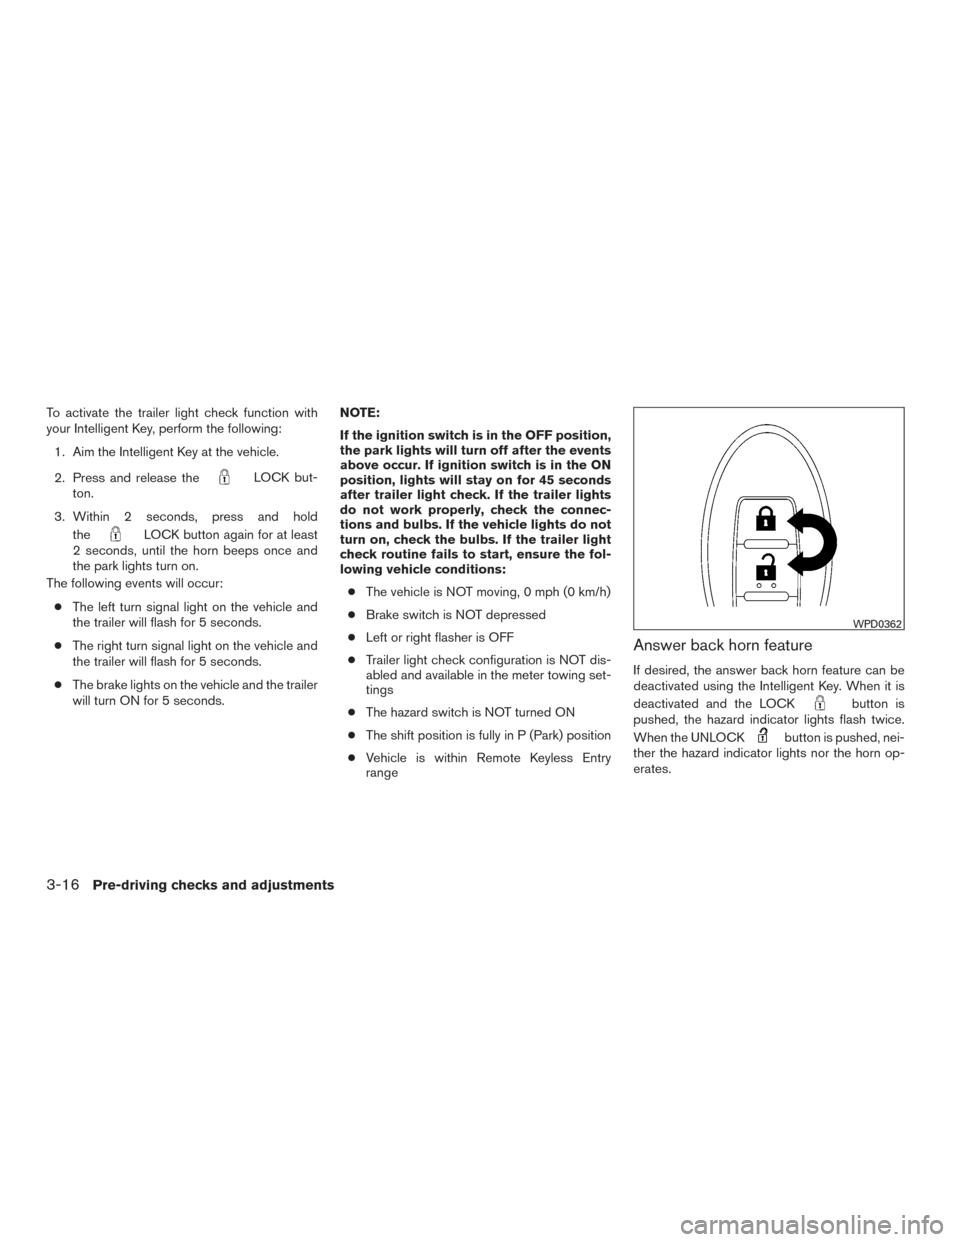
To activate the trailer light check function with
your Intelligent Key, perform the following:1. Aim the Intelligent Key at the vehicle.
2. Press and release the
LOCK but-
ton.
3. Within 2 seconds, press and hold the
LOCK button again for at least
2 seconds, until the horn beeps once and
the park lights turn on.
The following events will occur:
● The left turn signal light on the vehicle and
the trailer will flash for 5 seconds.
● The right turn signal light on the vehicle and
the trailer will flash for 5 seconds.
● The brake lights on the vehicle and the trailer
will turn ON for 5 seconds. NOTE:
If the ignition switch is in the OFF position,
the park lights will turn off after the events
above occur. If ignition switch is in the ON
position, lights will stay on for 45 seconds
after trailer light check. If the trailer lights
do not work properly, check the connec-
tions and bulbs. If the vehicle lights do not
turn on, check the bulbs. If the trailer light
check routine fails to start, ensure the fol-
lowing vehicle conditions:
● The vehicle is NOT moving, 0 mph (0 km/h)
● Brake switch is NOT depressed
● Left or right flasher is OFF
● Trailer light check configuration is NOT dis-
abled and available in the meter towing set-
tings
● The hazard switch is NOT turned ON
● The shift position is fully in P (Park) position
● Vehicle is within Remote Keyless Entry
range
Answer back horn feature
If desired, the answer back horn feature can be
deactivated using the Intelligent Key. When it is
deactivated and the LOCK
button is
pushed, the hazard indicator lights flash twice.
When the UNLOCK
button is pushed, nei-
ther the hazard indicator lights nor the horn op-
erates.
WPD0362
3-16Pre-driving checks and adjustments
Page 214 of 671
NOTE:
If you change the answer back horn and
light flash feature with the Intelligent Key,
the vehicle information display screen will
show the current mode after the ignition
switch has been cycled from the OFF to the
ON position. The vehicle information dis-
play screen can also be used to change the
answer back horn mode.
To deactivate:Press and hold the
andbuttonsfor at least 2 seconds.
The hazard indicator lights will flash three times to
confirm that the answer back horn feature has
been deactivated.
To activate: Press and hold the
andbuttonsfor at least 2 seconds once
more.
The hazard indicator lights will flash once and the
horn will sound once to confirm that the horn
beep feature has been reactivated.
Deactivating the horn beep feature does not si-
lence the horn if the alarm is triggered.
WARNING SIGNALS
To help prevent the vehicle from moving unex-
pectedly by erroneous operation of the Intelligent
Key or to help prevent the vehicle from being
stolen, a chime or buzzer sounds from inside and
outside the vehicle and a warning is displayed in
the instrument panel.
When a chime or beep sounds or a warning is
displayed, be sure to check the vehicle and the
Intelligent Key.
For additional information, refer to “Troubleshoot-
ing guide” in this section and “Vehicle information
display” in the “Instruments and controls” section
of this manual.
Pre-driving checks and adjustments3-17
Page 383 of 671
When adding air to an under-inflated tire, the TPMS
with Easy Fill Tire Alert provides visual and audible
signals outside the vehicle to help you inflate the
tires to the recommended COLD tire pressure.
Vehicle set-up1. Park the vehicle in a safe and level place.
2. Apply the parking brake and place the shift lever to the P (Park) position.
3. Place the ignition switch to the ON position. Do not start the engine.
Operation 1. Add air to the tire.
2. After a few seconds, the hazard indicators will start flashing.
3. When the designated pressure is reached, the horn beeps once and the hazard indica-
tors stop flashing.
4. Perform the above steps for each tire. ●If the tire is over-inflated more than ap-
proximately 4 psi (30 kPa) , the horn
beeps and the hazard indicators flash
three times. To correct the pressure, push
the core of the valve stem on the tire
briefly to release pressure. When the
pressure reaches the designated pres-
sure, the horn beeps once. ●
If the hazard indicator does not flash
within approximately 15 seconds after
starting to inflate the tire, it indicates that
the Easy Fill Tire Alert is not operating.
● The TPMS will not activate the Easy Fill
Tire Alert under the following conditions:
– If there is interference from an external device or transmitter.
– The air pressure from the inflation device is not sufficient to inflate the tire.
– There is a malfunction in the TPMS sys- tem.
– There is a malfunction in the horn or haz- ard indicators.
– The identification code of the tires pres- sure sensor is not registered to the sys-
tem.
– The battery of the tire pressure sensor is low.
● If the Easy Fill Tire Alert does not operate
due to TPMS interference, move the ve-
hicle about 3 ft (1 m) backward or forward
and try again.
If the Easy Fill Tire Alert is not working, use a tire
pressure gauge.
ON-PAVEMENT AND OFF-ROAD
DRIVING PRECAUTIONS
Utility vehicles have a significantly higher
rollover rate than other types of vehicles.
They have higher ground clearance than passen-
ger cars to make them capable of performing in a
variety of on-pavement and off-road applications.
This gives them a higher center of gravity than
ordinary vehicles. An advantage of higher ground
clearance is a better view of the road, allowing
you to anticipate problems. However, they are not
designed for cornering at the same speeds as
conventional 2-wheel drive vehicles any more
than low-slung sports cars are designed to per-
form satisfactorily under off-road conditions. If at
all possible, avoid sharp turns at high speeds. As
with other vehicles of this type, failure to operate
this vehicle correctly may result in loss of control
or vehicle rollover. In a rollover crash, an unbelted
person is significantly more likely to die than a
person wearing a seat belt.
For additional information, refer to “Driving safety
precautions” in this section.
5-6Starting and driving