Indicator NISSAN VERSA 2007 1.G Owner's Guide
[x] Cancel search | Manufacturer: NISSAN, Model Year: 2007, Model line: VERSA, Model: NISSAN VERSA 2007 1.GPages: 304, PDF Size: 4.72 MB
Page 194 of 304
Each time the engine is started, or when the
selector lever is shifted to any position other than
D (Drive) , the Overdrive off mode will be auto-
matically turned off.
Accelerator downshift
— in D position —
For passing or hill climbing, depress the accel-
erator pedal to the floor. This shifts the transmis-
sion down into a lower gear, depending on the
vehicle speed.
Fail-safe
When the fail-safe operation occurs, the CVT will
not be shifted into the selected driving position.
If the vehicle is driven under extreme con-
ditions, such as excessive wheel spinning
and subsequent hard braking, the fail-safe
system may be activated. The MIL may
come on to indicate the fail-safe mode is
activated, see “Malfunction indicator light
(MIL)” in the “Instrument and controls” sec-
tion. This will occur even if all electrical
circuits are functioning properly. In this
case, turn the ignition switch to the OFF
position and wait for 10 seconds. Then turn
the switch back to the ON position. The
vehicle should return to its normal operat-
ing condition. If it does not return to itsnormal operating condition, have a
NISSAN dealer check the transmission and
repair if necessary.
WARNING
When the high fluid temperature protec-
tion mode or fail-safe operation occurs,
vehicle speed may be gradually reduced.
The reduced speed may be lower than
other traffic, which could increase the
chance of a collision. Be especially care-
ful when driving. If necessary, pull to the
side of the road at a safe place and allow
the transmission to return to normal op-
eration, or have it repaired if necessary.
MANUAL TRANSMISSION (if so
equipped)
WARNING
cDo not downshift abruptly on slippery
roads. This may cause a loss of control.
cDo not over-rev the engine when shift-
ing to a lower gear. This may cause a
loss of control or engine damage.
CAUTION
cDo not rest your foot on the clutch pedal
while driving. This may cause clutch
damage.
cFully depress the clutch pedal before
shifting to help prevent transmission
damage.
cStop your vehicle completely before
shifting into R (Reverse) .
cWhen the vehicle is stopped with the
engine running (for example, at a stop
light) , shift to N (Neutral) and release
the clutch pedal with the foot brake
applied.
5-20Starting and driving
ZREVIEW COPYÐ2007 Versa(vrs)
Owners ManualÐUSA_English(nna)
10/05/06Ðdebbie
X
Page 197 of 304
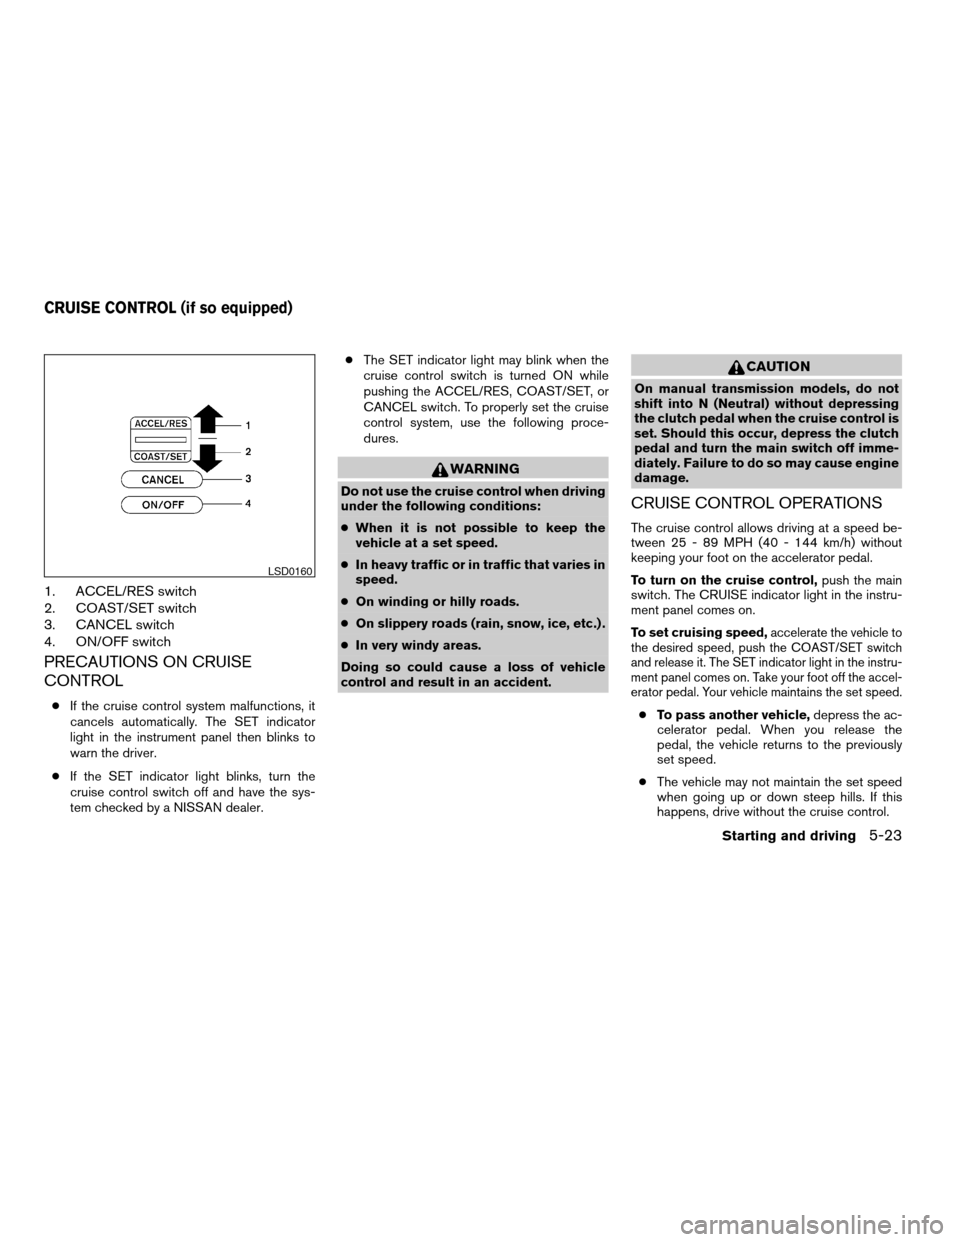
1. ACCEL/RES switch
2. COAST/SET switch
3. CANCEL switch
4. ON/OFF switch
PRECAUTIONS ON CRUISE
CONTROL
cIf the cruise control system malfunctions, it
cancels automatically. The SET indicator
light in the instrument panel then blinks to
warn the driver.
cIf the SET indicator light blinks, turn the
cruise control switch off and have the sys-
tem checked by a NISSAN dealer.cThe SET indicator light may blink when the
cruise control switch is turned ON while
pushing the ACCEL/RES, COAST/SET, or
CANCEL switch. To properly set the cruise
control system, use the following proce-
dures.
WARNING
Do not use the cruise control when driving
under the following conditions:
cWhen it is not possible to keep the
vehicle at a set speed.
cIn heavy traffic or in traffic that varies in
speed.
cOn winding or hilly roads.
cOn slippery roads (rain, snow, ice, etc.) .
cIn very windy areas.
Doing so could cause a loss of vehicle
control and result in an accident.
CAUTION
On manual transmission models, do not
shift into N (Neutral) without depressing
the clutch pedal when the cruise control is
set. Should this occur, depress the clutch
pedal and turn the main switch off imme-
diately. Failure to do so may cause engine
damage.
CRUISE CONTROL OPERATIONS
The cruise control allows driving at a speed be-
tween 25 - 89 MPH (40 - 144 km/h) without
keeping your foot on the accelerator pedal.
To turn on the cruise control,push the main
switch. The CRUISE indicator light in the instru-
ment panel comes on.
To set cruising speed,
accelerate the vehicle to
the desired speed, push the COAST/SET switch
and release it. The SET indicator light in the instru-
ment panel comes on. Take your foot off the accel-
erator pedal. Your vehicle maintains the set speed.
cTo pass another vehicle,depress the ac-
celerator pedal. When you release the
pedal, the vehicle returns to the previously
set speed.
cThe vehicle may not maintain the set speed
when going up or down steep hills. If this
happens, drive without the cruise control.
LSD0160
CRUISE CONTROL (if so equipped)
Starting and driving5-23
ZREVIEW COPYÐ2007 Versa(vrs)
Owners ManualÐUSA_English(nna)
10/05/06Ðdebbie
X
Page 198 of 304
To cancel the preset speed,use one of the
following three methods.
cPush the CANCEL button; the SET indicator
light in the instrument panel goes out.
cTap the brake pedal; the SET indicator light
goes out.
cTurn the main switch off. Both the CRUISE
indicator light and SET indicator light in the
instrument panel go out.
The cruise control is automatically canceled and
the SET light in the instrument panel goes out if:
cyou depress the brake or clutch pedal while
pushing the ACCEL/RES or SET/COAST
switch. The preset speed is deleted from
memory.
cthe vehicle slows down more than 8 MPH
(13 km/h) below the set speed.
cyou depress the clutch pedal (manual trans-
mission) , or move the shift selector lever to N
(Neutral) (CVT) .
To reset at a faster cruising speed,use one
of the following three methods.
cDepress the accelerator pedal. When the
vehicle attains the desired speed, push and
release the COAST/SET switch.cPush and hold the ACCEL/RES switch.
When the vehicle attains the speed you de-
sire, release the switch.
cPush and release the ACCEL/RES switch.
Each time you do this, the set speed in-
creases by about 1 MPH (1.6 km/h) .
To reset at a slower cruising speed,use one
of the following three methods.
cLightly tap the brake pedal. When the ve-
hicle attains the desired speed, push the
COAST/SET switch and release it.
cPush and hold the COAST/SET switch. Re-
lease the switch when the vehicle slows to
the desired speed.
cPush and release the COAST/SET switch.
Each time you do this, the set speed de-
creases by about 1 MPH (1.6 km/h) .
To resume the preset speed,push and re-
lease the ACCEL/RES switch. The vehicle re-
turns to the last set cruising speed when the
vehicle speed is over 25 MPH (40 km/h) .CAUTION
During the first 1,200 miles (2,000 km) ,
follow these recommendations to obtain
maximum engine performance and en-
sure the future reliability and economy of
your new vehicle. Failure to follow these
recommendations may result in short-
ened engine life and reduced engine
performance.
cAvoid driving for long periods at constant
speed, either fast or slow, and do not run the
engine over 4,000 rpm.
cDo not accelerate at full throttle in any gear.
cAvoid quick starts.
cAvoid hard braking as much as possible.
BREAK-IN SCHEDULE
5-24Starting and driving
ZREVIEW COPYÐ2007 Versa(vrs)
Owners ManualÐUSA_English(nna)
10/05/06Ðdebbie
X
Page 208 of 304
TIRE PRESSURE MONITORING
SYSTEM (TPMS) (if so equipped)
This vehicle is equipped with the tire pressure
monitoring system (TPMS) . It monitors tire pres-
sure of all tires except the spare. When the low
tire pressure warning light is lit, one or more of
your tires is significantly under-inflated. If the
vehicle is being driven with low tire pressure, the
TPMS will activate and warn you of it by the low
tire pressure warning light. This system will acti-
vate only when the vehicle is driven at speeds
above 16 MPH (25 km/h) . For more details, refer
to “Warning/indicator lights and audible remind-
ers” in the “Instruments and controls” section,
and “Tire pressure monitoring system (TPMS)” in
the “Starting and driving” section.
WARNING
cIf the low tire pressure warning light
illuminates while driving, avoid sudden
steering maneuvers or abrupt braking,
reduce vehicle speed, pull off the road
to a safe location and stop the vehicle
as soon as possible. Serious vehicle
damage could occur and may lead to an
accident and could result in serious
personal injury. Check the tire pressure
for all four tires. Adjust the tire pressure
to the recommended COLD tire pres-
sure shown on the Tire and Loading
Information label to turn the low tire
pressure warning light OFF. If you have
a flat tire, replace it with a spare tire as
soon as possible.
cWhen a spare tire is mounted or a wheel
is replaced, the TPMS will not function
and the low tire pressure warning light
will flash for approximately 1 minute.
The light will remain on after 1 minute.
Contact your NISSAN dealer as soon as
possible for tire replacement and/or
system resetting.
cReplacing tires with those not originally
specified by NISSAN could affect the
proper operation of the TPMS.cDo not inject any tire liquid or aerosol
tire sealant into the tires, as this may
cause a malfunction of the tire pressure
sensors.
CHANGING A FLAT TIRE
If you have a flat tire, follow the instructions be-
low.
Stopping the vehicle
1. Safely move the vehicle off the road and
away from traffic.
2. Turn on the hazard warning flashers.
3. Park on a level surface and apply the parking
brake. Shift the transmission into P (Park) or
the manual transmission into R (Reverse) .
4. Turn off the engine.
5. Raise the hood to warn other traffic and to
signal professional road assistance person-
nel that you need assistance.
6. Have all passengers get out of the vehicle
and stand in a safe place, away from traffic
and clear of the vehicle.
FLAT TIRE
6-2In case of emergency
ZREVIEW COPYÐ2007 Versa(vrs)
Owners ManualÐUSA_English(nna)
10/05/06Ðdebbie
X
Page 246 of 304

Rear window wiper blade
Contact a NISSAN dealer if checking or replace-
ment is required.If the brakes do not operate properly, have the
brakes checked by a NISSAN dealer.Self-adjusting brakes
Your vehicle is equipped with self-adjusting
brakes.
The front and rear disc-type brakes self-adjust
every time the brake pedal is applied.
WARNING
See a NISSAN dealer for a brake system
check if the brake pedal height does not
return to normal.
Brake pad wear indicators
The disc brake pads on your vehicle have audible
wear indicators. When a brake pad requires re-
placement, a high pitched scraping or screech-
ing sound will be heard when the vehicle is in
motion. The noise will be heard whether or not the
brake pedal is depressed. Have the brakes
checked as soon as possible if the wear indicator
sound is heard.
Under some driving or climate conditions, occa-
sional brake squeak, squeal or other noise may
be heard. Occasional brake noise during light to
moderate stops is normal and does not affect the
function or performance of the brake system.Proper brake inspection intervals should
be followed.For more information regarding
brake inspections, see the appropriate mainte-
nance schedule information in the “NISSAN Ser-
vice and Maintenance Guide”.
BRAKES
8-20Maintenance and do-it-yourself
ZREVIEW COPYÐ2007 Versa(vrs)
Owners ManualÐUSA_English(nna)
10/05/06Ðdebbie
X
Page 264 of 304
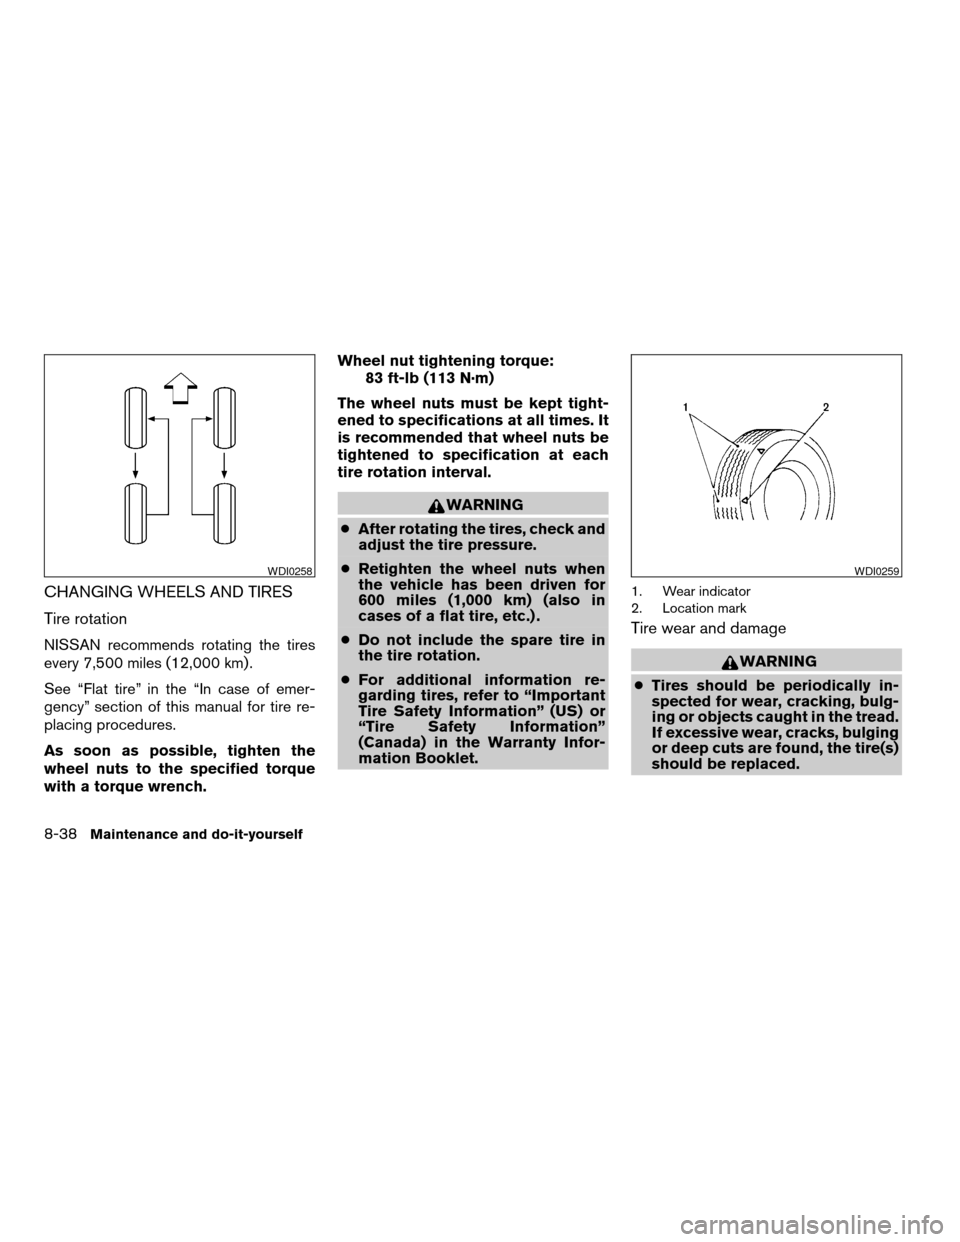
CHANGING WHEELS AND TIRES
Tire rotation
NISSAN recommends rotating the tires
every 7,500 miles (12,000 km) .
See “Flat tire” in the “In case of emer-
gency” section of this manual for tire re-
placing procedures.
As soon as possible, tighten the
wheel nuts to the specified torque
with a torque wrench.Wheel nut tightening torque:
83 ft-lb (113 N·m)
The wheel nuts must be kept tight-
ened to specifications at all times. It
is recommended that wheel nuts be
tightened to specification at each
tire rotation interval.
WARNING
cAfter rotating the tires, check and
adjust the tire pressure.
cRetighten the wheel nuts when
the vehicle has been driven for
600 miles (1,000 km) (also in
cases of a flat tire, etc.) .
cDo not include the spare tire in
the tire rotation.
cFor additional information re-
garding tires, refer to “Important
Tire Safety Information” (US) or
“Tire Safety Information”
(Canada) in the Warranty Infor-
mation Booklet.
1. Wear indicator
2. Location mark
Tire wear and damage
WARNING
cTires should be periodically in-
spected for wear, cracking, bulg-
ing or objects caught in the tread.
If excessive wear, cracks, bulging
or deep cuts are found, the tire(s)
should be replaced.
WDI0258WDI0259
8-38Maintenance and do-it-yourself
ZREVIEW COPYÐ2007 Versa(vrs)
Owners ManualÐUSA_English(nna)
10/05/06Ðdebbie
X
Page 265 of 304
cThe original tires have built-in
tread wear indicators. When the
wear indicators are visible, the
tire(s) should be replaced.
cTires degrade with age and use.
Have tires, including the spare,
over 6 years old checked by a
qualified technician because
some tire damage may not be ob-
vious. Replace the tires as neces-
sary to prevent tire failure and
possible personal injury.
cImproper service of the spare tire
may result in serious personal in-
jury. If it is necessary to repair the
spare tire, contact a NISSAN
dealer.
cFor additional information re-
garding tires, refer to “Important
Tire Safety Information” (US) or
“Tire Safety Information”
(Canada) in the Warranty Infor-
mation Booklet.Replacing wheels and tires
When replacing a tire, use the same size, tread
design, speed rating and load carrying capacity
as originally equipped. Recommended types and
sizes are shown in “Wheels and tires” in the
“Technical and consumer information” section of
this manual.
WARNING
cThe use of tires other than those recom-
mended or the mixed use of tires of
different brands, construction (bias,
bias-belted or radial) , or tread patterns
can adversely affect the ride, braking,
handling, ground clearance, body-to-
tire clearance, tire chain clearance,
speedometer calibration, headlight aim
and bumper height. Some of these ef-
fects may lead to accidents and could
result in serious personal injury.cIf the wheels are changed for any rea-
son, always replace with wheels which
have the same off-set dimension.
Wheels of a different off-set could
cause premature tire wear, degrade ve-
hicle handling characteristics and/or
interference with the brake
discs/drums. Such interference can
lead to decreased braking efficiency
and/or early brake pad/shoe wear. Re-
fer to “Wheels and tires” in the “Techni-
cal and consumer information” section
of this manual for wheel off-set
dimensions.
cWhen a spare tire is mounted or a wheel
is replaced, tire pressure will not be
indicated, the TPMS will not function
and the low tire pressure warning light
will flash for approximately 1 minute.
The light will remain on after 1 minute.
Contact your NISSAN dealer as soon as
possible for tire replacement and/or
system resetting.
cReplacing tires with those not originally
specified by NISSAN could affect the
proper operation of the TPMS.
Maintenance and do-it-yourself8-39
ZREVIEW COPYÐ2007 Versa(vrs)
Owners ManualÐUSA_English(nna)
10/05/06Ðdebbie
X
Page 267 of 304
cTire tread of the TEMPORARY USE
ONLY spare tire will wear at a faster rate
than the standard tire. Replace the
spare tire as soon as the tread wear
indicators appear.
cDo not use the spare tire on other
vehicles.
cDo not use more than one spare tire at
the same time.
cDo not tow a trailer when the TEMPO-
RARY USE ONLY spare tire is installed.
CAUTION
cDo not use tire chains on a TEMPO-
RARY USE ONLY spare tire. Tire chains
will not fit properly and may cause dam-
age to the vehicle.
cBecause the TEMPORARY USE ONLY
spare tire is smaller than the original
tire, ground clearance is reduced. To
avoid damage to the vehicle, do not
drive over obstacles. Also, do not drive
the vehicle through an automatic car
wash since it may get caught.
Maintenance and do-it-yourself8-41
ZREVIEW COPYÐ2007 Versa(vrs)
Owners ManualÐUSA_English(nna)
10/05/06Ðdebbie
X
Page 287 of 304

If you believe that your vehicle has a de-
fect which could cause a crash or could
cause injury or death, you should immedi-
ately inform the National Highway Traffic
Safety Administration (NHTSA) in addi-
tion to notifying NISSAN.
If NHTSA receives similar complaints, it
may open an investigation, and if it finds
that a safety defect exists in a group of
vehicles, it may order a recall and remedy
campaign. However, NHTSA cannot be-
come involved in individual problems be-
tween you, your dealer, or NISSAN.
To contact NHTSA, you may call the Ve-
hicle Safety Hotline toll-free at 1-888-
327-4236 (TTY: 1-800-424-9153); go
to http://www.safercar.gov; or write to:
Administrator, NHTSA, 400 Seventh
Street, SW., Washington, D.C. 20590.
You can also obtain other information
about motor vehicle safety from
http://www.safercar.gov.
You may notify NISSAN by contacting our
Consumer Affairs Department, toll-free, at
1-800-NISSAN-1.Due to legal requirements in some states and
Canadian Provinces, your vehicle may be re-
quired to be in what is called the “ready condi-
tion” for an Inspection/Maintenance (I/M) test of
the emission control system.
The vehicle is set to the “ready condition” when it
is driven through certain driving patterns. Usually,
the ready condition can be obtained by ordinary
usage of the vehicle.
If a powertrain system component is repaired or
the battery is disconnected, the vehicle may be
reset to a “not ready” condition. Before taking the
I/M test, check the vehicle’s
inspection/maintenance test readiness condi-
tion. Turn the ignition switch ON without starting
the engine. If the Malfunction Indicator Light
(MIL) comes on steady for 20 seconds and then
blinks for 10 seconds , the I/M test condition is
9not ready9. If the MIL does not blink after 20
seconds, the I/M test condition is9ready.9If the
MIL indicates the vehicle is in a9not ready9con-
dition, drive the vehicle through the following
pattern to set the vehicle to the ready condition. If
you cannot or do not want to perform the driving
pattern, a NISSAN dealer can conduct it for you.WARNING
Always drive the vehicle in a safe and
prudent manner according to traffic con-
ditions and obey all traffic laws.
1. Start the engine, the low temperature indi-
cator light
illuminates in blue. Allow
the engine to idle until the low temperature
indicator light
goes out, indicating
normal operating temperature.
2. Accelerate the vehicle to 55 MPH (88
km/h) , then quickly release the accelerator
pedal completely and keep it released for at
least 10 seconds.
3. Quickly depress the accelerator pedal for a
moment, then drive the vehicle at a speed of
53 - 60 MPH (86 - 96 km/h) for at least 9
minutes.
4. Stop the vehicle.
5. Accelerate the vehicle to 35 MPH (55 km/h)
and maintain the speed for 20 seconds.
6. Repeat steps 4 through 5 at least 10 times.
7. Accelerate the vehicle to 55 MPH (88 km/h)
and maintain the speed for at least 3 min-
utes.
REPORTING SAFETY DEFECTS (US
only)READINESS FOR INSPECTION/
MAINTENANCE (I/M) TEST
Technical and consumer information9-19
ZREVIEW COPYÐ2007 Versa(vrs)
Owners ManualÐUSA_English(nna)
10/05/06Ðdebbie
X
Page 291 of 304

10 Index
A
Active head restraint...............1-6
Air bag (See supplemental restraint
system).....................1-34
Air bag system
Front (See supplemental front impact air
bag system).................1-41
Side and curtain (See supplemental
side air bag and curtain side-impact
air bag system)...............1-45
Air bag warning labels.............1-48
Air bag warning light...........1-48, 2-11
Air cleaner housing filter............8-18
Air conditioner
Air conditioner operation...........4-5
Air conditioner service............4-9
Air conditioner specification label.....9-12
Air conditioner system refrigerant and oil
recommendations..............9-6
Heater and air conditioner controls.....4-3
Servicing air conditioner...........4-9
Air flow charts..................4-6
Alarm system
(See vehicle security system).........2-14
Anchor point locations.............1-19
Antenna.....................4-27
Anti-lock brake warning light..........2-7
Anti-lock braking system (ABS)........5-28
Armrests.....................1-5
Audible reminders................2-13Audio system..................4-10
Compact Disc (CD) changer.......4-23
Compact disc (CD) player.........4-18
FM-AM radio with compact disc (CD)
player....................4-16
FM/AM/SAT radio with compact disc (CD)
changer...................4-20
Radio....................4-10
Steering wheel audio control switch. . . .4-26
Automatic
Automatic power window switch.....2-29
Automatic transmission fluid (ATF). . . .8-11
Driving with automatic transmission. . . .5-13
Transmission selector lever lock
release................5-15, 5-19
B
Battery......................8-14
Charge warning light.............2-7
Before starting the engine...........5-11
Belt (See drive belt)..............8-17
BluetoothThands-free phone system.....4-28
Booster seats..................1-29
Brake
Anti-lock braking system (ABS)......5-28
Brake fluid..................8-13
Brake light (See stop light).........8-27
Brake system................5-27
Brake warning light..............2-7
Brake wear indicators........2-13, 8-20Parking brake operation..........5-22
Self-adjusting brakes............8-20
Brakes......................8-20
Break-in schedule................5-24
Brightness control
Instrument panel..............2-20
Bulb check/instrument panel..........2-7
Bulb replacement................8-27
C
Capacities and recommended
fuel/lubricants...................9-2
Car phone or CB radio.............4-27
Cargo (See vehicle loading information) . . .9-13
CD care and cleaning.............4-25
CD changer (See audio system)........4-23
CD player (See audio system).........4-18
Child restraint with top tether strap......1-18
Child restraints.......1-9, 1-10, 1-14, 1-16
Precautions on child
restraints............1-14, 1-23, 1-29
Top tether strap anchor point locations . .1-19
Child safety rear door lock............3-6
Chimes, audible reminders...........2-13
Cleaning exterior and interior..........7-2
Clock...................4-17, 4-20
Clutch
Clutch fluid.................8-13
C.M.V.S.S. certification label..........9-11
Cold weather driving..............5-29
ZREVIEW COPYÐ2007 Versa(vrs)
Owners ManualÐUSA_English(nna)
10/05/06Ðdebbie
X