lights NISSAN XTERRA 2001 WD22 / 1.G User Guide
[x] Cancel search | Manufacturer: NISSAN, Model Year: 2001, Model line: XTERRA, Model: NISSAN XTERRA 2001 WD22 / 1.GPages: 263, PDF Size: 2.25 MB
Page 62 of 263
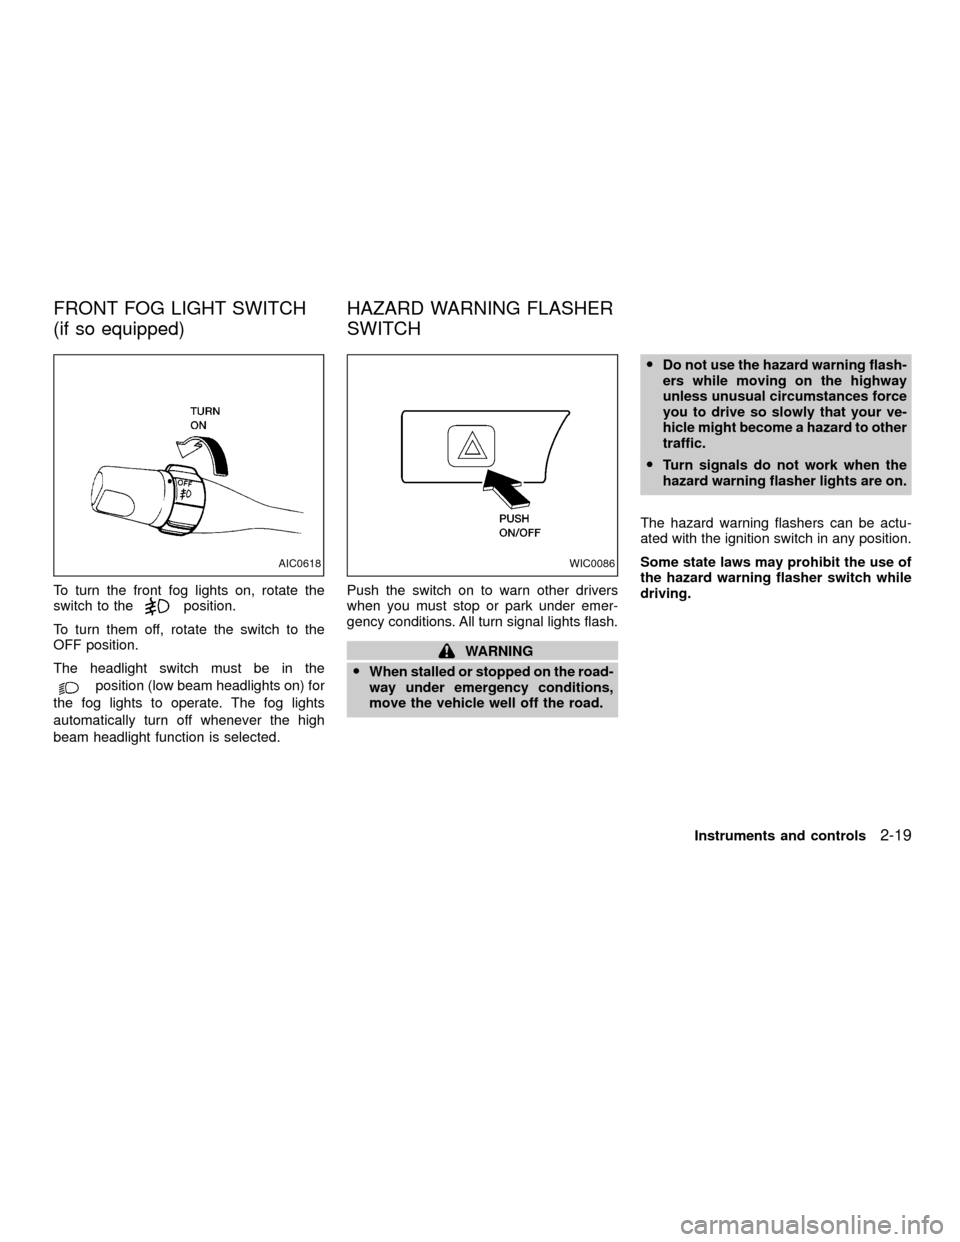
To turn the front fog lights on, rotate the
switch to theposition.
To turn them off, rotate the switch to the
OFF position.
The headlight switch must be in the
position (low beam headlights on) for
the fog lights to operate. The fog lights
automatically turn off whenever the high
beam headlight function is selected.Push the switch on to warn other drivers
when you must stop or park under emer-
gency conditions. All turn signal lights flash.
WARNING
OWhen stalled or stopped on the road-
way under emergency conditions,
move the vehicle well off the road.ODo not use the hazard warning flash-
ers while moving on the highway
unless unusual circumstances force
you to drive so slowly that your ve-
hicle might become a hazard to other
traffic.
OTurn signals do not work when the
hazard warning flasher lights are on.
The hazard warning flashers can be actu-
ated with the ignition switch in any position.
Some state laws may prohibit the use of
the hazard warning flasher switch while
driving.
AIC0618WIC0086
FRONT FOG LIGHT SWITCH
(if so equipped)HAZARD WARNING FLASHER
SWITCH
Instruments and controls2-19
ZX
Page 64 of 263
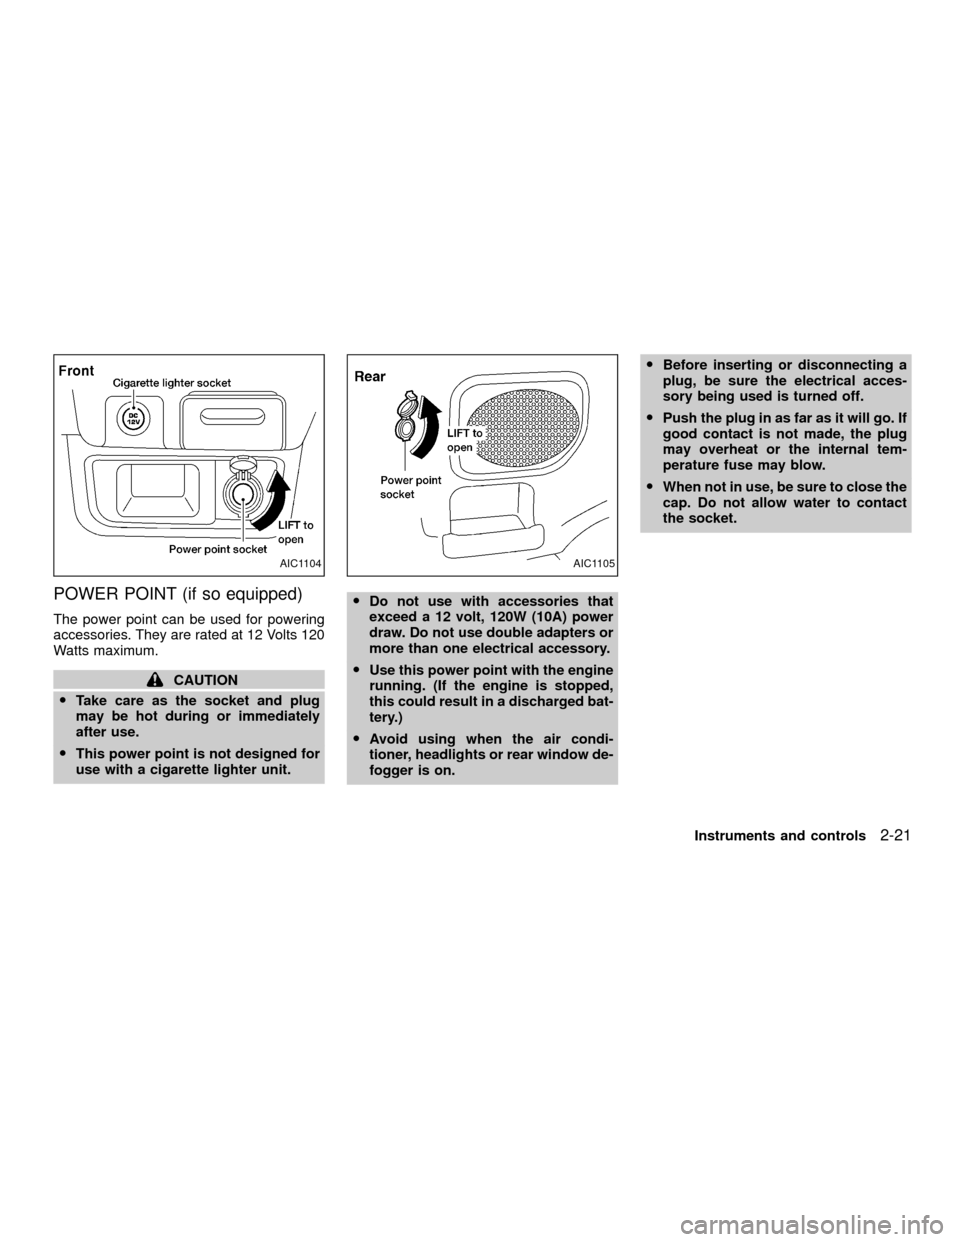
POWER POINT (if so equipped)
The power point can be used for powering
accessories. They are rated at 12 Volts 120
Watts maximum.
CAUTION
OTake care as the socket and plug
may be hot during or immediately
after use.
OThis power point is not designed for
use with a cigarette lighter unit.ODo not use with accessories that
exceed a 12 volt, 120W (10A) power
draw. Do not use double adapters or
more than one electrical accessory.
OUse this power point with the engine
running. (If the engine is stopped,
this could result in a discharged bat-
tery.)
OAvoid using when the air condi-
tioner, headlights or rear window de-
fogger is on.OBefore inserting or disconnecting a
plug, be sure the electrical acces-
sory being used is turned off.
OPush the plug in as far as it will go. If
good contact is not made, the plug
may overheat or the internal tem-
perature fuse may blow.
OWhen not in use, be sure to close the
cap. Do not allow water to contact
the socket.
AIC1104AIC1105
Instruments and controls2-21
ZX
Page 73 of 263
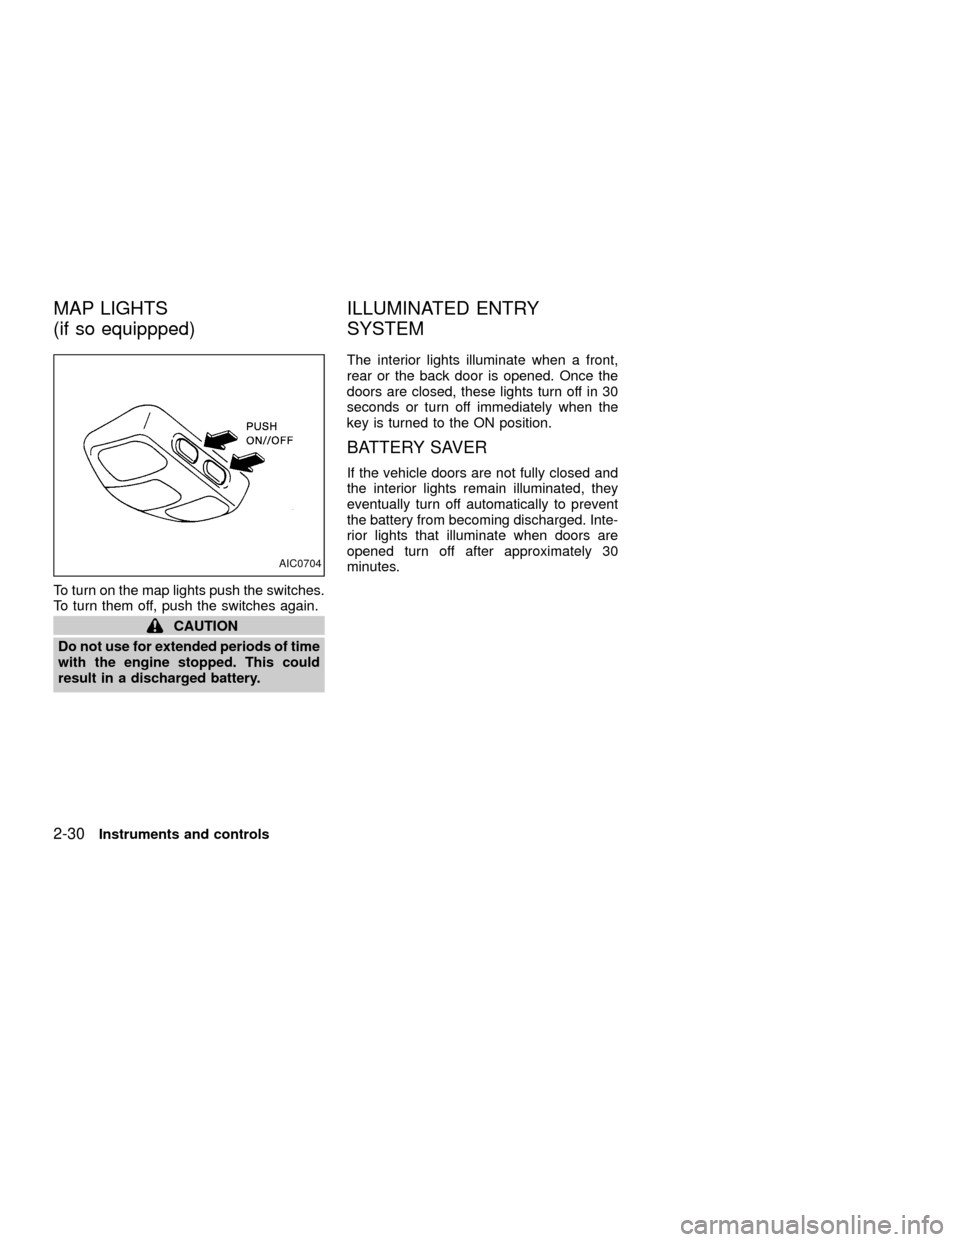
To turn on the map lights push the switches.
To turn them off, push the switches again.
CAUTION
Do not use for extended periods of time
with the engine stopped. This could
result in a discharged battery.The interior lights illuminate when a front,
rear or the back door is opened. Once the
doors are closed, these lights turn off in 30
seconds or turn off immediately when the
key is turned to the ON position.
BATTERY SAVER
If the vehicle doors are not fully closed and
the interior lights remain illuminated, they
eventually turn off automatically to prevent
the battery from becoming discharged. Inte-
rior lights that illuminate when doors are
opened turn off after approximately 30
minutes.
AIC0704
MAP LIGHTS
(if so equippped)ILLUMINATED ENTRY
SYSTEM
2-30Instruments and controls
ZX
Page 77 of 263
CHILD SAFETY REAR DOOR
LOCK
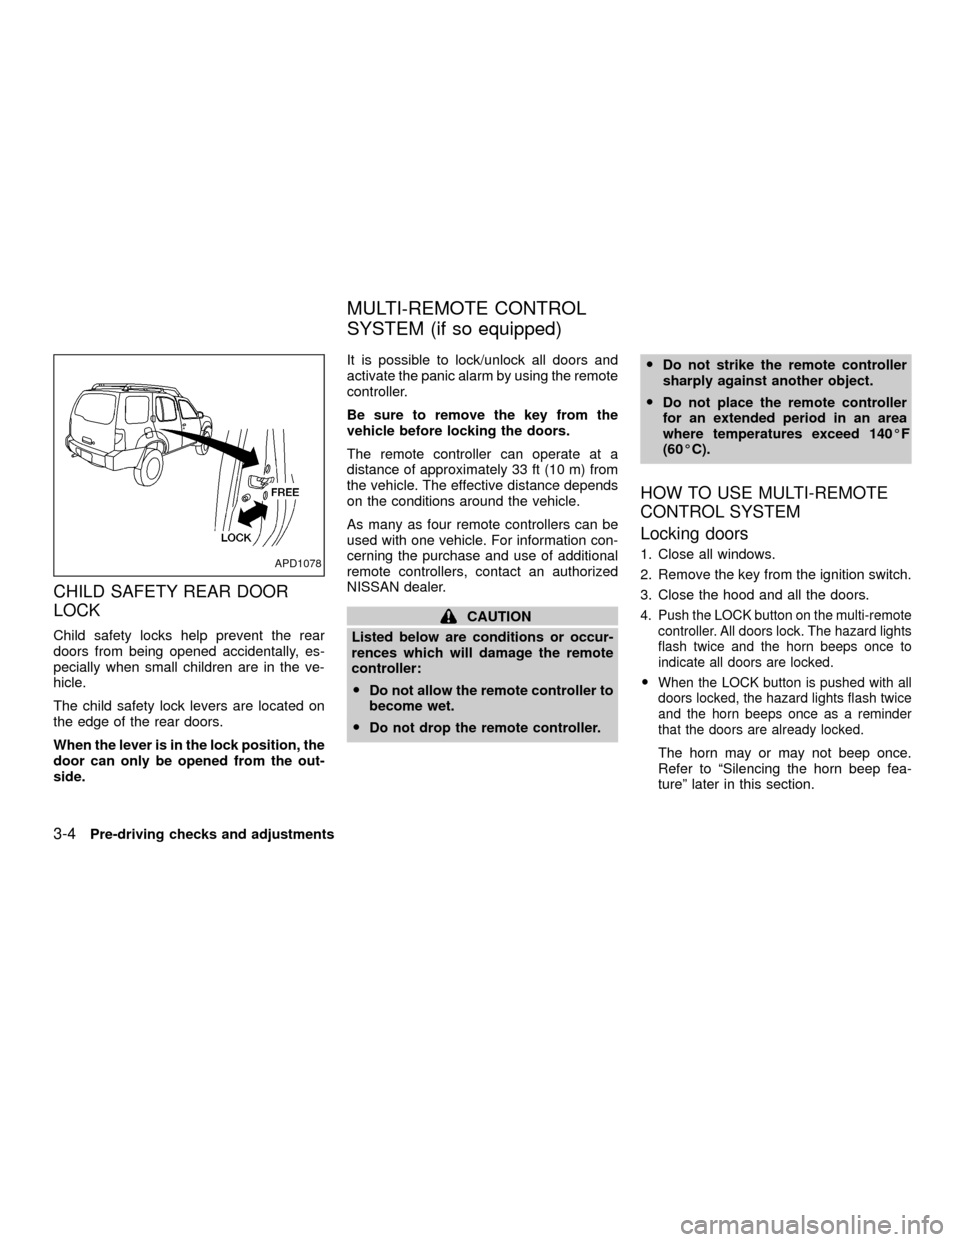
Child safety locks help prevent the rear
doors from being opened accidentally, es-
pecially when small children are in the ve-
hicle.
The child safety lock levers are located on
the edge of the rear doors.
When the lever is in the lock position, the
door can only be opened from the out-
side.It is possible to lock/unlock all doors and
activate the panic alarm by using the remote
controller.
Be sure to remove the key from the
vehicle before locking the doors.
The remote controller can operate at a
distance of approximately 33 ft (10 m) from
the vehicle. The effective distance depends
on the conditions around the vehicle.
As many as four remote controllers can be
used with one vehicle. For information con-
cerning the purchase and use of additional
remote controllers, contact an authorized
NISSAN dealer.
CAUTION
Listed below are conditions or occur-
rences which will damage the remote
controller:
ODo not allow the remote controller to
become wet.
ODo not drop the remote controller.ODo not strike the remote controller
sharply against another object.
ODo not place the remote controller
for an extended period in an area
where temperatures exceed 140ÉF
(60ÉC).
HOW TO USE MULTI-REMOTE
CONTROL SYSTEM
Locking doors
1. Close all windows.
2. Remove the key from the ignition switch.
3. Close the hood and all the doors.
4. Push the LOCK button on the multi-remote
controller. All doors lock. The hazard lights
flash twice and the horn beeps once to
indicate all doors are locked.
OWhen the LOCK button is pushed with all
doors locked, the hazard lights flash twice
and the horn beeps once as a reminder
that the doors are already locked.
The horn may or may not beep once.
Refer to ªSilencing the horn beep fea-
tureº later in this section.
APD1078
MULTI-REMOTE CONTROL
SYSTEM (if so equipped)
3-4Pre-driving checks and adjustments
ZX
Page 78 of 263

OIf a door is open and you push the LOCK
button, the doors will lock but the horn
will not beep and the hazard lights will not
flash.Unlocking doors
1. Push the UNLOCK button on the multi-
remote controller. Only the driver's side
door unlocks.2. Push the UNLOCK button on the multi-
remote controller again within five sec-
onds. All doors unlock.
3. The interior lights illuminate for 30 sec-
onds when the interior light switch is in
the O or DOOR position.
The interior lights can be turned off without
waiting 30 seconds by inserting the key into
the ignition and turning to the ON or START
position, locking the doors with the multi-
remote controller or pushing the
interior light switch to the OFF position.
Using the panic alarm
If you are near your vehicle and feel threat-
ened, you may activate the panic alarm to
call attention as follows:
1. Push the PANIC button on the remote
controller forlonger than 0.5 seconds.
2. The theft warning alarm and headlights
will stay on for 30 seconds.
3. The panic alarm stops when:
Oit has run for 30 seconds, or
Othe LOCK or UNLOCK button is pressed,
on the multi-remote controller.
WPD0048
Pre-driving checks and adjustments3-5
ZX
Page 79 of 263

Silencing the horn beep feature
If desired, the horn beep feature can be
deactivated using the multi-remote control-
ler.
To deactivate:Press and hold the LOCK
and UNLOCKtogether for at least two
seconds.
The hazard lights will quickly flash three
times to confirm that the horn beep feature
has been deactivated.
To activate:Press and hold the LOCK andUNLOCKtogether for at least two sec-
onds once more.
The hazard lights will quickly flash once and
the horn will sound once to confirm that the
horn beep feature has been reactivated.
Deactivating the horn feature does not si-
lence the horn if the alarm is triggered.
WIC0060
3-6Pre-driving checks and adjustments
ZX
Page 88 of 263
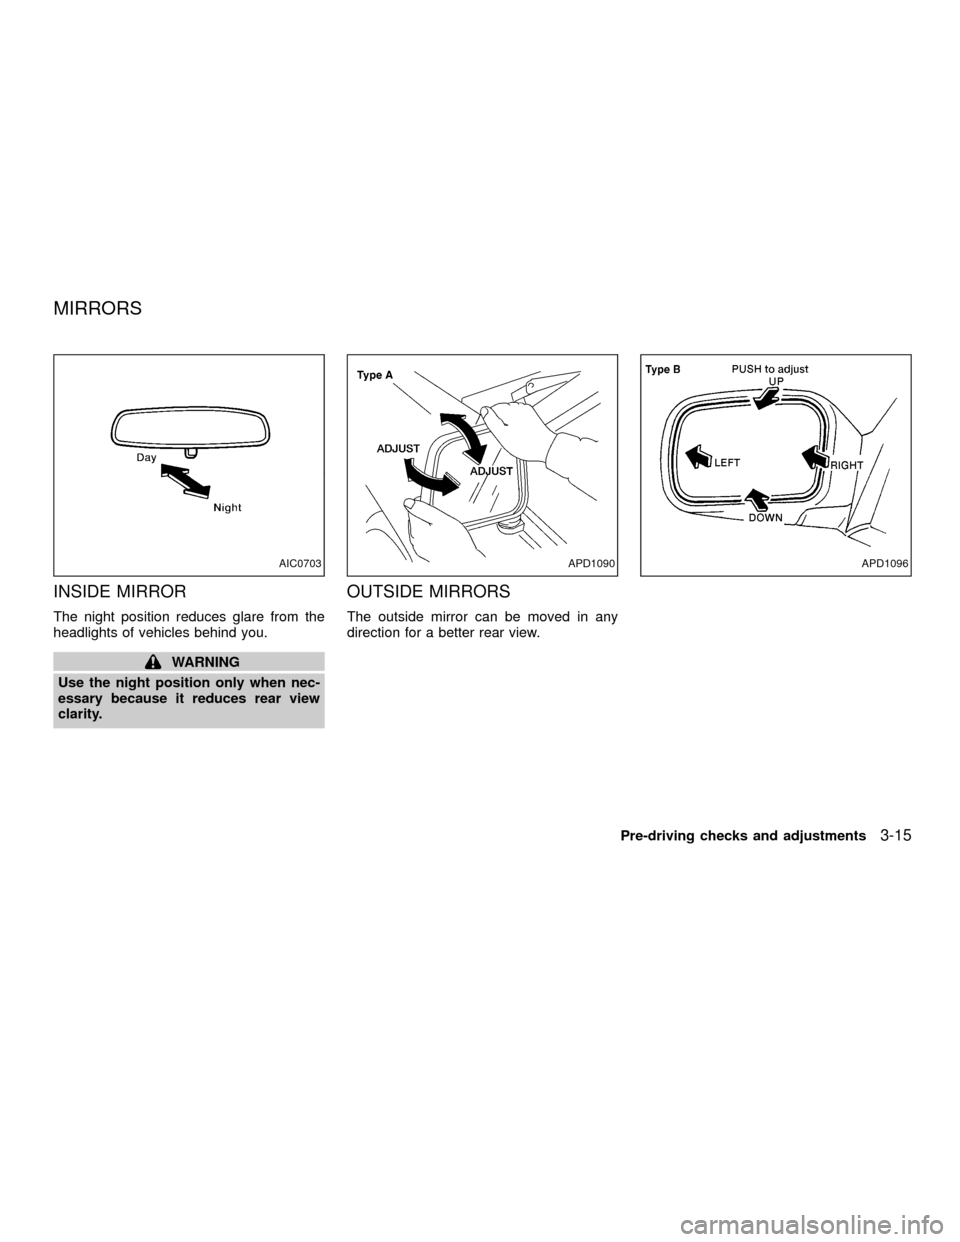
INSIDE MIRROR
The night position reduces glare from the
headlights of vehicles behind you.
WARNING
Use the night position only when nec-
essary because it reduces rear view
clarity.
OUTSIDE MIRRORS
The outside mirror can be moved in any
direction for a better rear view.
AIC0703APD1090APD1096
MIRRORS
Pre-driving checks and adjustments3-15
ZX
Page 135 of 263

ON (Normal operating position) (3)
This position turns on the ignition system
and electrical accessories.
START (4)
This position starts the engine. As soon as
the engine has started, release the key. It
automatically returns to the ON position.OMake sure the area around the vehicle is
clear.
OCheck fluid levels such as engine oil,
coolant, brake and clutch fluid, and win-
dow washer fluid as frequently as pos-
sible, at least whenever you refuel.
OCheck that all windows and lights are
clean.
OVisually inspect tires for their appearance
and condition. Also check tires for proper
inflation.
OLock all doors.
OPosition seat and adjust head restraints.
OAdjust inside and outside mirrors.
OFasten seat belts and ask all passengers
to do likewise.
OCheck the operation of warning lights
when key is turned to the ON (3) position.
See9Warning/Indicator lights and
chimes9in the9Instruments and controls9
section.1. Apply the parking brake.
2.Automatic transmission:
Move the selector lever to P (Park) or N
(Neutral). P (Park) is preferred.
The shift lever cannot be moved out of
P (Park) and into any of the other gear
positions if the ignition key is turned
to OFF or if the key is removed from
the ignition switch.
The starter is designed not to operate
if the selector lever is in one of the
driving positions.
Manual transmission:
Move the gearshift lever to N (Neutral),
and fully depress the clutch pedal to the
floor while starting the engine.
The starter is designed not to operate
unless the clutch pedal is fully de-
pressed.
3.With your foot off the accelerator
pedal,turn the ignition key to START.
Release the key when the engine starts.
If the engine starts, but fails to run, repeat
the above procedure.
BEFORE STARTING THE
ENGINESTARTING THE ENGINE
5-8Starting and driving
ZX
Page 164 of 263
matic transmission models, move the
lever to P (Park)). Switch off all unneces-
sary electrical systems (lights, heater, air
conditioner, etc.).
3. Remove vent caps on the battery (if so
equipped). Cover the battery with an old
cloth to reduce explosion hazard.
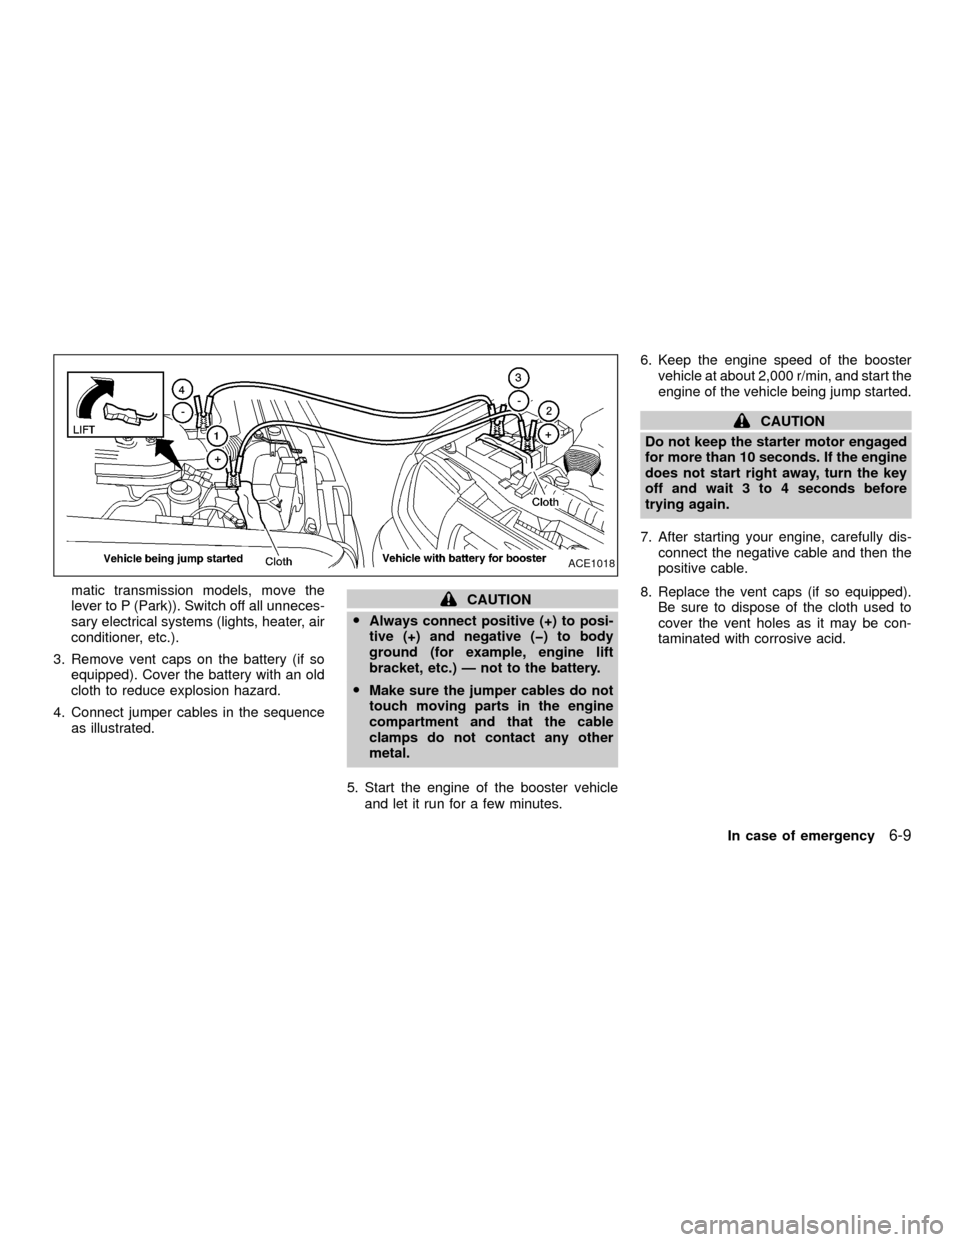
4. Connect jumper cables in the sequence
as illustrated.CAUTION
OAlways connect positive (+) to posi-
tive (+) and negative (þ) to body
ground (for example, engine lift
bracket, etc.) Ð not to the battery.
OMake sure the jumper cables do not
touch moving parts in the engine
compartment and that the cable
clamps do not contact any other
metal.
5. Start the engine of the booster vehicle
and let it run for a few minutes.6. Keep the engine speed of the booster
vehicle at about 2,000 r/min, and start the
engine of the vehicle being jump started.
CAUTION
Do not keep the starter motor engaged
for more than 10 seconds. If the engine
does not start right away, turn the key
off and wait 3 to 4 seconds before
trying again.
7. After starting your engine, carefully dis-
connect the negative cable and then the
positive cable.
8. Replace the vent caps (if so equipped).
Be sure to dispose of the cloth used to
cover the vent holes as it may be con-
taminated with corrosive acid.
ACE1018
In case of emergency6-9
ZX
Page 176 of 263

8 Do-it-yourself
Maintenance precautions .......................................8-2
Engine compartment check locations ....................8-3
Engine cooling system ...........................................8-5
Checking engine coolant level ..........................8-5
Changing engine coolant ..................................8-6
Engine oil ...............................................................8-9
Checking engine oil level ..................................8-9
Changing engine oil ........................................8-10
Changing engine oil filter.................................8-12
Automatic transmission fluid ................................8-13
Temperature conditions for checking ..............8-13
Power steering fluid..............................................8-14
Brake and clutch fluid...........................................8-15
Window washer fluid ............................................8-16
Window washer fluid reservoir ........................8-16
Battery ..................................................................8-16
Jump starting ...................................................8-17
Drive belts ............................................................8-18
Spark plugs ..........................................................8-19
Replacing spark plugs .....................................8-19
Air cleaner ............................................................8-20Windshield wiper blades ......................................8-22
Cleaning ..........................................................8-22
Replacing .........................................................8-22
Parking brake and brake pedal ............................8-24
Checking parking brake...................................8-24
Checking brake pedal .....................................8-24
Brake booster ..................................................8-25
Clutch pedal .........................................................8-26
Checking clutch pedal .....................................8-26
Fuses ....................................................................8-27
Passenger compartment .................................8-27
Multi-remote controller battery replacement ........8-28
Lights ....................................................................8-29
Headlights ........................................................8-29
Fog lights (if so equipped)...............................8-31
Exterior and interior lights ...............................8-32
Wheels and tires ..................................................8-34
Tire pressure ...................................................8-34
Types of tires ...................................................8-34
Tire chains .......................................................8-35
Changing wheels and tires ..............................8-36
ZX