stop start NISSAN XTERRA 2002 WD22 / 1.G Owners Manual
[x] Cancel search | Manufacturer: NISSAN, Model Year: 2002, Model line: XTERRA, Model: NISSAN XTERRA 2002 WD22 / 1.GPages: 263, PDF Size: 2.22 MB
Page 59 of 263

WARNING
O
Your brake system may not be working
properly if the warning light is on.
Driving could be dangerous. If you
judge it to be safe, drive carefully to
the nearest service station for repairs.
Otherwise have your vehicle towed be-
cause driving it could be dangerous.
OPressing the brake pedal with the
engine stopped and/or low brake
fluid level may increase your stop-
ping distance and require greater
pedal effort as well as pedal travel.
OIf the brake fluid level is below the
MINIMUM or MIN mark on the brake
fluid reservoir, do not drive until the
brake system has been checked at
an authorized NISSAN dealer.
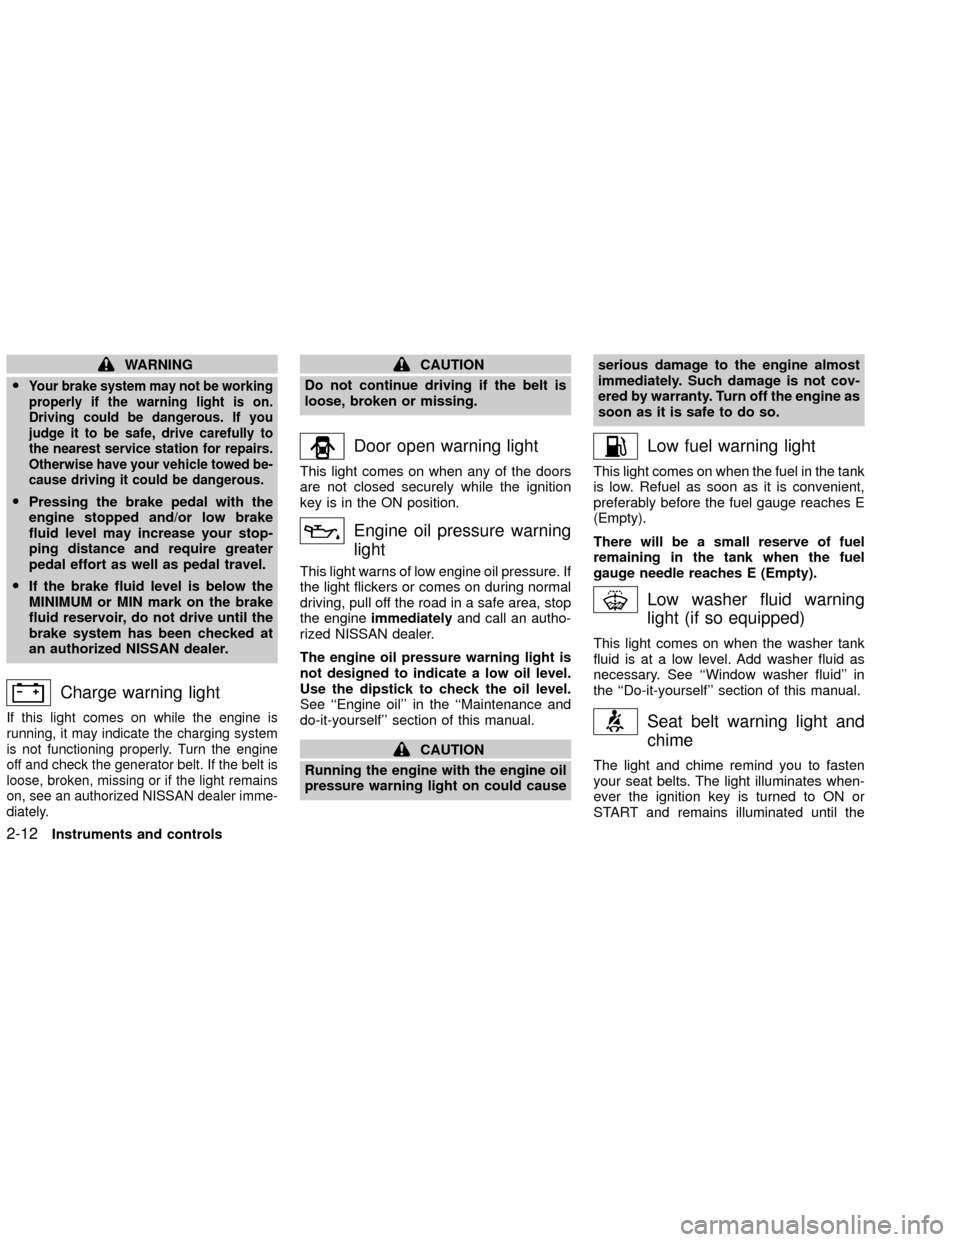
Charge warning light
If this light comes on while the engine is
running, it may indicate the charging system
is not functioning properly. Turn the engine
off and check the generator belt. If the belt is
loose, broken, missing or if the light remains
on, see an authorized NISSAN dealer imme-
diately.
CAUTION
Do not continue driving if the belt is
loose, broken or missing.
Door open warning light
This light comes on when any of the doors
are not closed securely while the ignition
key is in the ON position.
Engine oil pressure warning
light
This light warns of low engine oil pressure. If
the light flickers or comes on during normal
driving, pull off the road in a safe area, stop
the engineimmediatelyand call an autho-
rized NISSAN dealer.
The engine oil pressure warning light is
not designed to indicate a low oil level.
Use the dipstick to check the oil level.
See ``Engine oil'' in the ``Maintenance and
do-it-yourself'' section of this manual.
CAUTION
Running the engine with the engine oil
pressure warning light on could causeserious damage to the engine almost
immediately. Such damage is not cov-
ered by warranty. Turn off the engine as
soon as it is safe to do so.
Low fuel warning light
This light comes on when the fuel in the tank
is low. Refuel as soon as it is convenient,
preferably before the fuel gauge reaches E
(Empty).
There will be a small reserve of fuel
remaining in the tank when the fuel
gauge needle reaches E (Empty).
Low washer fluid warning
light (if so equipped)
This light comes on when the washer tank
fluid is at a low level. Add washer fluid as
necessary. See ``Window washer fluid'' in
the ``Do-it-yourself'' section of this manual.
Seat belt warning light and
chime
The light and chime remind you to fasten
your seat belts. The light illuminates when-
ever the ignition key is turned to ON or
START and remains illuminated until the
2-12Instruments and controls
ZX
Page 64 of 263

OThe SECURITY light blinks at a steady
1/2 second on - 1/2 second off rate (a
door, or the hood is open and the key is
not in the ACC or ON position). When the
ignition key is turned to the ACC or ON
position, the SECURITY light turns off.
Vehicle security system operation
The vehicle security system emits the fol-
lowing alarm:
OThe headlights blink and the horn sounds
intermittently. In addition, the starter mo-
tor does not operate.
OThe alarm automatically turns off after 50
seconds. However, the alarm reactivates
if the vehicle is tampered with again. The
alarm can be shut off by unlocking a door
with the key or by pressing the UNLOCK
buttonon the keyfob.
The alarm is activated by:
Oopening a door without using the key
(even if the door is unlocked by releasing
the inside lock knob).
Oopening the hood.
How to stop the alarm
The alarm stops only by unlocking a door with
the key or by pressing the UNLOCK button
on the keyfob.The alarm does not stop if the
ignition switch is turned to ACC or ON posi-
tion.
Silencing the horn beep feature
If desired, the horn beep feature can be
deactivated using the keyfob.
To deactivate:Press and hold the LOCK
and UNLOCK buttonsfor at least two
seconds.
The hazard lights will quickly flash three
times to confirm that the horn beep feature
has been deactivated.
To activate:Press and hold the LOCK and
UNLOCK buttonsfor at least two seconds
once more.
LIC0116
Instruments and controls2-17
ZX
Page 96 of 263

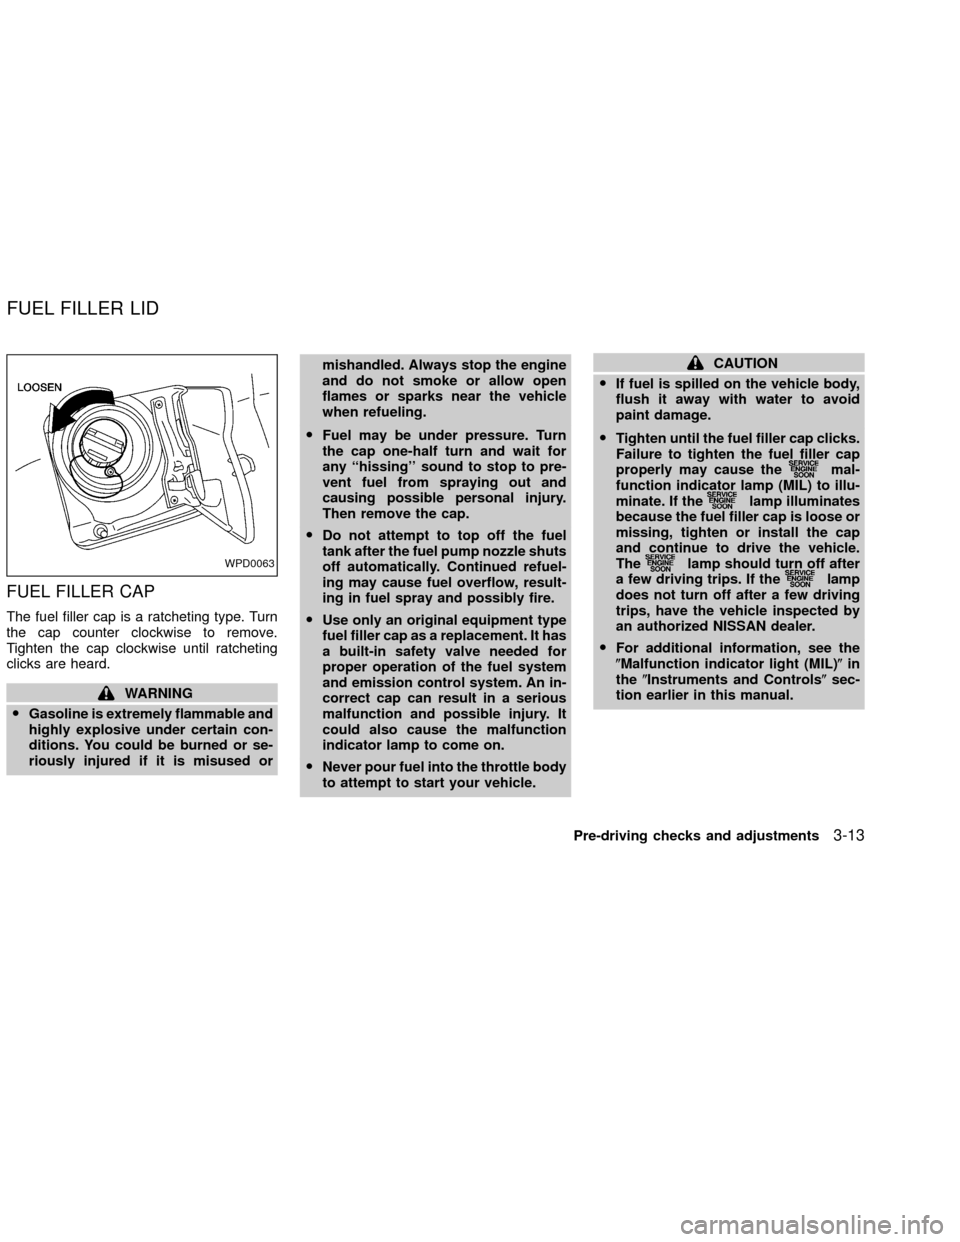
FUEL FILLER CAP
The fuel filler cap is a ratcheting type. Turn
the cap counter clockwise to remove.
Tighten the cap clockwise until ratcheting
clicks are heard.
WARNING
OGasoline is extremely flammable and
highly explosive under certain con-
ditions. You could be burned or se-
riously injured if it is misused ormishandled. Always stop the engine
and do not smoke or allow open
flames or sparks near the vehicle
when refueling.
OFuel may be under pressure. Turn
the cap one-half turn and wait for
any ``hissing'' sound to stop to pre-
vent fuel from spraying out and
causing possible personal injury.
Then remove the cap.
ODo not attempt to top off the fuel
tank after the fuel pump nozzle shuts
off automatically. Continued refuel-
ing may cause fuel overflow, result-
ing in fuel spray and possibly fire.
OUse only an original equipment type
fuel filler cap as a replacement. It has
a built-in safety valve needed for
proper operation of the fuel system
and emission control system. An in-
correct cap can result in a serious
malfunction and possible injury. It
could also cause the malfunction
indicator lamp to come on.
ONever pour fuel into the throttle body
to attempt to start your vehicle.
CAUTION
OIf fuel is spilled on the vehicle body,
flush it away with water to avoid
paint damage.
OTighten until the fuel filler cap clicks.
Failure to tighten the fuel filler cap
properly may cause the
mal-
function indicator lamp (MIL) to illu-
minate. If the
lamp illuminates
because the fuel filler cap is loose or
missing, tighten or install the cap
and continue to drive the vehicle.
The
lamp should turn off after
a few driving trips. If thelamp
does not turn off after a few driving
trips, have the vehicle inspected by
an authorized NISSAN dealer.
OFor additional information, see the
(Malfunction indicator light (MIL)(in
the(Instruments and Controls(sec-
tion earlier in this manual.
WPD0063
FUEL FILLER LID
Pre-driving checks and adjustments3-13
ZX
Page 118 of 263

Adjusting tone quality and speaker bal-
ance
Press the AUDIO button to enter the audio
adjust mode:
Bass!Mid!Treb!Fade!Bal
Press the TUNE/FF-REV (
or)or
SEEK/TRACK (
or) to adjust to the
desired levels. The display will return to the
regular radio display after 7 seconds, or you
may press the AUDIO button again to return
to the regular radio display.
Clock operation
Pressing the CLOCK button displays the
clock with the radio on or off. Press the
CLOCK button again to turn off the clock
display.
Clock set
1. Press and hold the CLOCK button until it
beeps (>2 seconds).
2. The hours will start flashing. Press
TUNE/FF-REV (
or)or
SEEK/TRACK (or) to adjust the
hours.
3. Press the CLOCK button to switch to the
minute adjustment.4. Press TUNE/FF-REV (
or)or
SEEK/TRACK (or) to adjust the
minutes.
5. Press the CLOCK button again to exit the
clock set mode.
The display will return to the regular clock
display after 7 seconds, or you may press
the CLOCK button again to return to the
regular clock display.
FM-AM radio operation
FM-AM band select
Push the AM or the FM button to change
from AM to FM reception.
The FM stereo indicator, ST, illuminates
during FM stereo reception. When the ste-
reo broadcast signal is weak, the radio
automatically changes from stereo to mon-
aural reception.
Station signal strength, distance from radio
transmitter, buildings, bridges, mountains,
and other external influences affect radio
reception. Intermittent changes in reception
quality normally are caused by these exter-
nal influences.Using a cellular phone in or near the
vehicle may influence radio reception
quality.
TUNE/FF-REV
WARNING
The radio should not be tuned while
driving so full attention may be given to
vehicle operation.
Use the
orbuttons for manual tun-
ing. To move quickly through the channels,
hold the tuning buttons down.
SEEK tuning
Push SEEK/TRACK (or). SEEK tuning
begins from low to high frequencies or high
to low frequencies, depending on which but-
ton is pressed, and stops at the next broad-
casting station. If using the up button, once
the highest broadcasting station is reached,
the radio continues in the SEEK mode at the
lowest broadcasting station. If using the
down button, once the lowest broadcasting
station is reached, the radio continues in the
Heater, air conditioner and audio systems4-19
ZX
Page 133 of 263

WARNING
ODo not leave children, unreliable
adults, or pets alone in your vehicle.
They could accidentally injure them-
selves or others through inadvertent
operation of the vehicle. Also, on
hot, sunny days, temperatures in a
closed vehicle could quickly become
high enough to cause severe or pos-
sibly fatal injuries to people or ani-
mals.
OProperly secure all cargo to help
prevent it from sliding or shifting. Do
not place cargo higher than the seat-
backs. In a sudden stop or collision,
unsecured cargo could cause per-
sonal injury.
EXHAUST GAS (carbon monoxide)
WARNING
ODo not breathe exhaust gases; they
contain colorless and odorless car-
bon monoxide. Carbon monoxide is
a dangerous. It can cause uncon-
sciousness or death.OIf you suspect that exhaust fumes
are entering the vehicle, drive with
all windows fully open, and have the
vehicle inspected immediately.
ODo not run the engine in closed
spaces such as a garage.
ODo not park the vehicle with the
engine running for any extended
length of time.
OKeep the back door and rear win-
dows closed while driving, other-
wise exhaust gases could be drawn
into the passenger compartment. If
you must drive with the back door or
rear windows open, follow these pre-
cautions:
1. Open all the windows.
2. Set the air recirculation switch
OFF and the fan control at 4 (high)
to circulate the air.
OIf electrical wiring or other cable
connections must pass to a trailer
through the seal on the back door or
the body, follow the manufacturer's
recommendation to prevent carbon
monoxide entry into the vehicle.O
If a special body, camper, or other
equipment is added for recreational
or other usage, follow the manufac-
turer's recommendation to prevent
carbon monoxide entry into the ve-
hicle. Do not occupy these areas
while the engine is running even if the
vehicle is parked. Some recreational
vehicle appliances such as stoves,
refrigerators, heaters, etc. may also
generate carbon monoxide.
OThe exhaust system and body
should be inspected by a qualified
mechanic whenever:
a. The vehicle is raised for service.
b. You suspect that exhaust fumes
are entering into the passenger
compartment.
c. You notice a change in the sound
of the exhaust system.
d.
You have had an accident involv-
ing damage to the exhaust system,
underbody, or rear of the vehicle.
PRECAUTIONS WHEN
STARTING AND DRIVING
5-2Starting and driving
ZX
Page 134 of 263

THREE-WAY CATALYST
The three-way catalyst is an emission control
device installed in the exhaust system. Ex-
haust gases in the converter are burned at
high temperatures to help reduce pollutants.
WARNING
OThe exhaust gas and the exhaust
system are very hot. Keep people,
animals or flammable materials
away from the exhaust system com-
ponents.
ODo not stop or park the vehicle over
flammable materials such as dry
grass, waste paper or rags. They
may ignite and cause a fire.
CAUTION
ODo not use leaded gasoline. Depos-
its from leaded gasoline will seri-
ously reduce the three-way cata-
lyst's ability to help reduce exhaust
pollutants.
OKeep your engine tuned up. Malfunc-
tions in the ignition, fuel injection, or
electrical systems can cause over-rich fuel flow into the three-way cata-
lyst, causing it to overheat. Do not
keep driving if the engine misfires,
or if noticeable loss of performance
or other unusual operating condi-
tions are detected. Have the vehicle
inspected promptly by an authorized
NISSAN dealer.
OAvoid driving with an extremely low
fuel level. Running out of fuel could
cause the engine to misfire, damag-
ing the three-way catalyst.
ODo not race the engine while warm-
ing it up.
ODo not push or tow your vehicle to
start the engine.
ON-PAVEMENT AND OFF-ROAD
DRIVING PRECAUTIONS
Utility vehicles have a significantly
higher rollover rate than other types of
vehicles.
They have higher ground clearance than
passenger cars to make them capable of
performing in a variety of on-pavement and
off-road applications. This gives them ahigher center of gravity than ordinary cars.
An advantage of higher ground clearance is
a better view of the road, allowing you to
anticipate problems. However, they are not
designed for cornering at the same speeds
as conventional two-wheel drive vehicles
any more than low-slung sports cars are
designed to perform satisfactorily under
off-road conditions. If at all possible, avoid
sharp turns or abrupt maneuvers particu-
larly at high speeds. As with other vehicles
of this type, failure to operate this vehicle
correctly may result in loss of control or
vehicle rollover.
Be sure to read the driving safety precau-
tions later in this section.
AVOIDING COLLISION AND
ROLLOVER
WARNING
Failure to operate this vehicle in a safe
and prudent manner may result in loss
of control or an accident.
Be alert and drive defensively at all times.
Obey all traffic regulations. Avoid excessive
speed, high speed cornering, or sudden
steering maneuvers, because these driving
Starting and driving
5-3
ZX
Page 140 of 263

OIf the engine is very hard to start in
extremely cold or hot weather, depress
the accelerator pedal fully and hold it
to help start the engine.
OIn the summer, when restarting the
engine within 30 minutes after it has
been stopped, keep the accelerator
pedal fully depressed while starting.
CAUTION
Do not operate the starter for more than
15 seconds at a time. If the engine does
not start, turn the key off and wait 10
seconds before cranking again, other-
wise the starter could be damaged.
4.Warm-up
Always allow the engine to idle for at
least 30 seconds after starting. Drive at a
moderate speed for a short distance first,
especially in cold weather.
AUTOMATIC TRANSMISSION (if
so equipped)
WARNING
ODo not depress the accelerator pedal
while shifting from P (Park) or N
(Neutral) to R (Reverse), D (Drive), 2
or 1. Always depress the brake pedal
until shifting is completed. Failure to
do so could cause you to lose con-
trol and have an accident.
OCold engine idle speed is high, so
use caution when shifting into a for-
ward or reverse gear before the en-
gine has warmed up.
ONever shift to P (Park) or R (Reverse)
while the vehicle is moving. This
could cause an accident.
CAUTION
OWhen stopping the vehicle on an
uphill grade, do not hold the vehicle
by depressing the accelerator pedal.
The foot brake should be used for
this purpose.
OOn slippery roads, do not downshift.
This may cause a loss of control.The automatic transmission in your vehicle
is electronically controlled by a transmission
control module to produce maximum power
and smooth operation.
The recommended operating procedures for
this transmission are shown on the following
pages. Follow these procedures for maximum
vehicle performance and driving enjoyment.
Starting the vehicle
OAfter starting the engine, fully depress
the foot brake pedal to ensure the ve-
hicle is at a complete stop before at-
tempting to shift the selector lever.
OKeep the foot brake pedal depressed
and shift the selector lever into a driving
gear.
ORelease the foot brake, then gradually
start the vehicle in motion.
This automatic transmission is designed
so the foot brake pedal MUST be de-
pressed before shifting from P (Park) to
any drive position while the ignition
switch is ON.
DRIVING THE VEHICLE
Starting and driving5-9
ZX
Page 141 of 263

The shift lever cannot be moved out of P
(Park) and into any of the other gear
positions if the ignition key is turned to
LOCK or if the key is removed.
The shift lever can be moved if the igni-
tion switch is in the ACC or OFF position
without depressing the foot brake pedal.
This allows the vehicle to be moved if the
battery is discharged.
Shifting
Push the button to shift into P (Park), R
(Reverse) or from D (Drive) to 2. All other
positions can be selected without pushing
the button.
WARNING
Apply the parking brake if the selector
lever is in any position while the engine
is not running. Failure to do so could
cause the vehicle to move unexpect-
edly or roll away and result in serious
personal injury or property damage.P (Park)
Use this selector position when the vehicle is
parked or when starting the engine. Always be
sure the vehicle is at a complete stop. For maxi-
mum safety, depress the brake pedal, then push
in the shift lever button and move the lever to the
P (Park) position. Apply the parking brake. When
parking on a hill, apply the parking brake first,
then shift the lever into the P (Park) position.
Shifting from P (Park)
If the ignition switch is in the ON position
and the foot brake pedal is depressed, but
the shift selector lever still cannot be moved
ASD1024
5-10Starting and driving
ZX
Page 142 of 263

out of P (Park), follow these instructions.
1. Turn the ignition key to the LOCK posi-
tion.
2. Apply the parking brake.
3. Reinsert the key and turn it to the ACC
position.
4. Depress the foot brake pedal and move
the shift selector lever to N (Neutral).
5. Start the engine.
These instructions for starting the vehicle in
N (Neutral) should only be used until service
can be obtained at an authorized NISSAN
dealership.
R (Reverse):
Use this position to back up. Always be sure
the vehicle is at a complete stop before
shifting into the R (Reverse) position. For
maximum safety, check to ensure the area
behind the vehicle is clear. With the brake
pedal depressed, push in the shift selector
lever button and move the shift selector
lever to the R (Reverse) position.N (Neutral)
Neither forward nor reverse gear is en-
gaged. The engine can be started in this
position. You may shift to N (Neutral) and
restart a stalled engine while the vehicle is
moving.
D (Drive)
Use this position for all normal forward
driving.
2 (Second gear)
Use this position for hill climbing or engine
braking on downhill grades.
Do not shift into the 2 position at speeds
above 68 MPH (110 km/h). Do not exceed
68 MPH (110 km/h) in the 2 position.
1 (Low gear)
Use this position when climbing steep hills
slowly or slow driving through deep snow,
sand or mud, or for maximum engine brak-
ing on steep downhill grades.
Do not shift into the 1 position at speeds
above 34 MPH (55 km/h). Do not exceed 34
MPH (55 km/h) in the 1 position.
WSD0017
Starting and driving5-11
ZX
Page 144 of 263

When cruising at a low speed or
climbing a gentle slope, you may feel
uncomfortable shift shocks as the
transmission shifts between third gear
and overdrive repeatedly. In this case,
depress the OVERDRIVE switch to
turn the OVERDRIVE off. The O/D
OFF indicator light in the instrument
panel comes on at this time.
When driving conditions change, depress
the overdrive switch to turn the OVER-
DRIVE on.
Remember not to drive at high speeds for
extended periods of time with the OVER-
DRIVE off. This reduces fuel economy.
MANUAL TRANSMISSION
WARNING
ODo not downshift abruptly on slip-
pery roads. This may cause a loss of
control.
ODo not over-rev the engine when
shifting to a lower gear. This may
cause a loss of control or engine
damage.
CAUTION
ODo not rest your foot on the clutch
pedal while driving. This may cause
clutch damage.
OStop your vehicle completely before
shifting into R (Reverse).
OWhen the vehicle is stopped with the
engine running (for example at a
stop light), shift to N (Neutral) and
release the clutch pedal with the foot
brake applied.
Shifting
To change gears, or when up shifting or
down shifting, depress the clutch pedal fully,
shift into the appropriate gear, then release
the clutch slowly and smoothly.
You cannot shift directly from 5th gear into R
(Reverse). First shift into the N (Neutral)
position, then into R (Reverse).
If it is difficult to move the shift lever into R
(Reverse) or 1st, shift into N (Neutral), then
release the clutch pedal. Depress the clutch
pedal and shift into R (Reverse) or 1st
again.
WDI0049
Starting and driving5-13
ZX