check engine light NISSAN XTERRA 2005 N50 / 2.G Owner's Manual
[x] Cancel search | Manufacturer: NISSAN, Model Year: 2005, Model line: XTERRA, Model: NISSAN XTERRA 2005 N50 / 2.GPages: 296, PDF Size: 4.89 MB
Page 217 of 296

8 Maintenance and do-it-yourself
Maintenance requirements..........................8-2
General maintenance..............................8-2
Explanation of general maintenance items.........8-2
Maintenance precautions...........................8-5
Engine compartment check locations................8-6
Engine cooling system.............................8-7
Checking engine coolant level...................8-7
Changing engine coolant........................8-8
Engine oil.........................................8-8
Checking engine oil level........................8-8
Changing engine oil............................8-9
Changing engine oil filter.......................8-10
5-speed automatic transmission fluid...............8-11
Power steering fluid...............................8-11
Brake and clutch fluid.............................8-11
Brake fluid....................................8-12
Clutch fluid...................................8-12
Window washer fluid.............................8-12
Window washer fluid reservoir..................8-12
Battery..........................................8-13
Jump starting.................................8-14
Variable Voltage Control System...................8-15
Drive belts.......................................8-15
Spark plugs......................................8-16Replacing spark plugs.........................8-16
Air cleaner.......................................8-17
In-cabin microfilter.............................8-17
Windshield wiper blades..........................8-19
Cleaning.....................................8-19
Replacing....................................8-19
Parking brake and brake pedal.....................8-22
Checking parking brake........................8-22
Checking brake pedal..........................8-22
Brake booster.................................8-23
Fuses...........................................8-23
Engine compartment...........................8-24
Passenger compartment.......................8-25
Battery replacement..............................8-26
Lights...........................................8-27
Headlights....................................8-27
Exterior and interior lights.......................8-28
Wheels and tires.................................8-31
Tire pressure..................................8-31
Tire labeling...................................8-34
Types of tires..................................8-37
Tire chains....................................8-37
Changing wheels and tires.....................8-38
ZREVIEW COPYÐ2005 Xterra(xtr)
Owners ManualÐUSA_English(nna)
11/15/04Ðdebbie
X
Page 226 of 296

7. Refill engine with recommended oil through
the oil filler opening, then install the oil filler
cap securely.
See “Capacities and recommended
fuel/lubricants” in the “Technical and con-
sumer information” section of this manual for
drain and refill capacity.
The drain and refill capacity depends on the
oil temperature and drain time. Use these
specifications for reference only. Always use
the dipstick to determine when the proper
amount of oil is in the engine.
8. Start the engine. Check for leakage around
the drain plug and oil filter. Correct as re-
quired.
9. Turn the engine off and wait more than 10
minutes. Check the oil level with the dipstick.
Add engine oil if necessary.
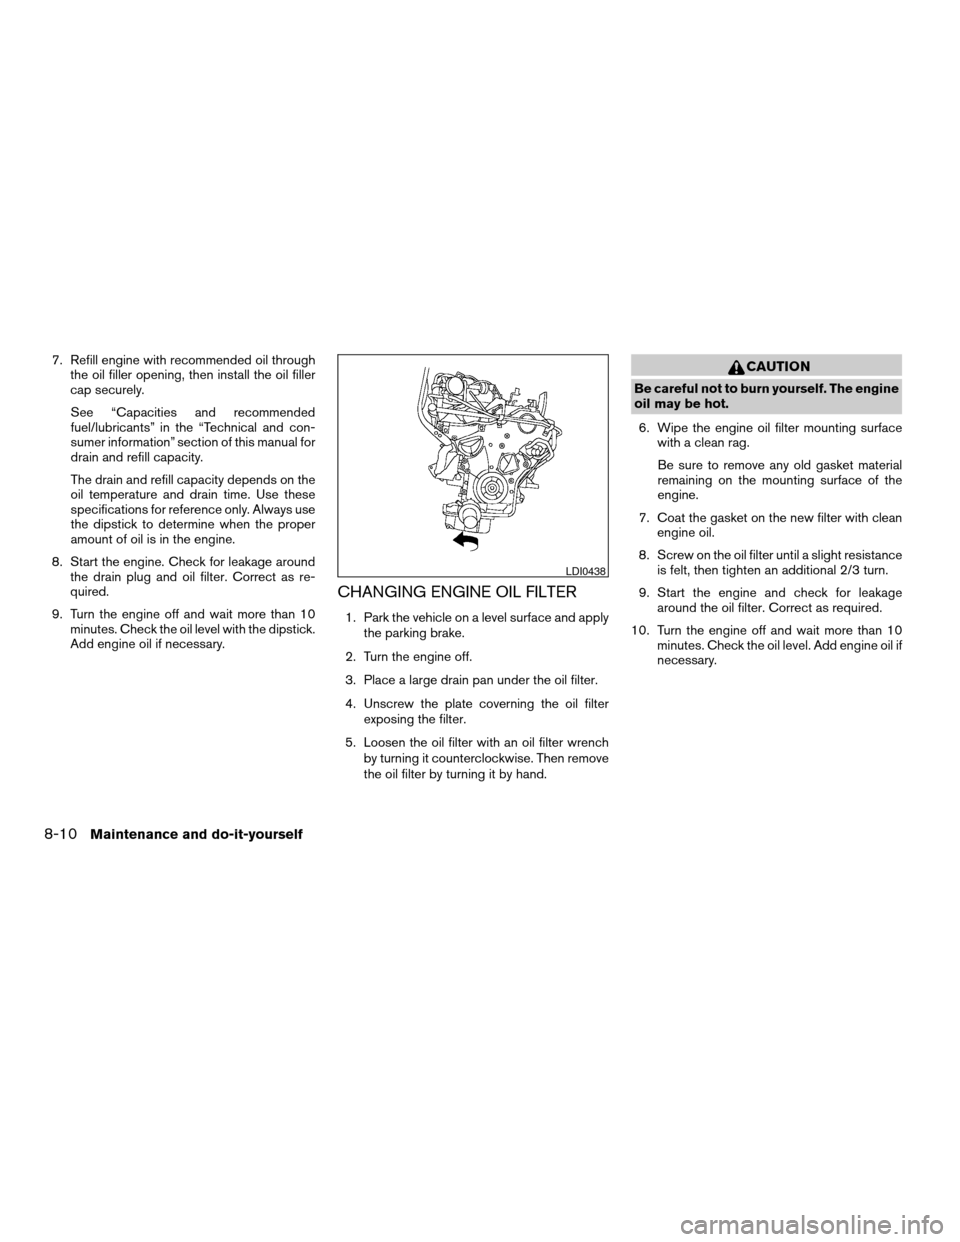
CHANGING ENGINE OIL FILTER
1. Park the vehicle on a level surface and apply
the parking brake.
2. Turn the engine off.
3. Place a large drain pan under the oil filter.
4. Unscrew the plate coverning the oil filter
exposing the filter.
5. Loosen the oil filter with an oil filter wrench
by turning it counterclockwise. Then remove
the oil filter by turning it by hand.
CAUTION
Be careful not to burn yourself. The engine
oil may be hot.
6. Wipe the engine oil filter mounting surface
with a clean rag.
Be sure to remove any old gasket material
remaining on the mounting surface of the
engine.
7. Coat the gasket on the new filter with clean
engine oil.
8. Screw on the oil filter until a slight resistance
is felt, then tighten an additional 2/3 turn.
9. Start the engine and check for leakage
around the oil filter. Correct as required.
10. Turn the engine off and wait more than 10
minutes. Check the oil level. Add engine oil if
necessary.
LDI0438
8-10Maintenance and do-it-yourself
ZREVIEW COPYÐ2005 Xterra(xtr)
Owners ManualÐUSA_English(nna)
11/15/04Ðdebbie
X
Page 238 of 296

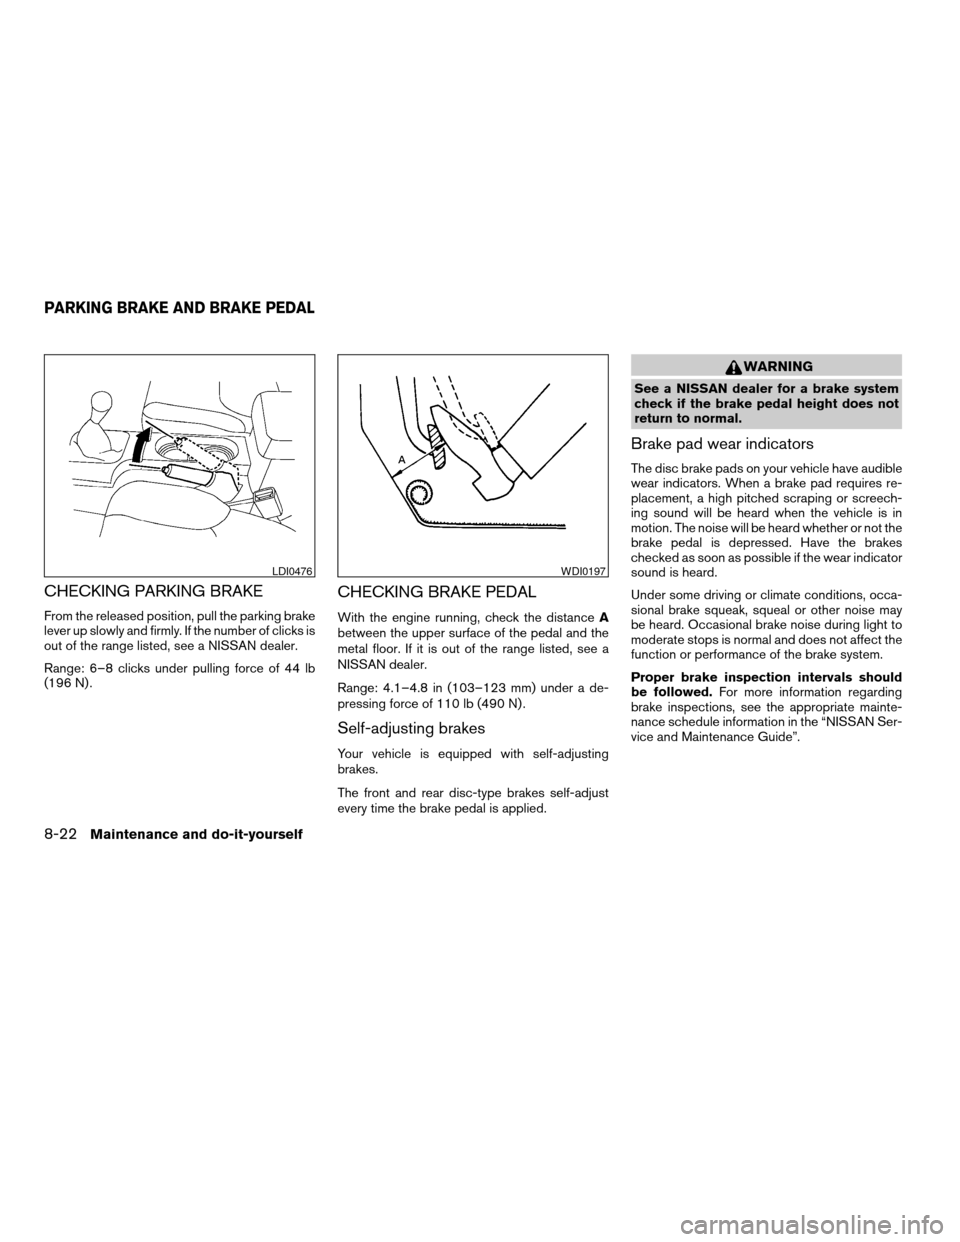
CHECKING PARKING BRAKE
From the released position, pull the parking brake
lever up slowly and firmly. If the number of clicks is
out of the range listed, see a NISSAN dealer.
Range: 6–8 clicks under pulling force of 44 lb
(196 N) .
CHECKING BRAKE PEDAL
With the engine running, check the distanceA
between the upper surface of the pedal and the
metal floor. If it is out of the range listed, see a
NISSAN dealer.
Range: 4.1–4.8 in (103–123 mm) under a de-
pressing force of 110 lb (490 N) .
Self-adjusting brakes
Your vehicle is equipped with self-adjusting
brakes.
The front and rear disc-type brakes self-adjust
every time the brake pedal is applied.
WARNING
See a NISSAN dealer for a brake system
check if the brake pedal height does not
return to normal.
Brake pad wear indicators
The disc brake pads on your vehicle have audible
wear indicators. When a brake pad requires re-
placement, a high pitched scraping or screech-
ing sound will be heard when the vehicle is in
motion. The noise will be heard whether or not the
brake pedal is depressed. Have the brakes
checked as soon as possible if the wear indicator
sound is heard.
Under some driving or climate conditions, occa-
sional brake squeak, squeal or other noise may
be heard. Occasional brake noise during light to
moderate stops is normal and does not affect the
function or performance of the brake system.
Proper brake inspection intervals should
be followed.For more information regarding
brake inspections, see the appropriate mainte-
nance schedule information in the “NISSAN Ser-
vice and Maintenance Guide”.
LDI0476WDI0197
PARKING BRAKE AND BRAKE PEDAL
8-22Maintenance and do-it-yourself
ZREVIEW COPYÐ2005 Xterra(xtr)
Owners ManualÐUSA_English(nna)
11/15/04Ðdebbie
X
Page 240 of 296

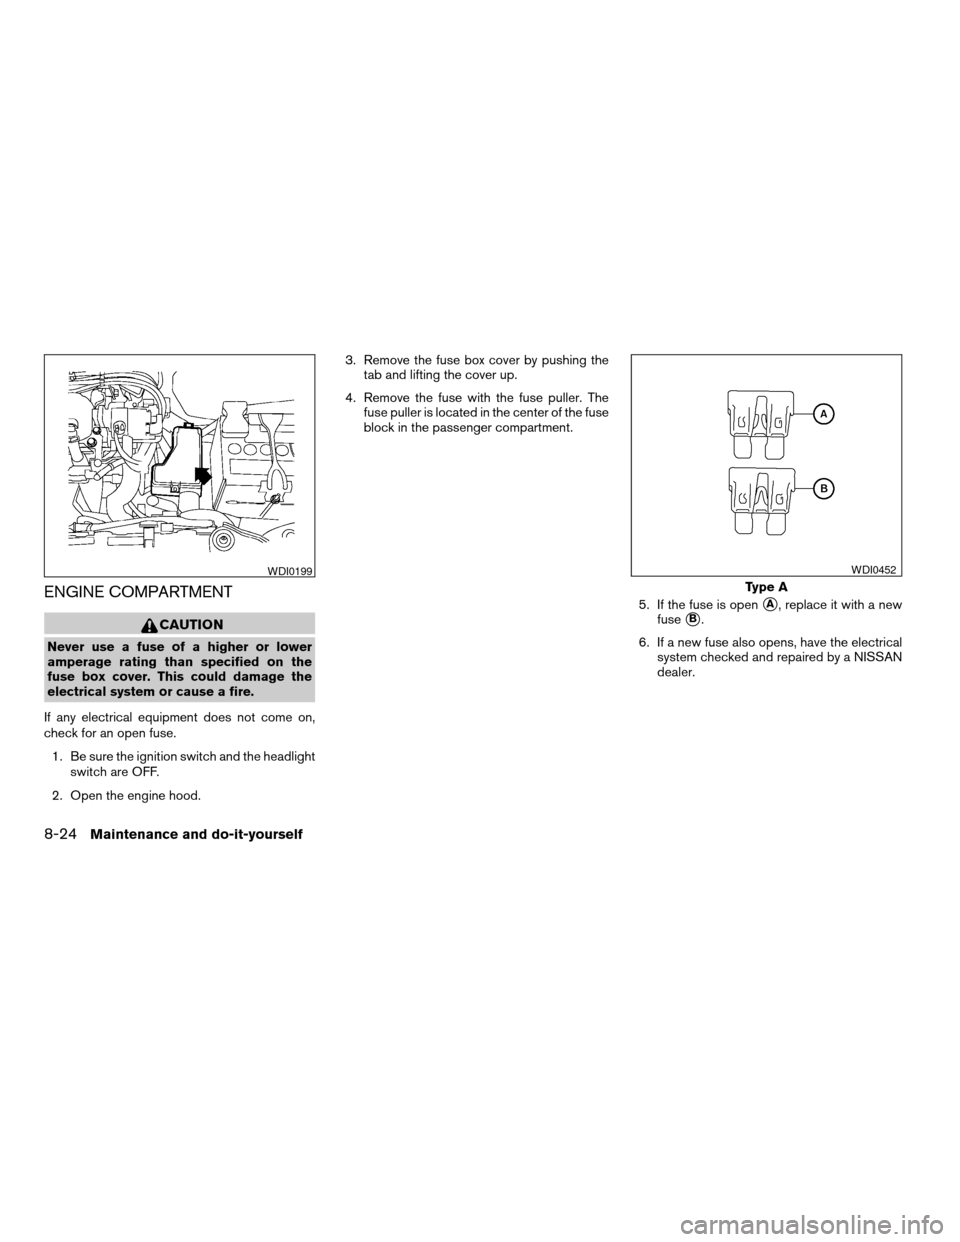
ENGINE COMPARTMENT
CAUTION
Never use a fuse of a higher or lower
amperage rating than specified on the
fuse box cover. This could damage the
electrical system or cause a fire.
If any electrical equipment does not come on,
check for an open fuse.
1. Be sure the ignition switch and the headlight
switch are OFF.
2. Open the engine hood.3. Remove the fuse box cover by pushing the
tab and lifting the cover up.
4. Remove the fuse with the fuse puller. The
fuse puller is located in the center of the fuse
block in the passenger compartment.
5. If the fuse is open
sA, replace it with a new
fuse
sB.
6. If a new fuse also opens, have the electrical
system checked and repaired by a NISSAN
dealer.
WDI0199
Type A
WDI0452
8-24Maintenance and do-it-yourself
ZREVIEW COPYÐ2005 Xterra(xtr)
Owners ManualÐUSA_English(nna)
11/15/04Ðdebbie
X
Page 243 of 296

If the battery is removed for any reason
other than replacement, perform step 5.
cAn improperly disposed battery can
hurt the environment. Always confirm
local regulations for battery disposal.
cThe keyfob is water-resistant; how-
ever, if it does get wet, immediately
wipe completely dry.
cThe operational range of the keyfob
extends to approximately 33 ft (10 m)
from the vehicle. This range may vary
with conditions.
FCC Notice:
Changes or modifications not expressly ap-
proved by the manufacturer for compliance
could void the user’s authority to operate
the equipment.
This device complies with Part 15 of the FCC
Rules and RSS-210 of Industry Canada.
Operation is subject to the following two
conditions: (1) This device may not cause
harmful interference, and (2) this device
must accept any interference received, in-
cluding interference that may cause undes-
ired operation of the device.
HEADLIGHTS
The headlight is a semi-sealed beam type which
uses a replaceable headlight (halogen) bulb. A
bulb can be replaced from inside the engine
compartment without removing the headlight as-
sembly.
CAUTION
cHigh pressure halogen gas is sealed
inside the halogen bulb. The bulb may
break if the glass envelope is scratched
or the bulb is dropped.
cWhen handling the bulb, do not touch
the glass envelope.
cDO NOT TOUCH THE BULB
cUse the same number and wattage as
originally installed:
Wattage 65/55Bulb No. HB5/9007*
*: Always check with the Parts Depart-
ment at a NISSAN dealer for the latest
parts information.
cDo not leave the bulb out of the head-
light reflector for a long period of time
as dust, moisture and smoke may enter
the headlight body and affect the per-
formance of the headlight.cAiming is not necessary after replacing
the bulb. When aiming adjustment is
necessary, contact a NISSAN dealer.
LIGHTS
Maintenance and do-it-yourself8-27
ZREVIEW COPYÐ2005 Xterra(xtr)
Owners ManualÐUSA_English(nna)
11/15/04Ðdebbie
X
Page 260 of 296

Octane rating tips
Using unleaded gasoline with an octane
rating lower than recommended can cause
persistent, heavy “spark knock.” (“Spark
knock” is a metallic rapping noise.) If se-
vere, this can lead to engine damage. If you
detect a persistent heavy spark knock even
when using gasoline of the stated octane
rating, or if you hear steady spark knock
while holding a steady speed on level
roads, have a NISSAN dealer correct the
condition. Failure to correct the condition
is misuse of the vehicle, for which NISSAN
is not responsible.
Incorrect ignition timing may result in spark
knock, after-run and/or overheating, which may
cause excessive fuel consumption or engine
damage. If any of the above symptoms are en-
countered, have your vehicle checked at a
NISSAN dealer.
However, now and then you may notice
light spark knock for a short time while
accelerating or driving up hills. This is not a
cause for concern, because you get the
greatest fuel benefit when there is light
spark knock for a short time under heavy
engine load.
ENGINE OIL AND OIL FILTER
RECOMMENDATION
Selecting the correct oil
It is essential to choose engine oil with the cor-
rect quality and viscosity to ensure satisfactory
engine life and performance. NISSAN recom-
mends the use of a low friction oil (energy con-
serving oil) in order to improve fuel economy and
conserve energy. Oils which do not have the
specified quality label should not be used as they
could cause engine damage.
Only those engine oils with the American Petro-
leum Institute (API) CERTIFICATION MARK onthe front of the container should be used. This
type of oil supersedes the existing API SG, SH, or
SJ and Energy Conserving II categories.
If you cannot find engine oil with the API CERTI-
FICATION MARK, use API grade SL Energy
Conserving oil. An oil with a single designation
SL, or in combination with other categories (for
example, SL/CF) may also be used if one with the
API CERTIFICATION MARK cannot be found. An
ILSAC grade GF-III oil can also be used.
NISSAN recommends mineral based oils. These
oils must, however, meet the API quality and SAE
viscosity ratings specified for your vehicle.
WTI0082
9-4Technical and consumer information
ZREVIEW COPYÐ2005 Xterra(xtr)
Owners ManualÐUSA_English(nna)
11/15/04Ðdebbie
X
Page 279 of 296

cAlways secure items in the trailer to prevent
load shift while driving.
cLoad the trailer so approximately 60% of the
trailer load is in the front half and 40% is in
the back half.
cCheck your hitch, trailer tire pressure, ve-
hicle tire pressure, trailer light operation, and
trailer wheel lug nuts every time you attach a
trailer to the vehicle.
cBe certain your rearview mirrors conform to
all federal, state or local regulations. If not,
install any mirrors required for towing before
driving the vehicle.
Trailer towing tips
In order to gain skill and an understanding of the
vehicle’s behavior, you should practice turning,
stopping and backing up in an area which is free
from traffic. Steering stability and braking perfor-
mance will be somewhat different than under
normal driving conditions.
cAlways secure items in the trailer to prevent
load shift while driving.
cAvoid abrupt starts, acceleration or stops.
cAvoid sharp turns or lane changes.
cAlways drive your vehicle at a moderate
speed.cWhen backing up, hold the bottom of the
steering wheel with one hand. Move your
hand in the direction in which you want the
trailer to go. Make small corrections and
back up slowly. If possible, have someone
guide you when you are backing up.
cAlways block the wheels on both vehicle and
trailer when parking. Parking on a slope is
not recommended; however, if you must do
so, first block the wheels and apply the park-
ing brake, and then move the transmission
shift selector lever into the P (Park) position.
If you move the shift selector lever to the P
(Park) position before blocking the wheels
and applying the parking brake, transmission
damage could occur.
cWhen going down a hill, shift into a lower gear
and use the engine braking effect. When
going up a long grade, downshift the trans-
mission to a lower gear and reduce speed to
reduce chances of engine overloading and/or
overheating. However, for long steep grades,
do not stay in 1st gear when driving above 35
MPH (56 km/h) or 2nd gear when driving
above 58 MPH (93 km/h) .
cIf the engine coolant rises to an extremely
high temperature when the air conditioner
system is on, turn off the air conditioner.
Coolant heat can be additionally vented byopening the windows, switching the fan
control to high and setting the temperature
control to the HOT position.
cTrailer towing requires more fuel than normal
circumstances.
cAvoid towing a trailer for your vehicle’s first
500 miles (805 km) .
cFor the first 500 miles (805 km) that you do
tow, do not drive over 50 MPH (80 km/h) .
cHave your vehicle serviced more often than
at intervals specified in the recommended
Maintenance Schedule in the “NISSAN Ser-
vice and Maintenance Guide”.
cWhen making a turn, your trailer wheels will
be closer to the inside of the turn than your
vehicle wheels. To compensate for this,
make a larger than normal turning radius
during the turn.
cCrosswinds and rough roads will adversely
affect vehicle/trailer handling, possibly caus-
ing vehicle sway. When being passed by
larger vehicles, be prepared for possible
changes in crosswinds that could affect ve-
hicle handling. If swaying does occur, firmly
grip the steering wheel, steer straight ahead,
and immediately (but gradually) reduce ve-
hicle speed. This combination will help sta-
bilize the vehicle. Never increase speed.
Technical and consumer information9-23
ZREVIEW COPYÐ2005 Xterra(xtr)
Owners ManualÐUSA_English(nna)
11/16/04Ðdebbie
X
Page 287 of 296

10 Index
4WD warning light...............2-12
A
Active brake limited slip (ABLS) system
(if so equipped).................5-29
Active head restraint...............1-5
Air bag (See supplemental restraint
system).....................1-39
Air bag system
Front (See supplemental front impact air
bag system).................1-46
Air bag warning labels.............1-54
Air bag warning light...........1-54, 2-13
Air cleaner housing filter............8-17
Air conditioner
Air conditioner operation...........4-5
Air conditioner service............4-9
Air conditioner specification label.....9-11
Air conditioner system refrigerant and
lubrication recommendations........9-6
Heater and air conditioner controls.....4-2
Servicing air conditioner...........4-9
Air flow charts..................4-6
Alarm system
(See vehicle security system).........2-18
Anchor point locations.............1-31
Antenna.....................4-26
Anti-lock brake system (ABS).........5-28
Anti-lock brake warning light..........2-10
Audible reminders................2-18Audio system..................4-10
Compact Disc (CD) changer.......4-23
Compact disc (CD) player.........4-18
FM-AM radio with compact disc (CD)
player.................4-16, 4-20
Radio....................4-10
Steering wheel audio control switch. . . .4-25
Automatic
Automatic power window switch.....2-42
Automatic transmission position indicator
light.....................2-14
Driving with automatic transmission. . . .5-10
Transmission selector lever lock
release....................5-12
B
Battery......................8-13
Charge warning light............2-11
Battery replacement
(See remote keyless entry system)......8-26
Before starting the engine............5-9
Belts (See drive belts).............8-15
Booster seats..................1-35
Brake
Anti-lock brake system (ABS).......5-28
Brake booster................8-23
Brake fluid..................8-11
Brake light (See stop light).........8-28
Brake pedal.................8-22
Brake system................5-27Brake warning light.............2-11
Brake wear indicators........2-18, 8-22
Parking brake check............8-22
Parking brake operation..........5-16
Self-adjusting brakes............8-22
Break-in schedule................5-18
Brightness control
Instrument panel..............2-24
Bulb check/instrument panel..........2-10
Bulb replacement................8-28
C
Capacities and recommended
fuel/lubricants...................9-2
Car phone or CB radio.............4-26
Cargo light...................2-44
Cargo net....................2-37
Cargo (See vehicle loading information) . . .9-12
CD care and cleaning.............4-25
CD changer (See audio system)........4-23
CD player (See audio system).........4-18
Check engine indicator light
(See malfunction indicator lamp).......2-15
Child restraint with top tether strap......1-30
Child restraints.......1-12, 1-13, 1-22, 1-29
Precautions on child restraints . . .1-22, 1-35
Top tether strap anchor point locations . .1-31
Child safety rear door lock............3-5
Chimes, audible reminders...........2-18
Cleaning exterior and interior..........7-2
ZREVIEW COPYÐ2005 Xterra(xtr)
Owners ManualÐUSA_English(nna)
11/16/04Ðdebbie
X
Page 288 of 296

Clock......................4-17
Clutch
Clutch fluid.................8-12
Clutch interlock (clutch start) switch.....2-28
Cold weather driving..............5-32
Compact disc (CD) player...........4-18
Console box...................2-31
Controls
Audio controls (steering wheel)......4-25
Heater and air conditioner controls.....4-2
Coolant
Capacities and recommended
fuel/lubricants.................9-2
Changing engine coolant..........8-8
Checking engine coolant level........8-7
Engine coolant temperature gauge.....2-6
Corrosion protection...............7-5
Cruise control..................5-17
Cup holders...................2-33
Curtain side-impact and rollover air bag . . .1-51
D
Daytime running light system
(Canada only)..................2-23
Defroster switch
Rear window and outside mirror defroster
switch....................2-22
Dimensions and weights.............9-8
Door locks....................3-3
Door open warning light............2-11
Drive belts....................8-15
Driving
Cold weather driving............5-32
Driving with automatic transmission. . . .5-10Driving with manual transmission.....5-14
Precautions when starting and driving . . .5-2
E
Economy - fuel.................5-19
Electronic locking rear differential (E-Lock)
system......................5-24
Electronic locking rear differential (E-Lock)
system switch..................2-27
Emission control information label.......9-10
Emission control system warranty.......9-25
Engine
Before starting the engine..........5-9
Capacities and recommended
fuel/lubricants.................9-2
Changing engine coolant..........8-8
Changing engine oil.............8-9
Changing engine oil filter..........8-10
Checking engine coolant level........8-7
Checking engine oil level..........8-8
Engine compartment check locations. . . .8-7
Engine coolant temperature gauge.....2-6
Engine cooling system............8-7
Engine oil...................8-8
Engine oil and oil filter recommendation . .9-4
Engine oil viscosity..............9-5
Engine serial number............9-10
Engine specifications.............9-7
Starting the engine..............5-9
Engine oil pressure gauge............2-8
Engine oil pressure low/engine coolant
temperature high warning light.........2-11
Event data recorders..............9-27
Exhaust gas (Carbon monoxide)........5-2F
First aid kit....................6-2
Flashers
(See hazard warning flasher switch)......2-25
Flat tire......................6-2
Floor mat positioning aid.............7-4
Fluid
Brake fluid..................8-11
Capacities and recommended
fuel/lubricants.................9-2
Clutch fluid.................8-12
Engine coolant................8-7
Engine oil...................8-8
Power steering fluid.............8-11
Window washer fluid............8-12
F.M.V.S.S. certification label..........9-10
Fog light switch.................2-24
Front air bag system (See supplemental
restraint system)................1-46
Front seats....................1-2
Fuel
Capacities and recommended
fuel/lubricants.................9-2
Fuel economy................5-19
Fuel filler cap................3-10
Fuel filler lid.................3-10
Fuel filler lid and cap.............3-9
Fuel gauge..................2-7
Fuel octane rating..............9-4
Fuel recommendation............9-3
Fuses......................8-23
Fusible links...................8-25
10-2
ZREVIEW COPYÐ2005 Xterra(xtr)
Owners ManualÐUSA_English(nna)
11/16/04Ðdebbie
X
Page 289 of 296

G
Gascap.....................3-10
Gauge
Engine coolant temperature gauge.....2-6
Engine oil pressure gauge..........2-8
Fuel gauge..................2-7
Odometer...................2-4
Speedometer.................2-4
Tachometer..................2-6
Trip computer.................2-5
Trip odometer.................2-4
Voltmeter...................2-8
General maintenance..............8-2
Glove box....................2-31
H
Hazard warning flasher switch.........2-25
Head restraints..................1-4
Active head restraint.............1-5
Headlight and turn signal switch........2-22
Headlights....................8-27
Heater
Heater and air conditioner controls.....4-2
Heater operation...............4-4
Hill descent control (HDC) switch.......2-26
Hill descent control (HDC) system......5-31
Hill start assist (HSA) system.........5-31
Hood release...................3-8
Hook
Luggage hook................2-35
Horn.......................2-25I
Ignition switch..................5-7
Immobilizer system..........2-19, 3-2, 5-8
Important vehicle information label.......9-10
In-cabin microfilter...............8-17
Increasing fuel economy............5-19
Indicator lights and audible reminders
(See warning/indicator lights and audible
reminders).....................2-9
Inside mirror...................3-12
Instrument brightness control.........2-24
Instrument panel..............0-6, 2-2
Interior light...................2-43
ISOFIX child restraints.............1-29
J
Jump starting...................6-8
K
Key ........................3-2
Keyless entry system
(See remote keyless entry system).......3-5
L
Labels
Air conditioner specification label.....9-11
Emission control information label.....9-10
Engine serial number............9-10F.M.V.S.S. certification label........9-10
Vehicle identification number (VIN) plate . .9-9
Warning labels (for SRS)..........1-54
LATCH (Lower Anchors and Tethers for CHildren)
System......................1-29
License plate
Installing the license plate.........9-11
Light
Air bag warning light.........1-54, 2-13
Brake light (See stop light).........8-28
Bulb check/instrument panel........2-10
Bulb replacement..............8-28
Charge warning light............2-11
Fog light switch...............2-24
Headlight and turn signal switch......2-22
Headlights..................8-27
Interior light.................2-43
Light bulbs..................8-27
Low tire pressure warning light......2-12
Low washer fluid warning light.......2-13
Passenger air bag and status
light..................1-48, 2-16
Security indicator light........1-48, 2-16
Warning/indicator lights and audible
reminders...................2-9
Lights
Map lights..................2-44
Lock
Child safety rear door lock..........3-5
Door locks..................3-3
Power door locks...............3-4
Rear door lock................3-9
Low fuel warning light.............2-12
Low tire pressure warning light........2-12
Low tire pressure warning system........5-3
Low washer fluid warning light.........2-13
10-3
ZREVIEW COPYÐ2005 Xterra(xtr)
Owners ManualÐUSA_English(nna)
11/16/04Ðdebbie
X