clutch NISSAN XTERRA 2006 N50 / 2.G Owners Manual
[x] Cancel search | Manufacturer: NISSAN, Model Year: 2006, Model line: XTERRA, Model: NISSAN XTERRA 2006 N50 / 2.GPages: 304, PDF Size: 4.93 MB
Page 13 of 304

Vehicle dynamic control (VDC) OFF
switch (P. 2-26)
15. Shift selector lever (P. 5-11)
16. 4WD shift switch (if so equipped)
(P. 5-20)
17. Climate controls (P. 4-2)
18. Hazard warning flasher switch (P. 2-25)
19. Ignition switch (P. 5-7)
20. Tilt steering wheel control (P. 3-11)
21. Clutch interlock (clutch start) switch
(if so equipped) (P. 2-29)
22. Power outside mirror controls
(if so equipped) (P. 3-13)
See the page number indicated in paren-
theses for operating details.
Illustrated table of contents0-7
ZREVIEW COPYÐ2006 Xterra(xtr)
Owners ManualÐUSA_English(nna)
07/29/05Ðdebbie
X
Page 74 of 304

2 Instruments and controls
Instrument panel...................................2-2
Meters and gauges................................2-3
Speedometer and odometer.....................2-4
Trip computer (if so equipped)...................2-5
Tachometer....................................2-6
Engine coolant temperature gauge...............2-6
Fuel gauge....................................2-7
Engine oil pressure gauge.......................2-8
Voltmeter......................................2-8
Warning/indicator lights and audible reminders.......2-9
Checking bulbs...............................2-10
Warning lights................................2-10
Indicator lights................................2-14
Audible reminders.............................2-18
Security systems (if so equipped)..................2-18
Vehicle security system (if so equipped)..........2-18
NISSAN vehicle immobilizer system
(if so equipped)...............................2-20
Windshield wiper and washer switch...............2-21
Switch operation..............................2-21
Rear window wiper and washer switch..............2-22
Rear window and outside mirror (if so equipped)
defroster switch..................................2-22Headlight and turn signal switch....................2-23
Headlight control switch........................2-23
Daytime running light system (Canada only)......2-24
Instrument brightness control...................2-24
Turn signal switch.............................2-25
Fog light switch (if so equipped)................2-25
Hazard warning flasher switch.....................2-25
Horn............................................2-26
Vehicle dynamic control (VDC) off switch............2-26
Hill descent control (HDC) switch (if so equipped) . . . 2-27
Electronic locking rear differential (E-Lock) system
switch (if so equipped)............................2-28
Clutch interlock (clutch start) switch
(if so equipped)..................................2-29
Power outlet.....................................2-29
Storage.........................................2-31
Storage trays.................................2-31
Console box..................................2-32
Glove box....................................2-32
Sunglasses holder (if so equipped)..............2-32
Map pockets..................................2-33
Seat pockets..................................2-33
Cup holders..................................2-34
ZREVIEW COPYÐ2006 Xterra(xtr)
Owners ManualÐUSA_English(nna)
07/29/05Ðdebbie
X
Page 77 of 304

Vehicle dynamic control (VDC) OFF
switch (P. 2-26)
15. Shift selector lever (P. 5-11)
16. 4WD shift switch (if so equipped)
(P. 5-20)
17. Climate controls (P. 4-2)
18. Hazard warning flasher switch (P. 2-25)
19. Ignition switch (P. 5-7)
20. Tilt steering wheel control (P. 3-11)
21. Clutch interlock (clutch start) switch
(if so equipped) (P. 2-29)
22. Power outside mirror controls
(if so equipped) (P. 3-13)
See the page number indicated in paren-
theses for operating details.
1. Warning/indicator lights
2. Tachometer
3. Speedometer
4. Fuel gauge
5. Voltmeter6. Odometer/Twin trip odometer/Trip com-
puter (if so equipped)
7. Engine oil pressure gauge
8. Engine coolant temperature gauge
WIC0911
METERS AND GAUGES
Instruments and controls2-3
ZREVIEW COPYÐ2006 Xterra(xtr)
Owners ManualÐUSA_English(nna)
07/29/05Ðdebbie
X
Page 86 of 304
The engine oil pressure warning light is not
designed to indicate a low oil level.Use the
dipstick to check the oil level. See “Engine oil” in
the “Maintenance and do-it-yourself” section of
this manual.
CAUTION
Running the engine with the engine oil
pressure warning light on could cause se-
rious damage to the engine almost imme-
diately. Such damage is not covered by
warranty. Turn off the engine as soon as it
is safe to do so.
4WD warning light (
model)
The 4WD warning light comes on when the key
switch is turned to ON. It turns off soon after the
engine is started.
If the engine or vehicle is not functioning properly,
the warning light will either remain illuminated or
blink. See “4WD warning light” in the “Starting
and driving” section.
CAUTION
cIf the warning light comes on or blinks
during operation, have your vehicle
checked by a NISSAN dealer as soon as
possible.
cDo not drive on dry hard surface roads
in the 4H or 4LO position. If the 4WD
warning light turns on when you are
driving on dry hard surface roads:
– in the 4H position, shift the 4WD shift
switch to 2WD.
– in the 4LO position for automatic
transmission models, stop the ve-
hicle and shift the transmission se-
lector lever to the N position with the
brake pedal depressed and shift the
4WD shift switch to 2WD.
– in the 4LO position for manual trans-
mission models, stop the vehicle and
shift the transmission shift lever to
the N position with the clutch pedal
depressed and shift the 4WD shift
switch to 2WD.
cIf the warning light is still on after the
above operation, have your vehicle
checked by a NISSAN dealer as soon as
possible.
Low fuel warning light
This light comes on when the fuel level in the fuel
tank is getting low. Refuel as soon as it is conve-
nient, preferably before the fuel gauge reaches E
(Empty) .There will be a small reserve of fuel
in the tank when the fuel gauge needle
reaches E (Empty) .
Low tire pressure warning
light
Your vehicle is equipped with a tire pressure
monitoring system (TPMS) that monitors the tire
pressure of all tires except the spare.
The low tire pressure warning light warns of low
tire pressure or indicates that the TPMS is not
functioning properly.
After the ignition switch is turned ON, this light
illuminates for about 1 second and turns off.
Low tire pressure warning:
If the vehicle is being driven with low tire pres-
sure, the warning light will illuminate.
When the low tire pressure warning light illumi-
nates, you should stop and adjust the tire pres-
sure to the recommended COLD tire pressure
shown on the Tire and Loading Information label
to turn the light OFF.
2-12Instruments and controls
ZREVIEW COPYÐ2006 Xterra(xtr)
Owners ManualÐUSA_English(nna)
07/29/05Ðdebbie
X
Page 89 of 304

Electronic locking rear
differential (E-Lock) system
on indicator light (if so
equipped)
This light comes on when the electronic locking
rear differential (E-Lock) system clutch is fully
engaged.
The indicator light flashes when the system is first
turned on. When the system fully engages, the
light remains on. If the switch is on and the
indicator light continues to flash, the system is
not engaged.
For additional information, see “Electronic lock-
ing rear differential (E-Lock) system switch” later
in this section and “Electronic locking rear differ-
ential (E-Lock) system” in the “Starting and driv-
ing” section of this manual.
4WD shift indicator light
(
model)
The light should turn off within 1 second after
turning the ignition switch to ON.
While the engine is running, the 4WD shift indi-
cator light will illuminate the position selected by
the 4WD shift switch.The 4WD shift indicator light may blink
while shifting from one drive mode to the
other.
Front passenger air bag
status light
The front passenger air bag status light ()
will be lit and the passenger front air bag will be
OFF depending on how the front passenger seat
is being used.
For front passenger air bag status light operation,
see “Front passenger air bag and status light” in
the “Safety — Seats, seat belts and supplemental
restraint system” section of this manual.
High beam indicator light
(Blue)
This blue light comes on when the headlight high
beams are on and goes out when the low beams
are selected.
The high beam indicator light also comes on
when the passing signal is activated.
Hill descent control (HDC)
system on indicator light (if so
equipped)
When the ignition switch is turned ON, this light
comes on briefly and then turns off.The light comes on when the hill descent control
system is activated.
If the HDC switch is on and the indicator light
blinks, the system is not engaged.
If the indicator light does not come on or blink
when the hill descent switch is on, the system
may not be functioning properly. Have the system
checked by a NISSAN dealer.
For additional information, see “Hill descent con-
trol (HDC) switch” later in this section and “Hill
descent control (HDC) system” in the “Starting
and driving” section of this manual.
Malfunction indicator light
(MIL)
If this indicator light comes on steady or blinks
while the engine is running, it may indicate a
potential emission control malfunction.
The malfunction indicator light may also come on
steady if the fuel-filler cap is loose or missing, or if
the vehicle runs out of fuel. Check to make sure
the fuel-filler cap is installed and closed tightly,
and that the vehicle has at least 3 gallons (11.4
liters) of fuel in the fuel tank.
After a few driving trips, the
light should
turn off if no other potential emission control
system malfunction exists.
Instruments and controls2-15
ZREVIEW COPYÐ2006 Xterra(xtr)
Owners ManualÐUSA_English(nna)
08/01/05Ðdebbie
X
Page 91 of 304

operational. If the light does not come on or does
not go off, have the traction control system
checked by a NISSAN dealer.
If the battery is removed or discharged, the trac-
tion control system is disabled and the slip indi-
cator light will not turn off after 2 seconds when
the ignition switch is turned to the ON position.
To reset the system, you must perform the reset
procedure. Refer to “Vehicle dynamic control
(VDC) system” in the “Starting and driving” sec-
tion of this manual.
If the light does not go off after performing the
reset procedure, have the traction control system
checked by a NISSAN dealer.
Transfer 4LO position
indicator light (
model)
The light should turn off within 1 second after
turning the ignition switch to ON.
This light comes on when the 4WD shift switch is
set in the 4LO position with the ignition key in the
ON position.
The transfer case may be damaged if you shift the
switch while driving.
Make sure the transfer 4LO position indicator
light turns on when you shift the 4WD shift switch
to 4LO.The indicator light may blink while shifting
from one drive mode to the other.
The 4LO indicator light must stop blinking and
remain illuminated or turn off before shifting the
transmission into gear. If the transmission selec-
tor lever is shifted from the N position to any other
gear when the 4LO indicator light is blinking, the
vehicle may move unexpectedly.
When you shift between 4H and 4LO, follow the
instructions below:
cFor automatic transmission models, stop the
vehicle and shift the transmission selector
lever to the N position with the brake pedal
depressed, then depress and turn the 4WD
shift switch to 4LO or 4H.
cFor manual transmission models, stop the
vehicle and shift the transmission selector
lever to the N position with the clutch pedal
depressed, then depress and turn the 4WD
shift switch to 4LO or 4H.
You cannot move the transfer 4WD shift switch
between 4H and 4LO unless you stop the vehicle
and shift the transmission selector lever to the N
position with the brake pedal (AT models) or
clutch pedal (MT models) depressed.
Turn signal/hazard indicator
lights
The appropriate light flashes when the turn signal
switch is activated.
Both lights flash when the hazard switch is turned
on.
Vehicle dynamic control off
indicator light
This indicator light comes on when the vehicle
dynamic control off switch is pushed to OFF, the
transfer case is in the 4LO position (
model) , or when the vehicle dynamic control sys-
tem is not functioning properly. This indicates the
vehicle dynamic control system is not operating.
Push the vehicle dynamic control off switch again
or restart the engine and the system will operate
normally. See “Vehicle dynamic control (VDC)
system” in the “Starting and driving” section of
this manual.
The vehicle dynamic control light also comes on
when you turn the ignition key to the ON position.
The light will turn off after about 2 seconds if the
system is operational. If the light stays on or
comes on along with the SLIP indicator light
while you are driving, have the vehicle dynamic
control system checked by a NISSAN dealer.
Instruments and controls2-17
ZREVIEW COPYÐ2006 Xterra(xtr)
Owners ManualÐUSA_English(nna)
08/01/05Ðdebbie
X
Page 103 of 304
WARNING
Pay special attention to your surround-
ings when using the clutch interlock
switch. The vehicle will move forward or
backward according to the gear selected.
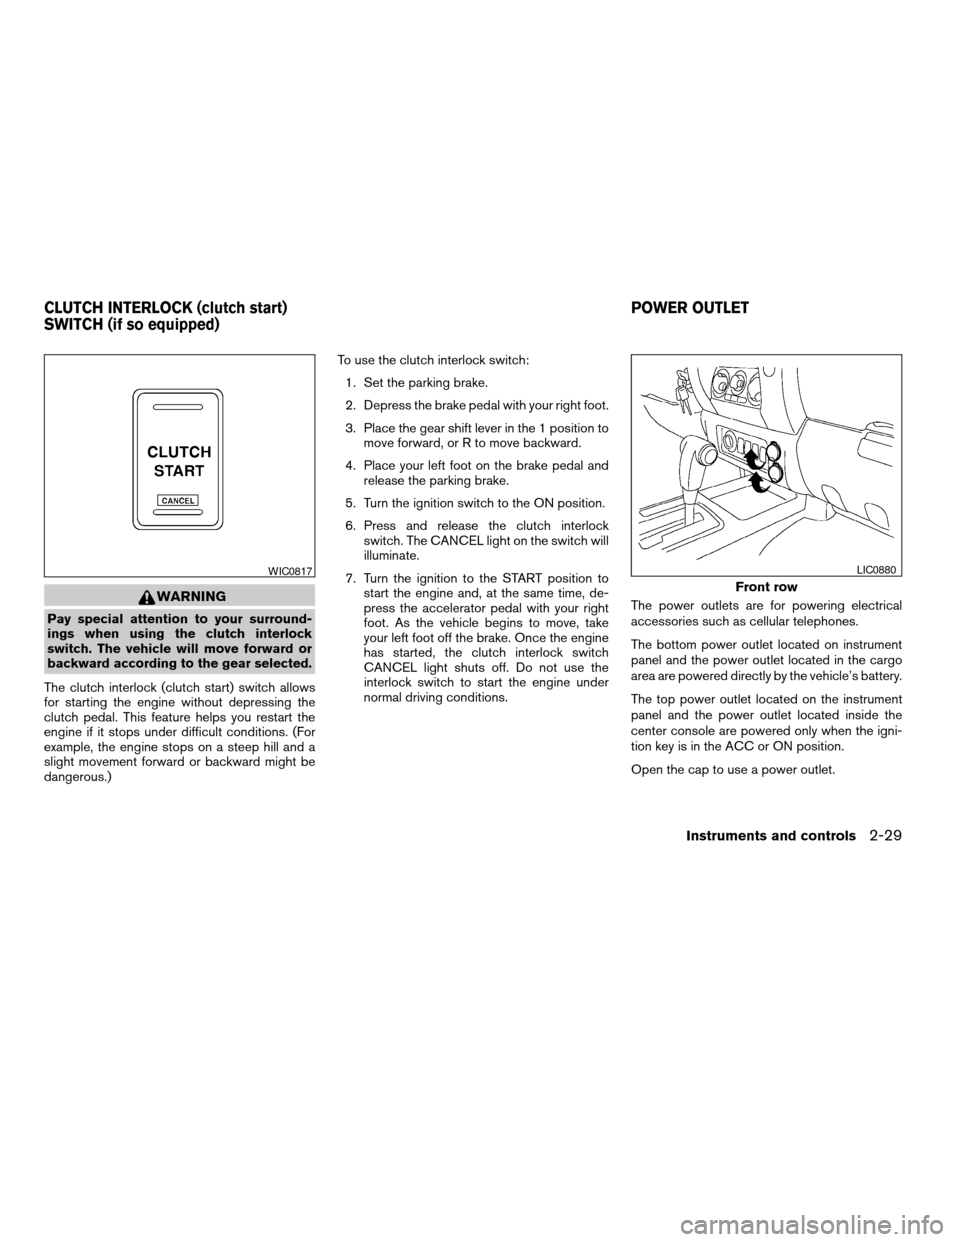
The clutch interlock (clutch start) switch allows
for starting the engine without depressing the
clutch pedal. This feature helps you restart the
engine if it stops under difficult conditions. (For
example, the engine stops on a steep hill and a
slight movement forward or backward might be
dangerous.)To use the clutch interlock switch:
1. Set the parking brake.
2. Depress the brake pedal with your right foot.
3. Place the gear shift lever in the 1 position to
move forward, or R to move backward.
4. Place your left foot on the brake pedal and
release the parking brake.
5. Turn the ignition switch to the ON position.
6. Press and release the clutch interlock
switch. The CANCEL light on the switch will
illuminate.
7. Turn the ignition to the START position to
start the engine and, at the same time, de-
press the accelerator pedal with your right
foot. As the vehicle begins to move, take
your left foot off the brake. Once the engine
has started, the clutch interlock switch
CANCEL light shuts off. Do not use the
interlock switch to start the engine under
normal driving conditions.The power outlets are for powering electrical
accessories such as cellular telephones.
The bottom power outlet located on instrument
panel and the power outlet located in the cargo
area are powered directly by the vehicle’s battery.
The top power outlet located on the instrument
panel and the power outlet located inside the
center console are powered only when the igni-
tion key is in the ACC or ON position.
Open the cap to use a power outlet.
WIC0817
Front row
LIC0880
CLUTCH INTERLOCK (clutch start)
SWITCH (if so equipped)POWER OUTLET
Instruments and controls2-29
ZREVIEW COPYÐ2006 Xterra(xtr)
Owners ManualÐUSA_English(nna)
08/01/05Ðdebbie
X
Page 168 of 304
DRIVING SAFETY PRECAUTIONS
Your NISSAN is designed for both normal and
off-road use. However, avoid driving in deep wa-
ter or mud as your NISSAN is mainly designed for
leisure use, unlike a conventional off-road ve-
hicle.
Remember that two-wheel drive models are less
capable than four-wheel drive models for rough
road driving and extrication when stuck in deep
snow or mud, or the like.
Please observe the following precautions:
WARNING
cDrive carefully when off the road and
avoid dangerous areas. Every person
who drives or rides in this vehicle
should be seated with their seat belt
fastened. This will keep you and your
passengers in position when driving
over rough terrain.
cDo not drive across steep slopes. In-
stead drive either straight up or straight
down the slopes. Off-road vehicles can
tip over sideways much more easily
than they can forward or backward.cMany hills are too steep for any vehicle.
If you drive up them, you may stall. If
you drive down them, you may not be
able to control your speed. If you drive
across them, you may roll over.
cDo not shift gears while driving on
downhill grades as this could cause
loss of control of the vehicle.
cStay alert when driving to the top of a
hill. At the top there could be a drop-off
or other hazard that could cause an
accident.
cIf your engine stalls or you cannot make
it to the top of a steep hill, never at-
tempt to turn around. Your vehicle
could tip or roll over. Always back
straight down in R (Reverse) gear. Never
back down in N (Neutral) or with the
clutch depressed (manual transmission
vehicles) , using only the brake, as this
could cause loss of control.
cHeavy braking going down a hill could
cause your brakes to overheat and fade,
resulting in loss of control and an acci-
dent. Apply brakes lightly and use a low
gear to control your speed. Use the Hill
Descent Control feature (if so
equipped) .cUnsecured cargo can be thrown around
when driving over rough terrain. Prop-
erly secure all cargo so it will not be
thrown forward and cause injury to you
or your passengers.
cTo avoid raising the center of gravity
excessively, do not exceed the rated
capactiy of the roof rack/gear bin (if so
equipped) and evenly distribute the
load. Secure heavy loads in the cargo
area as far forward and as low as pos-
sible. Do not equip the vehicle with tires
larger than specified in this manual.
This could cause your vehicle to roll
over.
cDo not grip the inside or spokes of the
steering wheel when driving off-road.
The steering wheel could move sud-
denly and injure your hands. Instead
drive with your fingers and thumbs on
the outside of the rim.
cBefore operating the vehicle, ensure
that the driver and all passengers have
their seat belts fastened.
cAlways drive with the floor mats in
place as the floor may become hot.
5-6Starting and driving
ZREVIEW COPYÐ2006 Xterra(xtr)
Owners ManualÐUSA_English(nna)
08/01/05Ðdebbie
X
Page 172 of 304
1. Apply the parking brake.
2.Automatic transmission:
Move the shift selector lever to P (Park) or N
(Neutral) . P (Park) is recommended.
The shift selector lever cannot be
moved out of P (Park) and into any of
the other gear positions if the ignition
key is turned to the OFF position or if
the key is removed from the ignition
switch.
The starter is designed not to operate if
the shift selector lever is in any of the
driving positions.
Manual transmission:
Move the shift lever to N (Neutral) . Depress
the clutch pedal to the floor while cranking
the engine.
The starter is designed not to operate
unless the clutch pedal is fully de-
pressed.
3. Crank the enginewith your foot off the
accelerator pedalby turning the ignition
key to START. Release the key when the
engine starts. If the engine starts, but fails to
run, repeat the above procedure.cIf the engine is very hard to start in ex-
tremely cold weather or when restarting,
depress the accelerator pedal a little (ap-
proximately 1/3 to the floor) and hold it
and then crank the engine. Release the
key and the accelerator pedal when the
engine starts.
cIf the engine is very hard to start because
it is flooded, depress the accelerator
pedal all the way to the floor and hold it.
Crank the engine for 5-6 seconds. After
cranking the engine, release the accel-
erator pedal. Crank the enginewith your
foot off the accelerator pedalby turn-
ing the ignition key to START. Release the
key when the engine starts. If the engine
starts, but fails to run, repeat the above
procedure.
CAUTION
Do not operate the starter for more than
15 seconds at a time. If the engine does
not start, turn the key off and wait 10
seconds before cranking again, otherwise
the starter could be damaged.4. Allow the engine to idle for at least 30 sec-
onds after starting. Do not race the engine
while warming it up. Drive at moderate
speed for a short distance first, especially in
cold weather.
STARTING THE ENGINE
5-10Starting and driving
ZREVIEW COPYÐ2006 Xterra(xtr)
Owners ManualÐUSA_English(nna)
08/01/05Ðdebbie
X
Page 177 of 304
CAUTION
cDo not rest your foot on the clutch pedal
while driving. This may cause clutch
damage.
cFully depress the clutch pedal before
shifting to help prevent transmission
damage.
cStop your vehicle completely before
shifting into R (Reverse) .
cWhen the vehicle is stopped with the
engine running (for example, at a stop
light) , shift to N (Neutral) and release
the clutch pedal with the foot brake
applied.
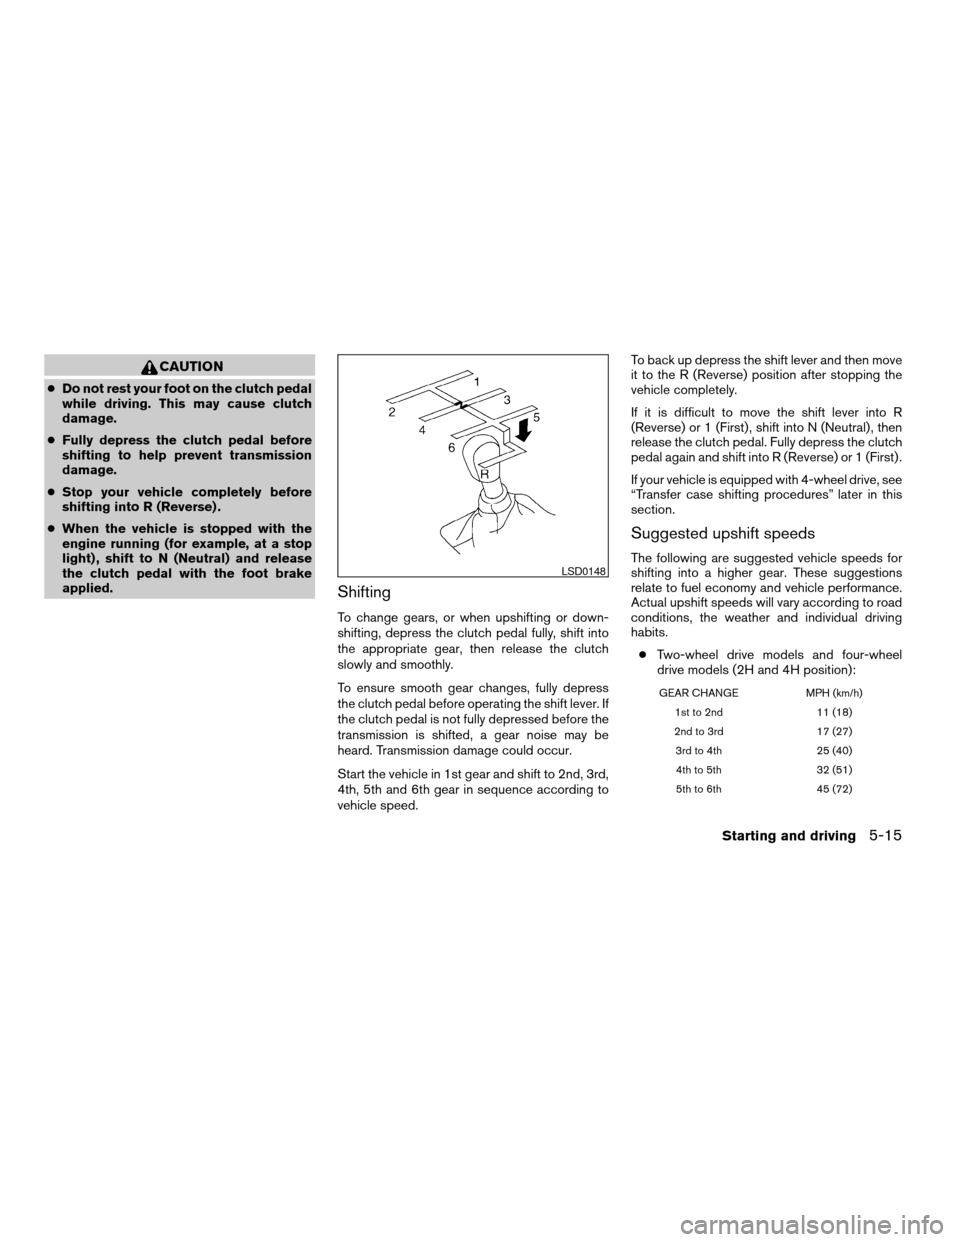
Shifting
To change gears, or when upshifting or down-
shifting, depress the clutch pedal fully, shift into
the appropriate gear, then release the clutch
slowly and smoothly.
To ensure smooth gear changes, fully depress
the clutch pedal before operating the shift lever. If
the clutch pedal is not fully depressed before the
transmission is shifted, a gear noise may be
heard. Transmission damage could occur.
Start the vehicle in 1st gear and shift to 2nd, 3rd,
4th, 5th and 6th gear in sequence according to
vehicle speed.To back up depress the shift lever and then move
it to the R (Reverse) position after stopping the
vehicle completely.
If it is difficult to move the shift lever into R
(Reverse) or 1 (First) , shift into N (Neutral) , then
release the clutch pedal. Fully depress the clutch
pedal again and shift into R (Reverse) or 1 (First) .
If your vehicle is equipped with 4-wheel drive, see
“Transfer case shifting procedures” later in this
section.
Suggested upshift speeds
The following are suggested vehicle speeds for
shifting into a higher gear. These suggestions
relate to fuel economy and vehicle performance.
Actual upshift speeds will vary according to road
conditions, the weather and individual driving
habits.
cTwo-wheel drive models and four-wheel
drive models (2H and 4H position):
GEAR CHANGE MPH (km/h)
1st to 2nd 11 (18)
2nd to 3rd 17 (27)
3rd to 4th 25 (40)
4th to 5th 32 (51)
5th to 6th 45 (72)
LSD0148
Starting and driving5-15
ZREVIEW COPYÐ2006 Xterra(xtr)
Owners ManualÐUSA_English(nna)
08/01/05Ðdebbie
X