spare wheel Oldsmobile Achieva 1997 Owner's Manuals
[x] Cancel search | Manufacturer: OLDSMOBILE, Model Year: 1997, Model line: Achieva, Model: Oldsmobile Achieva 1997Pages: 372, PDF Size: 18.52 MB
Page 219 of 372
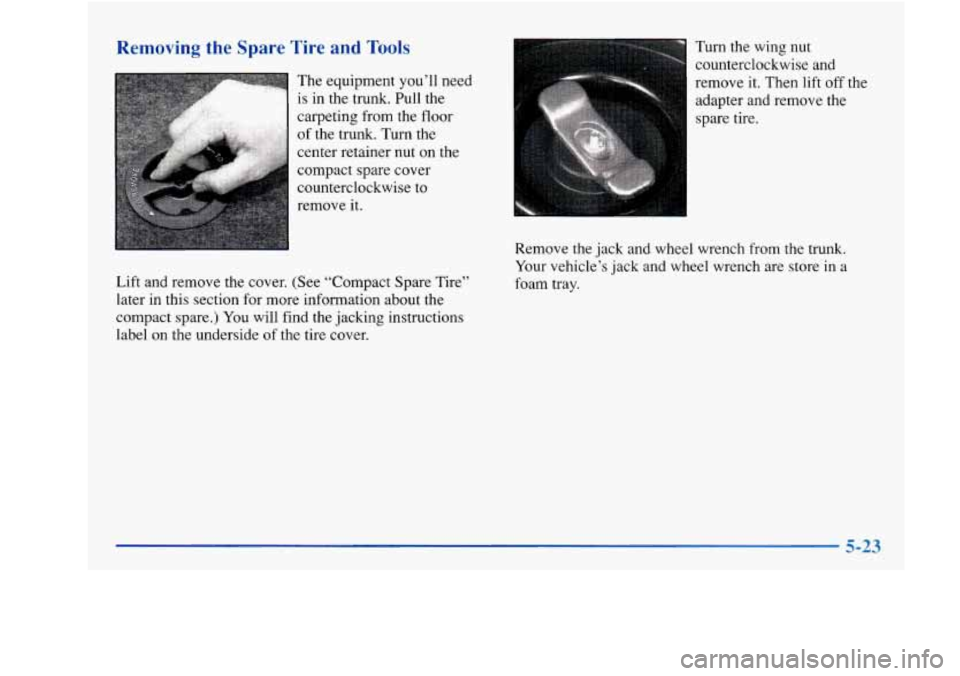
Removing the Spare Tire and Tools
Lift and remove the cover. (See “Compact Spare Tire”
later in this section for more information about the
compact spare.) You will find
the jacking instructions
label on the underside of the tire cover. Turn the wing
nut
counterclockwise and
remove it. Then lift off the
adapter and remove the
spare tire.
Remove the jack and wheel wrench
from the trunk.
Your vehicle’s jack and wheel wrench are store in
a
foam tray.
5-23
Page 220 of 372
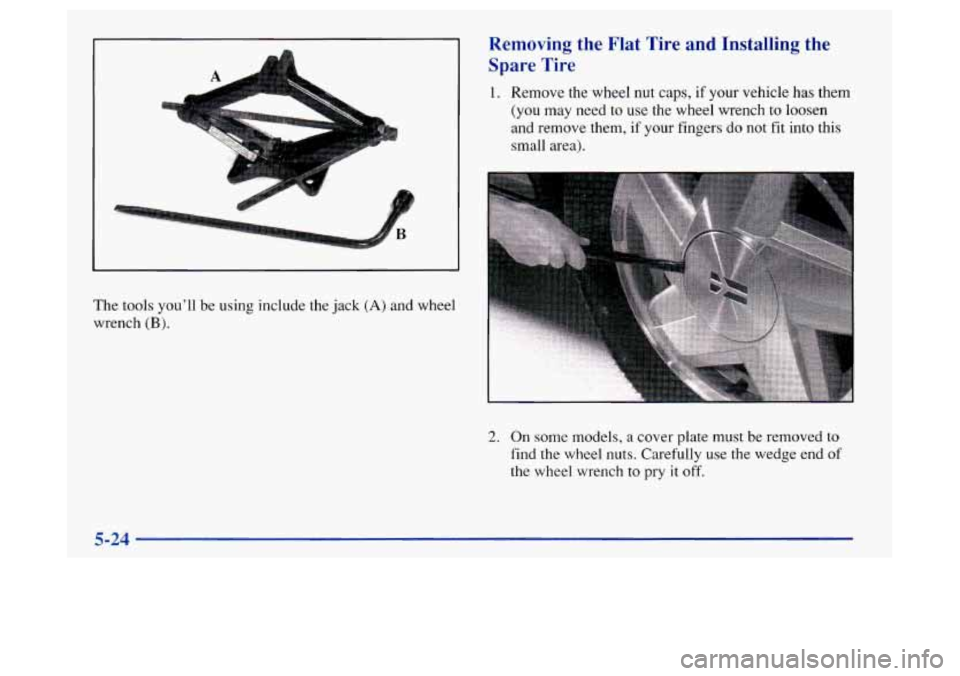
The tools you'll be using include the jack (A) and wheel
wrench
(B).
Removing the Flat Tire and Installing the
Spare Tire
1. Remove the wheel nut caps, if your vehicle has them
(you may need to use the wheel wrench to loosen
and remove them, if your fingers do not fit into this
small area).
2. On some models, a cover plate must be removed to
find the wheel nuts. Carefully use the wedge end
of
the wheel wrench to pry it off.
5-24
Page 221 of 372
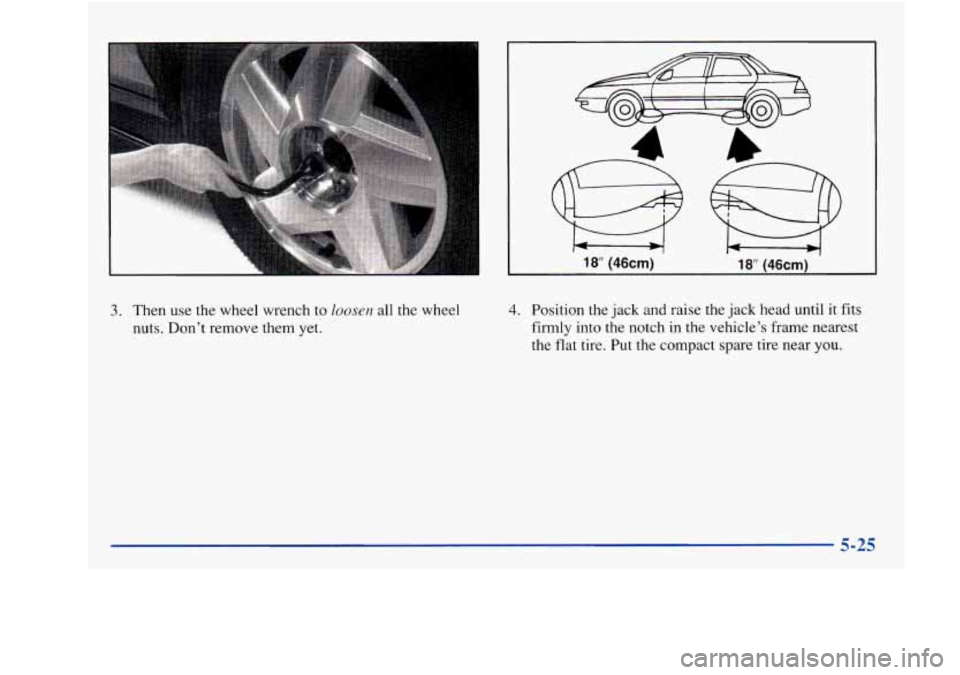
3. Then use the wheel wrench to loosen all the wheel
nuts. Don’t remove them yet.
18” (46cm) 18” (46cm)
4. Position the jack and raise the jack head until it fits
firmly into the notch
in the vehicle’s frame nearest
the flat tire. Put the compact spare tire near
you.
Page 222 of 372
c
Getting under a vehicle when it is jacked up is
dangerous.
If the vehicle slips off the jack, you
could be badly injured or killed. Never get under
a vehicle when it is supported only by a jack.
Raising your vehicle with the jack improperly
positioned can damage the vehicle and even
make the vehicle fall.
To help avoid personal
injury and vehicle damage, be sure
to fit the jack
lift head into the proper location before raising your vehicle.
1 NOTICE: I
Do not jack or lift the vehicle using the oil pan.
Pans could crack and begin to leak fluid.
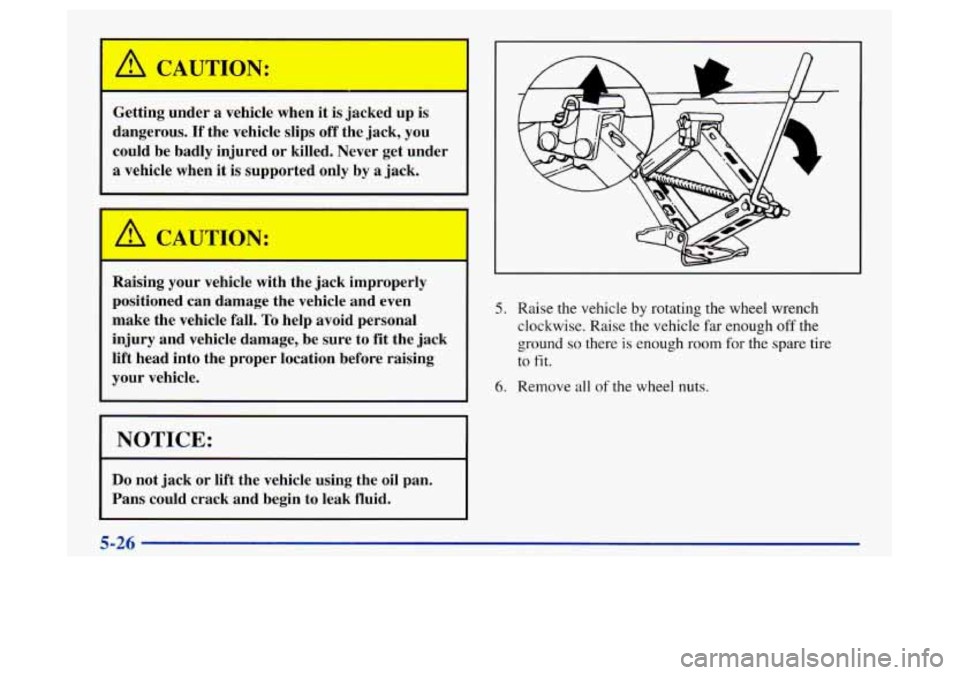
5. Raise the vehicle by rotating the wheel wrench
clockwise. Raise the vehicle far enough off the
ground so there is enough room for the spare tire
to
fit.
6. Remove all of the wheel nuts.
7-26
Page 223 of 372
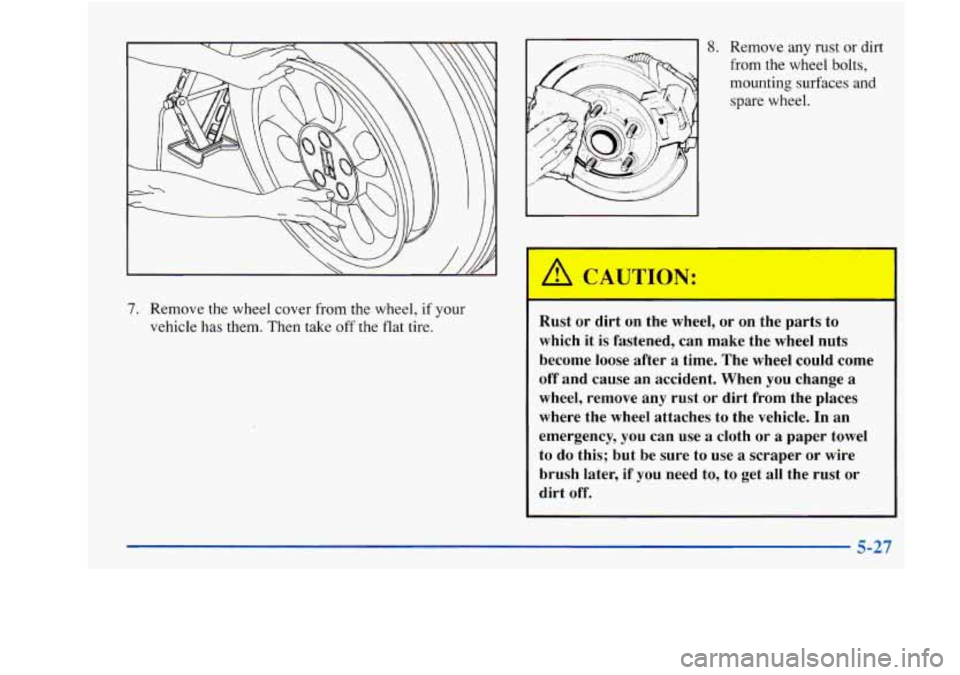
7. Remove the wheel cover from the wheel, if your
vehicle has them. Then take
off the flat tire.
8. Remove any rust or dirt
from the wheel bolts, mounting surfaces and
spare wheel.
A CAUTION:
Rust or dirt on the w , or on the parts to
which it is fastened, can make the wheel nuts
become
loose after a time. The wheel could come
off and cause an accident. When you change
a
wheel, remove any rust or dirt from the places
where the wheel attaches to the vehicle. In an
emergency,
you can use a cloth or a paper towel
to do this; but be sure to use
a scraper or wire
brush later,
if you need to, to get all the rust or
dirt off.
Page 225 of 372
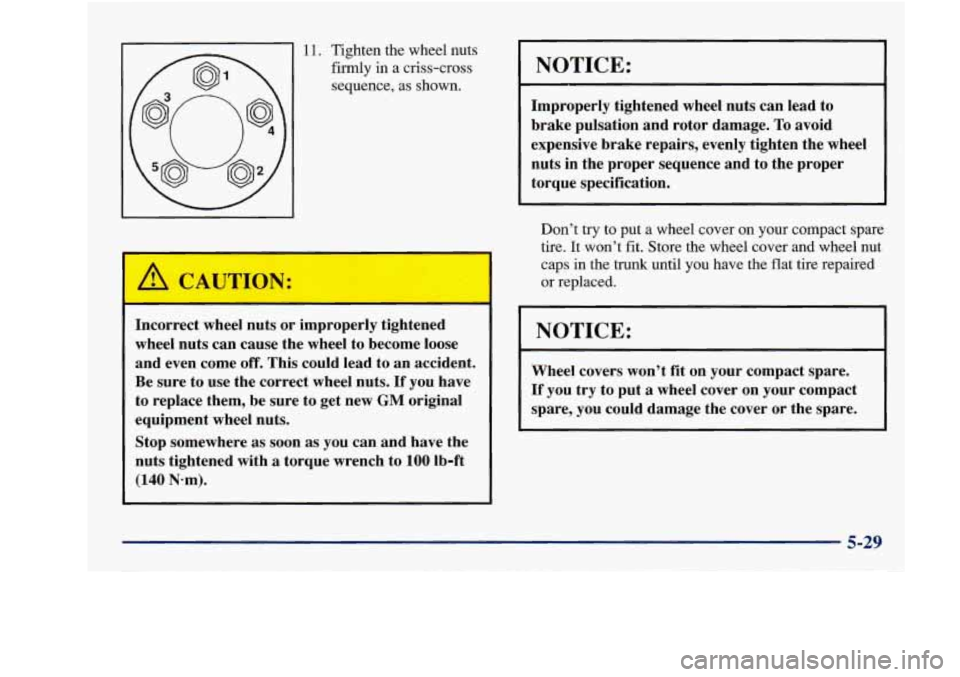
11. Tighten the wheel nuts
firmly in a criss-cross
sequence, as shown.
NOTICE:
Improperly tightened wheel nuts can lead to
brake pulsation and rotor damage.
To avoid
expensive brake repairs, evenly tighten the wheel
nuts in the proper sequence and to the proper
torque specification.
Incorrect wheel nuts
or improperly tightened
wheel nuts can cause the wheel to become loose
and even come
off. This could lead to an accident.
Be sure to use the correct wheel nuts. If you have
to replace them, be sure to get new
GM original
equipment wheel nuts.
Stop somewhere as soon as you can and have the
nuts tightened with
a torque wrench to 100 lb-ft
(140 N-m). Don’t
try to put
a wheel cover on your compact spare
tire. It won’t fit. Store the wheel cover and wheel nut
caps in the
trunk until you have the flat tire repaired
or replaced.
I I
I NOTICE:
Wheel covers won’t fit on your compact spare.
If you try to put
a wheel cover on your compact
spare, you could damage the cover or the spare.
5-29
Page 226 of 372
Storing the Flat Tire and Tools
Storing a jack, a tire or other equipment in the
passenger compartment
of the vehicle could
cause injury.
In a sudden stop or collision, loose
equipment could strike someone. Store all these
in the proper place.
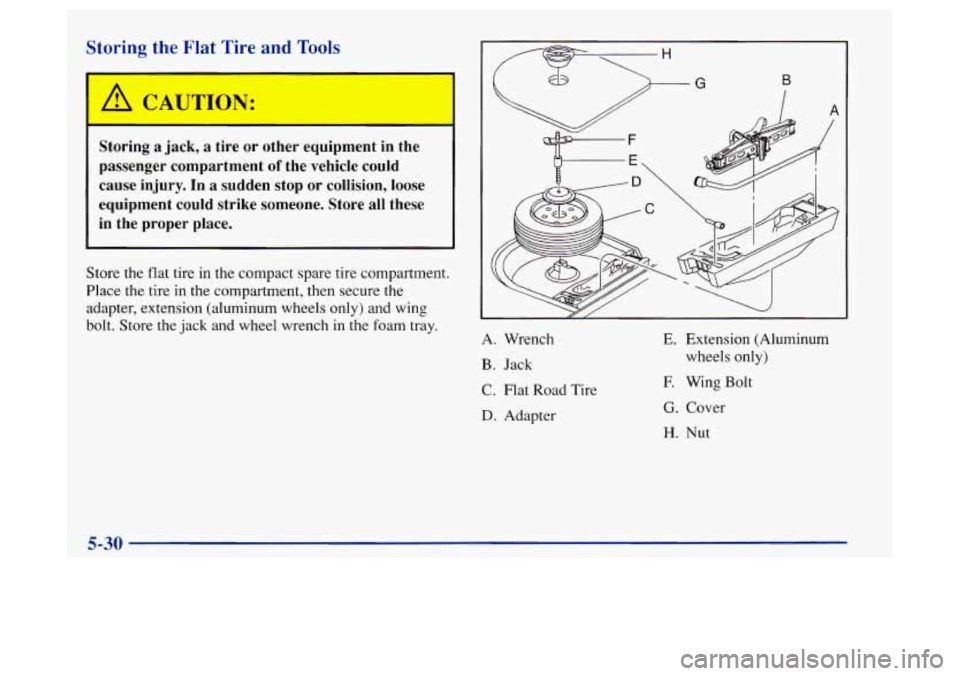
Store the flat tire in the compact spare tire compartment.
Place the tire in the compartment, then secure the
adapter, extension (aluminum wheels only) and wing
bolt. Store the jack and wheel wrench
in the foam tray.
B I
A. Wrench E. Extension (Aluminum
B. Jack
C. Flat Road Tire
D. Adapter wheels only)
E Wing Bolt
G. Cover
H. Nut
5-30
Page 228 of 372
Compact Spare Tire
Although the compact spare tire was fully inflated when
your vehicle was new,
it can lose air after a time. Check
the inflation pressure regularly. It should be
60 psi
(420 Wa).
After installing the compact spare on your vehicle, you
should stop as soon as possible and make sure your spare
tire is correctly inflated. The compact spare
is made to
perform well at speeds up
to 65 mph (105 km/h) for
distances up to
3,000 miles (5 000 km), so you can finish
your trip and have your full-size tire repaired or replaced
where you want.
Of course, it’s best to replace your spare
with a full-size tire as
soon as you can. Your spare will
last longer and be in good shape in case
you need
it again.
NOTICE:
I
When the compact spare is installed, don’t take
your vehicle through an automatic car wash with
guide rails. The compact spare can get caught on
the rails. That can damage the tire and wheel,
and maybe other parts
of your vehicle. Don’t use your compact
spare
on other vehicles.
And don’t mix your compact spare tire or wheel with
other wheels or tires. They won’t fit. Keep your spare
tire and its wheel together.
NOTICE:
Tire chains won’t fit your compact spare. Using
them can damage
your vehicle and can damage
the chains too. Don’t use tire chains on
your
compact spare.
5-32
Page 272 of 372
NOTICE: (Continued)
If your tires have too much air (overinflation),
you can get the following:
Unusual wear
Bad handling
Rough ride
0 Needless damage from road hazards.
When to Check
Check your tires once a month or more.
Don’t forget your compact spare tire. It should be at
60 psi (420 Pa).
How to Check
Use a good quality pocket-type gage to check tire
pressure. You can’t tell if your tires are properly inflated
simply by looking at them. Radial tires may look
properly inflated even when they’re underinflated.
Be sure to put the valve caps back on the valve stems.
They help prevent leaks by keeping
out dirt and moisture.
Tire Inspection and Rotation
Tires should be rotated every 6,000 to 8,000 miles
( 10 000 to 13 000 km). Any time you notice unusual
wear, rotate your tires as soon as possible and check
wheel alignment. Also check for damaged tires or wheels.
See “When It’s Time for New Tires” and “Wheel
Replacement” later
in this section for more information.
The purpose
of regular rotation is to achieve more
uniform wear for all tires on the vehicle. The first
rotation is the most important. See “Scheduled
Maintenance Services” in the Index for scheduled
rotation intervals.
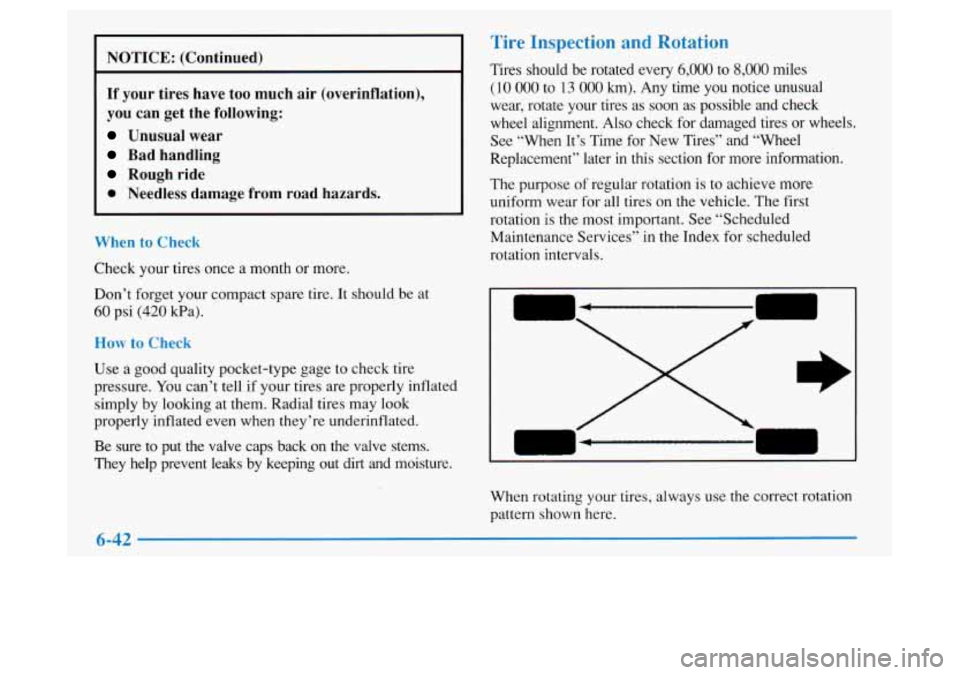
When rotating your tires, always use the correct rotation
pattern shown here.
6-42
Page 273 of 372
Don’t include the compact spare tire in your tire rotation. [t’s Time for New
After the tires have been rotated, adjust the front and
rear inflation pressures as shown
on the Tire-Loading
Information label. Make certain that all wheel nuts are
properly tightened. See “Wheel Nut Torque” in
the Index.
I
Rust or dirt on a wheel, or on the parts to which
it is fastened, can make wheel nuts become loose
after
a time. The wheel could come off and cause
an accident. When
you change a wheel, remove
any rust or dirt from places where the wheel
attaches to the vehicle. In an emergency, you can
use
a cloth or a paper towel to do this; but be
sure to use
a scraper or wire brush later, if you
need to, to get all the rust or dirt off. (See
“Changing
a Flat Tire” in the Index.)
kc
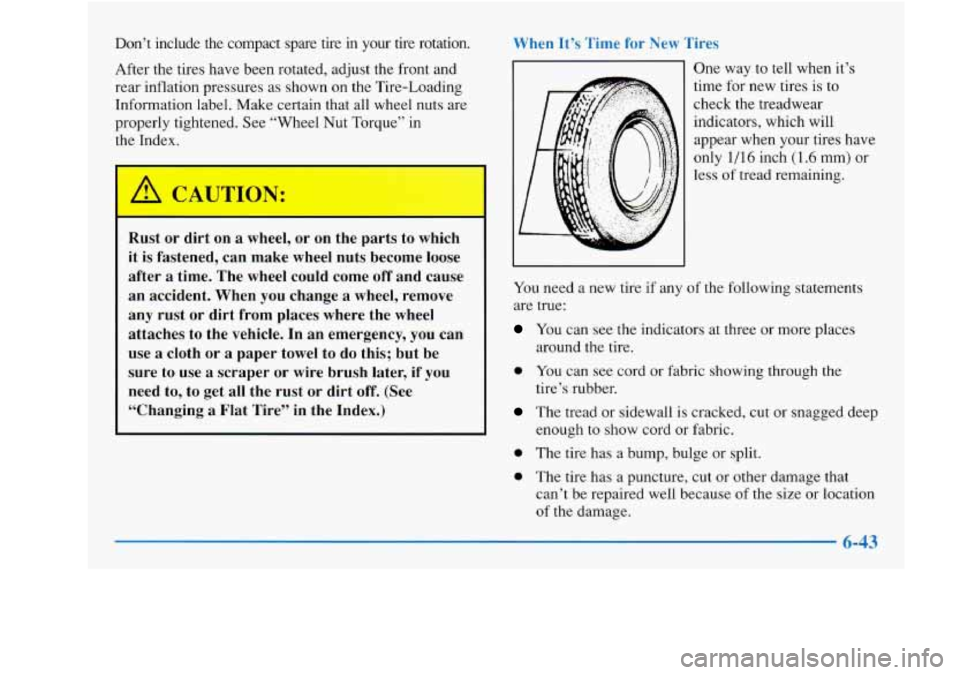
One way to tell when it’s
time for new tires is
to
check the treadwear
indicators, which will
appear when your tires have
only
1/16 inch (1.6 mm) or
less of tread remaining.
You need a new tire if any of the following statements
are true:
You can see the indicators at three or more places
around the tire.
0 You can see cord or fabric showing through the
The tread or sidewall is cracked, cut or snagged deep
tire’s rubber.
enough to show cord
or fabric.
0 The tire has a bump, bulge or split.
0 The tire has a puncture, cut or other damage that
can’t be repaired well because
of the size or location
of the damage.
6-43