maintenance schedule Oldsmobile Achieva 1998 Owner's Manuals
[x] Cancel search | Manufacturer: OLDSMOBILE, Model Year: 1998, Model line: Achieva, Model: Oldsmobile Achieva 1998Pages: 356, PDF Size: 18.04 MB
Page 3 of 356
The 1998 Oldsmobile Achieva Owner’s Manual
1-1
2-1
3- 1
4- 1
5- 1
6- 1
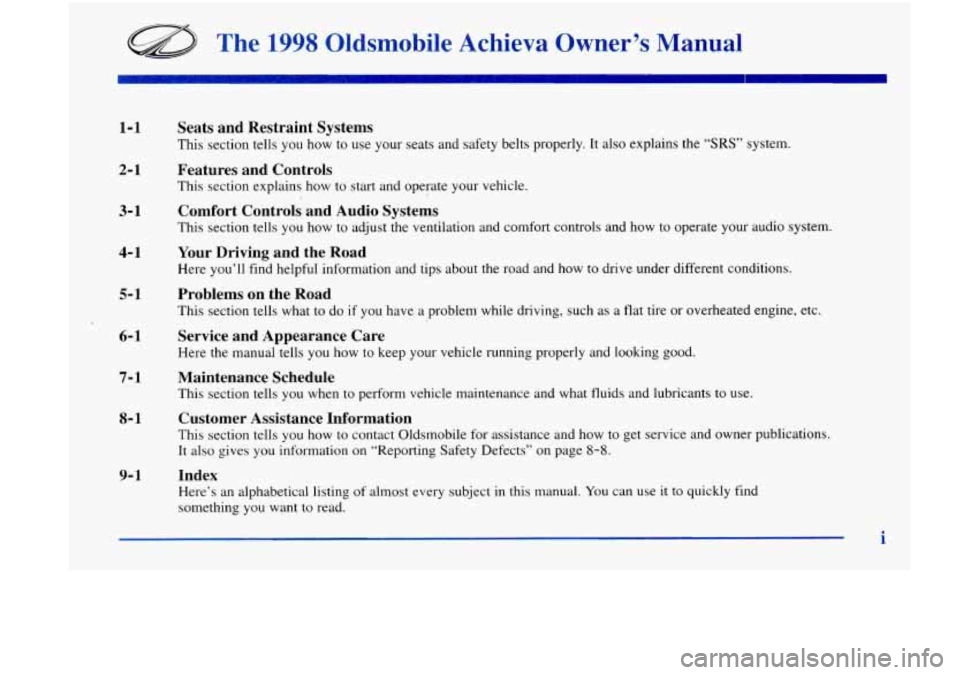
Seats and Restraint Systems
This section tells you how to use your seats and safety belts properly. It also explains the “SRS” system.
Features and Controls
This section explains how to start and operate your vehicle.
Comfort Controls and Audio Systems
This section tells you how to adjust the ventilation and comfort controls and how to operate your audio system.
Your Driving and the Road
Here you’ll find helpful information and tips about the road and how to drive under different conditions.
Problems on the Road
This section tells what to do if you have a problem while driving, such as a flat tire or overheated engine, etc.
Service and Appearance Care
Here the manual tells you how to keep your vehicle running properly and looking good.
7- 1 Maintenance Schedule
This section tells you when to perform vehicle maintenance and what fluids and lubricants to use.
8- 1
9-1
Customer Assistance Information
This section tells you how to contact Oldsmobile for assistance and how to get service and owner publications.
It also gives you information on “Reporting Safety Defects” on page
8-8.
Index
Here’s an alphabetical listing of almost every subject in this manual. You can use it to quickly find
something you want to read.
i
Page 188 of 356
Maintenance When Trailer Towing
Your vehicle will need service more often when you’re
pulling a trailer. See the Maintenance Schedule for more
on this. Things that are especially important in trailer
operation are automatic transaxle fluid (don’t overfill),
engine oil, belt, cooling system and brake adjustment.
Each
of these is covered in this manual, and the Index
will help you find them quickly. If you’re trailering, it’s
a good idea to review these sections before you
start
your trip.
Check periodically to
see that all hitch nuts and bolts
are tight.
Engine Cooling When Trailer Towing
Your cooling system may temporarily overheat during
severe operating conditions. See “Engine Overheating’’
in the Index.
Towing A Trailer
(Except 3100 Engine)
Your vehicle is neither designed nor intended to tow
a trailer.
4-40
Page 244 of 356
As shown in the chart, SAE 5W-30 is best for your
vehicle. However, you can use
SAE 1 OW-30 if it's going
to be
0" F (- 18 " C) or above. These numbers on an oil
container show its viscosity, or thickness.
Do not use
other viscosity oils, such as
SAE 20W-50.
NOTICE:
Use only engine oil with the American Petroleum
Institute Certified For Gasoline Engines
"Starburst" symbol. Failure to use the
recommended oil can result in engine damage not
covered by your warranty.
GM Goodwrench@ oil meets all the requirements for
your vehicle.
If you are in an area where the temperature falls
below
-20°F (-29"C), consider using either an
SAE 5W-30 synthetic oil or an SAE OW-30 oil. Both
will provide easier cold starting and better protection
for your engine at extremely low temperatures.
Engine Oil Additives
Don't add anything to your oil. Your retailer is ready to
advise if you think something should be added.
When to Change Engine Oil
If any one of these is true for you, use the short triplcity
maintenance schedule:
e
0
0
e
e
Most trips are less than 5 to 10 miles (8 to 16 km).
This is particularly important when outside
temperatures are below freezing.
Most trips include extensive idling (such as frequent
driving in stop-and-go traffic).
Most trips are through dusty areas.
You frequently tow a trailer
or use a carrier on top of
your vehicle.
The vehicle
is used for delivery service, police, taxi
or other commercial application.
Driving under these conditions causes engine oil to
break down sooner. If any one of these
is true for your
vehicle, then you need to change your oil and filter
every
3,000 miles (5 000 km) or 3 months -- whichever
occurs first.
6-16
Page 245 of 356
If none of them is true, use the long triphighway
maintenance schedule. Change the oil and filter every
7,500 miles (12 500 km) or 12 months -- whichever
occurs first. Driving
a vehicle with a fully warmed
engine under highway conditions causes engine oil to
break down slower.
What to Do with Used Oil
Did you know that used engine oil contains certain
elements that may be unhealthy for your skin and could
even cause cancer? Don’t let used oil stay on your skin
for very long. Clean your skin and nails
with soap and
water, or a good hand cleaner. Wash or properly throw
away clothing or rags containing used engine oil. (See
the manufacturer’s warnings about the use and disposal
of oil products.)
Used oil can be a real threat to the environment.
If you
change your own oil, be sure to drain all free-flowing oil
from the filter before disposal. Don’t ever dispose of oil
by putting it in the trash, pouring it on the ground, into
sewers, or into streams or bodies of water. Instead,
recycle it by taking it to a place that collects used oil. If
you have a problem properly disposing of your used oil,
ask your retailer, a service station or a local recycling
center for help.
Air Cleaner
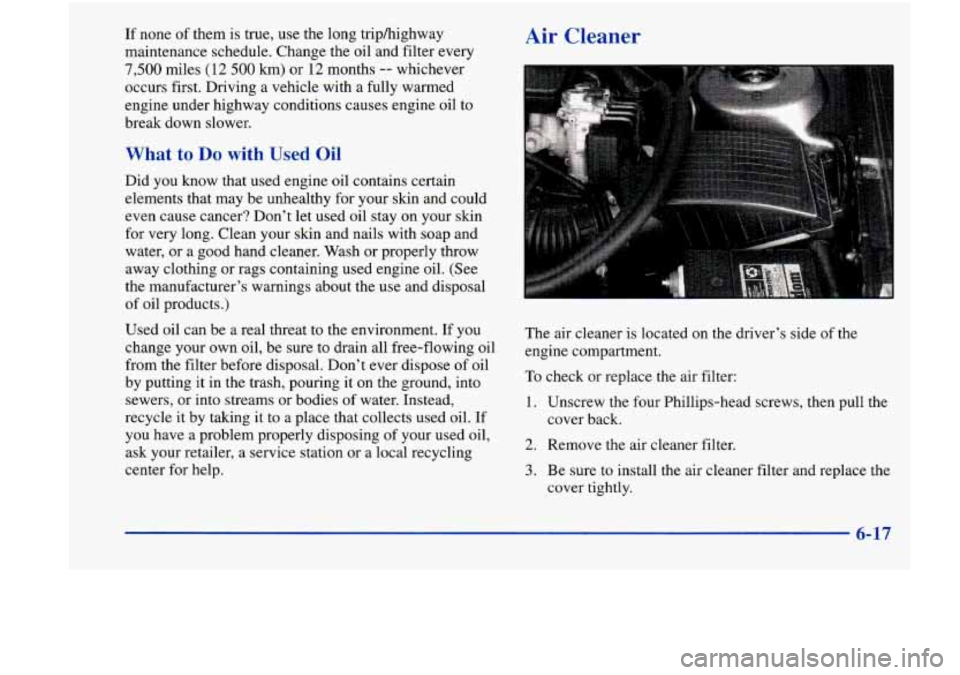
The air cleaner is located on the driver’s side of the
engine compartment.
To check or replace the air filter:
1. Unscrew the four Phillips-head screws, then pull the
cover back.
2. Remove the air cleaner filter.
3. Be sure to install the air cleaner filter and replace the
cover tightly.
6-17
Page 246 of 356
Refer to the Maintenance Schedule to determine when to
replace the air filter.
See “Scheduled Maintenance Services” in the Index.
Operating the engine with the air cleaner off can
cause you or others to be burned. The air cleaner
not only cleans the
air, it stops flame if the engine
backfires.
If it isn’t there, and the engine
backfires, you could be burned. Don’t drive with
it
off, and be careful working on the engine with
the air cleaner off.
I NOTICE:
If the air cleaner is off, a backfire can cause a
damaging engine fire. And, dirt can easily get
into your engine, which will damage it. Always
have the air cleaner in place when you’re driving.
Automatic Transaxle Fluid
When to Check and Change
A good time to check your automatic transaxle fluid
level is when the engine oil is changed.
Change both the fluid and filter every
50,000 miles
(83 000 km) if the vehicle is mainly driven under one
or more
of these conditions:
0 In heavy city traffic where the outside temperature
regularly reaches
90°F (32°C) or higher.
In hilly or mountainous terrain.
When doing frequent trailer towing.
Uses such as found in taxi, police or delivery service.
If you do not use your vehicle under any of these
conditions, the fluid and filter do not require changing.
See “Scheduled Maintenance Services”
in the Index.
6-18
Page 249 of 356
How to Add Fluid
Refer to the Maintenance Schedule to determine what
kind of transaxle fluid to use. See “Recommended
Fluids and Lubricants” in the Index.
If the fluid level is low, add only enough of the proper
fluid to bring the level into the cross-hatched area on
the dipstick.
1. Pull out the dipstick.
2. Using a long-neck hnnel, add enough fluid at the
dipstick hole to bring
it to the proper level.
3. After adding fluid, recheck the fluid level as
described under “How to Check.”
4. When the correct fluid level is obtained, push
the dipstick back in all the way.
Engine Coolant
The cooling s stem in your vehicle is filled with
DEX-COOL engine coolant.
This coolant is designed
to remain in your vehicle for 5 years or
150,000 miles
(240 000 km) whichever occurs first, if you add only
DEX-COOL’ extended life coolant.
B
It doesn’t take much fluid, generally less than The following explains your cooling system and how
one pint
(0.5 L). Don’t oveflZZ. to add coolant when it is low. If you have a problem
with engine overheating, see “Engine Overheating” in
I 3 the Index.
NOTICE: A 50/50 mixture of water and DEX-COOL@
coolant will:
We recommend you use only fluid labeled
DEXRON@-III, because fluid with that label is
made especially for your automatic transaxle.
is not covered by your new vehicle warranty.
Protect against rust and corrosion. Damage caused by fluid other than DEXRON-III
a Give boiling protection up to 265 “F (129 “C).
a Give freezing protection down to -34°F (-37°C).
Help keep the proper engine temperature. z
Let the warning lights and gages work as
they should.
6-21
Page 266 of 356
NOTICE: (Continued)
If your tires have too much air (overinflation),
you
can get the following:
Unusual wear
0 Bad handling
Rough ride
Needless damage from road hazards.
When
to Check
Check your tires once a month or more.
Don’t forget your compact spare tire. It should be at
60 psi (420 Wa).
How to Check
Use a good quality pocket-type gage to check tire
pressure. You can’t tell if your tires are properly inflated
simply by looking at them. Radial tires may look
properly inflated even when they’re underinflated.
Be sure to put the valve caps back
on the valve
stems. They help prevent leaks by keeping out dirt
and moisture.
Tire Inspection and Rotation
Tires should be rotated every 6,000 to 8,000 miles
(10 OOO to 13 O00 km). Any time you notice unusual
wear, rotate your tires as soon as possible and check
wheel alignment.
Also check for damaged tires or wheels.
See ‘When It’s Time for New Tires” and ‘Wheel
Replacement” later in this section for more information.
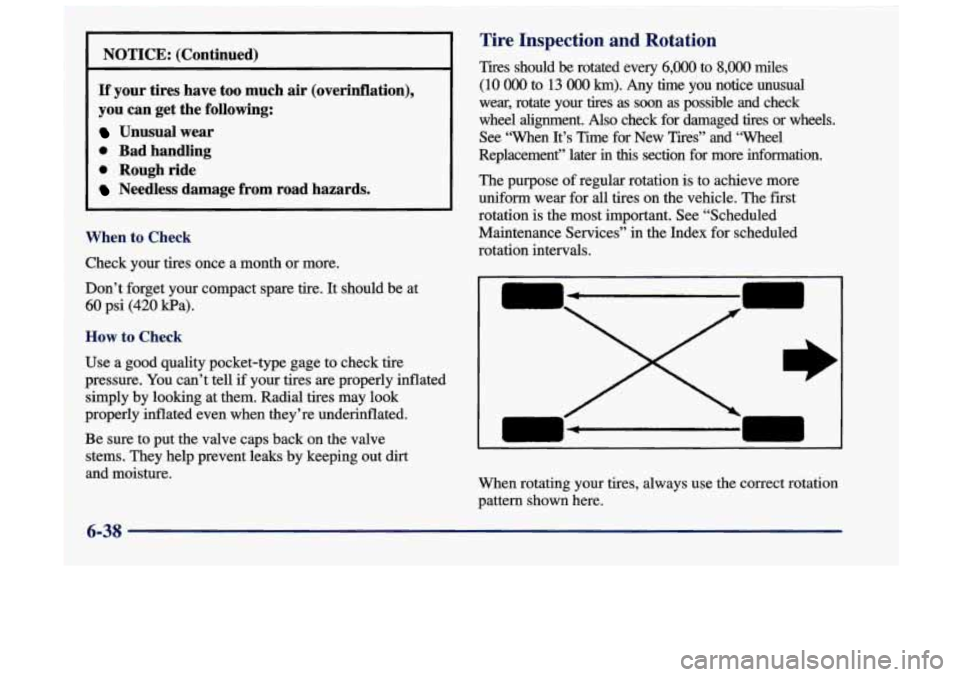
The purpose of regular rotation is to achieve more
uniform wear for
all tires on the vehicle. The first
rotation is the most important. See “Scheduled
Maintenance Services” in the Index for scheduled
rotation intervals.
When rotating your tires, always use the correct rotation
pattern shown here.
6-38 -
Page 291 of 356
Section 7 Maintenance Schedule
This section covers the maintenance required for your vehicle. Your vehicle needs these services to retain its safety,
dependability and emission control performance.
7-2
7-3
7-4
7-5 7-5
7-6
7-6 Introduction
How
This Section is Organized
Part
A: Scheduled Maintenance Services
Short Trip/City Definition
Short Trip/City Intervals
Long TripMighway Definition
Long Tripmighway Intervals 7-7
7-2
1
7-30
7-34
7-36
7-37
Short
Trip/City Maintenance Schedule
Long Trip/Highway Maintenance Schedule
Part B: Owner Checks and Services
Part
C: Periodic Maintenance Inspections
Part
D: Recommended Fluids and Lubricants
Part
E: Maintenance Record
Page 293 of 356

How This Section is Organized
The remainder of this section is divided into five parts:
“Part A: Scheduled Maintenance Services” shows
what to have done and how often. Some
of these
services can be complex,
so unless you are technically
qualified and have the necessary equipment, you should
let your retailer’s service department or another
qualified service center do these jobs.
Performing maintenance work on a vehicle can
be dangerous. In trying to do some jobs, you can
be seriously injured.
Do your own maintenance
work only
if you have the required know-how
and the proper tools and equipment for the job.
If you have any doubt, have a qualified
technician do the work.
If you are skilled enough to do some work on your
vehicle, you will probably want to get the service
information. See “Service and Owner Publications”
in
the Index.
“Part B: Owner Checks and Services” tells
you what should be checked and when. It also explains
what you can easily do to help keep your vehicle in
good condition.
“Part C: Periodic Maintenance Inspections”
explains important inspections that your retailer’s
service department or another qualified service center
should perform.
“Part D: Recommended Fluids and Lubricants” lists
some recommended products to help keep your vehicle
properly maintained. These products,
or their
equivalents, should be used whether you do the work
yourself or have it done.
“Part E: Maintenance Record” provides a place for
you to record the maintenance performed on your
vehicle. Whenever any maintenance is performed, be
sure to write it down in this part. This will help you
determine when your next maintenance should be done.
In addition, it is a good idea to keep your maintenance
receipts. They may be needed
to qualify your vehicle for
warranty repairs.
7-3
~
Page 294 of 356

Part A: Scheduled Maintenance
Services
Using Your Maintenance Schedule
we at General Motors want to help you keep your
vehicle
in good working condition. But we don’t know
exactly how you’ll drive it. You may drive
very short
distances only a few times a week. Or you may drive
long distances all the time in very hot, dusty weather.
You may
use your vehicle in making deliveries. Or
you may drive it to work, to do errands or in many
other ways.
Because of all the different ways people use their
vehicles, maintenance needs vary, You may even need
more frequent checks and replacements than you’ll find
in the schedules in this section.
So please read this
section and note how you drive. If you have any
questions on how to keep your vehicle
in good
condition, see your Oldsmobile retailer.
This
part tells you the maintenance services you should
have done and when you should schedule them.
If you
go to your retailer for your service needs, you’ll know
that GM-trained and supported service people will
perform the work using genuine GM parts. The
proper fluids and lubricants to
use are listed in Part D.
Make sure whoever services your vehicle uses these. All
parts should be replaced and all necessary repairs done
before you or anyone else drives the vehicle.
These schedules are for vehicles that:
0 carry passengers and cargo within recommended
limits.
You will find these limits on your vehicle’s
Tire-Loading Information label. See “Loading Your
Vehicle’’
in the Index.
0 are driven on reasonable road surfaces within legal
driving limits.
0 use the recommended fuel. See “Fuel” in the Index.
Selecting the Right Schedule
First you’ll need to decide which of the two schedules is
right for your vehicle. Here’s how
to decide which
schedule
to follow:
7-4