stop start Oldsmobile Achieva 1998 Owner's Manuals
[x] Cancel search | Manufacturer: OLDSMOBILE, Model Year: 1998, Model line: Achieva, Model: Oldsmobile Achieva 1998Pages: 356, PDF Size: 18.04 MB
Page 76 of 356
Parking Lots
If you park in a lot where someone will be watching
your vehicle, it’s best to lock it up and take your keys.
But what if you have to leave your key?
0
0
0
0
0
0
If possible, park in a busy, well lit area.
Put your valuables in a storage area, like your
trunk or glove box. Be sure to close and lock the
storage area.
Close all windows.
Slide the remote trunk release lockout switch all
the way to the right.
Lock the glove box.
Lock all the doors except the driver’s.
Passlock@
Your vehicle is equipped with the Passlock
theft-deterrent system. During normal
operation, the SECURITY light will
go
off after the engine is started.
If the engine stalls
and the SECURITY light flashes,
wait until the light stops flashing before trying to restart
the engine. Remember to release the key from the
START position as soon as the engine starts.
If you are driving and the SECURITY light comes
on, you will be able to restart the engine if you turn
the engine
off. However, your Passlock system is
not working properly and must be serviced by your
retailer. Your vehicle is not protected by Passlock at this
time. You may also want to check the fuse (see “Fuses
and Circuit Breakers” in the Index). See your retailer
for service.
If the SECURITY light comes on while the engine is
running, a problem has been detected and the system
may need service. See your retailer for service.
In an emergency, call the Oldsmobile Roadside
Assistance Center at
1-800-442-OLDS (6537).
Passlock is a passive theft-deterrent system. The system
is armed once the key is removed from the ignition.
Passlock enables fuel
if the ignition lock cylinder is
turned with a valid key. If a correct key is not used,
fuel is disabled.
2-12
Page 77 of 356
New Vehicle ‘ ~ -eak-In”
NOTICE:
Your vehicle doesn’t need an elaborate
“break-in.” But it will perform better in the long
run if you follow these guidelines:
a
a
a
Don’t drive at any one speed -- fast or
slow
-- for the first 500 miles (805 km).
Don’t make full-throttle starts.
Avoid making hard stops for the first
200 miles (322 km) or so. During this time
your new brake linings aren’t yet broken
in. Hard stops with new linings can mean
premature wear and earlier replacement.
Follow this breaking-in guideline every
time you get new brake linings.
Don’t tow a trailer during break-in.
See “Towing a Trailer” in the Index for
more information.
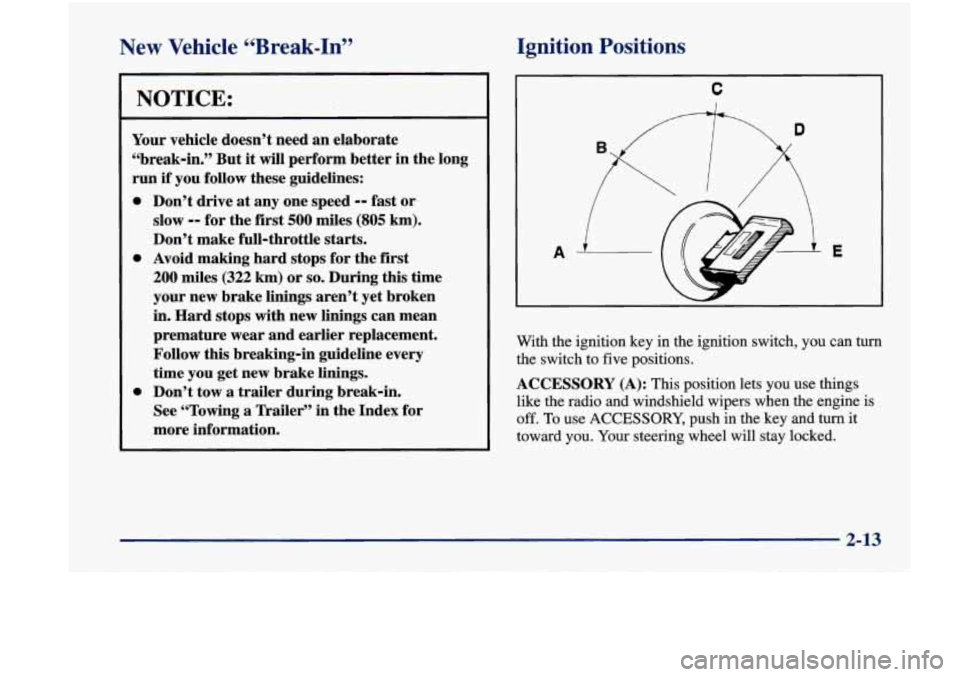
Ignition Positions
I C
D
With the ignition key in the ignition switch, you can turn
the switch to five positions.
ACCESSORY (A): This position lets you use things
like the radio and windshield wipers when the engine is
off. To use ACCESSORY, push in the key and turn it
toward
you. Your steering wheel will stay locked.
2-13
Page 78 of 356
L-OCK (B): Before you put the key into the ignition
switch, the switch
is in LOCK. It is also the only
position in which you can remove the key.
This locks
your steering wheel, ignition and transaxle
(on
automatic transaxle models).
OFF (C): This position unlocks the steering wheel and
ignition, but does not send electrical power to any
accessories. Use this position if your vehicle must be
pushed or towed, but never try to push-start your
vehicle. A warning chime will sound if you open the
driver’s door when the ignition is off and the key is
in the ignition.
RUN (D): This position is where the key returns after
you start your engine and release the switch. The switch
stays in the RUN position when the engine is running.
But even when the engine is not running, you can use
RUN to operate your electrical power accessories, and
to display some instrument panel warning lights.
START (E): This position starts the engine. When the
engine starts, release the key. The ignition switch will
return to
RUN for normal driving.
Note that even
if the engine is not running, the positions
ACCESSORY and RUN are on positions that allow you
to operate your electrical accessories, such as the radio.
NOTICE:
If your key seems stuck in LOCK and you can’t
turn it, be sure you are using the correct key; if
so, is it all the way in? If it is, then turn the
steering wheel left and right while you turn the
key hard. But, turn the key only with your hand.
Using
a tool to force it could break the key or the
ignition switch.
If none of this works, then your
vehicle needs service.
Starting Your Engine
Move your shift lever to PARK (P) or NEUTRAL (N).
Your engine won’t start in any other position
-- that’s a
safety feature.
To restart when you’re already moving,
use NEUTRAL (N) only.
NOTICE:
Don’t try to shift to PARK (P) if your Oldsmobile
is moving. If you do, you could damage the
transaxle. Shift to
PARK (P) only when your
vehicle is stopped.
2-14
Page 79 of 356
Starting Your 2.4 Liter Engine
1. With your foot off the accelerator pedal, turn your
ignition key to
START. When the engine starts, let
go of the key. The idle speed will go down as your
engine gets warm.
NOTICE:
Holding your key in START for longer than
15 seconds at a time will cause your battery to be
drained much sooner. And the excessive heat can
damage your starter motor.
L
2. If the engine doesn’t start right away, and if the
weather is very cold (below
-20” F or -29” C),
push the accelerator pedal about one-quarter of the
way down while you turn the key to START. Do this
until the engine starts.
As soon as it does, let go of
the key.
3. If your engine still won’t start (or starts but then stops), \
it could be flooded with too much gasoline. Try
pushing your accelerator pedal all
the way to the floor
and holding it there as you hold the key in START for
a maximum of
15 seconds. This clears the extra
gasoline from the engine.
If the engine still won’t start
or starts briefly but then stops again, repeat step 1 or 2,
depending on temperature. When the engine starts,
release the key and the accelerator pedal.
NOTICE:
Your engine is designed to work with the
electronics in your vehicle. If you add electrical
parts or accessories, you could change the
way
the engine operates. Before adding electrical
equipment, check with your retailer. If you don’t,
your engine might not perform properly.
If you ever have to have your vehicle towed, see
the part
of this manual that tells how to do it
without damaging your vehicle. See “Towing
Your Vehicle” in the Index.
2-15
Page 80 of 356
Starting Your 3100 Engine
1. Without pushing the accelerator pedal, turn your
ignition key to START. When the engine starts, let
go
of the key. The idle speed will go down as your
engine gets warm.
NOTICE:
Holding your key in START for longer than
15 seconds at a time will cause your battery to
be drained much sooner. And the excessive heat
can damage your starter motor.
2. If your engine won’t start (or starts but then stops), it
could be flooded with too much gasoline. Try
pushing your accelerator pedal all the way to the
floor and holding it there as you hold the key in
START for up to
15 seconds. This clears the extra
gasoline from the engine.
NOTICE:
Your engine is designed to work with the
electronics in your vehicle.
If you add electrical
parts
or accessories, you could change the way
the engine operates. Before adding electrical
equipment, check with your retailer.
If you don’t,
your engine might not perform properly.
If you ever have to have your vehicle towed, see
the part of this manual that tells how to do it
without damaging your vehicle. See “Towing
Your Vehicle” in the Index.
2-16
Page 84 of 356
REVERSE (R): Use this gear to back up.
NOTICE:
Shifting to REVERSE (R) while your vehicle
is moving forward could damage your transaxle.
Shift to REVERSE (R) only after your vehicle
is stopped.
To rock your vehicle back and forth to get out of snow,
ice or sand without damaging your transaxle, see
“Stuck: In Sand,
Mud, Ice or Snow” in the Index.
NEUTRAL
(N): In this position, your engine doesn’t
connect with the wheels.
To restart when you’re
already moving, use NEUTRAL (N) only. Also, use
NEUTRAL
(N) when your vehicle is being towed.
‘A TION:
Shifting out of PARK (P) or NEUTRAL (N) while
your engine is “racing” (running
at high speed)
is dangerous. Unless your foot is firmly on the
brake pedal, your vehicle could move very
rapidly. You could lose control and hit people or
objects. Don’t shift out
of PARK (P) or
NEUTRAL
(N) while your engine is racing.
I NOTICE:
Damage to your transaxle caused by shifting out
of PARK
(P) or NEUTRAL (N) with the engine
racing isn’t covered by your warranty.
2-20
Page 117 of 356
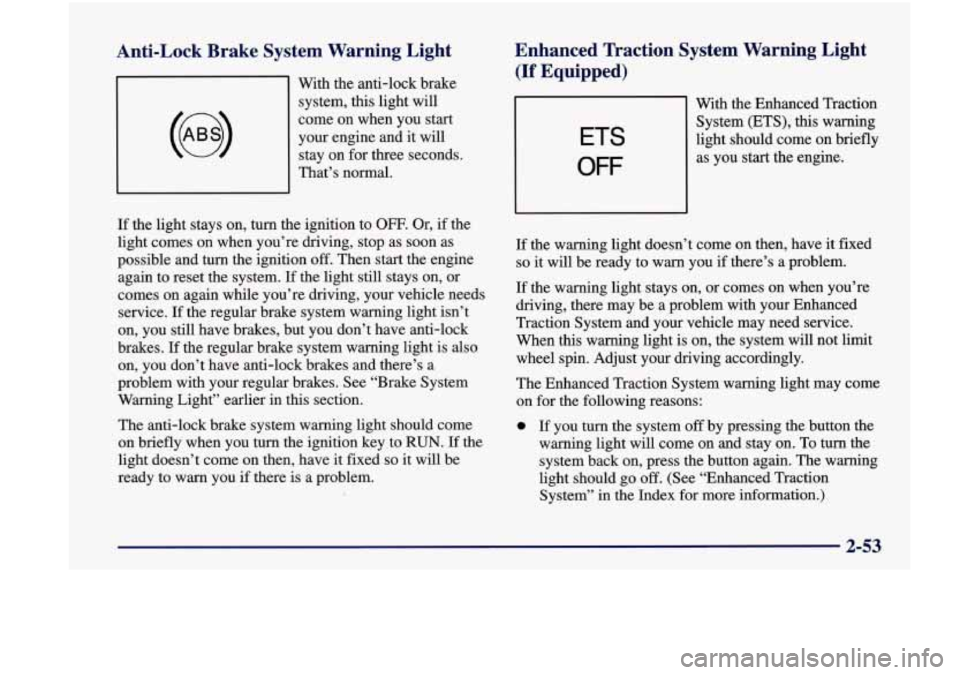
Anti-Lock Brake System Warning Light
With the anti-lock brake
system,
this light will
come on when you start
your engine and it will
stay on for three seconds.
That’s normal.
Enhanced Traction System Warning Light
(If Equipped)
ETS
OFF
With the Enhanced Traction
System (ETS),
this warning
light should come on briefly
as you start the engine.
If the light stays on, turn the ignition to
OFF. Or, if the
light comes on when you’re driving, stop as soon as
possible and turn the ignition
off. Then start the engine
again to reset the system.
If the light still stays on, or
comes on again while you’re driving, your vehicle needs
service.
If the regular brake system warning light isn’t
on, you still have brakes, but you don’t have anti-lock
brakes.
If the regular brake system warning light is also
on, you don’t have anti-lock brakes and there’s a
problem with your regular brakes. See “Brake System
Warning Light” earlier in this section.
The anti-lock brake system warning light should come
on briefly when you turn the ignition key to
RUN. If the
light doesn’t come on then, have it fixed
so it will be
ready to warn you
if there is a problem. If
the warning light doesn’t come on then, have it fixed
so it will be ready to warn you if there’s a problem.
If the warning light stays on, or comes on when you’re
driving, there may be a problem with your Enhanced
Traction System and your vehicle may need service.
When this warning light is on, the system will not limit
wheel spin. Adjust your driving accordingly.
The Enhanced Traction System warning light may come
on for the following reasons:
0 If you turn the system off by pressing the button the
warning light will come on and stay on. To turn the
system back on, press the button again. The warning
light should go
off. (See “Enhanced Traction
System” in the Index for more information.)
2-53
Page 120 of 356
This light should come on, as a check to show you it is
working, when the ignition is
on and the engine is not
running. If the light doesn’t
come on, have it repaired.
This light will also come on during a malfunction in
one
of two ways:
Light Flashing -- A misfire condition has been
detected.
A misfire increases vehicle emissions
and may damage the emission control system on
your vehicle. Retailer
or qualified service center
diagnosis and service may
be required.
Light On Steady -- An emission control system
malfunction has been detected on your vehicle.
Retailer or qualified service center diagnosis and
service may be required.
If the Light Is Flashing
The following may prevent more serious damage
to your vehicle:
Reducing vehicle speed.
0 Avoiding hard accelerations.
Avoiding steep uphill grades.
0 If you are towing a trailer, reduce the amount of
cargo being hauled as soon as it is possible. If
the light stops flashing and remains on steady, see
“If the Light
Is On Steady’’ following.
If the light continues to flash, when it
is safe to do so,
stop the vehicle. Find a safe place to park your vehicle.
Turn the key
off, wait at least 10 seconds and restart the
engine. If the light remains on steady, see “If the Light
Is On Steady” following. If the light is still flashing,
follow the previous steps, and drive the vehicle to your
retailer or qualified service center for service.
If the Light Is On Steady
You may be able to correct the emission system
malfunction by considering the following:
Did you recently put fuel into your vehicle?
If
so, reinstall the fuel cap, making sure to fully install
the cap. The diagnostic system can determine
if the
fuel cap has been left off or improperly installed. A
loose or missing fuel cap will allow
fuel to evaporate
into the atmosphere. A few driving trips with the cap
properly installed should turn the light off.
Did you just drive through a deep puddle of water?
If
so, your electrical system may be wet. The condition
will usually be corrected when the electrical system
dries out. A few driving trips should turn the light off.
2-56
Page 121 of 356
Have you recently changed brands of fuel?
If so, be sure to fuel your vehicle with quality fuel (see
“Fuel” in the Index). Poor fuel quality will cause your
engine not to run as efficiently as designed. You may
notice this as stalling after start-up, stalling when you
put the vehicle into gear, misfiring, hesitation on
acceleration or stumbling on acceleration. (These
conditions may go away once the engine
is warmed up.)
This will be detected by the system and cause the light
to turn
on.
If you experience one or more of these conditions,
change the fuel brand you use. It will require at least one
full tank of the proper fuel to turn the light off.
If none of the above steps have made the light turn off,
have your retailer or qualified service center check the
vehicle. Your retailer has the proper test equipment and
diagnostic tools to fix any mechanical or electrical
problems that may have developed.
Oil Pressure Warning Light
This light tells you if there
could be a problem with
your engine oil pressure.
This light can come on briefly, which is normal and
doesn’t show
a problem:
a
a
As a bulb check, the light comes on when you turn
your key to
RUN and goes off when the engine is
started. If it doesn’t, be sure to have it fixed
so it
will be there to warn you.
For the four cylinder engine, when idling at a stop
sign, the light may blink on and then off. In addition,
if
you make a hard stop, the light may come on for
a moment.
But, when this light
comes on and stays on, it means oil
isn’t going through your engine properly. You could be
low on oil, or you might have some other oil problem.
2-57
Page 139 of 356
Playing a Compact Disc
With the ignition on, insert a disc partway into the slot,
label side up. The player will pull it in and the disc
should begin playing. If you want to insert
a CD when
the ignition is off, first press
EJECT or RCL.
The CD player will play either normal-size discs or
the smaller
8 cm discs with an adapter.
Note that when the disc is inserted,
CD will be
displayed. When the disc is playing, a box will appear
around
CD on the display. If you select a tone setting for
your
CD, it will be activated each time you play a CD.
As each new track starts to play, the track number will
appear in the display.
If
E (error) and a number appear on the radio display
and the disc comes out, it could be that:
E20: The road is too rough. The disc should play
when the road is smoother.
0 E20: The disc is dirty, scratched, wet or upside down.
0 E20: The air is very humid. If so, wait about an hour
If any error occurs repeatedly or if an error can’t be
corrected, please contact your retailer. If your radio
and try
again. displays
an error number, write
it down and provide it to
your retailer when reporting the problem.
REV (1): Press and hold this button to quickly reverse
within
a track. You will hear sound at a reduced volume.
The display will show elapsed time.
FWD (2): Press and hold this button to quickly advance
within a track. You will hear sound at a reduced volume.
The display will show elapsed time.
RDM (5): Press this button to hear the tracks in random,
rather than sequential, order. RDM will appear on the
display when you press this button.
TONE: Press this button to select a tone while playing a
compact disc. The tone will be automatically set
whenever you play a compact disc.
SEEK: Press the down arrow to go to the start of the
current track if more than eight seconds have played.
Press the up arrow to go
to the next track. If you hold
the button or press it more than once, the player will
continue moving rearward or forward through the disc.
SCAN: Press this button to listen to each selection for a
few seconds. The disc will go to the next selection, stop
for a few seconds, then
go on to the next selection. Press
this button again to stop scanning. The sound will mute
while scanning,
SCAN will appear on the display.
3-15