steering Oldsmobile Alero 2003 s Owner's Guide
[x] Cancel search | Manufacturer: OLDSMOBILE, Model Year: 2003, Model line: Alero, Model: Oldsmobile Alero 2003Pages: 354, PDF Size: 16.74 MB
Page 203 of 354
Notice: Spinning your wheels can destroy parts of
your vehicle as well as the tires.
If you spin the
wheels
too fast while shifting your transaxle back
and forth, you can destroy your transaxle. See
“Rocking Your Vehicle
To Get It Out.”
For information about using tire chains on your vehicle,
see Tire
Chains on page 5-60.
Rocking Your Vehicle To Get It Out
First, turn your steering wheel left and right. That will
clear the area around your front wheels. Then shift back
and forth between REVERSE
(R) and a forward gear
(or with a manual transaxle, between FIRST
(1) or
SECOND
(2) and REVERSE (R)), spinning the wheels
as little as possible. Release the accelerator pedal
while you shift, and press lightly on the accelerator pedal
when the transaxle is in gear. By slowly spinning your
wheels in the forward and reverse directions, you
will cause a rocking motion that may free your vehicle.
H
that doesn’t get you out after a few tries, you may
need to be towed out. If you do need to be towed
out
see “Towing Your Vehicle’’ following.
4-30
Page 206 of 354
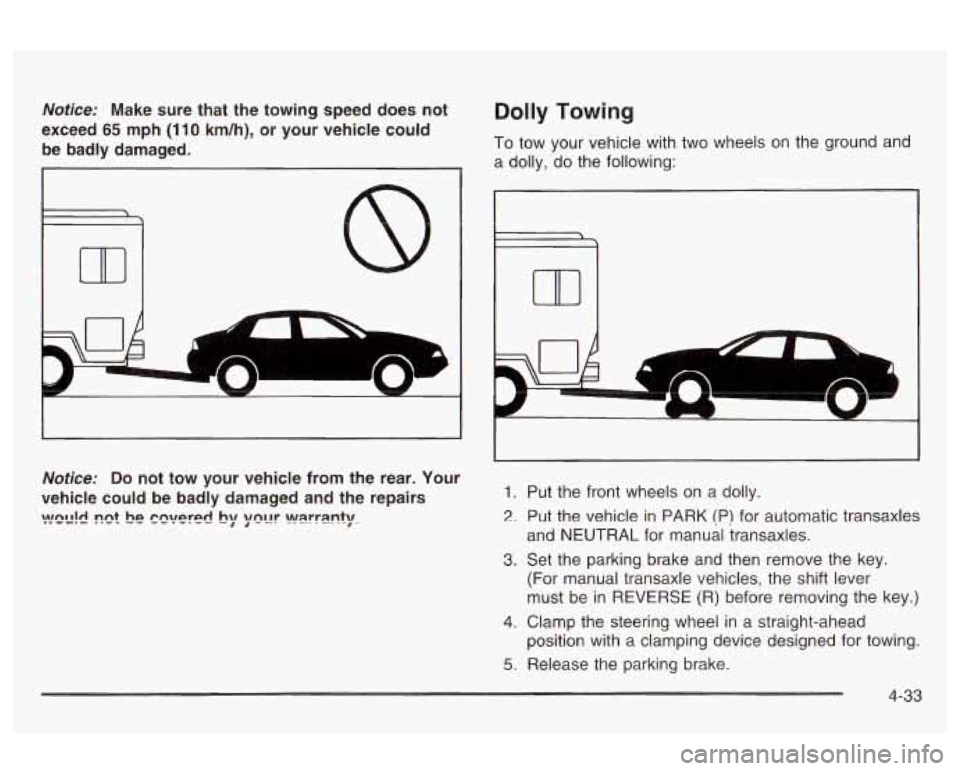
Notice: Make sure that the towing speed does not
exceed
65 mph (1 10 km/h), or your vehicle could
be badly damaged.
Dolly Towing
To tow your vehicle with two wheels on the ground and
a dolly, do the following:
Notice:
Do not tow your vehicle from the rear. Your
vehicle could be badly damaged and the repairs
!?!!X!d !?e! he Pn~!PlPc! by ;mL!r wsrrsnty.
1. Put the front wheels on a dolly.
2. Put the vehicle in PARK (P) for automatic transaxles
and NEUTRAL for manual transaxles.
3. Set the parking brake and then remove the key.
(For manual transaxle vehicles, the shift lever
must be in REVERSE
(R) before removing the key.)
4. Clamp the steering wheel in a straight-ahead
position with a clamping device designed for towing.
5. Release the parking brake.
4-33
Page 213 of 354
Driving with a Trailer
Towing a trailer requires a certain amount of experience.
Before setting out for the open road, you’ll want to get
to know your rig. Acquaint yourself with the feel of
handling and braking with the added weight of the trailer.
And always keep in mind that the vehicle you are
driving is now a good deal longer and not nearly as
responsive as your vehicle is by itself.
Before you start, check the trailer hitch and platform
(and attachments), safety chains, electrical connector,
lamps, tires and mirror adjustment.
If the trailer has
electric brakes, start your vehicle and trailer moving and
then apply the trailer brake controller by hand to be
sure the brakes are working. This lets you check your
electrical connection at the same time.
During your trip, check occasionally to be sure that the
load is secure, and that the lamps and any trailer
brakes are still working.
Following Distance
Stay at least twice as far behind the vehicle ahead as
you would when driving your vehicle without a trailer.
This can help you avoid situations that require
heavy braking and sudden turns.
Passing
You’ll need more passing distance up ahead when
you’re towing a trailer. And, because you’re a good deal
longer, you’ll need to go much farther beyond the
passed vehicle before you can return to your lane.
Backing Up
Hold the bottom of the steering wheel with one hand.
Then, to move the trailer to the left, just move that hand
to the left. To move the trailer to the right, move your
hand to the right. Always back up slowly and,
if possible,
have someone guide you.
Making Turns
Notice: Making very sharp turns while trailering
could cause the trailer to come in contact with the
vehicle. Your vehicle could be damaged. Avoid
making very sharp turns while trailering.
When you’re turning with a trailer, make wider turns
than normal.
Do this so your trailer won’t strike
soft shoulders, curbs, road signs, trees or other objects.
Avoid jerky or sudden maneuvers. Signal well in
advance.
4-40
Page 216 of 354
Section 5 Service and Appearance Care
Service ........................................................... -5-3
Doing Your Own Service Work ......................... 5.4
Adding Equipment to the Outside
of Your
Vehicle
..................................................... -5-4
Fuel
............................................................... -5-5
Gasoline Octane ........................................... -5-5
Gasoline Specifications .................................... 5.5
California Fuel .............................................. -5-6
Additives
...................................................... -5-6
Fuels in Foreign Countries
.............................. -5-6
Filling Your Tank
..................................... 5-7
Fillins a Portable Fuel Container .. ...... 5.8
the Hood
...................................................... 5-9
Hood Release .............................................. 5-10
Engine Compartment Overview ....................... 5-12
Engine Oil
.................................................. -5-1 5
Au'romaiic Transaxie Fiuia A-LL
Manual Transaxle Fluid .................................. 5-22
Checking
Things Under
Engine Air CleanedFilter
................................ 5-21 - ^^ .............................
Hydraulic Clutch ........................................... 5-22
Engine Overheating
....................................... 5-26
Cooling System
............................................ 5-28
Power Steering Fluid
..................................... 5-35
Windshield Washer Fluid
............ ............ -5-36
Brakes
...................................................... -5-38
Battery
........................................................ 5-41
Jump Starting
.............................................. 5-42
Engine Coolant
............................................. 5-23
Headlamp Aiming
........................................... 5-47
Bulb Replacement .......................................... 5-49
Haloger;
!3L;lbs .............................................. 5-49
Headlamps .................. .... ......... 5-49
Front Turn Signal and
Parking Lamps
.......... ......... 5-50
Center High-Mounted Stoplamp (CHMSL)
.................................... 5-50
Taillamps, Turn Signal, and Stoplamps ............ 5-50 n-.-~ n ..II-- nepmwzIIIe111 DUIU~ J-J 1 rc4 .......................................
5- 1
Page 228 of 354
A. Engine Coolant Surge Tank
B. Engine Oil Dipstick
C. Engine Oil Fill Cap
D. Brake Fluid Reservoir
E. Power Steering Fluid Reservoir F. Engine Compartment Fuse Block
G. Engine Air
Cleaner/Filter
H. Battery
I. Windshield Washer Fluid Reservoir
5-1 3
Page 229 of 354
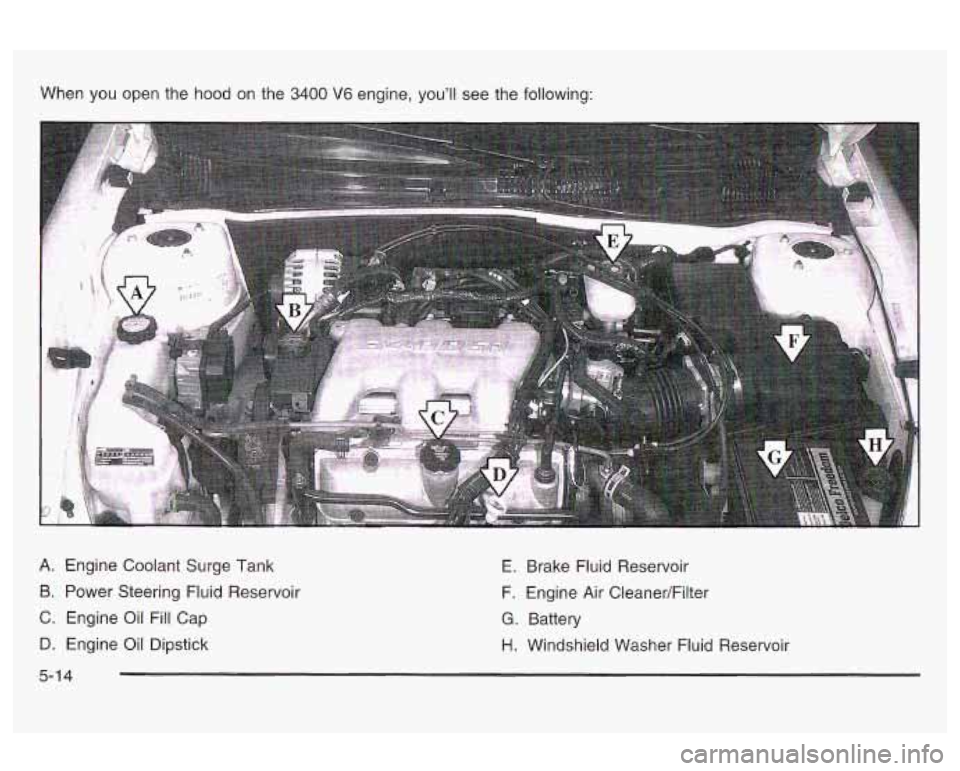
When you open the hood on the 3400 V6 engine, you'll see the following:
A. Engine Coolant Surge Tank
B. Power Steering Fluid Reservoir
C. Engine Oil Fill Cap
D. Engine Oil Dipstick E.
Brake Fluid Reservoir
F. Engine Air Cleaner/Filter
G. Battery
H. Windshield Washer Fluid Reservoir
5-1 4
Page 250 of 354
Power Steering Fluid
5. Then replace the pressure cap. Be sure the
pressure cap is hand-tight and fully seated.
See your dealer,
if necessary.
A L
L.
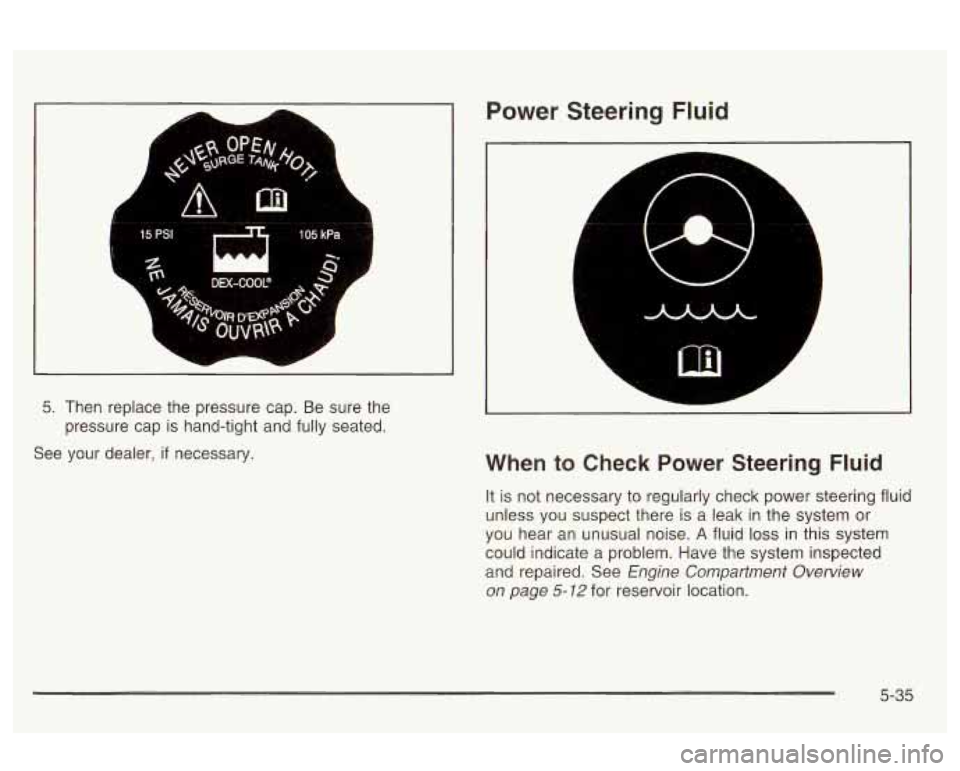
When to Check Power Steering Fluid
It is not necessary to regularly check power steering fluid
unless you suspect there is a leak in the system or
you hear an unusual noise.
A fluid loss in this system
could indicate a problem. Have the system inspected
and repaired. See
Engine Compartment Overview
on page
5-72 for reservoir location.
5-35
Page 251 of 354
How to Check Power Steering Fluid
Turn the key off, let the engine compartment cool down,
wipe the cap and the top of the reservoir clean, then
unscrew the cap and wipe the dipstick with a clean rag.
Replace the cap and completely tighten it. Then
remove the cap again and look at the fluid level on the
dipstick.
The level should be at the
FULL COLD mark. If
necessary, add only enough fluid
to bring the level up to
the mark.
What to Use
To determine what kind of fluid to use, see Part Dr
Recommended Fluids and Lubricants on page 6- 15.
Always use the proper fluid. Failure to use the proper
fluid can cause leaks and damage hoses and seals.
Windshield Washer Fluid
What to Use
When you need windshield washer fluid, be sure to read
the manufacturer’s instructions before use.
If you will
be operating your vehicle in an area where the
temperature may fall below freezing, use
a fluid that has
sufficient protection against freezing. See
Engine
Compartment Overview on page
5-12 for reservoir
location.
Adding Washer Fluid
Your vehicle has a low
washer fluid telltale that
will come on in the
WASHER
FLU ID
instrument panel cluster
when the washer fluid
is low.
See
Low Washer Fluid Warning Light on page 3-36 for
more information.
5-36
Page 276 of 354
Notice: If your vehicle has a tire size other than
P225/50R16 size tires, use tire chains only where
legal and only when you must. Use only
SAE Class
“S” type chains that are the proper size for your
tires. Install them on the front tires and tighten them
as tightly as possible with the ends securely
fastened. Drive slowly and follow the chain manufacturer’s instructions.
If you can hear the
chains contacting your vehicle, stop and retighten
them.
If the contact continues, slow down until
it stops. Driving too fast or spinning the wheels with
chains on will damage your vehicle.
If a Tire Goes Flat
It’s unusual for a tire to “blow out” while you’re driving,
especially
if you maintain your tires properly. If air
goes out of a tire, it’s much more likely to leak out
slowly. But
if you should ever have a “blowout”, here are
a few tips about what to expect and what to do:
If a front tire fails, the flat tire will create a drag that
pulls the vehicle toward that side. Take your foot off the
accelerator pedal and grip the steering wheel firmly.
Steer to maintain lane position, and then gently brake to
a stop well out of the traffic lane.
A rear blowout, particularly on a curve, acts much like a
skid and may require the same correction you’d use
ir; a skid. In any rear blowoi:, rem0t.e yoi; foot from the
accelerator pedal. Get the vehicle under control by
steering the way you want the vehicle to go. It may be
very bumpy and noisy, but you can still steer. Gently
brake to a stop
- well off the road if possible.
If a tire goes flat, the next part shows how to use your
iackinq equipment to chanqe a flat tire safely.
5-61
Page 298 of 354
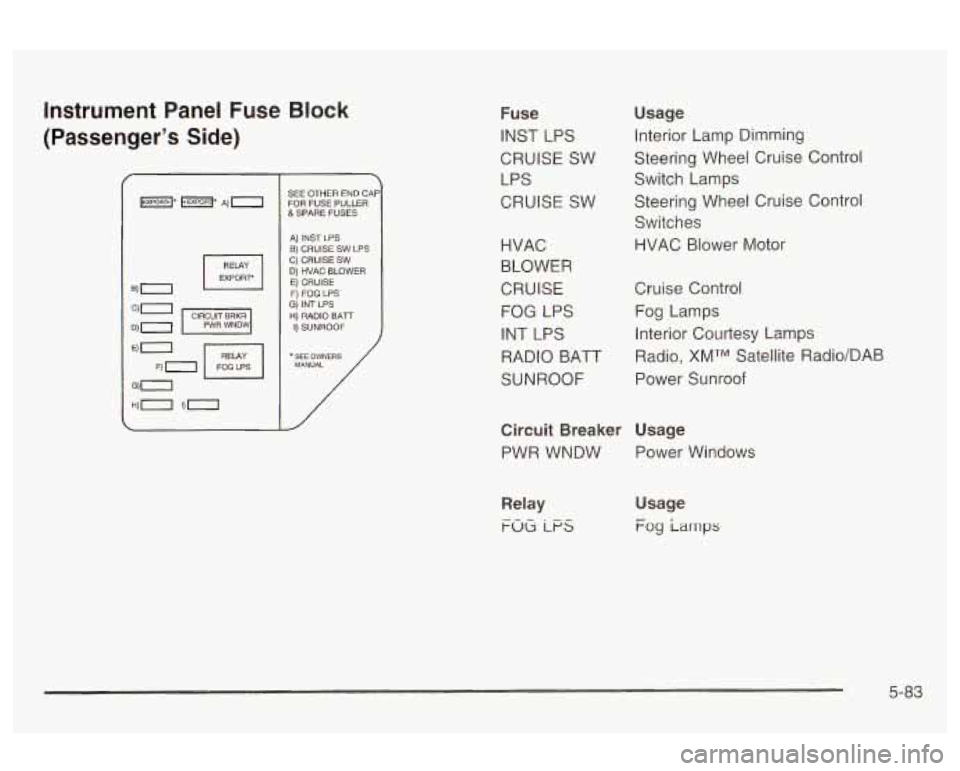
Instrument Panel Fuse Block
(Passenger’s Side)
SEE OTHER END CAF FOR FUSE PULLER &SPARE FUSES
A) INST LPS
C) CRUISE
SW B) CRUISE SW LPS
0) HVAC BLOWER E) CRUISE F) FOG LPS G) INT LPS H) RADIO BATr I) SUNROOF
* SEE OWNERS MANUAL /
1’
Fuse
INST LPS
CRUISE SW LPS
CRUISE SW Usage
Interior Lamp Dimming
Steering Wheel Cruise Control
Switch Lamps
Steering Wheel Cruise Control
Switches
HVAC Blower Motor
HVAC
BLOWER
CRUISE Cruise Control
FOG LPS
Fog Lamps
INT LPS Interior Courtesy Lamps
RADIO BAT Radio, XMTM Satellite Radio/DAB
SUNROOF Power Sunroof
Circuit Breaker Usage
PWR WNDW Power Windows
Relay
FOG LFS
Usage
Fog iarnps
5-83