ECO mode Oldsmobile Alero 2003 Owner's Manuals
[x] Cancel search | Manufacturer: OLDSMOBILE, Model Year: 2003, Model line: Alero, Model: Oldsmobile Alero 2003Pages: 354, PDF Size: 16.74 MB
Page 78 of 354
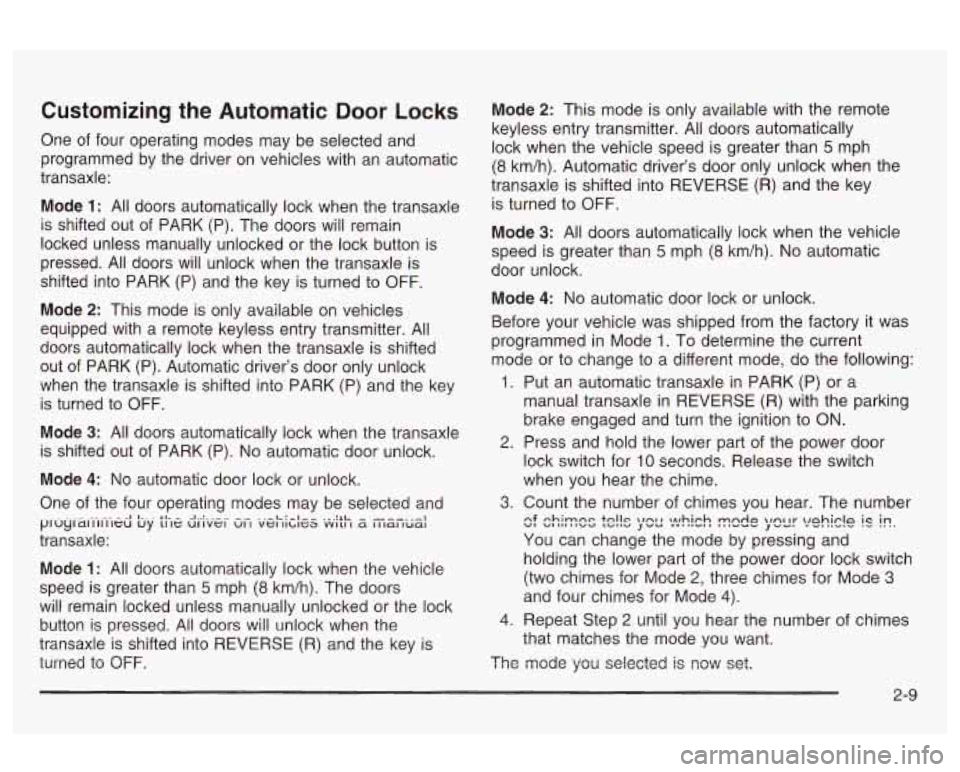
Customizing the Automatic Door Locks
One of four operating modes may be selected and
programmed by the driver on vehicles with an automatic
transaxle:
Mode
1: All doors automatically lock when the transaxle
is shifted out of PARK (P). The doors will remain
locked unless manually unlocked or the lock button is
pressed.
All doors will unlock when the transaxle is
shifted into PARK (P) and the key is turned to
OFF.
Mode 2: This mode is only available on vehicles
equipped with a remote keyless entry transmitter.
All
doors automatically lock when the transaxle is shifted
out of PARK (P). Automatic driver’s door only unlock
when the transaxle
is shifted into PARK (P) and the key
is turned to
OFF.
Mode 3: All doors automatically lock when the transaxle
is shifted out of PARK (P).
No automatic door unlock.
Mode
4: No automatic door lock or unlock.
One of the four operating modes may be selected and
transaxle: Mode
1: All doors automatically lock when the vehicle
speed is greater than
5 mph (8 km/h). The doors
will remain locked unless manually unlocked or the lock
huffon is pressed. A!! doors will unlock when the
transaxle
is shifted into REVERSE (R) and the key is
turned to
OFF.
^I I-. . 11- - -I..:. _^__ -.- .-.l-:-1-- ... :*L. -^_. .,I ~IUCJI~I I 11 II~U uy 11 IG UI IVGI VI I VGI IILIGCI VVILI I 6 I I la1 lual
Mode 2: This mode is only available with the remote
keyless entry transmitter. All doors automatically
lock when the vehicle speed is greater than
5 mph
(8 km/h). Automatic driver’s door only unlock when the
transaxle is shifted into REVERSE (R) and the key
is turned to
OFF.
Mode 3: All doors automatically lock when the vehicle
speed is greater than
5 mph (8 km/h). No automatic
door unlock.
Mode
4: No automatic door lock or unlock.
Before your vehicle was shipped from the factory
it was
programmed in Mode
1. To determine the current
mode or to change to a different mode, do the following:
1.
2.
3.
4.
Put an automatic transaxle in PARK (P) or a
manual transaxle
in REVERSE (R) with the parking
brake engaged and turn the ignition to
ON.
Press and hold the lower part of the power door
lock switch for
10 seconds. Release the switch
when you hear the chime.
Count the number of chimes you hear. The number
You can change the mode by pressing and
holding the lower part of the power door lock switch
(two chimes for Mode
2, three chimes for Mode 3
and four chimes for Mode 4).
Repeat Step 2 until you hear the number of chimes
that matches the mode you want.
c! chirzcs tc!!s yc: v:!ic!? n?!x!e ;‘c)L!!- vehk!e In in-
The mode you selected is now set.
2-9
Page 125 of 354
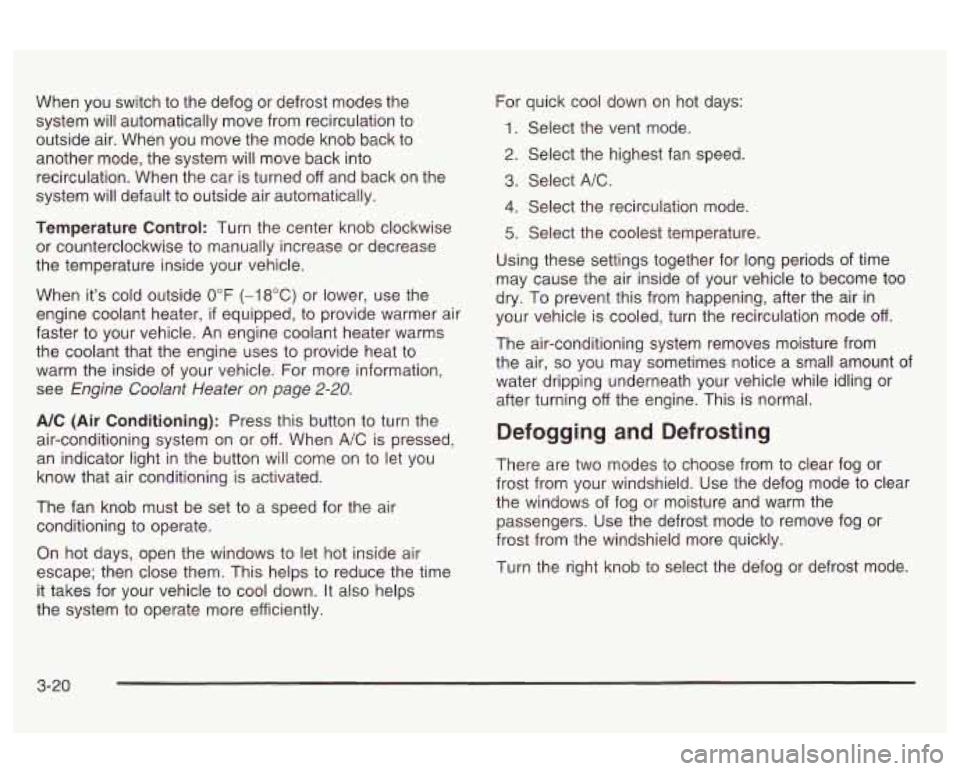
When you switch to the defog or defrost modes the
system will automatically move from recirculation to
outside air. When you move the mode knob back to
another mode, the system will move back into
recirculation. When the car is turned off and back on the
system will default to outside air automatically.
Temperature Control: Turn the center knob clockwise
or counterclockwise to manually increase or decrease
the temperature inside your vehicle.
When it’s cold outside
0°F (-18°C) or lower, use the
engine coolant heater,
if equipped, to provide warmer air
faster to your vehicle. An engine coolant heater warms
the coolant that the engine uses to provide heat to
warm the inside of your vehicle. For more information,
see
Engine Coolant Heater on page 2-20.
A/C (Air Conditioning): Press this button to turn the
air-conditioning system on or off. When
A/C is pressed,
an indicator light in the button will come on to let you
know that air conditioning is activated.
The fan knob must be set to a speed for the air
conditioning to operate.
On hot days, open the windows to let hot inside air
escape; then close them. This helps to reduce the time
it takes for your vehicle to cool down. It also helps
the system to operate more efficiently. For
quick cool down
on hot days:
1. Select the vent mode.
2. Select the highest fan speed.
3. Select A/C.
4. Select the recirculation mode.
5. Select the coolest temperature.
Using these settings together for long periods of time
may cause the air inside of your vehicle to become too
dry. To prevent this from happening, after the air in
your vehicle is cooled, turn the recirculation mode off.
The air-conditioning system removes moisture from
the air,
so you may sometimes notice a small amount of
water dripping underneath your vehicle while idling or
after turning off the engine. This is normal.
Defogging and Defrosting
There are two modes to choose from to clear fog or
frost from your windshield. Use the defog mode to clear
the windows of fog or moisture and warm the
passengers. Use the defrost mode to remove fog or
frost from the windshield more quickly.
Turn the right knob to select the defog or defrost mode.
3-20
Page 145 of 354
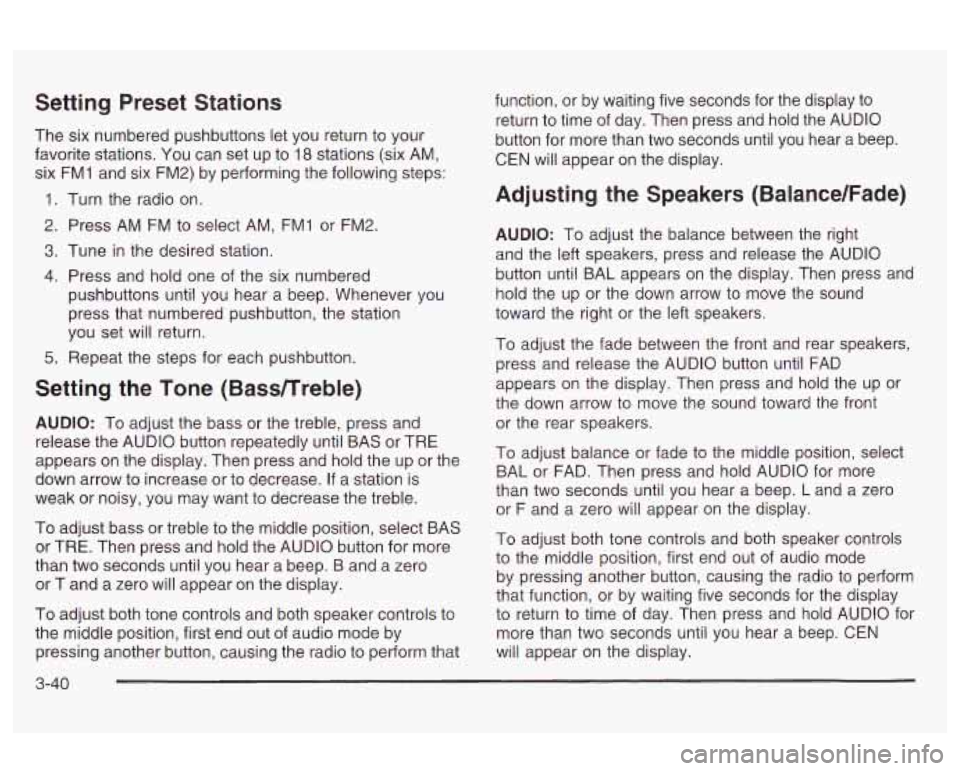
Setting Preset Stations
The six numbered pushbuttons let you return to your
favorite stations.
You can set up to 18 stations (six AM,
six FMI and six FM2) by performing the following steps:
1. Turn the radio on.
2. Press AM
FM to select AM, FMI or FM2.
3. Tune in the desired station.
4. Press and hold one of the six numbered
pushbuttons until you hear a beep. Whenever you
press that numbered pushbutton, the station
you set will return.
5. Repeat the steps for each pushbutton.
Setting the Tone (Bassnreble)
AUDIO: To adjust the bass or the treble, press and
release the AUDIO button repeatedly until BAS or TRE
appears on the display. Then press and hold the up or the
down arrow to increase or to decrease.
If a station is
weak or noisy, you may want to decrease the treble.
To adjust bass or treble to the middle position, select BAS
or TRE. Then press and hold the AUDIO button for more
than two seconds until you hear a beep. B and a zero
or T and a zero will appear on the display.
To adjust both tone controls and both speaker controls to
the middle position, first end out of audio mode by
pressing another button, causing the radio to perform that function, or
by waiting five seconds for the display to
return to time of day. Then press and hold the AUDIO
button for more than two seconds until you hear a beep.
CEN will appear on the display.
Adjusting the Speakers (Balance/Fade)
AUDIO: To adjust the balance between the right
and the left speakers, press and release the AUDIO
button until BAL appears on the display. Then press and
hold the up or the down arrow to move the sound
toward the right or the left speakers.
To adjust the fade between the front and rear speakers,
press and release the AUDIO button until FAD
appears on the display. Then press and hold the up or
the down arrow to move the sound toward the front
or the rear speakers.
To adjust balance or fade to the middle position, select
BAL or FAD. Then press and hold AUDIO for more
than two seconds until you hear a beep.
L and a zero
or
F and a zero will appear on the display.
To adjust both tone controls and both speaker controls
to the middle position, first end out of audio mode
by pressing another button, causing the radio to perform
that function, or by waiting five seconds for the display
to return to time
of day. Then press and hold AUDIO for
more than two seconds until you hear a beep. CEN
will appear on the display.
3-40
Page 149 of 354
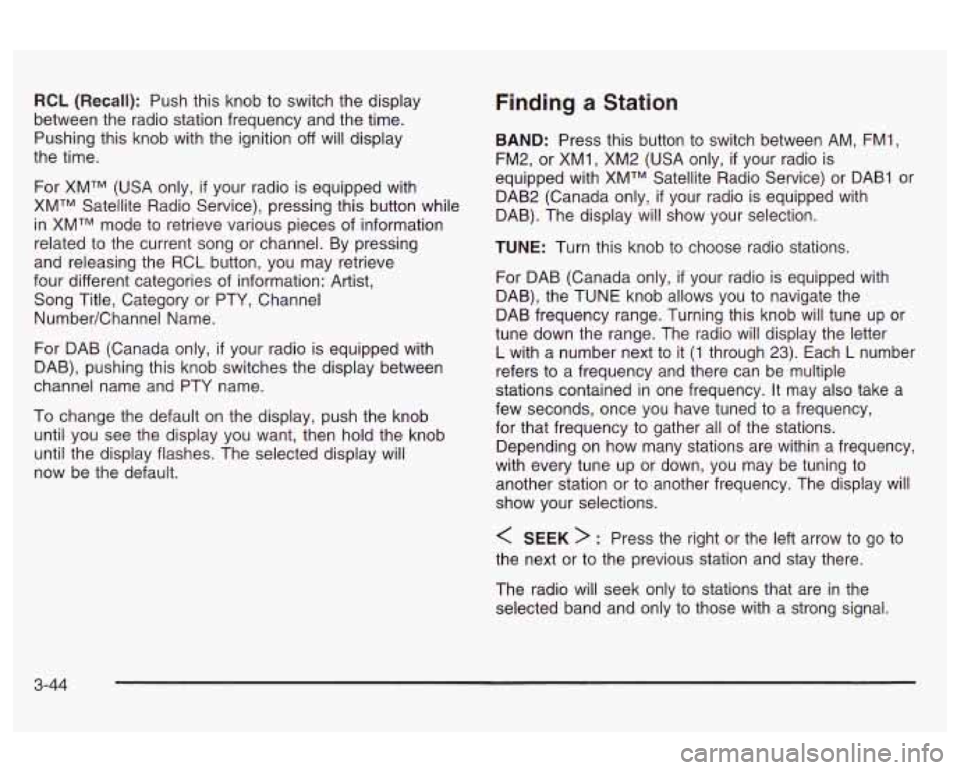
RCL (Recall): Push this knob to switch the display
between the radio station frequency and the time.
Pushing this knob with the ignition
off will display
the time.
For XMTM (USA only,
if your radio is equipped with
XMTM Satellite Radio Service), pressing this button while
in XMTM mode to retrieve various pieces of information
related to the current song or channel. By pressing
and releasing the RCL button, you may retrieve
four different categories of information: Artist,
Song Title, Category or PTY, Channel
NumberKhannel Name.
For DAB (Canada only,
if your radio is equipped with
DAB), pushing this knob switches the display between
channel name and PTY name.
To change the default on the display, push the knob
until you see the display you want, then hold the knob
until the display flashes. The selected display will
now be the default.
Finding a Station
BAND: Press this button to switch between AM, FMI,
FM2, or XMI, XM2 (USA only,
if your radio is
equipped with XMTM Satellite Radio Service) or DAB1 or
DAB2 (Canada only,
if your radio is equipped with
DAB). The display will show your selection.
TUNE: Turn this knob to choose radio stations.
For DAB (Canada only,
if your radio is equipped with
DAB), the TUNE knob allows you to navigate the
DAB frequency range. Turning this knob will tune up or
tune down the range. The radio will display the letter
L with a number next to it (1 through 23). Each L number
refers to a frequency and there can be multiple
stations contained in one frequency. It may also take a
few seconds, once you have tuned to a frequency,
for that frequency to gather all of the stations.
Depending on how many stations are within a frequency,
with every tune up or down, you may be tuning to
another station or to another frequency. The display
will
show your selections.
< SEEK > : Press the right or the left arrow to go to
the next or to the previous station and stay there.
The radio will seek only to stations that are in the
selected band and only to those with a strong signal.
3-44
Page 159 of 354
RCL (Recall): Push this knob to switch the display
between the radio station frequency and the time.
Pushing this knob with the ignition off
Will display
the time.
For XMTM (USA only,
if your radio is equipped with
XMTM Satellite Radio Service), pressing this button while
in XMTM mode to retrieve various pieces of information
related to the current song or channel. By pressing
and releasing the RCL button, you may retrieve
four different categories of information: Artist,
Song Title, Category or PTY, Channel
NumberEhannel Name.
For DAB (Canada only,
if your radio is equipped with
DAB), pushing this knob switches the display between
channel name and PTY name.
To change the default on the display, push the knob
until you see the display you want, then hold the knob
until the display flashes. The selected display will
now be the default.
Finding a Station
BAND: Press this button to switch between AM, FM,
FM2, or XMI
, XM2 (USA only, if your radio is equipped
with XMTM Satellite Radio Service) or DABI, DAB2
(Canada only,
if your radio is equipped with DAB). The
display will show your selection.
TUNE: Turn this knob to select radio stations.
For DAB (Canada only,
if your radio is equipped with
DAB), the TUNE knob allows you to navigate the
DAB frequency range. Turning this knob will tune up or
tune down the range. The radio will display the letter
L with a number next to it (1 through 23). Each L number
refers to a frequency and there can be multiple
stations contained in one frequency. It may also take a
few seconds, once you have tuned to a frequency,
for that frequency
to gather all of the stations.
Depending on how many stations are within a frequency,
with every tune up or down, you may be tuning to
another station or to another frequency. The display will
show your selections.
< SEEK > : Press the right or the left arrow to go to
the next or to the previous station and stay there.
The radio will seek only to stations that are
in the
selected band and only to those with a strong signal.
3-54
Page 162 of 354
BAND (Alternate Frequency): Alternate frequency
allows the radio to switch to a stronger station with the
same program type. Press and hold BAND for two
seconds to turn alternate frequency on. AF ON
will appear on the display. The radio may switch to
stronger stations. Press and hold BAND again for two
seconds to turn alternate frequency
off. AF OFF
will appear on the display. The radio will not switch to
other stations.
This function does not apply for
XMTM or DAB.
Setting Preset PTYs (RDS Only)
The six numbered pushbuttons let you return to your
favorite program types (PTYs). These pushbuttons have
factory PTY presets. You can set up to 12 PTYs
(six FMI and six FM2) by performing the following steps:
Press BAND to select FMI or FM2.
Press the P-TYPE button to activate program type
select mode.
Turn the P-TYPE knob to select a PTY.
Press and hold one of the six numbered
pushbuttons until you hear a beep. Whenever you
press that numbered pushbutton, the PTY you
set will return.
RDS and DAB Messages
ALERT!: Alert warns of local or national emergencies.
When an alert announcement comes on the current
radio station, ALERT! will appear on the display. You will
hear the announcement, even
if the volume is muted
or a cassette tape or compact disc
is playing. If the
cassette tape or compact disc player is playing, play will
stop during the announcement. You will not be able
to turn
off alert announcements.
ALERT! will not be affected by tests of the emergency
broadcast system. This feature is not supported by
all RDS stations.
INFO (Information): If the current station has a
message, INFO will appear on the display. Press this
button to see the message. The message may display
the artist and song title, call in phone numbers, etc.
If the whole message is not displayed, parts of it
will appear every three seconds. To scroll through the
message at your own speed, press the INFO button
i-epeaidiy.
A II~W yruup ui wvr& wiii appear on
the display with each press. Once the complete
message has been displayed, INFO will disappear from
the display until another new message is received.
The old message can be displayed by pressing
the INFO button until a new message is received or a
different station
is tuned to.
5. Repeat the steps for each pushbutton.
3-57
Page 168 of 354
Playing a Compact Disc
With the ignition on, insert a disc partway into the slot,
label side up. The player will pull it in and the disc
should begin playing. If you want to insert a CD when
the ignition is
off, first press the eject button or the
RCL knob.
When the disc is inserted, the CD symbol will be
displayed.
If you select an EQ setting for your CD, it will
be activated each time you play a CD.
As each new track starts to play, the track number will
appear on the display.
If an error appears on the display, see “Compact Disc
Messages” later in this section.
1 REV (Reverse): Press and hold this pushbutton to
reverse quickly within a track.
You will hear sound at a
reduced volume. Release it to play the passage. The
display will show elapsed time.
2 FWD (Forward): Press and hold this pushbutton to
advance quickly within a track. You will hear sound at a
reduced voiume. Helease
it to play the passage. The
display
will show elapsed time.
4 RDM (Random): Press this pushbutton to hear the
tracks in random, rather than sequential, order.
RDM and the track number will appear on the display.
Press this pushbution again io turn off ranciom mode. AUTO
EQ (Automatic
Equalizer): Press this button to
select the desired equalization setting while playing a
compact disc. The equalization will be automatically set
whenever you play a compact disc. See “AUTO
EQ”
listed previously for more information.
< SEEK > : Press the left arrow to go to the start of
the current track
if more than eight seconds have
played. Press the right arrow to go to the next track.
If
you hold this button or press it more than once, the
player will continue moving backward or forward through
the disc.
< SCAN > : Press and hold either arrow for more
than two seconds until you hear a beep and SCAN
appears on the display. The disc will go to the next
track, play for a few seconds, then go on to the
next track. SCAN and the track number will appear on
the display. Press this button again to stop scanning.
RCL (Recall): Press this knob to see how long the
current track has been playing.
To change the default
on the display (track
or elapsed time), push the
knob until you see the display you want, then hold the
knob until the display flashes. The selected display
will now be the default. While elapsed time is showing,
EL TM will appear on the display.
BAND: Press this button to listen to the radio when a
CD is piaying.
3-63
Page 327 of 354
We will provide the following services during the
Bumper-to-Bumper warranty period, at no expense
to you:
Fuel delivery
Lock-out service (identification required)
Tow to the nearest dealership for warranty service
or in the event of a vehicle-disabling accident
Flat tire change
Jump starts
Minor repairs to disabled vehicles
Assistance when vehicle is mired in sand, mud
or snow
Trip routing
Trip interruption expense benefits
Dealership locator service
Oldsmobile Roadside Assistance specifically excludes
coverage for mounting, dismounting or changing
of snow
tires, chains or other traction devices.
In some cases, where service is impractical, the driver
may be authorized to obtain other service for which
reimbursement is provided. In
many instances, mechanical failures are covered
under Oldsmobile’s comprehensive warranty. However,
when other services are utilized, our Roadside
Assistance Representatives will explain any payment
obligations you might incur.
For prompt and efficient assistance when calling, please
provide the following to the Roadside Assistance
Representative:
Location of vehicle
Telephone number of your location
Vehicle model, year and color
Mileage of vehicle
Vehicle Identification Number (VIN)
Vehicle license plate number
Oldsmobile reserves the right to limit services or
reimbursement to an owner or driver when,
in
Oldsmobile’s judgement, the claims become excessive
in frequency or type of occurrence.
While we hope you never have the occasion to use our
service, it is added security while traveling for you
and your family. Remember, we’re only a phone
call away. Oldsmobile Roadside Assistance:
1 -800-442-OLDS (6537), text telephone (TTY)
users, call 1-888-889-2438.
7-6