service indicator Oldsmobile Alero 2004 Owner's Manuals
[x] Cancel search | Manufacturer: OLDSMOBILE, Model Year: 2004, Model line: Alero, Model: Oldsmobile Alero 2004Pages: 360, PDF Size: 2.49 MB
Page 1 of 360
Seats and Restraint Systems........................... 1-1
Front Seats
............................................... 1-2
Rear Seats
............................................... 1-8
Safety Belts
.............................................. 1-9
Child Restraints
.......................................1-32
Supplemental Restraint
System (SRS)
......................................1-54
Restraint System Check
............................1-60
Features and Controls..................................... 2-1
Keys
........................................................ 2-2
Doors and Locks
....................................... 2-7
Windows
.................................................2-14
Theft-Deterrent Systems
............................2-16
Starting and Operating Your Vehicle
...........2-16
Mirrors
....................................................2-33
Storage Areas
.........................................2-34
Sunroof
..................................................2-35
Instrument Panel............................................. 3-1
Instrument Panel Overview
.......................... 3-2
Climate Controls
......................................3-19
Warning Lights, Gages and Indicators
.........3-23
Audio System(s)
.......................................3-39Driving Your Vehicle....................................... 4-1
Your Driving, the Road, and Your Vehicle
..... 4-2
Towing
...................................................4-31
Service and Appearance Care.......................... 5-1
Service
..................................................... 5-3
Fuel
......................................................... 5-4
Checking Things Under the Hood
................. 5-9
Headlamp Aiming
.....................................5-48
Bulb Replacement
....................................5-50
Windshield Wiper Blade Replacement
.........5-53
Tires
......................................................5-54
Appearance Care
.....................................5-81
Vehicle Identification
.................................5-89
Electrical System
......................................5-89
Capacities and Specifications
.....................5-95
Maintenance Schedule..................................... 6-1
Maintenance Schedule
................................ 6-2
Customer Assistance Information.................... 7-1
Customer Assistance Information
.................. 7-2
Reporting Safety Defects
...........................7-11
Index................................................................ 1
2004 Oldsmobile Alero Owner ManualM
Page 105 of 360
Instrument Panel Overview...............................3-2
Hazard Warning Flashers................................3-4
Other Warning Devices...................................3-5
Horn.............................................................3-5
Tilt Wheel.....................................................3-5
Turn Signal/Multifunction Lever.........................3-6
Windshield Wiper Lever...................................3-9
Cruise Control..............................................3-10
Exterior Lamps.............................................3-14
Interior Lamps..............................................3-16
Accessory Power Outlets...............................3-18
Ashtrays and Cigarette Lighter........................3-19
Climate Controls............................................3-19
Climate Control System.................................3-19
Outlet Adjustment.........................................3-22
Warning Lights, Gages and Indicators.............3-23
Instrument Panel Cluster................................3-24
Speedometer and Odometer...........................3-25
Tachometer.................................................3-25
Safety Belt Reminder Light.............................3-26
Air Bag Readiness Light................................3-26
Charging System Light..................................3-27
Up-Shift Light...............................................3-28
Brake System Warning Light..........................3-28
Anti-Lock Brake System Warning Light.............3-29
Enhanced Traction System Warning Light.........3-30
Enhanced Traction System Active Light............3-31
Engine Coolant Temperature Gage..................3-31
Low Coolant Warning Light............................3-32Malfunction Indicator Lamp.............................3-32
Oil Pressure Light.........................................3-35
Change Engine Oil Light................................3-36
Security Light...............................................3-37
Cruise Control Light......................................3-37
Low Washer Fluid Warning Light.....................3-37
Service Vehicle Soon Light............................3-38
Fuel Gage...................................................3-38
Audio System(s).............................................3-39
Setting the Time for Radios without Radio
Data Systems (RDS)..................................3-39
Setting the Time for Radios with Radio Data
Systems (RDS).........................................3-40
Radio with CD (Base Level)...........................3-40
Radio with CD (Up Level)..............................3-45
Radio with Cassette and CD..........................3-55
Theft-Deterrent Feature
(RDS Radios)...........................................3-67
Understanding Radio Reception......................3-67
Care of Your Cassette Tape Player.................3-67
Care of Your CDs.........................................3-68
Care of Your CD Player................................3-68
Backglass Antenna.......................................3-69
XM™ Satellite Radio Antenna System
(48 Contiguous US States).........................3-69
Chime Level Adjustment................................3-69
Section 3 Instrument Panel
3-1
Page 136 of 360
Low Coolant Warning Light
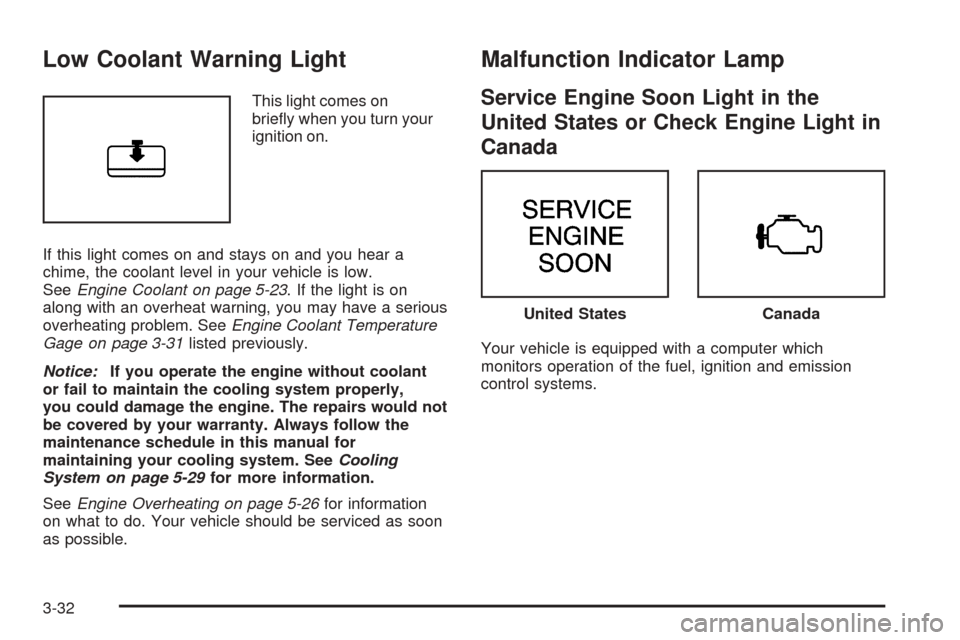
This light comes on
briefly when you turn your
ignition on.
If this light comes on and stays on and you hear a
chime, the coolant level in your vehicle is low.
SeeEngine Coolant on page 5-23. If the light is on
along with an overheat warning, you may have a serious
overheating problem. SeeEngine Coolant Temperature
Gage on page 3-31listed previously.
Notice:If you operate the engine without coolant
or fail to maintain the cooling system properly,
you could damage the engine. The repairs would not
be covered by your warranty. Always follow the
maintenance schedule in this manual for
maintaining your cooling system. SeeCooling
System on page 5-29for more information.
SeeEngine Overheating on page 5-26for information
on what to do. Your vehicle should be serviced as soon
as possible.
Malfunction Indicator Lamp
Service Engine Soon Light in the
United States or Check Engine Light in
Canada
Your vehicle is equipped with a computer which
monitors operation of the fuel, ignition and emission
control systems.
United StatesCanada
3-32
Page 142 of 360

Service Vehicle Soon Light
This light will come on
briefly when you turn the
ignition to ON.
It will stay on, or come on and a chime will sound if it
detects a problem on the vehicle, such as a Daytime
Running Lamps (DRL) or an automatic headlamp
system malfunction. If this happens, see your dealer as
soon as possible.
Fuel Gage
Your fuel gage tells you about how much fuel you have
left, when the ignition is on. When the indicator nears
empty, the light will come on and you will hear a chime.
You still have a little fuel left, but you should get
more soon.
Here are four things that some owners ask about. None
of these show a problem with your fuel gage:
•At the service station, the gas pump shuts off
before the gage reads full.
United StatesCanada
3-38
Page 172 of 360
For best results, use a scrubbing action, non-abrasive
cleaning cassette with pads which scrub the tape
head as the hubs of the cleaner cassette turn. The
recommended cleaning cassette is available through
your dealer.
The cut tape detection feature of your cassette tape
player may identify the cleaning cassette as a damaged
tape, in error. To prevent the cleaning cassette from
being ejected, use the following steps.
1. Turn the ignition on.
2. Turn the radio off.
3. Press and hold the TP CD button for five seconds.
4. Insert the scrubbing action cleaning cassette.
5. Eject the cleaning cassette after the manufacturer’s
recommended cleaning time.
You may also choose a non-scrubbing action, wet-type
cleaner which uses a cassette with a fabric belt to
clean the tape head. This type of cleaning cassette will
not eject on its own. A non-scrubbing action cleaner
may not clean as thoroughly as the scrubbing type
cleaner. The use of a non-scrubbing action, dry-type
cleaning cassette is not recommended.After you clean the player, press and hold the eject
button for five seconds to reset the CLEAN PLAYR
indicator. The radio will display CLEANED to show the
indicator was reset.
Cassettes are subject to wear and the sound quality
may degrade over time. Always make sure the cassette
tape is in good condition before you have your tape
player serviced.
Care of Your CDs
Handle CDs carefully. Store them in their original cases
or other protective cases and away from direct
sunlight and dust. If the surface of a CD is soiled,
dampen a clean, soft cloth in a mild, neutral detergent
solution and clean it, wiping from the center to the edge.
Be sure never to touch the side without writing when
handling CDs. Pick up CDs by grasping the outer edges
or the edge of the hole and the outer edge.
Care of Your CD Player
The use of CD lens cleaners for CDs is not advised,
due to the risk of contaminating the lens of the CD optics
with lubricants internal to the CD mechanism.
3-68
Page 226 of 360
Some gasolines that are not reformulated for low
emissions may contain an octane-enhancing additive
called methylcyclopentadienyl manganese tricarbonyl
(MMT); ask the attendant where you buy gasoline
whether the fuel contains MMT. General Motors does not
recommend the use of such gasolines. Fuels containing
MMT can reduce the life of spark plugs and the
performance of the emission control system may be
affected. The malfunction indicator lamp may turn on. If
this occurs, return to your authorized GM dealer for
service.
Fuels in Foreign Countries
If you plan on driving in another country outside the
United States or Canada, the proper fuel may be hard
to find. Never use leaded gasoline or any other fuel
not recommended in the previous text on fuel. Costly
repairs caused by use of improper fuel would not
be covered by your warranty.
To check the fuel availability, ask an auto club, or
contact a major oil company that does business in the
country where you will be driving.
Filling Your Tank
{CAUTION:
Fuel vapor burns violently and a fuel �re can
cause bad injuries. To help avoid injuries to you
and others, read and follow all the instructions
on the pump island. Turn off your engine when
you are refueling. Do not smoke if you are near
fuel or refueling your vehicle. Keep sparks,
�ames and smoking materials away from fuel.
Do not leave the fuel pump unattended when
refueling your vehicle — this is against the law
in some places. Keep children away from the
fuel pump; never let children pump fuel.
5-6
Page 260 of 360

Brake Wear
Disc brake pads have built-in wear indicators that make
a high-pitched warning sound when the brake pads
are worn and new pads are needed. The sound
may come and go or be heard all the time your vehicle
is moving (except when you are pushing on the
brake pedal firmly).
{CAUTION:
The brake wear warning sound means that
soon your brakes will not work well. That
could lead to an accident. When you hear the
brake wear warning sound, have your vehicle
serviced.Notice:Continuing to drive with worn-out brake
pads could result in costly brake repair.
Some driving conditions or climates may cause a brake
squeal when the brakes are first applied or lightly
applied. This does not mean something is wrong with
your brakes.
Properly torqued wheel nuts are necessary to help
prevent brake pulsation. When tires are rotated, inspect
brake pads for wear and evenly tighten wheel nuts in
the proper sequence to GM torque specifications.
If you have rear drum brakes, they do not have wear
indicators, but if you ever hear a rear brake rubbing
noise, have the rear brake linings inspected immediately.
Also, the rear brake drums should be removed and
inspected each time the tires are removed for rotation or
changing. When you have the front brake pads
replaced, have the rear brakes inspected, too.
Brake linings should always be replaced as complete
axle sets.
5-40
Page 268 of 360
Headlamp Aiming
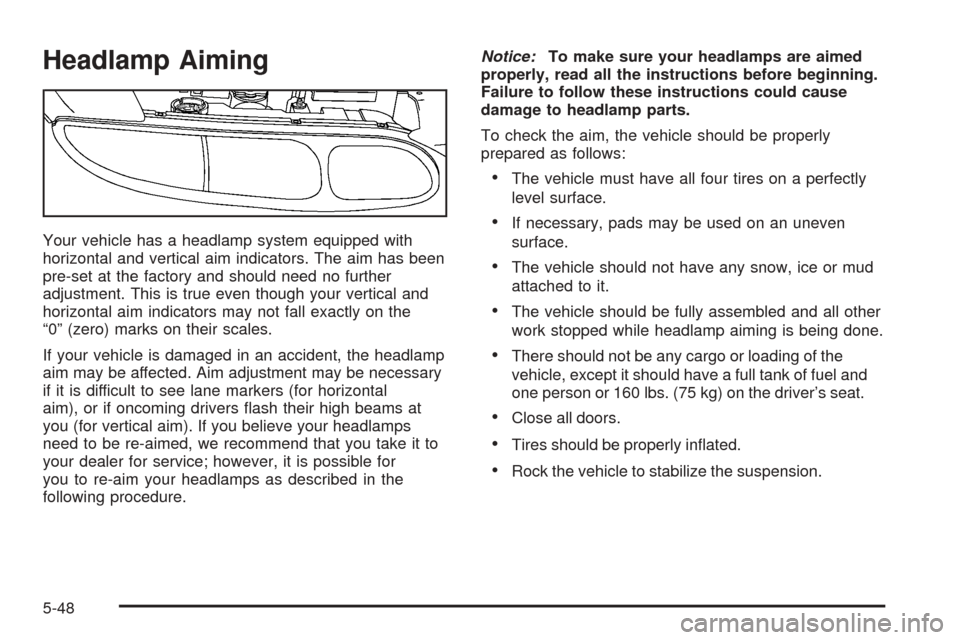
Your vehicle has a headlamp system equipped with
horizontal and vertical aim indicators. The aim has been
pre-set at the factory and should need no further
adjustment. This is true even though your vertical and
horizontal aim indicators may not fall exactly on the
“0” (zero) marks on their scales.
If your vehicle is damaged in an accident, the headlamp
aim may be affected. Aim adjustment may be necessary
if it is difficult to see lane markers (for horizontal
aim), or if oncoming drivers flash their high beams at
you (for vertical aim). If you believe your headlamps
need to be re-aimed, we recommend that you take it to
your dealer for service; however, it is possible for
you to re-aim your headlamps as described in the
following procedure.Notice:To make sure your headlamps are aimed
properly, read all the instructions before beginning.
Failure to follow these instructions could cause
damage to headlamp parts.
To check the aim, the vehicle should be properly
prepared as follows:
•The vehicle must have all four tires on a perfectly
level surface.
•If necessary, pads may be used on an uneven
surface.
•The vehicle should not have any snow, ice or mud
attached to it.
•The vehicle should be fully assembled and all other
work stopped while headlamp aiming is being done.
•There should not be any cargo or loading of the
vehicle, except it should have a full tank of fuel and
one person or 160 lbs. (75 kg) on the driver’s seat.
•Close all doors.
•Tires should be properly inflated.
•Rock the vehicle to stabilize the suspension.
5-48
Page 353 of 360
Infants and Young Children, Restraints...............1-34
Inflation - Tire Pressure...................................5-61
Instrument Panel
Cluster.......................................................3-24
Overview..................................................... 3-2
Instrument Panel Brightness.............................3-16
Instrument Panel Fuse Block (Passenger’s Side)....5-92
Instrument Panel Fuse Block
(Driver’s Side).............................................5-91
Instrument Panel Fuse Blocks...........................5-90
Interior Lamps................................................3-16
J
Jump Starting.................................................5-42
K
Key Removal.................................................2-30
Keyless Entry System....................................... 2-3
Keys............................................................... 2-2
L
Lamps
Exterior......................................................3-14
Interior.......................................................3-16
Lap Belt........................................................1-27Lap-Shoulder Belt...................................1-15, 1-24
LATCH System
Child Restraints...........................................1-43
Securing a Child Restraint Designed for the
LATCH System........................................1-46
Latches, Seatback............................................ 1-5
Leaving Your Vehicle.......................................2-12
Leaving Your Vehicle With the Engine Running . . . 2-29
Lift Seat, Power............................................... 1-7
Light
Air Bag Readiness.......................................3-26
Anti-Lock Brake System Warning...................3-29
Brake System Warning.................................3-28
Change Engine Oil......................................3-36
Charging System.........................................3-27
Cruise Control.............................................3-37
Enhanced Traction System (ETS) Active Light....3-31
Enhanced Traction System (ETS) Warning
Light......................................................3-30
Low Coolant Warning...................................3-32
Low Washer Fluid Warning...........................3-37
Malfunction Indicator....................................3-32
Oil Pressure...............................................3-35
Safety Belt Reminder...................................3-26
Security.....................................................3-37
Service Vehicle Soon...................................3-38
Up-Shift.....................................................3-28
Loading Your Vehicle.......................................4-34
Lockout Protection..........................................2-11
7
Page 354 of 360
Locks
Delayed Locking........................................... 2-8
Door........................................................... 2-7
Leaving Your Vehicle....................................2-12
Lockout Protection.......................................2-11
Power Door.................................................. 2-8
Programmable Automatic Door Locks............... 2-9
Loss of Control...............................................4-15
Low Coolant Warning Light..............................3-32
Low Washer Fluid Warning Light.......................3-37
M
Maintenance Schedule
Additional Required Services........................... 6-6
At Each Fuel Fill........................................... 6-8
At Least Once a Month.................................. 6-9
At Least Once a Year.................................... 6-9
Introduction.................................................. 6-2
Maintenance Footnotes.................................. 6-7
Maintenance Record....................................6-14
Maintenance Requirements............................. 6-2
Normal Maintenance Replacement Parts.........6-13
Owner Checks and Services........................... 6-8
Recommended Fluids and Lubricants.............6-12
Scheduled Maintenance................................. 6-4Maintenance Schedule (cont.)
Using Your................................................... 6-3
Your Vehicle and the Environment................... 6-2
Maintenance When Trailer Towing.....................4-45
Making Turns.................................................4-43
Malfunction Indicator Light................................3-32
Manual Seats................................................... 1-2
Manual Transaxle............................................2-18
Fluid..........................................................5-22
Operation...................................................2-25
Manual Windows............................................2-14
Matching Transmitter(s) to Your Vehicle............... 2-5
Mexico, Central America and Caribbean Islands/
Countries (Except Puerto Rico and U.S. Virgin
Islands) – Customer Assistance....................... 7-5
Mirrors
Manual Rearview Mirror................................2-33
Outside Convex Mirror.................................2-34
Outside Power Mirrors..................................2-33
Outside Remote Control Mirror......................2-33
MyGMLink.com................................................ 7-4
N
New Vehicle Break-In......................................2-16
Normal Maintenance Replacement Parts............6-13
8