power steering Oldsmobile Alero 2004 Owner's Manuals
[x] Cancel search | Manufacturer: OLDSMOBILE, Model Year: 2004, Model line: Alero, Model: Oldsmobile Alero 2004Pages: 360, PDF Size: 2.49 MB
Page 183 of 360
If you do not have anti-lock, use a “squeeze” braking
technique. This will give you maximum braking
while maintaining steering control. You can do this by
pushing on the brake pedal with steadily increasing
pressure.
In an emergency, you will probably want to squeeze the
brakes hard without locking the wheels. If you hear or
feel the wheels sliding, ease off the brake pedal.
This will help you retain steering control. If youdohave
anti-lock, it is different. See “Anti-Lock Brake System”
in this section.
In many emergencies, steering can help you more than
even the very best braking.
Enhanced Traction System (ETS)
Your vehicle may have an Enhanced Traction System
(ETS) that limits wheel spin. This is especially useful in
slippery road conditions. The system operates only if
it senses that one or both of the front wheels are
spinning or beginning to lose traction. When this
happens, the system reduces engine power and may
also upshift the transaxle to limit wheel spin.This light will come on
when your Enhanced
Traction System is limiting
wheel spin. See
Enhanced Traction System
Active Light on page 3-31.
You may feel or hear the system working, but this is
normal.
If your vehicle is in cruise control when the enhanced
traction system begins to limit wheel spin, the cruise
control will automatically disengage. When road
conditions allow you to safely use it again, you may
re-engage the cruise control. SeeCruise Control
on page 3-10.
The Enhanced Traction System operates in all transaxle
shift lever positions. But the system can upshift the
transaxle only as high as the shift lever position you’ve
chosen, so you should use the lower gears only
when necessary. SeeAutomatic Transaxle Operation on
page 2-22.
4-9
Page 185 of 360
Steering
Power Steering
If you lose power steering assist because the engine
stops or the system is not functioning, you can steer but
it will take much more effort.
Steering Tips
Driving on Curves
It is important to take curves at a reasonable speed.
A lot of the “driver lost control” accidents mentioned on
the news happen on curves. Here is why:
Experienced driver or beginner, each of us is subject to
the same laws of physics when driving on curves.
The traction of the tires against the road surface makes
it possible for the vehicle to change its path when
you turn the front wheels. If there is no traction, inertia
will keep the vehicle going in the same direction. If
you have ever tried to steer a vehicle on wet ice, you
will understand this.
The traction you can get in a curve depends on the
condition of your tires and the road surface, the angle at
which the curve is banked, and your speed. While
you are in a curve, speed is the one factor you
can control.Suppose you are steering through a sharp curve.
Then you suddenly apply the brakes. Both control
systems — steering and braking — have to do their work
where the tires meet the road. Unless you have
four-wheel anti-lock brakes, adding the hard braking can
demand too much of those places. You can lose
control.
The same thing can happen if you are steering through a
sharp curve and you suddenly accelerate. Those
two control systems — steering and acceleration — can
overwhelm those places where the tires meet the road
and make you lose control. SeeEnhanced Traction
System (ETS) on page 4-9.
What should you do if this ever happens? Ease up on
the brake or accelerator pedal, steer the vehicle the way
you want it to go, and slow down.
Speed limit signs near curves warn that you should
adjust your speed. Of course, the posted speeds
are based on good weather and road conditions. Under
less favorable conditions you will want to go slower.
If you need to reduce your speed as you approach
a curve, do it before you enter the curve, while your front
wheels are straight ahead.
Try to adjust your speed so you can “drive” through the
curve. Maintain a reasonable, steady speed. Wait to
accelerate until you are out of the curve, and then
accelerate gently into the straightaway.
4-11
Page 221 of 360
Service............................................................5-3
Doing Your Own Service Work.........................5-3
Adding Equipment to the Outside of Your
Vehicle......................................................5-4
Fuel................................................................5-4
Gasoline Octane............................................5-4
Gasoline Specifications....................................5-4
California Fuel...............................................5-5
Additives.......................................................5-5
Fuels in Foreign Countries...............................5-6
Filling Your Tank............................................5-6
Filling a Portable Fuel Container.......................5-9
Checking Things Under the Hood.....................5-9
Hood Release..............................................5-10
Engine Compartment Overview.......................5-12
Engine Oil...................................................5-15
Engine Air Cleaner/Filter................................5-20
Automatic Transaxle Fluid..............................5-21
Manual Transaxle Fluid..................................5-22
Hydraulic Clutch...........................................5-22
Engine Coolant.............................................5-23
Engine Overheating.......................................5-26
Cooling System............................................5-29
Power Steering Fluid.....................................5-35
Windshield Washer Fluid................................5-36Brakes........................................................5-38
Battery........................................................5-41
Jump Starting...............................................5-42
Headlamp Aiming...........................................5-48
Bulb Replacement..........................................5-50
Halogen Bulbs..............................................5-50
Headlamps..................................................5-50
Front Turn Signal and Parking Lamps..............5-51
Center High-Mounted Stoplamp (CHMSL).........5-51
Taillamps, Turn Signal, and Stoplamps............5-52
Replacement Bulbs.......................................5-52
Windshield Wiper Blade Replacement..............5-53
Tires..............................................................5-54
Inflation - Tire Pressure.................................5-61
Tire Inspection and Rotation...........................5-62
When It Is Time for New Tires.......................5-64
Buying New Tires.........................................5-65
Uniform Tire Quality Grading..........................5-66
Wheel Alignment and Tire Balance..................5-67
Wheel Replacement......................................5-67
Tire Chains..................................................5-69
If a Tire Goes Flat........................................5-70
Changing a Flat Tire.....................................5-70
Compact Spare Tire......................................5-80
Section 5 Service and Appearance Care
5-1
Page 233 of 360
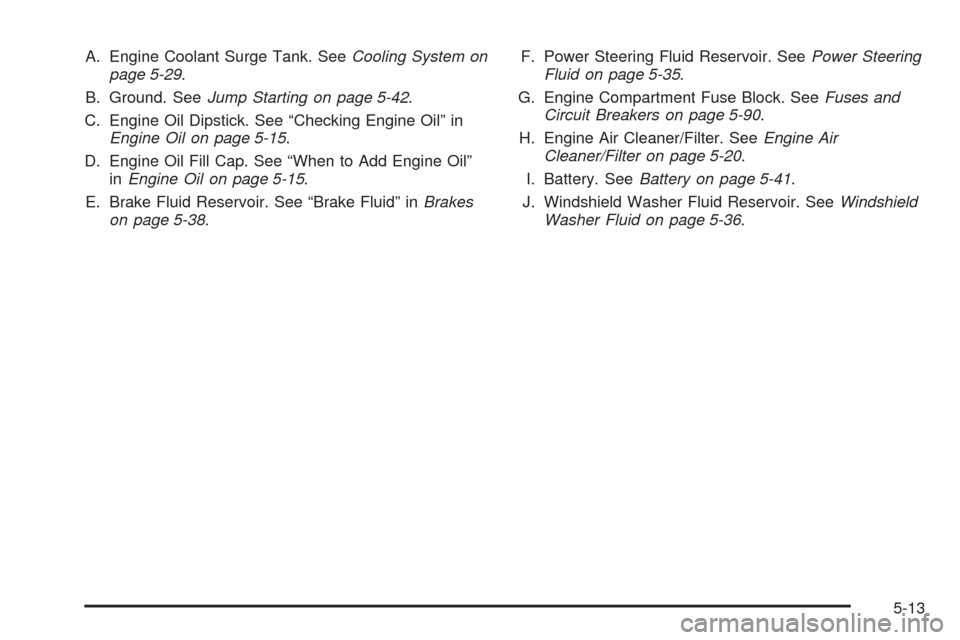
A. Engine Coolant Surge Tank. SeeCooling System on
page 5-29.
B. Ground. SeeJump Starting on page 5-42.
C. Engine Oil Dipstick. See “Checking Engine Oil” in
Engine Oil on page 5-15.
D. Engine Oil Fill Cap. See “When to Add Engine Oil”
inEngine Oil on page 5-15.
E. Brake Fluid Reservoir. See “Brake Fluid” inBrakes
on page 5-38.F. Power Steering Fluid Reservoir. SeePower Steering
Fluid on page 5-35.
G. Engine Compartment Fuse Block. SeeFuses and
Circuit Breakers on page 5-90.
H. Engine Air Cleaner/Filter. SeeEngine Air
Cleaner/Filter on page 5-20.
I. Battery. SeeBattery on page 5-41.
J. Windshield Washer Fluid Reservoir. SeeWindshield
Washer Fluid on page 5-36.
5-13
Page 235 of 360
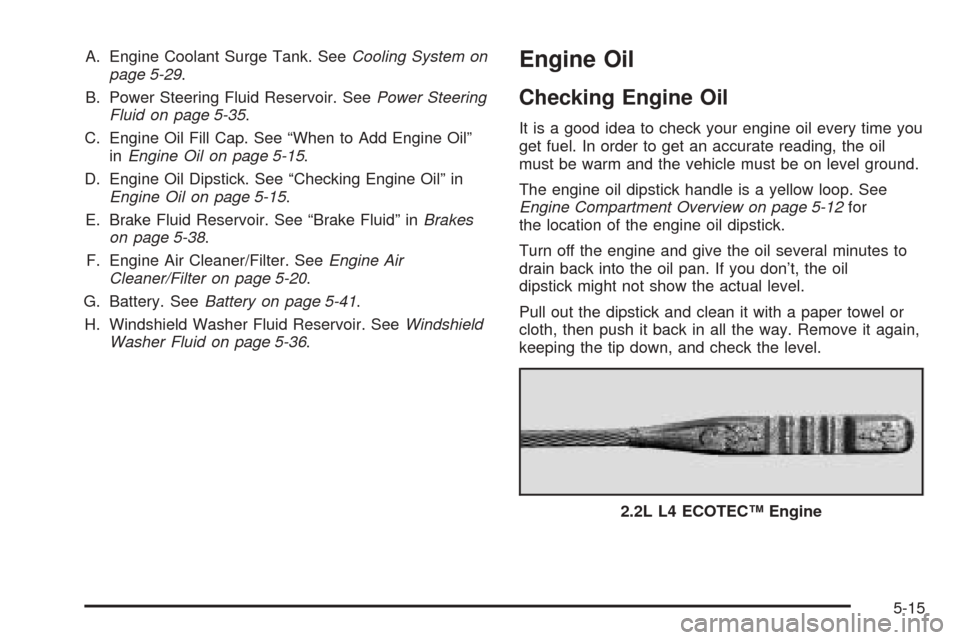
A. Engine Coolant Surge Tank. SeeCooling System on
page 5-29.
B. Power Steering Fluid Reservoir. SeePower Steering
Fluid on page 5-35.
C. Engine Oil Fill Cap. See “When to Add Engine Oil”
inEngine Oil on page 5-15.
D. Engine Oil Dipstick. See “Checking Engine Oil” in
Engine Oil on page 5-15.
E. Brake Fluid Reservoir. See “Brake Fluid” inBrakes
on page 5-38.
F. Engine Air Cleaner/Filter. SeeEngine Air
Cleaner/Filter on page 5-20.
G. Battery. SeeBattery on page 5-41.
H. Windshield Washer Fluid Reservoir. SeeWindshield
Washer Fluid on page 5-36.Engine Oil
Checking Engine Oil
It is a good idea to check your engine oil every time you
get fuel. In order to get an accurate reading, the oil
must be warm and the vehicle must be on level ground.
The engine oil dipstick handle is a yellow loop. See
Engine Compartment Overview on page 5-12for
the location of the engine oil dipstick.
Turn off the engine and give the oil several minutes to
drain back into the oil pan. If you don’t, the oil
dipstick might not show the actual level.
Pull out the dipstick and clean it with a paper towel or
cloth, then push it back in all the way. Remove it again,
keeping the tip down, and check the level.
2.2L L4 ECOTEC™ Engine
5-15
Page 255 of 360

6. Replace the pressure cap. Be sure the pressure
cap is hand-tight and fully seated.
See your dealer, if necessary.
Power Steering Fluid
When to Check Power Steering Fluid
It is not necessary to regularly check power steering fluid
unless you suspect there is a leak in the system or
you hear an unusual noise. A fluid loss in this system
could indicate a problem. Have the system inspected
and repaired. SeeEngine Compartment Overview
on page 5-12for reservoir location.
5-35
Page 256 of 360
How to Check Power Steering Fluid
Turn the key off, let the engine compartment cool down,
wipe the cap and the top of the reservoir clean, then
unscrew the cap and wipe the dipstick with a clean rag.
Replace the cap and completely tighten it. Then remove
the cap again and look at the fluid level on the dipstick.
The level should be at the FULL COLD mark. If
necessary, add only enough fluid to bring the level up to
the mark.
What to Use
To determine what kind of fluid to use, see
Recommended Fluids and Lubricants on page 6-12.
Always use the proper fluid. Failure to use the proper
fluid can cause leaks and damage hoses and seals.
Windshield Washer Fluid
What to Use
When you need windshield washer fluid, be sure to read
the manufacturer’s instructions before use. If you will
be operating your vehicle in an area where the
temperature may fall below freezing, use a fluid that has
sufficient protection against freezing. SeeEngine
Compartment Overview on page 5-12for reservoir
location.
Adding Washer Fluid
Your vehicle has a low
washer fluid telltale that
will come on in the
instrument panel cluster
when the washer fluid
is low.
SeeLow Washer Fluid Warning Light on page 3-37for
more information.
5-36
Page 279 of 360
Tire Terminology and De�nitions
Air Pressure:The amount of air inside the tire pressing
outward on each square inch of the tire. Air pressure
is expressed in pounds per square inch (psi) or
kilopascal (kPa).
Accessory Weight:This means the combined weight
of optional accessories. Some examples of optional
accessories are, automatic transmission, power steering,
power brakes, power windows, power seats, and air
conditioning.
Aspect Ratio:The relationship of a tire’s height to its
width.
Belt:A rubber coated layer of cords that is located
between the plies and the tread. Cords may be made
from steel or other reinforcing materials.
Bead:The tire bead contains steel wires wrapped by
steel cords that hold the tire onto the rim.
Bias Ply Tire:A pneumatic tire in which the plies are
laid at alternate angles substantially less than 90 degrees
to the centerline of the tread.
Cold In�ation Pressure:The amount of air pressure in
a tire, measured in pounds per square inch (psi) before a
tire has built up heat from driving. SeeInflation - Tire
Pressure on page 5-61.Curb Weight:This means the weight of a motor
vehicle with standard and optional equipment including
the maximum capacity of fuel, oil and coolant, but
without passengers and cargo.
DOT Markings:A code molded into the sidewall of a
tire signifying that the tire is in compliance with the U.S.
Department of Transportation motor vehicle safety
standards. The DOT code includes the Tire Identification
Number (TIN), an alphanumeric designator which can
also identify the tire manufacturer, production plant,
brand and date of production.
GVWR:Gross Vehicle Weight Rating, seeLoading
Your Vehicle on page 4-34.
GAWR FRT:Gross Axle Weight Rating for the front
axle, seeLoading Your Vehicle on page 4-34.
GAWR RR:Gross Axle Weight Rating for the rear axle,
seeLoading Your Vehicle on page 4-34.
Intended Outboard Sidewall:The side of an
asymmetrical tire that must always face outward when
mounted on a vehicle.
Kilopascal (kPa):The metric unit for air pressure.
There are 6.9 kPa’s to one psi.
Light Truck (LT-Metric) Tire:A tire used on light duty
trucks and some multipurpose passenger vehicles.
5-59
Page 312 of 360
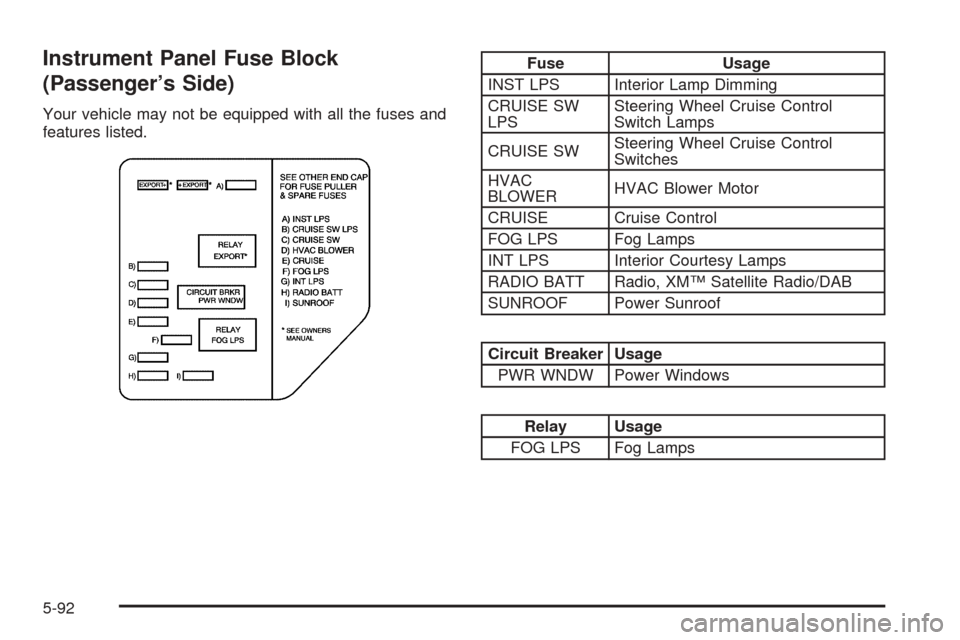
Instrument Panel Fuse Block
(Passenger’s Side)
Your vehicle may not be equipped with all the fuses and
features listed.
Fuse Usage
INST LPS Interior Lamp Dimming
CRUISE SW
LPSSteering Wheel Cruise Control
Switch Lamps
CRUISE SWSteering Wheel Cruise Control
Switches
HVAC
BLOWERHVAC Blower Motor
CRUISE Cruise Control
FOG LPS Fog Lamps
INT LPS Interior Courtesy Lamps
RADIO BATT Radio, XM™ Satellite Radio/DAB
SUNROOF Power Sunroof
Circuit Breaker Usage
PWR WNDW Power Windows
Relay Usage
FOG LPS Fog Lamps
5-92
Page 323 of 360
Maintenance Footnotes
†The U.S. Environmental Protection Agency or the
California Air Resources Board has determined that the
failure to perform this maintenance item will not nullify
the emission warranty or limit recall liability prior to
the completion of the vehicle’s useful life. We, however,
urge that all recommended maintenance services be
performed at the indicated intervals and the
maintenance be recorded.
(a)Visually inspect brake lines and hoses for proper
hook-up, binding, leaks, cracks, chafing, etc. Inspect
disc brake pads for wear and rotors for surface
condition. Inspect drum brake linings for wear or cracks.
Inspect other brake parts, including drums, wheel
cylinders, calipers, parking brake, etc.
(b)Visually inspect front and rear suspension and
steering system for damaged, loose or missing part or
signs of wear. Inspect power steering lines and
hoses for proper hook-up, binding, leaks, cracks,
chafing, etc.
(c)Visually inspect hoses and have them replaced if they
are cracked, swollen or deteriorated. Inspect all pipes,
fittings and clamps; replace with genuine GM parts as
needed. To help ensure proper operation, a pressure test
of the cooling system and pressure cap and cleaning the
outside of the radiator and air conditioning condenser is
recommended at least once a year.(d)Visually inspect wiper blades for wear or cracking.
Replace blade inserts that appear worn or damaged
or that streak or miss areas of the windshield.
(e)Make sure the safety belt reminder light and all your
belts, buckles, latch plates, retractors and anchorages
are working properly. Look for any other loose or
damaged safety belt system parts. If you see anything
that might keep a safety belt system from doing its
job, have it repaired. Have any torn or frayed safety belts
replaced. Also look for any opened or broken air bag
coverings, and have them repaired or replaced. (The air
bag system does not need regular maintenance.)
(f)Lubricate all key lock cylinders, door hinges and
latches, hood hinges and latches and trunk lid hinges
and latches. More frequent lubrication may be required
when exposed to a corrosive environment. Applying
silicone grease on weatherstrips with a clean cloth will
make them last longer, seal better and not stick or
squeak.
(g)Check system for interference or binding and for
damaged or missing parts. Replace parts as needed.
Replace any components that have high effort or
excessive wear. Do not lubricate accelerator or cruise
control cables.
6-7