check engine OLDSMOBILE AURORA 1996 Owner's Manual
[x] Cancel search | Manufacturer: OLDSMOBILE, Model Year: 1996, Model line: AURORA, Model: OLDSMOBILE AURORA 1996Pages: 388, PDF Size: 20.24 MB
Page 263 of 388

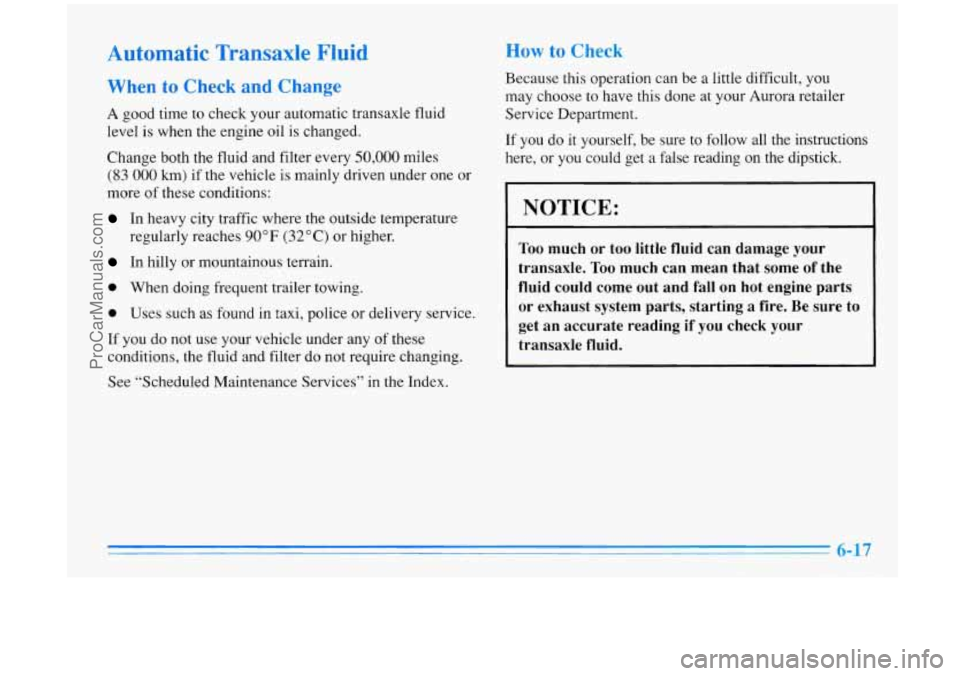
Automatic Transaxle Fluid
When to Check and Change
A good time to check your automatic transaxle fluid
level
is when the engine oil is changed.
Change both the fluid and filter every
50,000 miles
(83 000 km) if the vehicle is mainly driven under one or
more
of these conditions:
In heavy city traffic where the outside temperature
regularly reaches
90 OF (32 O C) or higher.
In hilly or mountainous terrain.
0 When doing frequent trailer towing.
0 Uses such as found in taxi, police or delivery service.
If you do not use your vehicle under any of these
conditions, the fluid and filter do not require changing.
See “Scheduled Maintenance Services” in the Index.
How to Check
Because this operation can be a little difficult, you
may choose to have this done at your Aurora retailer
Service Department.
If
you do it yourself, be sure to follow all the instructions
here, or
you could get a false reading on the dipstick.
I NOTICE:
Too much or too little fluid can damage your
transaxle.
Too much can mean that some of the
fluid could come out and fall on hot engine parts or exhaust system parts, starting a fire. Be sure to
get an accurate reading
if you check your
transaxle fluid.
ProCarManuals.com
Page 264 of 388

Wait at least 30 minutes before checking the transaxle
fluid level if
you have been driving:
0 When outside temperatures are above 90°F (32 " C).
At high speed for quite a while.
In heavy traffic -- especially in hot weather.
While pulling a trailer.
To get the right reading, the fluid should be at normal
operating temperature, which is 180°F to
200" F
(82°C to 93°C).
Get the vehicle warmed up by driving about
15 miles
(24
km) when outside temperatures are above 50°F
(10°C). If it's colder than 50°F (lO"C), you may have
to drive longer.
Park your vehicle on a level place. Keep the engine
running.
With the parking brake applied, place the shift lever
in PARK
(P).
With your foot on the brake pedal, move the shift
lever through each gear range, pausing for about
three seconds in each range. Then, position the shift
lever in PARK
(P).
Let the engine run at idle for three to five minutes.
Then, without shutting off the engine, follow
these steps:
1. Pull out the
dipstick and wipe
it with a clean rag
or paper towel.
2. Push it back in all the way, wait three seconds and
then pull it back out again.
ProCarManuals.com
Page 267 of 388

Adding only plain water to your cooling system
can be dangerous. Plain water, or some other
liquid like alcohol, can boil before the proper
coolant mix will. Your vehicle’s coolant warning
system
is set for the proper coolant mix. With
plain water or the wrong mix, your engine could
get too hot but you wouldn’t get the overheat
warning. Your engine could catch fire and you or
others could be burned. Use
a 50/50 mix of clean
water and
DEX-COOL TM (orange-colored,
silicate-free) antifreeze.
NOTICE:
If you us& an improper coolant mix, your engine
could overheat and be badly damaged. The
repair cost wouldn’t be covered by your
warranty. Too much water in the mix can freeze
and crack the engine, radiator, heater core and
other parts.
If you have to add coolant more than four times a year,
have your retailer check your cooling system.
I NOTICE:
If you use the proper coolant, you don’t have to
add extra inhibitors or additives which claim to
improve the system. These can be harmful.
ProCarManuals.com
Page 268 of 388

Checking Coolant
The engine coolant surge tank is located on the driver's
side
of the engine compartment.
-
A CAUTION:
Turning the surge tank pressure cap when the
engine and radiator are hot can allow steam and
scalding liquids to blow out and burn you badly.
Never turn the surge tank pressure cap
-- even a
little
-- when the engine and radiator are hot.
6-22
When your engine is cold, the coolant level should be at
the FULL COLD mark or a little higher.
If the message LOW ENGINE COOLANT is
displayed on your message center, it means
you
on engine coolant. 're
low
ProCarManuals.com
Page 270 of 388

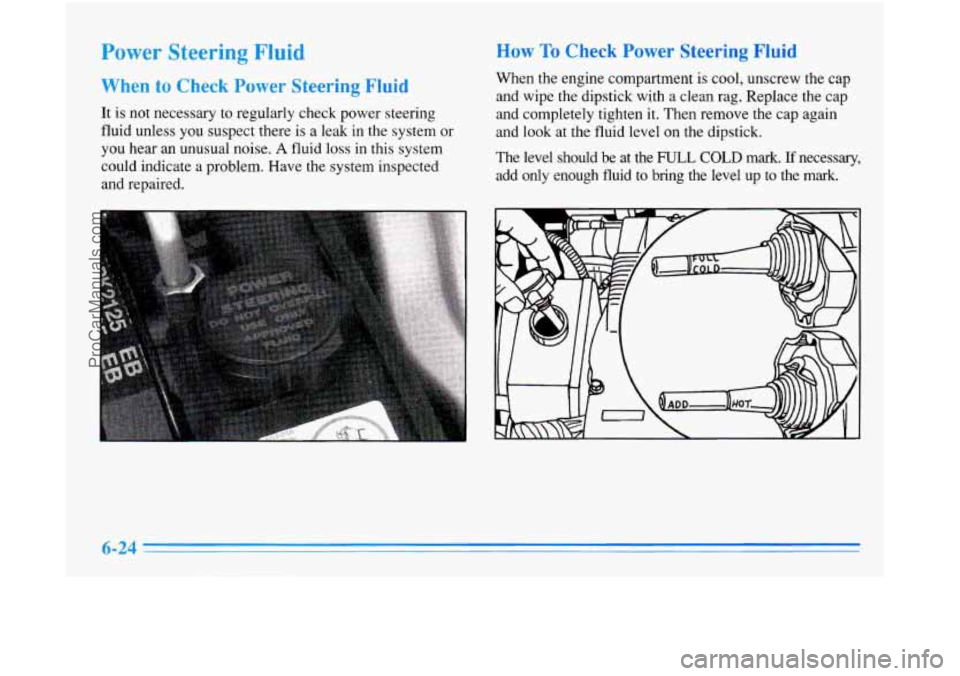
Power Steering Fluid
When to Check Power Steering Fluid
It is not necessary to regularly check power steering
fluid unless you suspect there is a leak in the system or
you hear an unusual noise.
A fluid loss in this system
could indicate a problem. Have the system inspected
and repaired.
How To Check Power Steering Fluid
When the engine compartment is cool, unscrew the cap
and wipe
the dipstick with a clean rag. Replace the cap
and completely tighten it. Then remove the cap again
and look at the fluid level on the dipstick.
The level should be at the
FU,L COLD mark. If necessary,
add only enough fluid to
bring the. level up to the mark.
ProCarManuals.com
Page 316 of 388

Engine Accessory Belt The 4.0L Aurora engine uses an engine accessory belt.
This diagram shows the features connected
by the belt
routing. See"Maintenance Schedu1e"in the Index for
when to check the belt.
1.
2.
3.
4.
5.
6.
Tensioner Arm Pulley
Power Steering Pump Pulley
Idler Pulley
Alternator Pulley
Air Conditioner Compressor Pulley
Harmonic Balancer
ProCarManuals.com
Page 356 of 388

Part B: Owner Checks and Services
Listed below are owner checks and services which
should be performed at the intervals specified to help
ensure the safety, dependability and emission control
performance of your vehicle.
Be sure any necessary repairs are completed at once.
Whenever any fluids or lubricants are added
to your
vehicle, make sure they are the proper ones, as shown
in Part D.
At Each Fuel Fill
It is important for you OY a service station attendant to
perform these underhood checks at each fuel fill.
Engine Oil Level Check
Check the engine oil level and add the proper oil if
necessary. See “Engine Oil”
in the Index for further
details.
Engine Coolant Level Check
Check the engine coolant level and add the proper
coolant mix
if necessary. See “Engine Coolant” in the
Index for further details.
Windshield Washer Fluid Level Check
Check the windshield washer fluid level in the
windshield washer tank and add the proper fluid if
necessary. See “Windshield Washer Fluid” in the Index
for further details.
At Least Once a Month
Tire Inflation Check
Make sure tires are inflated to the correct pressures.
See “Tires” in the Index
for further details.
Cassette Deck Service
Clean cassette deck. Cleaning should be done every
50 hours of tape play. See “Audio Systems” in the Index
for further details.
Power Antenna Service
Clean power antenna mast. See “Audio Systems” in
the Index for further details.
ProCarManuals.com
Page 358 of 388

Starter Switch Check
r-
When you are doing this check, the vehicle could
move suddenly. If it does,
you or others could be
injured. Follow the steps below.
1.
2.
3.
Before you start, be sure you have enough room
around
the vehicle.
Firmly apply both the parking brake (see “Parking
Brake” in the Index if necessary) and the regular
brake.
NOTE: Do not use the accelerator pedal, and be
ready to turn off the engine immediately if it starts.
Try to start the engine in each gear. The starter
should work only in PARK (P) or NEUTRAL
(N).
If the starter works in any other position, your
vehicle needs service.
Brake-Transaxle Shift Interlock (BTSI) Check
(Automatic Transaxle)
When you are doing this check, the vehicle could move suddenly. If it
does, you or others could be
injured. Follow the steps below.
1. Before you start, be sure you have enough
room around the vehicle. It should be parked on a level surface.
2. Firmly apply the parking brake (see “Parking Brake”
in the Index if necessary).
NOTE: Be ready to apply the regular brake
immediately if the vehicle begins to move.
3. With the engine off, turn the key to the RUN position,
but don’t start the engine. Without applying the
regular brake, try to move the shift lever out of
PARK (P) with normal effort. If the shift lever moves
out of PARK
(P), your vehicle’s BTSI needs service.
ProCarManuals.com
Page 359 of 388

Steering Column Lock Check
While parked, and with the parking brake set, try to turn
the key
to LOCK in each shift lever position.
0 The key should turn to LOCK only when the shift
The key should come out only in LOCK.
Parking Brake and Automatic Transaxle PARK (P)
Mechanism Check lever
is in PARK
(P).
When you are doing this check, your vehicle
could begin to move.
You or others could be
injured and property could be damaged. Make
sure there is
room in front of your vehicle in case
it begins to roll. Be ready to apply the regular
brake at once should the vehicle begin to move. Park on
a fairly steep hill, with the vehicle facing
downhill. Keeping your foot on the regular brake, set the
parking brake.
0 To check the parking brake: With the engine running
and transaxle
in NEUTRAL (N), slowly remove foot
pressure from the regular brake pedal.
Do this until
the vehicle is held by the parking brake only.
0 To check the PARK (P) mechanism’s holding ability:
Shift to
PARK (P). Then release all brakes.
Underbody Flushing
Service
At least every spring, use plain water to flush any
corrosive materials from the underbody. Take care to
clean thoroughly any areas where mud and other debris
can collect.
ProCarManuals.com
Page 375 of 388

Accessory Power Outlet ......................... 2-54
AirBag
....................................... 1-18
How Does it Restrain
........................... 1-22
How it Works
................................ 1-20
Location
.................................... 1-20
Readiness Light ......................... 1 . 19, 2-64
Servicing
................................... 1-23
What Makes it Inflate
.......................... 1-21
What Will
You See After it Inflates ............... 1-22
When Should it Inflate
......................... 1-21
Air Cleaner
.................................... 6-14
Air Conditioning
................................ 3-5
Air Conditioning Refrigerants ..................... 6-69
Air Control. Climate Control System
............. 3.3. 3.4
Alarm. Universal Theft-Deterrent .................. 2- 15
Alignment and Balance. Tire
...................... 6-46
Aluminum Wheels. Cleaning
...................... 6-53
Antenna. Power
................................ 3-28
Antifreeze
...................................... 6-20
Anti-Lock
Brakes
...................................... 4-6
Brake System Warning Light
................ 2.66. 4.6
Anti-LockoutFeature
............................ 2-7
Anti.Theft. Radio
.............................. 3-23
Appearance Care
................................ 6-48
Appearance Care Materials
....................... 6-55
Arbitration Program
............................... 8-6 Ashtrays
....................................... 2-52
Audio Equipment, Adding
........................ 3-26
Audio Systems
................................. 3-10
Automatic
DoorLocks
................................... 2-4
Electronic Climate Control
...................... 3-1
Overdrive
................................... 2-25
Check
...................................... 7-39
Fluid
....................................... 6-17
Operation
................................... 2-23
Park Mechanism Check
........................ 7-41
Auto-Push Knob, Climate Control
.................. 3-2
Averagespeed
................................. 2-76
Battery
........................ : ............. 6-30
Jump Starting ................................. 5-2
Replacement
.................................. 2-11
Saver
...................................... 2-47
Audio
Controls, Steering Wheel Touch Control
....... 3-25
Automatic Transaxle
WarningLight
............................... 2-64
Warnings
................................ 5-2, 5-5
Belt, Engine Accessory
.......................... 6-70
Battery
Voltage Message
......................... 2-76
BBB Auto Line
................................. 8-6
Better Business Bureau Mediation
................... 8-6
9-1
ProCarManuals.com