radio OLDSMOBILE AURORA 1996 Owners Manual
[x] Cancel search | Manufacturer: OLDSMOBILE, Model Year: 1996, Model line: AURORA, Model: OLDSMOBILE AURORA 1996Pages: 388, PDF Size: 20.24 MB
Page 64 of 388

Remote Lock Control
You can lock and unlock
your doors or unlock your
trunk from up to
30 feet
(9 m) away using the key
chain transmitter supplied
with your vehicle.
Your Remote Lock Control operates on a radio
frequency subject to Federal Communications
Commission (FCC) Rules.
This device complies with Part
15 of the FCC Rules.
Operation is subject to the following two conditions:
(1) This device may not cause harmful interference,
and
(2) This device must accept any interference
received, including interference that may cause
undesired operation. Should interference to this system
occur, try this:
0 Check to determine if battery replacement is necessary.
See
the instructions on battery replacement.
0 Check the distance. You may be too far from your
0 Check the location. Other vehicles or objects may
vehicle. This product has
a maximum range.
be blocking the signal.
See your Aurora retailer or a qualified technician
Changes or modifications to this system by other than an
authorized service facility could void authorization to
use this equipment.
for
service.
2-8
ProCarManuals.com
Page 76 of 388

NOTICE:
If your key seems stuck in LOCK and you can’t
turn it, be sure it is
all the way in, If it is, then
turn the steering wheel left and right while you
turn the key
hard. But turn the key only with
your hand. Using
a tool to force it could break
the key or the ignition switch.
If none of this
works, then your vehicle needs service.
Key Reminder Warning
If you leave your key in the ignition, in the OFF
position, you will hear a warning chime when you open
the driver’s door.
Retained Accessory Power I
After you turn your ignition off and remove the key, you
will still have electrical power to such accessories as the
radio, power windows, and sunroof
(if equipped) for up
to
10 minutes. But if you open a door, power is shut off.
Starting Your Engine
Move your shift lever to PARK (P) ,or NEUTRAL (N).
Your engine won’t start in any other position -- that% a
safety feature.
To restart when you’re already moving,
use NEUTRAL (N) only.
NOTICE:
Don’t try to shift to PARK (P) if your Aurora is
moving.
If you do, you could damage the
transaxle:Shift to PARK
(P) only when your
vehicle is stopped.
Starting Your 4.0 Liter Engine
1. Without pushing the accelerator pedal, turn your
ignition key to
START. When the engine starts, let
go
of the key. The idle speed will go down as your
engine gets warm.
ProCarManuals.com
Page 101 of 388
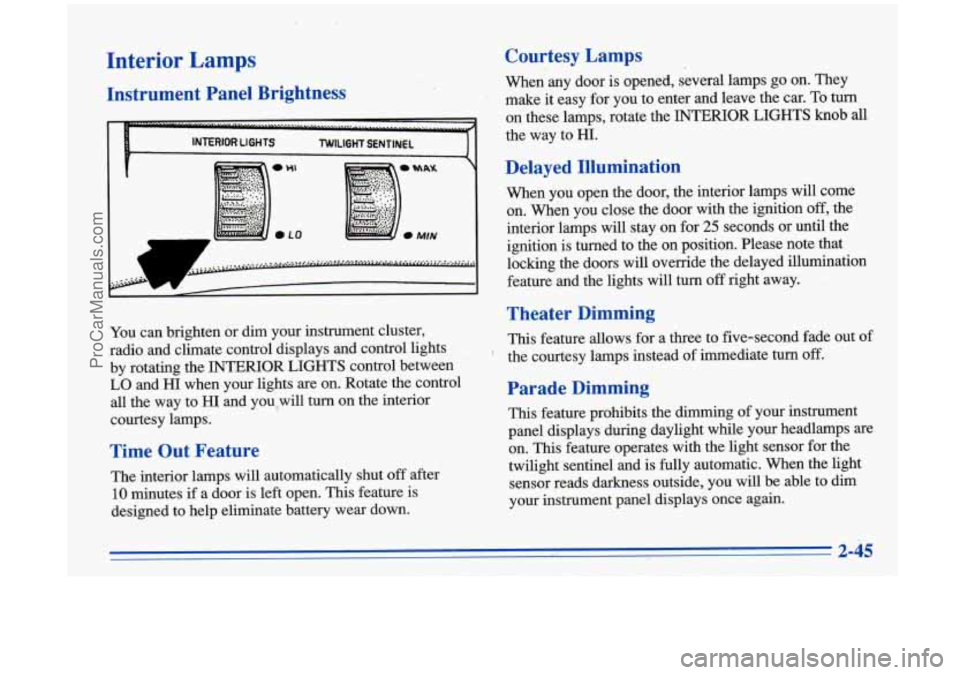
Interior Lamps
Instrument Panel Brightness
1
You can brighten or dim your instrument cluster,
radio and climate control displays and control lights
by rotating the INTERIOR LIGHTS control between
LO and HI when your lights are on. Rotate the control
all the way to HI and you,will turn on the interior
courtesy lamps.
Time Out Feature
The interior lamps will automatically shut off after
10 minutes if a door is left open. This feature is
designed to help eliminate battery wear down.
Courtesy Lamps
When any door is opened, several lamps go on. They
make it easy for you to enter and leave the car.
To turn
on these lamps, rotate the INTERIOR .LIGHTS knob all
the way to HI.
Delayed Illumination
When you open the door, the interior lamps will come
on. When you close the door with
the ignition off, the
interior lamps will stay
on for 25 seconds or until the
ignition is turned to the on position. Please note that
locking the doors will override the delayed illumination
feature and the lights will turn
off right away.
Theater Dimming
This feature allows for a three to five-second fade out of
the courtesy lamps instead of immediate
turn off.
Parade Dimming
This feature prohibits the dimming of your instrument
panel displays during daylight while your headlamps are
on. This feature operates with the light sensor for the
twilight sentinel and is
fully automatic. When the light
sensor reads darkness outside, you will be able to dim
your instrument panel displays once again.
t
ProCarManuals.com
Page 110 of 388

Accessory Power Outlet
The power outlet inside the front ashtray can be used to
plug in electrical equipment such as a cellular telephone,
CB radio, etc. Follow the proper installation instructions
that
are included with any electrical equipment you
install. The accessory power outlet is off if the ignition
is turned
off.
I NOTICE:
~
When using the accessory power outlet, the
maximum load
of any electrical equipment
should
not exceed 15 amps.
Sunroof (Option)
Your express open sunroof provides an airy, spacious feel
to your vehicle's interior and can
also increase ventilation.
It includes a sliding glass panel
and a sliding sunshade.
The control switch will work only when the ignition is on, or when Retained Accessory Power
is active.
L . .. ..
1
To open the sunroof, press the control switch rearward
and release it to open the glass panel and sunshade.
ProCarManuals.com
Page 111 of 388

If you want to stop the sunroof in a partially open
position, lightly press the switch again. To fully open the
sunroof, press the switch rearward again. The sunshade
can also be opened by hand.
To close the sunroof, press and hold the control switch
forward to close the glass panel.
The sunroof glass panel cannot be opened or closed if
your vehicle has an electrical failure.
To open the sunroof rear vent, open the sunshade by
hand. Press the control switch forward when the sunroof
is closed.
To close the sunroof rear vent, press the switch
rearward.
This transmitter allows you to consolidate the functions
of
up to three individual hand-held transmitters. It will
operate garage doors and gates, or with the accessory
package, other devices controlled by radio frequency such as home/offke lighting systems and security systems.
The transmitter will learn and transmit the frequencies
of most current transmitters and is powered by your
vehicle’s battery and charging system.
ProCarManuals.com
Page 120 of 388

Air Bag Readiness Light
There is an air bag readiness light on the instrument
panel, which shows AIR BAG. The system checks the
air bag’s electrical system for malfunctions. The light
tells you if there is an electrical problem. The system
check includes the air bag sensors, the air bag modules,
the wiring and the crash sensing and diagnostic module.
For more infoimation on the air bag system, see “Air
Bag” in the Index.
AIR BAG
You will see this light flash
for a few seconds when you
turn your ignition to RUN
or START. Then the light
should go out. This means
the system is ready.
If the air bag readiness light doesn’t come on when you
start your vehicle, or stays on, or comes
on when you
are driving, your air bag system may not work properly.
Have your vehicle serviced right away.
Battery Warnlng Light
VOLTS
This light will come on
briefly when you start the
vehicle, as a check to show
you it is working, then it
should
go out. If it stays on,
or comes on while
you are
driving, you may have a
problem with the electrical
charging system.
A warning chime and the message CHECK CHARGE
SYSTEM may also come on. Have it checked right
away. Driving while this light is on could drain your
battery.
If you must drive a short distance with the light on, be
certain to turn off all your accessories, such as the radio
and climate control.
ProCarManuals.com
Page 149 of 388
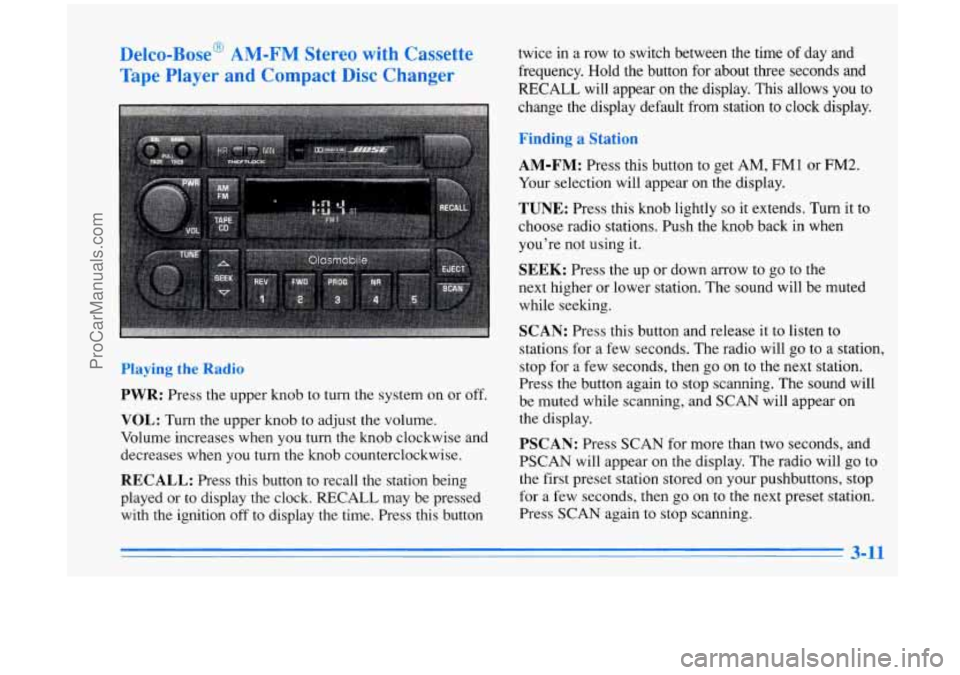
Delco-Bose' AM-FM Stereo with Cassette
Tape Player
and Compact Disc Changer
Playing the Radio
PWR: Press the upper knob to turn the system on or off.
VOL: Turn the upper knob to adjust the volume.
Volume increases when you turn the knob clockwise and
decreases when you turn the knob counterclockwise.
RECALL: Press this button to recall the station being
played or to display the clock. RECALL may be pressed
with
the ignition off to display the time. Press this button twice in a row
to switch between the time of day and
frequency. Hold the button for about three seconds and RECALL will appear on the display. This allows you to
change the display default from station to clock display.
Finding a Station
AM-FM: Press this button to get AM, FM1 or FM2.
Your selection will appear on the display.
TUNE: Press this knob lightly so it extends. Turn it to
choose radio stations. Push the knob back in when
you're not using it.
SEEK: Press the up or down arrow to go to the
next higher or lower station. The sound will be muted
while seeking.
SCAN: Press this button and release it to listen to
stations for a few seconds. The radio will
go to a station,
stop for a few seconds, then go on to the next station.
Press the button again to stop scanning.
The sound will
be muted while scanning, and SCAN will appear on
the display.
PSCAN: Press SCAN for more than two seconds, and
PSCAN will appear on the display. The radio will
go to
the first preset station stored on your pushbuttons, stop
for a few seconds, then go on to the next preset station.
Press SCAN again to stop scanning.
3-ll
ProCarManuals.com
Page 150 of 388
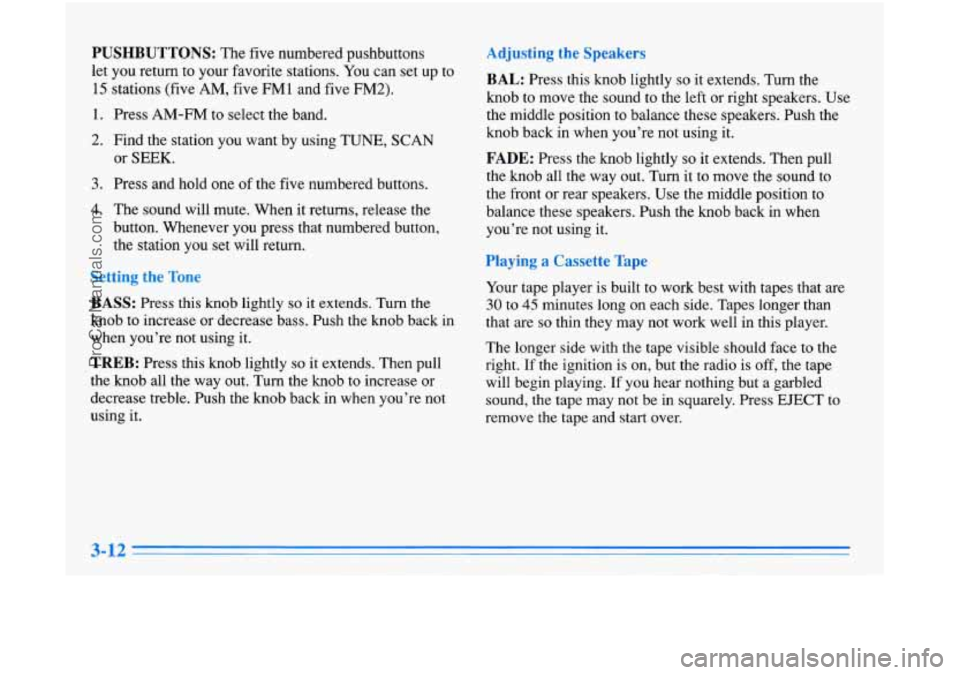
PUSHBUTTONS: The five numbered pushbuttons
let you return to your favorite stations. You can set up to
15 stations (five AM, five FMl and five FM2).
1. Press AM-FM to select the band.
2. Find the station you want by using TUNE, SCAN
or
SEEK.
3. Press and hold one of the five numbered buttons.
4. The sound will mute. When it returns, release the
button. Whenever you press that numbered button,
the station you set will return.
Setting the Tone
BASS: Press this knob lightly so it extends. Turn the
knob to increase or decrease bass. Push the knob back in
when you’re not using it.
TREB: Press this knob lightly so it extends. Then pull
the knob all the way out. Turn the knob to increase or
decrease treble. Push the knob back in when you’re not
using
it.
Adjusting the Speakers
BAL: Press this knob lightly so it extends. Turn the
knob
to move the sound to the left or right speakers. Use
the middle position to balance these speakers. Push the
knob back in when you’re not using it.
FADE: Press the knob lightly so it extends. Then pull
the knob all the way out. Turn it
to move the sound to
the front or rear speakers. Use the middle position
to
balance these speakers. Push the knob back in when
you’re not using it.
Playing a Cassette Tape
Your tape player is built to work best with tapes that are
30 to 45 minutes long on each side. Tapes longer than
that are
so thin they may not work well in this player.
The longer side with the tape visible should face to the
right.
If the ignition is on, but the radio is off, the tape
will begin playing.
If you hear nothing but a garbled
sound, the tape may not be in squarely. Press EJECT to
remove the tape and start over.
ProCarManuals.com
Page 151 of 388
While the tape is playing, use the VOL, FADE, BAL,
TREB and BASS controls just as you do for the radio.
The display will show TP with a box around
it and an
arrow to show which side
of the tape is playing.
Your tape bias is set automatically. When a metal or
chrome tape is inserted,
HI-BIAS appears on the
display.
If you want to insert a tape when the ignition is
off, first press EJECT or RCL.
If E and a number appear on the radio display, the tape
won’t play because
of an error.
0 E10: The tape is tight and the player can’t turn the
tape hubs. Remove the tape. Hold the tape with the
open end down and try to turn the right hub
counterclockwise with a pencil. Turn the tape over
and repeat. If the hubs do not turn easily, your tape
may be damaged and should not be used in thecd
..
player. Try a new tape to make sure your player is
working properly.
0 Ell: The tape is broken. Try a new tape.
If any error occurs repeatedly or if an error can’t be
corrected, please contact your retailer.
If your radio
displays an error number, write
it down and provide it to
your retailer when reporting the problem.
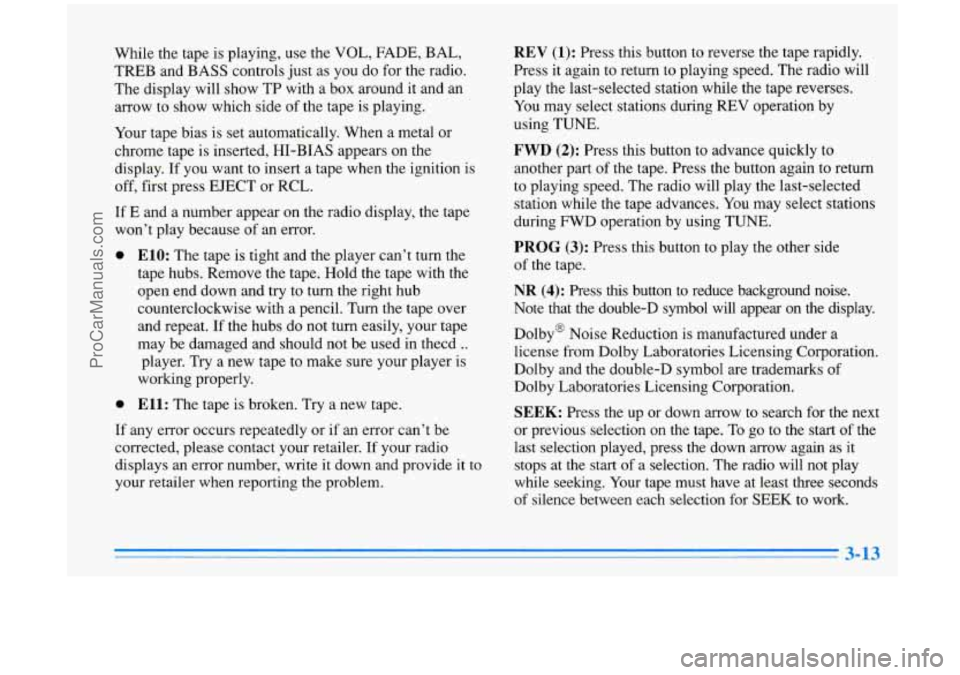
REV (1): Press this button to reverse the tape rapidly.
Press it again to return
to playing speed. The radio will
play the last-selected station while the tape reverses.
You may select stations during REV operation by
using TUNE.
FWD (2): Press this button to advance quickly to
another part of the tape. Press the button again to return
to playing speed. The radio will play the last-selected
station while the tape advances. You may select stations
during FWD operation by using
TUNE.
PROG (3): Press this button to play the other side
of the tape.
NR (4): Press this button to reduce background noise.
Note that the double-D symbol will appear on the display.
Dolby@ Noise Reduction is manufactured under a
license from Dolby Laboratories Licensing Corporation.
Dolby and the double-D symbol are trademarks of
Dolby Laboratories Licensing Corporation.
SEEK: Press the up or down arrow to search for the next
or previous selection on the tape.
To go to the start of the
last selection played, press the down arrow again as
it
stops at the start of a selection. The radio will not play
while seeking. Your tape must have at least three seconds
of silence between each selection for SEEK to work.
- -3
ProCarManuals.com
Page 152 of 388
SCAN: Press this button to listen to each selection for a
few seconds. The tape will go to the next selection, stop
for a few seconds, then go on to the next selection. Press
this button again to stop scanning. The sound will be
muted and SCAN will appear on the display.
AM-FM: Press this button to play the radio when a tape
is in the player. The tape will stop but remain in the
player.
TAPE-CD: Press this button to change to the tape
function when the radio is on. A box will appear around
TP on the display when the tape is active. Press AM-FM
to return to the radio while a tape is playing.
EJECT Press this button to remove the tape. The radio
will play. EJECT may be activated with either the
ignition or radio off. Cassettes may be loaded with the
radio off if this button is pressed first.
CLN: This message may appear on the display. If it
does, your cassette tape player needs to be cleaned. It
will still play tapes, but you should clean
it as soon as
possible to prevent damage to your tapes and pliyer. See
“Care of Your Cassette Tape Player” in the Index. After
you clean the player, press and hold EJECT for five
seconds to reset the CLN indicator. The radio will
display
--- to show the indicator was reset.
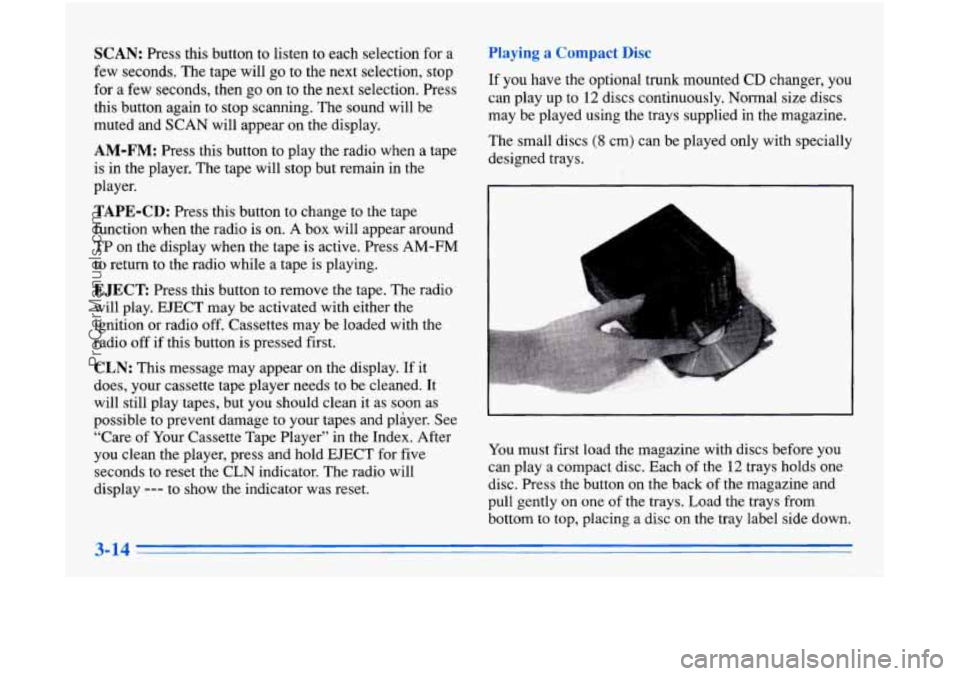
Playing a Compact Disc
If you have the optional trunk mounted CD changer, you
can play up to
12 discs continuously. Normal size discs
may be played using the trays supplied in the magazine.
The small discs
(8 cm) can be played only with specially
designed trays.
I
I
A L
You must first load the magazine with discs before you
can play a compact disc. Each of the
12 trays holds one
disc. Press the button on the back of the magazine and
pull gently on one of the trays. Load
the trays from
bottom to top, placing a disc on the tray label side down.
ProCarManuals.com