buttons Oldsmobile Aurora 1997 s User Guide
[x] Cancel search | Manufacturer: OLDSMOBILE, Model Year: 1997, Model line: Aurora, Model: Oldsmobile Aurora 1997Pages: 404, PDF Size: 20.75 MB
Page 148 of 404

Automatic Operation
Press the AUTO-PUSH knob when you want the system
to automatically adjust the interior temperature to your
preference. When the system is set for automatic
operation, air will come from the floor, upper or the
windshield outlets depending on the temperature inside
the vehicle, the outside temperature and the sun load.
Fan speed will vary as the system reaches and maintains
the comfort setting you have selected.
To find your comfort setting, start with the system in
automatic mode by pressing the AUTO-PUSH knob.
Adjust the comfort setting by using
the red and blue
buttons located below the digital display until you reach
a value of 75°F (24"C), on the display. Give the vehicle
about
20 minutes to stabilize and then readjust the
comfort setting if necessary. The display will show the
comfort setting for five seconds and then
it will show
the outside temperature.
In cold weather, the system will delay turning on the fan
to avoid blowing cold air. The length of the delay
depends
on the engine coolant temperature and the
outside temperature. Rotating the AUTO FAN knob will
override this delay by turning
off the automatic fan
mode and changing the fan speed.
I A I
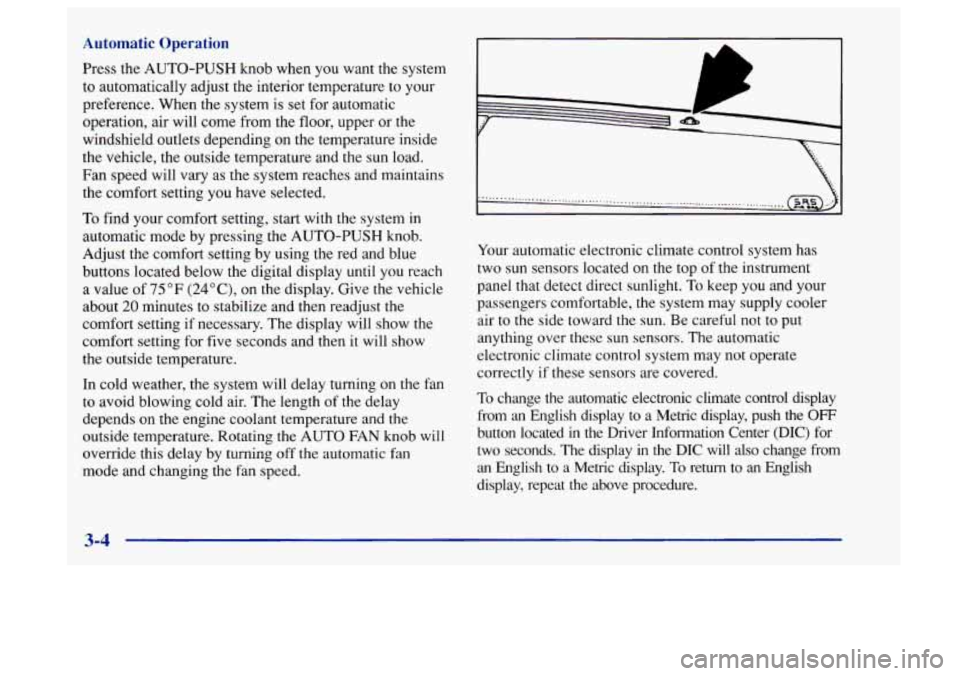
Your automatic electronic climate control system has
two sun sensors located on the top of the instrument
panel that detect direct sunlight.
To keep you and your
passengers comfortable, the system may supply cooler
air to the side toward the sun. Be careful not
to put
anything over these sun sensors. The automatic
electronic climate control system may not operate
correctly if these sensors are covered.
To change the automatic electronic climate control display
from an English display to a Metric display, push the
OFF
button located in the Driver Information Center (DIC) for
two seconds. The display
in the DIC will also change from
an English
to a Metric display. To return to an English
display, repeat
the above procedure.
3-4
Page 156 of 404

RCL: Press this button briefly to recall the station being
played or to display the clock.
To change what is
normally shown on the display (station or time), press
the
RCL button until you see the display you want, then
hold the RCL button until the display flashes. If you
press the button when the ignition is off,
the clock will
show for a few seconds.
Finding a Station
AM-FM: Press this button to switch between AM, FMl
and FM2. The display shows your selection.
TUNE: Press this knob lightly so it extends. Turn it to
choose radio stations. Push the knob back into its stored
position when you’re not using it.
SEEK: Press the up or down arrow to go to the next
higher or lower station and stay there. The sound will
mute while seeking.
SCAN: Press this button and release it to listen to
stations for a few seconds. The radio will go to a station,
stop for a few seconds, then
go on to the next station.
Press the button again to stop scanning. The sound will
mute while scanning, and SCAN will appear on the
display. If you press SCAN for more than two seconds,
the radio will change to P SCAN mode. P SCAN will
appear on the display.
PUSHBUTTONS: The five numbered pushbuttons let
you return
to your favorite stations. You can set up to
15 stations (five AM, five FM 1 and five FM2). Just:
1.
2.
3.
4.
5.
6.
Turn the radio on.
Press AM-FM to select the band.
Tune in the desired station. Press
TONE to select the equalization that best suits
the type
of station selected.
Press and hold one of the five numbered buttons.
The sound will mute, When
it returns, release the
button. Whenever you press that numbered button,
the station you set will return and the tone that you
selected
will also be automatically selected for
that button.
Repeat the steps for each pushbutton.
P SCAN: Press SCAN for more than two seconds, and
P SCAN will appear on the display. The radio will go to
the first preset station stored on your pushbuttons, stop
for a few seconds, then
go on to the next preset station.
Press SCAN again to stop scanning.
3-12
Page 162 of 404

PUSHBUTTONS: The five numbered pushbuttons let
you return to your favorite stations. You can set up to
15 stations (five AM, five FM1 and five FM2). Just:
1. Turn the radio on.
2. Press AM-FM to select the band.
3. Tune in the desired station.
4. Press and hold one of the five numbered buttons. The
sound will mute, When it returns, release
the button.
Whenever
you press that numbered button, the station
you set will return.
5. Repeat the steps for each pushbutton.
P SCAN: Press SCAN for more than two seconds, and
P SCAN will appear on the display. The radio will go to
the first preset station stored on your pushbuttons, stop
for a few seconds, then
go on to the next preset station.
Press SCAN again to stop scanning.
Setting the Tone
BASS:
Press this knob lightly so it extends. Turn the
knob to increase or decrease bass.
TREB: Press this knob lightly so it extends. Then pull
the knob all the way out. Turn the knob to increase or
decrease treble. If a station is weak or noisy, you may
want to decrease the treble.
Push these knobs back into their stored positions when
you’re not using them.
3-18
Page 168 of 404

All of the CD functions are controlled by the radio
buttons except
for ejecting the magazine. Whenever a
CD magazine with discs is loaded in the changer, the
compact disc symbol (CDC) will appear on the radio
display.
If the CD changer is checking the magazine for
CDs, the (CDC) symbol will flash on
the display until
the changer is ready to play. When a CD begins playing,
a disc and track number will be displayed. The disc
numbers are listed on the front of the magazine.
Compact Disc Errors
If E and a number appear on the display, an error has
occurred and the compact disc temporarily cannot play.
The CD changer will send an error message to the
receiver
to indicate:
E34: CD Changer Door Open
E35: CD Changer Cartridge Empty
If the error occurred while trying to play a CD in the
compact disc player or changer, the following conditions
may have caused the error:
The road is too rough. The disc should play when the
road
is smoother.
0 The disc is dirty, scratched, wet or upside down.
The air is very humid. If so, wait about an hour and
try again.
The CD changer door is open. Completely close the
An empty magazine is inserted in the CD changer.
door to restore normal operation.
Try the magazine again with a disc loaded
on one of
the trays.
If any error occurs repeatedly or if an error cannot be
corrected, please contact your retailer. If your radio
displays an error number, write it down and provide it to
your retailer when reporting the problem.
Playing a Compact Disc
REV (1): Press and hold this button to quickly reverse
within a track.
As the CD reverses, elapsed time will be
displayed to help you find the correct passage.
FWD (2): Press and hold this button to quickly advance
within a track.
As the CD advances, elapsed time will be
displayed to help you find the correct passage.
PROG (3): Press this button to select the next disc in the
magazine. Each time
you press PROG, the disc number on
the radio display
will increment to the next available CD.
If a CD cannot be played, its number will be skipped
when selecting discs while using the PROG button.
3-24
Page 170 of 404

Activating the Theft-Deterrent Feature
The instructions which follow, explain how to enter your
secret code to activate the THEFTLOCK system. It is
recommended that you read through all nine steps
before starting the procedure.
NOTE: If you allow more than
15 seconds to elapse
between any steps, the radio automatically reverts to
time and
you must start the procedure over at Step 4.
1. Write down any three or four-digit number from
000 to 1999 and keep it in a safe place separate from
the vehicle.
2. Turn the ignition to ACCESSORY or RUN.
3. Turn the radio off.
4. Press the 1 and 4 buttons together. Hold them down
until
--- shows on the display. Next you will use the
secret code number which
you have written down.
5. Press MN and 000 will appear on the display.
6. Press MN again to make the last two digits agree
7. Press HR to make the first one or two digits agree
with
your code.
with your code.
8. Press AM-FM after you have confirmed that the
code matches the secret code you have written down
The display will show REP to let you know that you
need to repeat Steps
5 through 7 to confirm your
secret code.
9. Press AM-FM and this time the display will show
SEC to let you know that your radio is secure.
3-26
Page 171 of 404

Unlocking the Theft-Deterrent Feature After a
Power
Loss
Enter your secret code as follows; pause no more than
15 seconds between steps:
1. LOC appears when the ignition is on.
2. Press MN and 000 will appear on the display.
3. Press MN again to make the last two digits agree
4. Press HR to make the first one or two digits agree
with
your code.
with your code.
5. Press AM-FM after you have confirmed that the
code matches the secret code you have written down.
The display will show SEC, indicating the radio is
now operable and secure.
If you enter the wrong code eight times, INOP will
appear
on the display. You will have to wait an hour
with the ignition on before you can try again. When you
try again, you will only have three chances to enter the
correct code before INOP appears.
If you lose or forget your code, contact your retailer.
Disabling the Theft-Deterrent Feature
1. Turn the ignition to ACCESSORY or RUN.
2. Turn the radio off.
3. Press the 1 and 4 buttons together. Hold them down
until SEC shows on the display.
4. Press MN and 000 will appear on the display.
5. Press MN again to make the last two digits agree
with your code.
6. Press HR to make the first one or two digits agree
with your code.
7. Press AM-FM after you have confirmed that the
code matches the secret code you have written down.
The display will show
---, indicating that the radio is
no longer secured.
If the code entered is incorrect, SEC will appear on the
display. The radio will remain secured until the correct
code is entered.
When battery power is removed and later applied to a
secured radio, the radio won’t turn
on and LOC will
appear on the display.
To unlock a secured radio,
see “Unlocking the
Theft-Deterrent Feature After a Power
Loss” earlier in
this section.
Enter your secret code as follows; pause no more than
15 seconds between steps:
3-27
Page 172 of 404

Steering Wheel Controls for Audio System
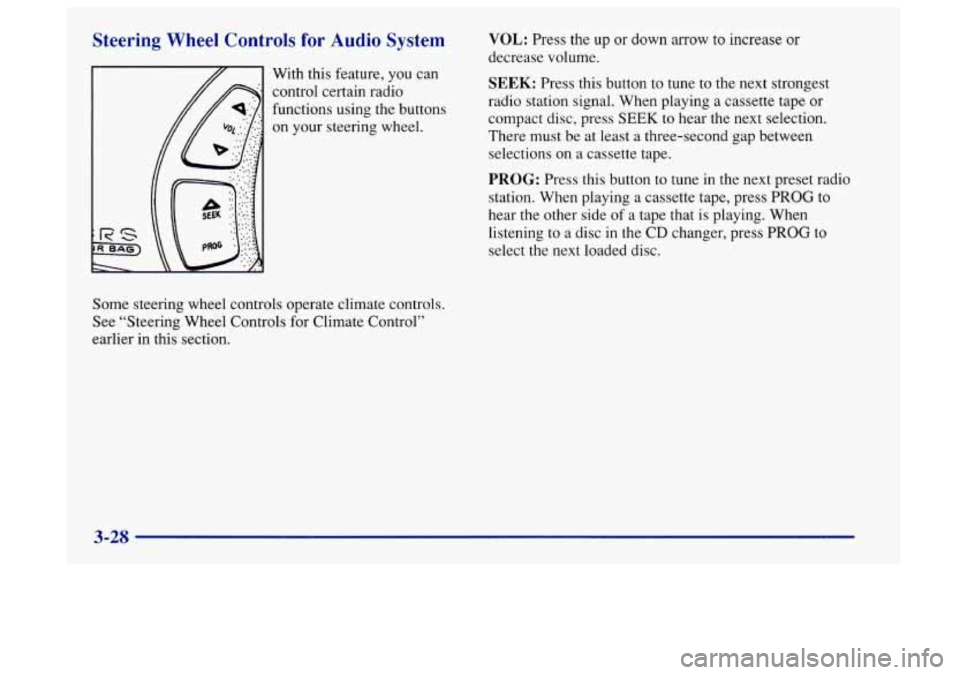
With this feature, you can
control certain radio
functions using the buttons
on your steering wheel.
VOL: Press the up or down arrow to increase or
decrease volume.
SEEK: Press this button to tune to the next strongest
radio station signal. When playing a cassette tape
or
compact disc, press SEEK to hear the next selection.
There must be at least a three-second gap between
selections on a cassette tape.
PROG: Press this button to tune in the next preset radio
station. When playing a cassette tape, press
PROG to
hear the other side
of a tape that is playing. When
listening to a disc
in the CD changer, press PROG to
select the next loaded disc.
Some steering wheel controls operate climate controls.
See “Steering Wheel Controls for Climate Control”
earlier in this section.
3-28