buttons Oldsmobile Aurora 1997 Owner's Manuals
[x] Cancel search | Manufacturer: OLDSMOBILE, Model Year: 1997, Model line: Aurora, Model: Oldsmobile Aurora 1997Pages: 404, PDF Size: 20.75 MB
Page 12 of 404
The seat and mirror positions will be stored for the
number pressed. Repeat the procedure to store another
position with the other number if desired.
To adjust the
seat and mirrors to the stored position, press the number
corresponding to the position. The memory function will
only work with the gearshift in PARK (P).
To stop the automatic movement, move the seat switch
in any direction. For easier exiting, press the
1 and 2
buttons at the same time to move the seat completely
down and back.
Remote Lock Control Personalization
Feature
Each Remote Lock Control transmitter can be
programmed to move the driver’s seat and outside
mirrors to a set memory position when
the transmitter’s
UNLOCK button is pressed. For programming
instructions, see “Personalization Features’’ in the Index.
Heated Front Seat (Option)
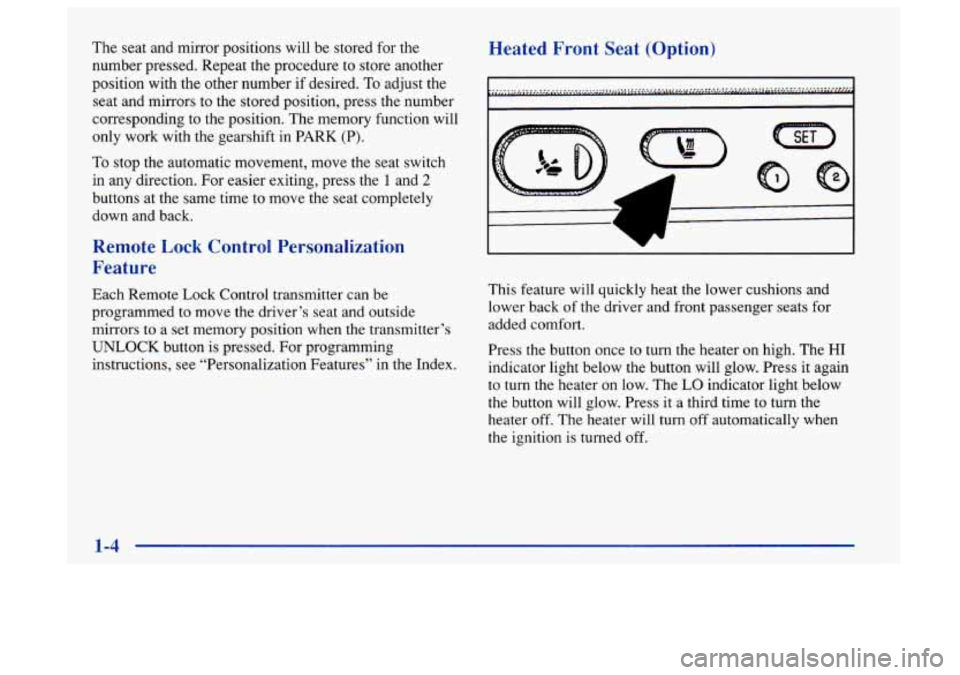
This feature will quickly heat the lower cushions and
lower back
of the driver and front passenger seats for
added comfort.
Press the button once
to turn the heater on high. The HI
indicator light below the button will glow. Press it again
to turn the heater
on low. The LO indicator light below
the button will glow. Press
it a third time to turn the
heater
off. The heater will turn off automatically when
the ignition is turned off.
1-4
Page 65 of 404
Changes or modifications to this system by other than an
authorized service facility could void authorization to
use this equipment.
This system has a range of about 3 feet (1 m) up to 30 feet
(9 m). At times you may notice a decrease in range.
This is normal for any remote lock control system. If the
transmitter does not work or if
you have to stand closer to
your vehicle for the transmitter to work,
try this:
0
0
0
0
Check to determine if battery replacement or
resynchronization is necessary. See
the instructions
that follow.
Check the distance. You may be too far from your
vehicle. You may need to stand closer during rainy
or snowy weather.
Check the location. Other vehicles or objects may be
blocking the signal. Take a few steps to
the left or right,
hold the transmitter higher, and
try again.
If you’re still having trouble, see your Aurora retailer
or a qualified technician for service.
Operation
The driver’s door will unlock when UNLOCK is pressed.
If pressed again within
25 seconds, all doors will unlock.
Pressing the
UNLOCK button will also illuminate the
interior lamps. (See “Illuminated Entry’’
in the Index.) All
doors will lock when
LOCK is pressed. The
trunk will unlock when the opened trunk symbol
is
pressed, but only when the ignition is off. The trunk
symbol will also work when the ignition
is on, but only
while in PARK
(P) or NEUTRAL (N).
Instant Alarm
When the button with the horn symbol on the key
transmitter is pressed, the horn will sound and the
headlamps and taillamps will flash for
up to two
minutes. This can be turned
off by pressing the instant
alarm button again, unlocking the vehicle with a key or
by turning
the ignition on.
Resynchronization
If only the instant alarm button works, the transmitter
needs
to be resynchronized to the receiver. Do this by
pressing and holding both the LOCK and UNLOCK
buttons for about eight seconds; you must be within
range of the vehicle.
Once the transmitter has been resynchronized, the horn
will chirp and the exterior lamps will flash once. The
system should now operate properly.
Page 67 of 404
Personalization Features Memory Seat and Mirrors
The following
list of features that are available on your The transmitters can also be programmed to move the
Aurora can be programmed to the driver’s preference for driver’s
seat and outside mirrors to a set memory
each
of the key transmitters. position when the key transmitter’s UNLOCK button
0
0
0
a
Memory Door Locks: This feature programs your
door locks to automatically lock or unlock when
shifting in and
out of PARK (P).
Security Feedback: This feature provides feedback
to the driver when the vehicle receives
a command
from the key transmitter.
Delayed Locking: This feature lets the driver delay
the actual locking of the vehicle. When all doors
have been closed, the doors will lock automatically
after five seconds.
Perimeter Lighting: When the UNLOCK button on
the key transmitter is pressed, the headlamps,
parking lamps, back-up lamps and cornering lamps
will turn
on in dark conditions.
For more detailed information and programming
instructions, refer to the Index for each individual
feature listed above.
is pressed.
To program the system:
1. Adjust the driver’s seat to a comfortable position.
Adjust both outside mirrors
to suit you. See
“Mirrors” in the Index.
2. Press the SET button on the driver’s door panel. You
will hear one beep.
3. Within five seconds, press one of the two memory
buttons on
the door panel. You will hear two beeps to
confirm that the mirror and the seat positions are
entered into memory.
4. Press the UNLOCK button on the appropriate
transmitter within five seconds.
You will hear
two beeps.
The second key transmitter can be programmed to
record a different seat and mirror position by following
the same steps.
2-11
Page 68 of 404
If you prefer to program the exit seat position, which
moves the seat completely down and back, follow
these steps:
1. Press the SET button on the driver’s door panel. You
will hear one beep.
2. Press one of the memory buttons on the driver’s door
panel.
You will hear one beep, but the seat will not
move at this time.
3. Press the UNLOCK button on the appropriate
transmitter within five seconds. You will hear
two beeps.
This personalization feature will work only when the
vehicle is in PARK
(P). A beep will sound inside the
vehicle when the UNLOCK button on the transmitter is
pressed to move the seat and mirrors.
To turn this feature off, pr.ess SET and then UNLOCK
within five seconds.
Delayed Locking
This Personalization feature lets the driver delay the
actual
locking of the vehicle. When the power door lock
switch is pressed, with the key removed
from the
ignition and the driver’s door open, a chime will sound
three times to signal that the lock delay mode is active.
When all doors have been closed, the doors will lock
automatically after five seconds. If any door is opened
before this, the five-second timer will reset itself once
all the doors have been closed again.
Pressing the door lock switch twice within two seconds
will override this feature.
The delayed locking feature can be turned on or
off for
each remote transmitter.
To turn the feature on:
1. Press and hold the power door lock switch
throughout this procedure. All the doors will lock.
2. Press the UNLOCK button on the remote transmitter.
The lock delay is still
off and all doors will remain locked.
3. Press the UNLOCK button on the remote transmitter
again. Lock delay is now active and
all doors will unlock.
4. Release the power door lock switch.
To turn the feature off, repeat the previous procedure.
2-12
Page 70 of 404
1 To replace the battery:
NOTICE: I 1. Insert a coin into-the notch near the keyring. Turn the
coin counterclockwise to separate the two halves
of
When replacing the battery, use care not to touch
any of the circuitry. Static from your body the transmitter.
transferred to these surfaces may damage
the transmitter.
2. Once the transmitter is separated, use a pencil to
remove the old battery. Do not use a metal object.
3. Replace the battery as the instructions under the
cover indicate.
4. Snap the transmitter back together tightly to be sure
no moisture can enter.
5. Resynchronize the transmitter by pressing and
holding the
LOCK and UNLOCK buttons for eight
seconds within range
of the vehicle. Once the
transmitter is resynchronized, the horn will chirp and
the exterior lamps will flash once.
2-14
Page 118 of 404
Your vehicle’s engine should be turned off while
programming your transmitter. Follow these steps to
program up to three channels:
1.
2.
3.
4.
- -
If you have not previously programmed a universal
transmitter channel, proceed to Step
2. Otherwise,
hold down the two outside buttons on the universal
transmitter until the red light begins to flash rapidly
(approximately
20 seconds). Then release the
buttons. This procedure initializes the memory and
erases any previous settings for all three channels.
Hold the end
of your hand-held transmitter against
the bottom surface of the universal transmitter
so
that you can still see the red light.
Decide which one of the three channels you want to
program. Using both hands, press the hand-held
transmitter button and the desired button on the
universal transmitter. Continue to hold both buttons
through Step
4.
Hold down both buttons until you see the red light
on the universal transmitter flash slowly then rapidly.
The rapid flashing, which could take up to
90 seconds, indicates that the universal transmitter
has been programmed. Release both buttons three
seconds after the light starts
to flash rapidly. If
you have trouble programming the universal
transmitter, make sure that you have followed the
directions exactly
as described and that the batteries in
the hand-held transmitter are not dead. If you still
cannot program it, rotate your hand-held transmitter end
over end and try again. The universal transmitter may
not work with older garage door openers that do not
meet current Federal Consumer Safety Standards. If you
cannot program the transmitter after repeated attempts,
consult your Aurora retailer.
Be sure to keep your original hand-held transmitter in case
you need to erase and reprogram the universal transmitter.
Note to Canadian Owners: During programming, your
hand-held transmitter may stop transmitting after one or
two seconds. If you are programming from
one of these
transmitters, you should press and re-press the button on
the hand-held transmitter every two seconds without
ever releasing
the button on the universal transmitter.
Release both buttons three seconds after the red light on
the universal transmitter begins to flash rapidly.
Operating the Transmitter
Press and hold the appropriate button on the universal
transmitter. The red light comes on while the signal
is
being transmitted.
Note that the effective transmission range
of the
universal transmitter may differ from your hand-held
transmitter and also from one channel to another.
2-62
Page 119 of 404
Training a Garage Door Opener Equipped
with “Rolling Codes”
If you programmed the universal transmitter, but the
garage door will not open, and
if your garage door
opener was manufactured after
1995, your garage door
may have a security feature that changes the “code”
of your garage door opener every time it is opened
or closed.
To determine if your garage door opener has this rolling
code feature, press the appropriate button on the
universal transmitter that was programmed. If the red
light flashes rapidly for one to two seconds, then turns
solid, your garage door opener has this feature.
To program a garage door opener with the rolling code
feature, do the following:
1.
2.
3. Program your hand-held
transmitter to the universal
transmitter by following the steps provided under
“Programming the Transmitter” earlier.
Remove the cover panel from
the garage door
opener receiver. It is located near the garage door
opener motor.
Locate the training button on the garage door opener
receiver. The exact location and color will vary
among brands.
4.
5.
6.
Press the training button on the garage door opener
receiver for one to two seconds.
Return to your vehicle and press the programmed
button on the universal transmitter until the red light
flashes rapidly (about two seconds).
Release the button, then press it again
to confirm it
was programmed to the garage door opener receiver.
You may now use either the universal transmitter or the
hand-held transmitter to open your garage door. If
you
still have difficulty in programming and require
assistance, please call your Aurora retailer.
Erasing Channels
To erase all three programmed channels, hold down the
two outside buttons until the red light begins to flash.
Individual channels cannot be erased, but can be
reprogrammed using the procedure for programming the
transmitter explained earlier.
Accessories
Accessories for your universal transmitter are available
from
the manufacturer of the unit. If you would like
additional information please call 1-800-355-35 15.
2-63
Page 136 of 404
Driver Information Center
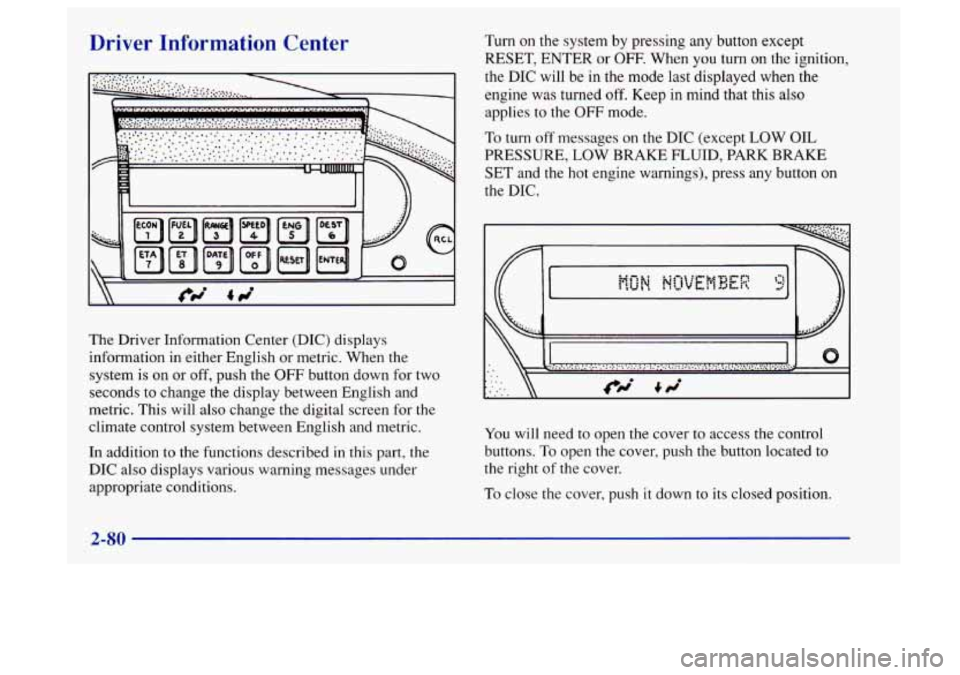
The Driver Information Center (DIC) displays
information in either English or metric. When the
system
is on or off, push the OFF button down for two
seconds to change the display between English and
metric. This will also change the digital screen for the
climate control system between English and metric.
In addition to the functions described in this part, the
DIC also displays various warning messages under
appropriate conditions.
Turn on the system by pressing any button except
RESET, ENTER or
OFF- When you turn on the ignition,
the DIC will be in the mode
last displayed when the
engine was turned
off. Keep in mind that this also
applies to the
OFF mode.
To turn off messages on the DIC (except LOW OIL
PRESSURE,
LOW BRAKE FLUID, PARK BRAKE
SET and the hot engine warnings), press any button on
the DIC.
0
You will need to open the cover to access the control
buttons.
To open the cover, push the button located to
the right of the cover.
To close the cover, push it down to its closed position.
2-80
Page 146 of 404
Comfort Controls
This section tells you how to operate your climate
control system. Your climate control system uses
ozone-friendly
R- 134a refrigerant.
Automatic Electronic Climate Control
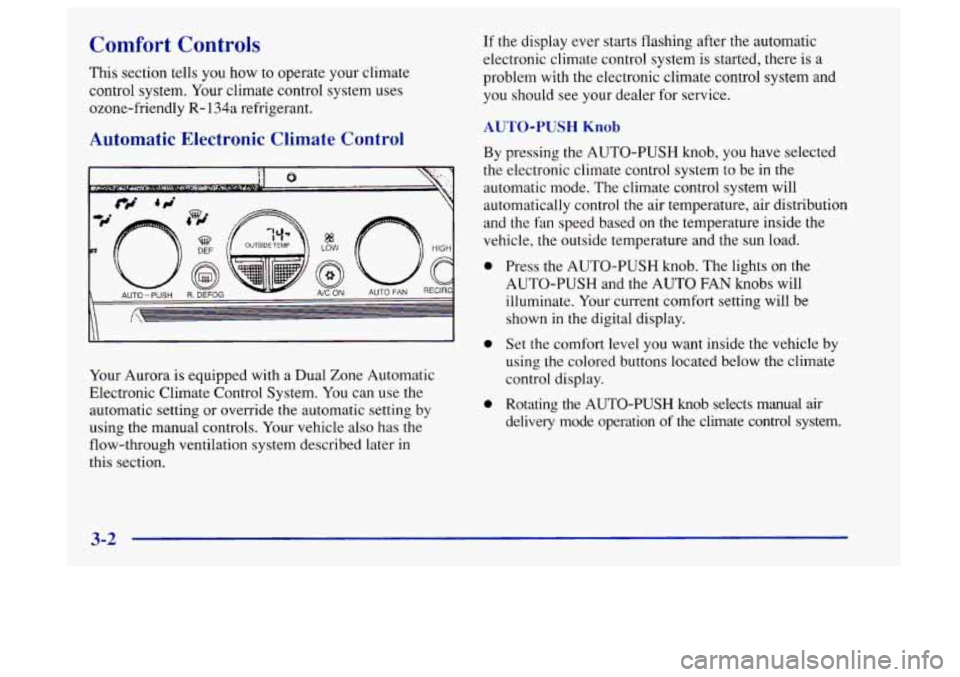
Your Aurora is equipped with a Dual Zone Automatic
Electronic Climate Control System. You can use the
automatic setting or override the automatic setting
by
using the manual controls. Your vehicle also has the
flow-through ventilation system described later
in
this section.
If the display ever starts flashing after the automatic
electronic climate control system is started, there is a
problem with the electronic climate control system and
you should see your dealer for service.
AUTO-PUSH Knob
By pressing the AUTO-PUSH knob, you have selected
the electronic climate control system to be in the
automatic mode. The climate control system will
automatically control the air temperature, air distribution
and the fan speed based on
the temperature inside the
vehicle, the outside temperature and the sun load.
0
0
0
Press the AUTO-PUSH knob. The lights on the
AUTO-PUSH and the AUTO FAN knobs will
illuminate. Your current comfort setting will be
shown in the digital display.
Set the comfort level you want inside the vehicle by
using the colored buttons located below the climate
control display.
Rotating the
AUTO-PUSH knob selects manual air
delivery mode operation of the climate control system.
3-2
Page 147 of 404
Temperature Buttons AUTO FAN Knob
To adjust the comfort level you want maintained inside
the vehicle, use the red and blue buttons located below
the digital display. If you want a warmer comfort level,
push the red button. If you want a cooler comfort level,
push the blue button. Your selected comfort setting will
be displayed on the digital screen for five seconds,
then
the outside temperature will be displayed.
Mode Control
Rotate the AUTO-PUSH knob to deliver air through
the floor, upper or windshield outlets. The system will
stay in the selected mode until the AUTO-PUSH
knob is pressed. This
knob controls the fan speed in either an automatic
mode or a manual mode.
0 Pressing the AUTO FAN knob puts the fan control in
the automatic mode. The AUTO FAN light will
appear below the knob. The fan speed indicators will
not be illuminated when the system is in the
automatic fan control mode.
Rotating the AUTO FAN knob selects a manual fan
speed. Rotate this knob to the right
to raise the fan
speed. Rotate this knob to the left to lower the fan
speed. Rotating the AUTO FAN knob overrides
the automatic fan control mode.
The fan speed
indicators will be illuminated while in the manual
fan control mode.
3-3