change time Oldsmobile Aurora 1997 s Owner's Guide
[x] Cancel search | Manufacturer: OLDSMOBILE, Model Year: 1997, Model line: Aurora, Model: Oldsmobile Aurora 1997Pages: 404, PDF Size: 20.75 MB
Page 187 of 404
Braking in Emergencies
With anti-lock, you can steer and brake at the same
time.
In many emergencies, steering can help you more
than even the very best braking.
Steering
Power Steering
If you lose power steering assist because the engine
stops or the system
is not functioning, you can steer but
it will take much more effort.
Magnasteer TM
Your vehicle is equipped with GM Magnasteer TM, a
steering system that continuously adjusts the effort you
feel when steering at all vehicle speeds. It provides ease
when parking yet a firm, solid feel at highway speeds.
Steering Tips
Driving on Curves
It’s important to take curves at a reasonable speed.
A lot of the “driver lost control” accidents mentioned on
the news happen on curves. Here’s why: Experienced
driver or beginner, each of
us is subject to
the same laws of physics when driving
on curves. The
traction of the tires against the road surface makes it
possible for the vehicle to change its path when you turn
the front wheels. If there’s no traction, inertia will keep
the vehicle going
in the same direction. If you’ve ever
tried to steer a vehicle on wet ice, you’ll understand this.
The traction you can get in a curve depends on the
condition
of your tires and the road surface, the angle at
which the curve is banked, and your speed. While you’re
in a curve, speed
is the one factor you can control.
Suppose you’re steering through a sharp curve.
Then you suddenly accelerate. Both control
systems
-- steering and acceleration -- have to do their
work where the tires meet the road. Adding the sudden
acceleration can demand
too much of those places. You
can lose control. Refer to “Traction Control System” in
the Index.
What should you do if this ever happens? Ease up on the
accelerator pedal, steer the vehicle the way you want
it
to go, and slow down.
Speed limit signs near curves warn that you should
adjust your speed. Of course, the posted speeds
are
based on good weather and road conditions. Under less
favorable conditions
you’ll want to go slower.
Page 190 of 404

Do not get too close to the vehicle you want to pass
while you’re awaiting an opportunity. For one thing,
following too closely reduces your area of vision,
especially if you’re following a larger vehicle. Also,
you won’t have adequate space if the vehicle
ahead suddenly slows or stops. Keep back a
reasonable distance.
When it looks like a chance to pass is coming up,
start to accelerate but stay in the right lane and don’t
get
too close. Time your move so you will be
increasing speed
as the time comes to move into the
other lane.
If the way is clear to pass, you will have a
“running start” that more than makes up for the
distance you would lose by dropping back. And if
something happens to cause you to cancel your pass,
you need only slow down and drop back again and
wait for another opportunity.
0 If other cars are lined up to pass a slow vehicle, wait
your turn. But take care that someone isn’t trying to
pass you as you pull out to pass the slow vehicle.
Remember to glance over your shoulder and check
the blind spot.
Check your mirrors, glance over your shoulder, and
start your left lane change signal before moving out
of the right lane to pass. When you are far enough
ahead of the passed vehicle to see its front in your
inside mirror, activate your right lane change signal
and move back into the right lane. (Remember that
your right outside mirror is convex. The vehicle you
just passed may seem to be farther away from you
than it really is.)
0 Try not to pass more than one vehicle at a time on
two-lane roads. Reconsider before passing the
next vehicle.
0 Don’t overtake a slowly moving vehicle too rapidly.
Even though the brake lamps are not flashing, it may
be slowing down or starting to turn.
0 If you’re being passed, make it easy for the
following driver to get ahead of you. Perhaps you
can ease a little to the right.
4-14
Page 213 of 404
Making Turns
I NOTICE:
Making very sharp turns while trailering could
cause the trailer to come in contact with the
vehicle. Your vehicle could be damaged. Avoid
making very sharp turns while trailering.
When you’re turning with a trailer, make wider turns than
normal.
Do this so your trailer won’t strike soft shoulders,
curbs, road signs,
trees or other objects. Avoid jerky or
sudden maneuvers. Signal well in advance.
Turn Signals When Towing a Trailer
The green arrows on your instrument panel will flash
whenever you signal a turn or lane change. Properly
hooked up, the trailer lamps will also flash, telling other
drivers you’re about to turn, change lanes or stop.
When towing a trailer, the green arrows
on your
instrument panel will flash for turns even
if the bulbs on
the trailer are burned out. Thus, you may think drivers
behind you
are seeing your signal when they are not. It’s
important to check occasionally to be sure the trailer
bulbs are still working. Your
vehicle may have bulb warning messages. When
you plug a trailer lighting system into your vehicle’s
lighting system, its bulb warning messages may not let
you know
if one of your lamps goes out. So, when you
have a trailer lighting system plugged in, be sure to
check your vehicle and trailer lamps from time
to time
to be sure they’re all working. Once you disconnect the
trailer lamps, the bulb warning messages again can tell
you if one
of your vehicle lamps is out.
Driving On Grades
Reduce speed and shift to a lower gear before you start
down a long or steep downgrade.
If you don’t shift
down, you might have
to use your brakes so much that
they would get hot and no longer work well.
Parking on Hills
You really should not park your vehicle, with a trailer
attached, on a hill. If something goes wrong, your rig
could start to move. People can be injured, and both
your vehicle and the trailer can be damaged.
4-37
Page 245 of 404
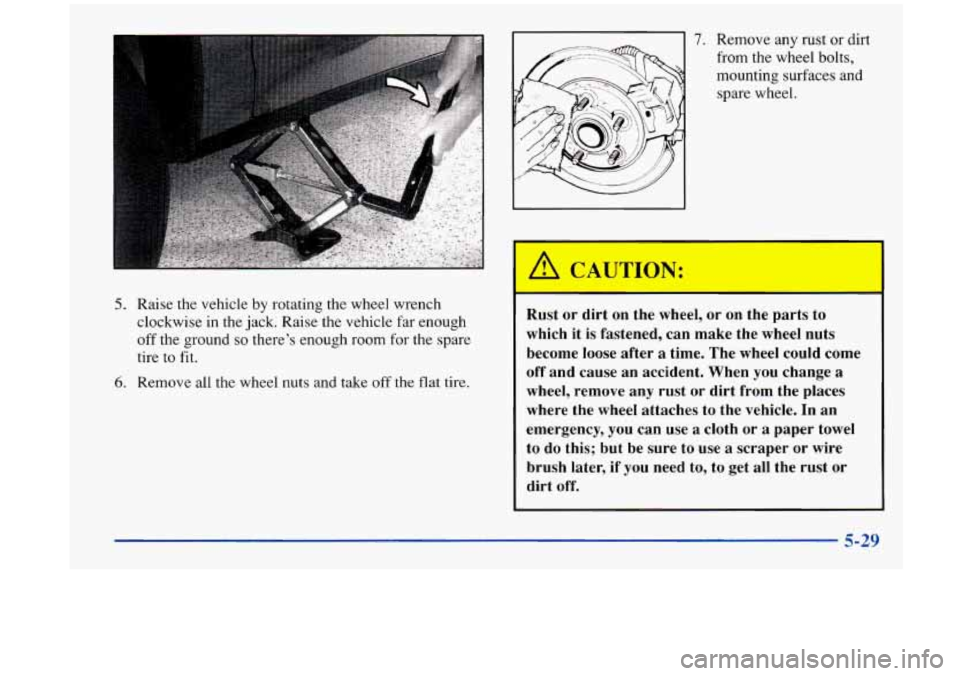
5. Raise the vehicle by rotating the wheel wrench
clockwise in the jack. Raise the vehicle far enough
off the ground so there’s enough room for the spare
tire
to fit.
6. Remove all the wheel nuts and take off the flat tire.
7. Remove any rust or dirt
from the wheel bolts,
mounting surfaces and
spare wheel.
Rust or dirt on the wheel, or on the parts to
which it is fastened, can make the wheel nuts
become loose after
a time. The wheel could come
off and cause an accident. When you change
a
wheel, remove any rust or dirt from the places
where the wheel attaches to the vehicle. In an
emergency,
you can use a cloth or a paper towel
to do this; but be sure to use
a scraper or wire
brush later, if you need to, to get all the rust or
dirt off.
5-29
Page 270 of 404
Operating the engine with the air cleaner off can
cause you or others to be burned. The air cleaner
not only cleans the air, it stops flame if the engine
backfires.
If it isn’t there, and the engine
backfires, you could be burned. Don’t drive with
it off, and be careful working on the engine with
the air cleaner
off.
NOTICE:
If the air cleaner is off, a backfire can cause a
damaging engine fire. And, dirt can easily get
into your engine, which will damage it. Always
have the air cleaner in place when you’re driving.
Automatic Transaxle Fluid
When to Check and Change
A good time to check your automatic transaxle fluid
level is when the engine oil is changed.
Change both the fluid and filter every
50,000 miles
(83 000 km) if the vehicle is mainly driven under one or
more of these conditions:
0 In heavy city traffic where the outside temperature
regularly reaches
90 OF (32 O C) or higher.
In hilly or mountainous terrain.
0 When doing frequent trailer towing.
0 Uses such as found in taxi, police or delivery service.
If you do not use your vehicle under any of these
conditions, the fluid and filter do not require changing.
See “Scheduled Maintenance Services” in the Index.
6-18
Page 283 of 404
Brake Ad-iustment
NOTICE:
Continuing to drive with worn-out brake pads
could result
in costly brake repair.
Some driving conditions or climates may cause a brake
squeal when the brakes are first applied or lightly
applied. This does not mean something is wrong with
your brakes.
Properly torqued wheel nuts are necessary to help
prevent brake pulsation. When tires are rotated, inspect brake pads for wear and evenly torque wheel nuts in the
proper sequence to GM specifications.
Brake linings should always be replaced as complete
axle sets.
See “Brake System Inspection”
in Section 7 of this manual
under
Part C “Periodic Maintenance Inspections.”
Brake Pedal Travel
See your retailer if the brake pedal does not return to
normal height, or if there is a rapid increase in pedal
travel. This could be a sign
of brake trouble. Every
time you apply the brakes, with or without the
vehicle moving, your brakes adjust for wear.
Replacing Brake System Parts
The braking system on a modern vehicle is complex. Its
many parts have to be of top quality and work well
together if the vehicle is to have really good braking.
Your vehicle was designed and tested with top-quality
GM brake parts. When you replace parts
of your braking
system
-- for example, when your brake linings wear
down and
you have to have new ones put in -- be sure
you get new approved GM replacement parts. If you
don’t, your brakes may no longer work properly. For
example, if someone puts in brake linings that are wrong
for your vehicle, the balance between your front and
rear brakes can
change
-- for the worse. The braking performance
you’ve come to expect can change in many other ways
if
someone puts in the wrong replacement brake parts.
Page 299 of 404
After the tires have been rotated, adjust the front and
rear inflation pressures as shown on the Tire-Loading
Information label. Make certain that all wheel nuts are
properly tightened. See “Wheel Nut Torque” in
the Index.
Rust or dirt on a wheel, or on the parts to which
it is fastened, can make wheel nuts become loose
after a time. The wheel could come off and cause
an accident. When you change
a wheel, remove
any rust
or dirt from places where the wheel
attaches to the vehicle.
In an emergency, you can
use
a cloth or a paper towel to do this; but be
sure
to use a scraper or wire brush later, if you
need to, to get
all the rust or dirt off. (See
“Changing
a Flat Tire” in the Index.) When
It’s Time for New Tires
r
L
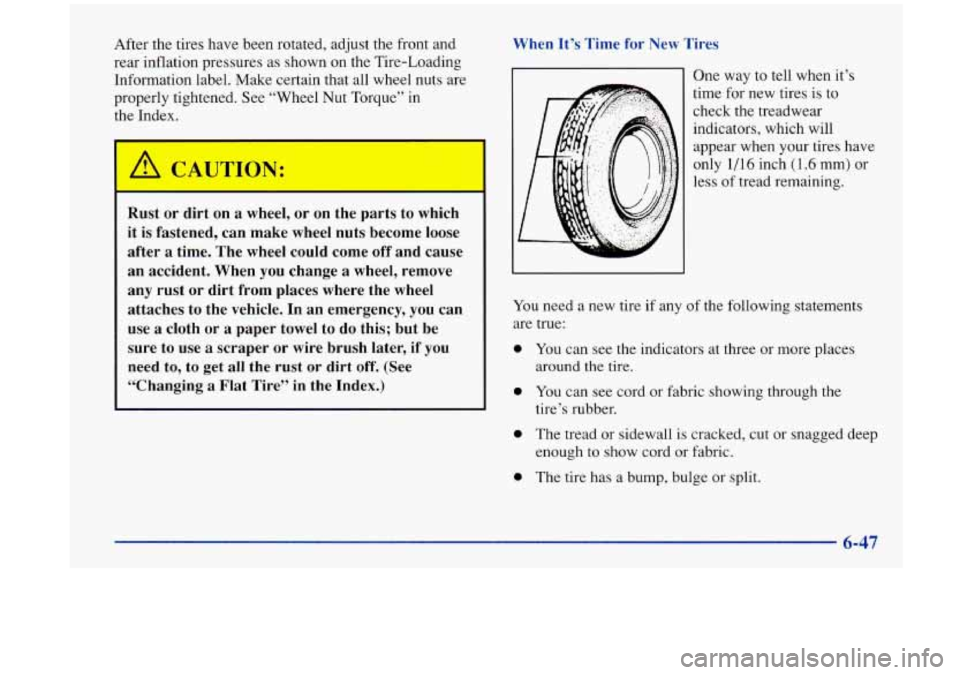
I One way to tell when it’s
time for new tires is to
check the treadwear
indicators, which will
appear when your tires have
only
1/16 inch (1.6 mrn) or
less of tread remaining.
You need a new tire if any
of the following statements
are true:
0
0
0
0
You can see the indicators at three or more places
around
the tire.
You can see cord or fabric showing through the
tire’s rubber.
The tread
or sidewall is cracked, cut or snagged deep
enough to show cord or fabric.
The tire has a bump, bulge or split.
6-47
-
Page 335 of 404
Short TripKity Maintenance Schedule
The services shown in this schedule up to 100,000 miles
(166
000 krn) should be performed after 100,000 miles
(166
000 km) at the same intervals. The services shown
at 150,000 miles (240
000 km) should be performed at
the same interval after 150,000 miles (240
000 km).
See “Owner Checks and Services” and “Periodic
Maintenance Inspections” following.
Footnotes
-f The U.S. Environmental Protection Agency or the
California Air Resources Board has determined that the
failure to perform this maintenance item will not nullify
the emission warranty or limit recall liability prior to the
completion of the vehicle’s useful life. We, however,
urge that all recommended maintenance services be
performed at the indicated intervals and the maintenance
be recorded.
# Lubricate the suspension and steering linkage,
transaxle shift linkage, parking brake cable guides and
underbody contact points and linkage.
* Your vehicle has an Engine Oil Life Monitor. This
monitor will show
you when to change the oil -- usually
between
3,000 miles (5 000 km) and 7,500 miles
(12
500 km) since your last oil change. Under severe
conditions, the indicator may come on before
3,000 miles (5 000 km). Never drive your vehicle
more than
7,500 miles (12 500 krn) or 12 months,
(whichever occurs first), without an oil change.
The system won’t detect dust in the oil.
So if you
drive in a dusty area be sure to change your oil every
3,000 miles (5 000 km) or sooner if the CHANGE OIL
light comes on. Remember to reset the Oil Life Monitor
when the oil has been changed. For more information, see “Engine Oil Life Monitor” in the Index.
+ A good time to check your brakes is during tire
rotation. See “Brake System Inspection’’ under “Periodic
Maintenance Inspection” in Part
C of this schedule.
7-7
Page 356 of 404
Long Tripmighway Maintenance Schedule
The services shown in this schedule up to 100,000 miles
(166 000 km) should be performed after 100,000 miles
(166
000 km) at the same intervals. The services shown
at 150,000 miles
(240 000 km) should be performed at
the same interval after 150,000 miles
(240 000 km).
See “Owner Checks and Services” and “Periodic
Maintenance Inspections’’ following.
Footnotes
The U.S. Environmental Protection Agency or the
California Air Resources Board has determined that the
failure to perform this maintenance item will not nullify
the emission warranty or limit recall liability prior to the
completion of the vehicle’s useful life. We, however,
urge that all recommended maintenance services be
performed at the indicated intervals and the maintenance
be recorded.
# Lubricate the suspension and steering linkage,
transaxle shift linkage, parking brake cable guides and
underbody contact points and linkage.
* Your vehicle has an Engine Oil Life Monitor. This
monitor will show you when
to change the oil -- usually
between
3,000 miles (5 000 km) and 7,500 miles
(12
500 km) since your last oil change. Under severe
conditions,
the indicator may come on before
3,000 miles (5 000 km). Never drive your vehicle more
than
7,500 miles (12 500 km) or 12 months without an
oil change.
The system won’t detect dust in the oil.
So if you drive
in a dusty area, be sure to change your oil every
3,000 miles (5 000 km) or sooner if the CHANGE OIL
light comes on. Remember to reset the Oil Life Monitor
when the oil has been changed. For more information,
see “Engine Oil Life Monitor” in the Index.
+ A good time to check your brakes is during tire
rotation. See “Brake System Inspection” under “Periodic
Maintenance Inspections” in Part
C of this schedule.
7-28
Page 389 of 404
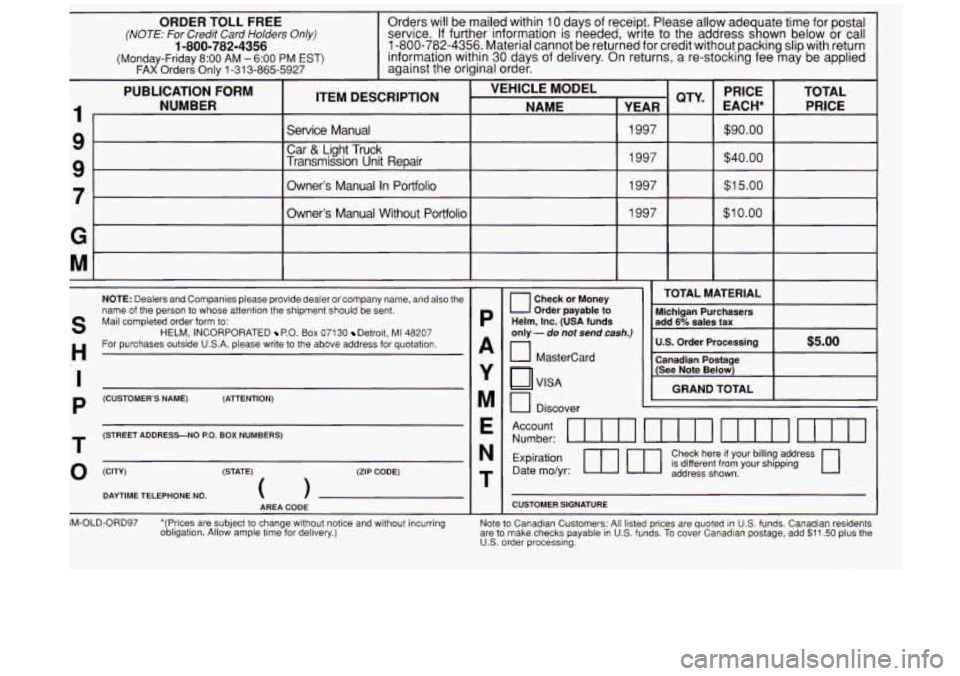
ORDER TOLL FREE
(NOTE: For Credit Card Holders Only)
(Monday-Friday 8:OO AM - 6:OO PM EST) FAX Orders Only 1-31 3-865-5927
1-800-782-4356
Orders will be mailed within 1 O.days of receipt. Please allow ade uate time for postal
servlce.
If further mformatlon IS needed, write to the address s a own below or call
1-800-782-4356. Material cannot be returned for credit without packing slip with return
information withln
30 days of delivery. On returns, a re-stocking fee may be applied
against the original order.
PUBLICATION FORM
ITEM DESCRIPTION VEHICLE MODEL
It NUMBER
NAME I YEAR I
9-
9
7-
G
M
Service Manual Car
8( Light Truck 1997
Transmission Unit Repair 1997
Owner’s Manual In Portfolio 1997
Owner’s Manual Without Portfolio 1997
S
H
I
P
T
0
NOTE: Dealers and Companies please provide dealer
or company name, and also the
name of the person to whose attention the shipment should be sent.
Mail completed order form to:
For purchases outside USA. please write to the above address for quotation.
HELM, INCORPORATED P.O. Box 07130 Detroit, MI 48207
(CUSTOMER’S NAME) (ATTENTION)
(STREET ADDRESS-NO
P.O. BOX NUMBERS)
(CW (STATE)
(ZIP CODE)
DAYTIME TELEPHONE NO.
0
AREA CODE I
GM-OLD-ORD97 ‘(Prices are subject to change without notice and without incurring
obligation. Allow ample time for delivery.)
P
A
Y
M
E
N
T
- I
T
O Check or Money
Order payable
to Helm, Inc. (USA funds
only
- do not send cash.)
[c1 Mastercard
VISA
0 Discover L
QTY‘ EACH* PRICE TOTAL
PRICE
$90.00
$1 5.00
*
$1 0.00
I I I
TOTAL MATERIAL I
Michigan Purchasers
add 6% sales tax
U.S. Order Processing
$5.00
Canadian Postage
(See Note Below)
GRAND TOTAL
Account Number: ttrn UIn 11111 UIIl
Expiration 17 ml Check here if your billing address
Date mo/yr: is different from your shipping
address shown.
CUSTOMER SIGNATURE
Note to Canadian Customers: All listed prices are quoted in US. funds. Canadian residents
are to make checks payable in US. funds. To cover Canadian postage, add $11.50 plus the US. order processing.