tires Oldsmobile Aurora 1998 s User Guide
[x] Cancel search | Manufacturer: OLDSMOBILE, Model Year: 1998, Model line: Aurora, Model: Oldsmobile Aurora 1998Pages: 380, PDF Size: 19.75 MB
Page 204 of 380
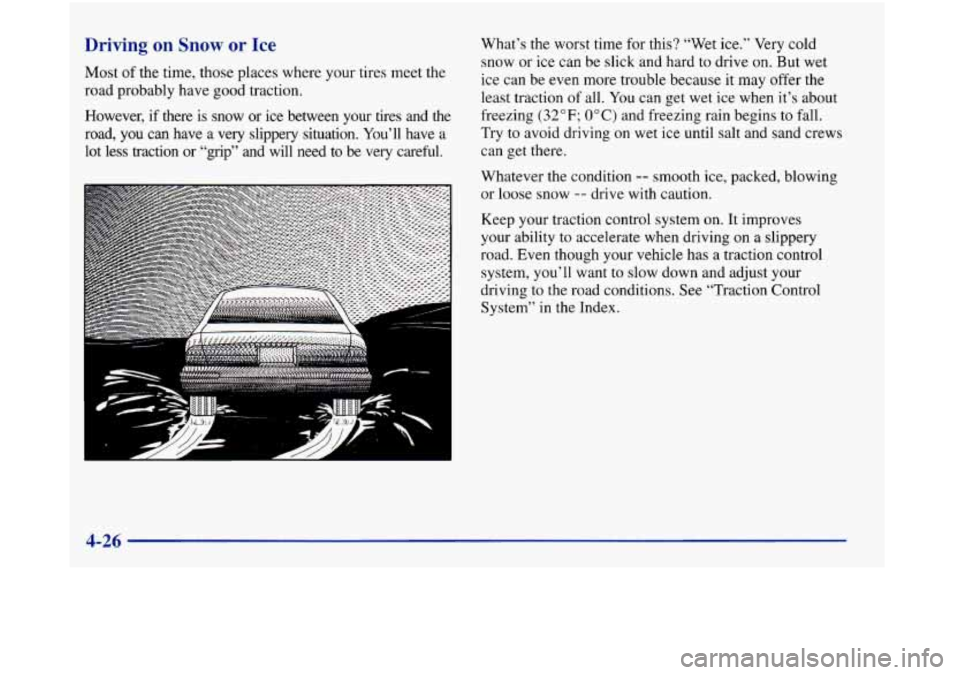
Driving on Snow or Ice
Most of the time, those places where your tires meet the
road probably have good traction.
However, if there is snow or ice between your tires and the
road, you can have a
very slippery situation. You’ll have a
lot less traction or “grip” and will need to be very careful. What’s the worst
time for this? “Wet ice.” Very cold
snow or ice can be slick and hard to drive on. But wet
ice can be even more trouble because it may offer the
least traction of all. You can get wet ice when it’s about
freezing
(32°F; OOC) and freezing rain begins to fall.
Try to avoid driving on wet ice until salt and sand crews
can get there.
Whatever the condition
-- smooth ice, packed, blowing
or loose snow
-- drive with caution.
Keep your traction control system on. It improves
your ability to accelerate when driving on a slippery
road. Even though your vehicle has a traction control
system, you’ll want to slow down and adjust your
driving to the road conditions. See “Traction Control
System” in the Index.
4-26
Page 207 of 380
Run your engine only as long as you must. This saves
fuel. When you run the engine, make it go a little faster
than just idle. That is, push the accelerator slightly. This
uses less fuel for the heat that you get and
it keeps the
battery charged. You will need a well-charged battery to
restart the vehicle, and possibly for signaling later on
with your headlamps. Let the heater run for a while.
Then, shut the engine off and close the window almost
all the way to preserve the heat. Start the engine again
and repeat this only when you feel really uncomfortable
from the cold. But do it as little as possible. Preserve the
fuel as long as you can. To help keep warm, you can get
out of the vehicle and do some fairly vigorous exercises
every half hour or
so until help comes.
Loading Your Vehicle
Fhl OCCUPANTS
VEHICLE CAP. WT.
7
TIRE-LOADING INFORMATION
FRT. CTR. RR. TOTAL LBS. KG
MAX. LOADING & GVWR SAME AS VEHICLE
CAPACITY WEIGHT
XXX COLD TIRE
TIRE
SIZE SPEED PRESSURE
RTG PSliKPa
FRT.
RR.
SPA.
IF TIRES ARE HOT, ADD 4PSIj28KPa
SEE OWNER’S MANUAL FOR ADDITIONAL
INFORMATION
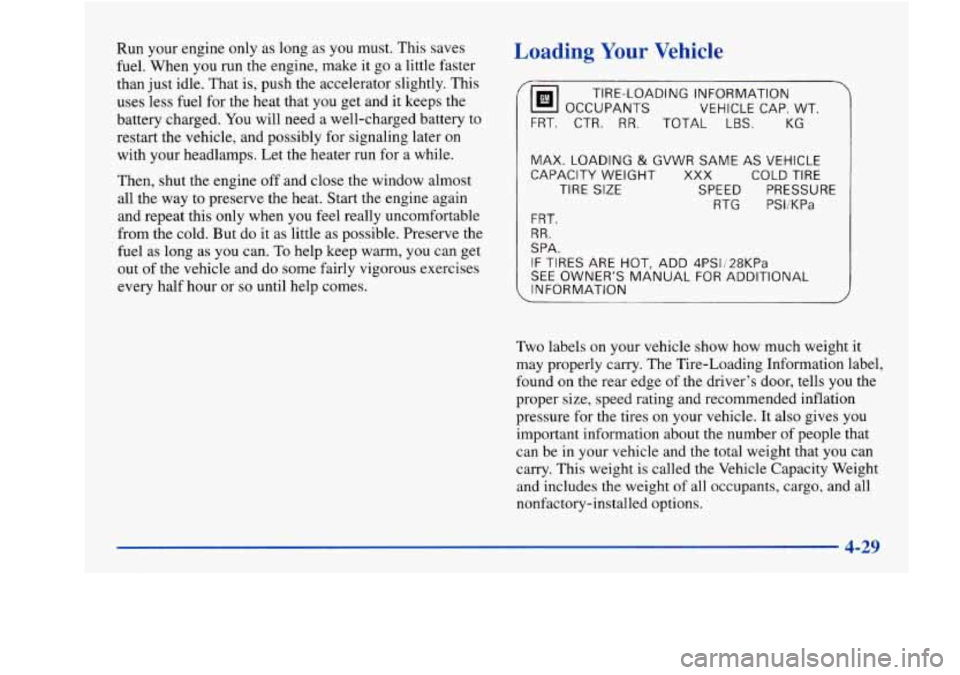
Two labels on your vehicle show how much weight it
may properly carry. The Tire-Loading Information label,
found on the rear edge
of the driver’s door, tells you the
proper size, speed rating and recommended inflation
pressure
for the tires on your vehicle. It also gives you
important information about the number of people that
can be in your vehicle and the total weight that you can
carry. This weight is called the Vehicle Capacity Weight
and includes the weight of all occupants, cargo, and all
nonfactory-installed options.
Page 210 of 380
That’s the reason for this part. In it are many
time-tested, important trailering tips and safety rules.
Many
of these are important for your safety and that of
your passengers.
So please read this section carefully
before you pull a trailer.
Load-pulling components such as the engine, transaxle,
wheel assemblies and tires are forced to work harder
against the drag of the added weight. The engine is
required to operate at relatively higher speeds and under
greater loads, generating extra heat. What’s more, the
trailer adds considerably
to wind resistance, increasing
the pulling requirements.
If You Do Decide To Pull A Trailer
If you do, here are some important points:
There are many different laws, including speed limit
restrictions, having to do with trailering. Make sure
your rig will be legal, not only where you live but
also where you’ll be driving. A good source for this
information can be state or provincial police.
Consider using a sway control. You can ask a hitch
dealer about sway controls.
0 Don’t tow a trailer at all during the first 1,000 miles
(1 600 km) your new vehicle is driven. Your engine,
axle or other parts could be damaged.
0
0
Then, during the first 500 miles (800 km) that you
tow
a trailer, don’t drive over 50 mph (80 kmk) and
don’t make starts at full throttle. This helps your
engine and other parts of your vehicle wear in at the
heavier loads.
Obey speed limit restrictions when towing a trailer.
Don’t drive faster than the maximum posted speed
for trailers (or
no more than 55 mph (90 km/h)) to
save wear on your vehicle’s parts.
Three important considerations have to do with weight:
the weight of the trailer,
the weight of the trailer tongue
and the total weight on your vehicle’s tires.
Weight of the Trailer
How heavy can a trailer safely be?
It should never weigh more than
1000 lbs. (450 kg).
But even that can be too heavy.
It depends on how you plan to use your rig.
For
example, speed, altitude, road grades, outside
temperature and how much your vehicle is used to pull a
trailer are all important. And, it can also depend on any
special equipment that you have on your vehicle.
4-32
Page 212 of 380

Total Weight on Your Vehicle’s Tires
Be sure your vehicle’s tires are inflated to the upper
limit for cold tires. You’ll find these numbers on
the Tire-Loading Information label at the rear edge
of the driver’s door or see “Loading Your Vehicle”
in the Index. Then be sure you don’t go over the
GVW limit for your vehicle, including the weight
of the trailer tongue.
Hitches
It’s important to have the correct hitch equipment.
Crosswinds, large trucks going by and rough roads are a
few reasons why you’ll need the right hitch, Here are
some rules to follow:
The rear bumper on your vehicle is not intended for
hitches.
Do not attach rental hitches or other
bumper-type hitches to it. Use only a frame-mounted
hitch that does not attach to the bumper.
Will you have to make any holes in the body of your
vehicle when you install a trailer hitch?
If you do,
then be sure to seal the holes later when you remove
the hitch. If you don’t seal them, deadly carbon
monoxide (CO) from your exhaust can get into your
vehicle (see “Carbon Monoxide” in the Index). Dirt
and water can, too.
Safety Chains
You should always attach chains between your vehicle
and your trailer. Cross the safety chains under the tongue
of the trailer
so that the tongue will not drop to the road
if it becomes separated from the hitch. Instructions
about safety chains may be provided by the hitch
manufacturer or by the trailer manufacturer. Follow the
manufacturer’s recommendation for attaching safety
chains and do not attach them to the bumper. Always
leave just enough slack
so you can turn with your rig.
And, never allow safety chains to drag on the ground.
Trailer Brakes
Does your trailer have its own brakes?
Be sure to read and follow the instructions for the trailer
brakes
so you’ll be able to install, adjust and maintain
them properly.
Because you have anti-lock brakes, do not try to tap into
your vehicle’s brake system.
If you do, both brake
systems won’t work well, or at all.
Page 213 of 380

Driving with a Trailer
Towing a trailer requires a certain amount of experience.
Before setting out for the open road, you’ll want to get
to know your rig. Acquaint yourself with the feel of
handling and braking with the added weight of the
trailer. And always keep in mind that the vehicle you are
driving is now a good deal longer and not nearly as
responsive
as your vehicle is by itself.
Before you start, check the trailer hitch and platform
(and attachments), safety chains, electrical connector,
lamps, tires and mirror adjustment. If the trailer has
electric brakes, start your vehicle and trailer moving and
then apply the trailer brake controller by hand to be sure
the brakes are working. This lets you check your
electrical connection at the same time.
During your trip, check occasionally to be sure that the
load is secure, and that the lamps and any trailer brakes
are still working.
Following Distance
Stay at least twice as far behind the vehicle ahead as you
would when driving your vehicle without a trailer. This
can help you avoid situations that require heavy braking
and sudden turns.
Passing
You’ll need more passing distance up ahead when
you’re towing a trailer. And, because you’re a good
deal longer, you’ll need to go much farther beyond the
passed vehicle before you can return
to your lane.
Backing Up
Hold the bottom of the steering wheel with one hand.
Then, to move the trailer to the left, just move that hand
to the left.
To move the trailer to the right, move your
hand to the right. Always back up slowly and, if
possible, have someone guide
you.
4-35
Page 224 of 380
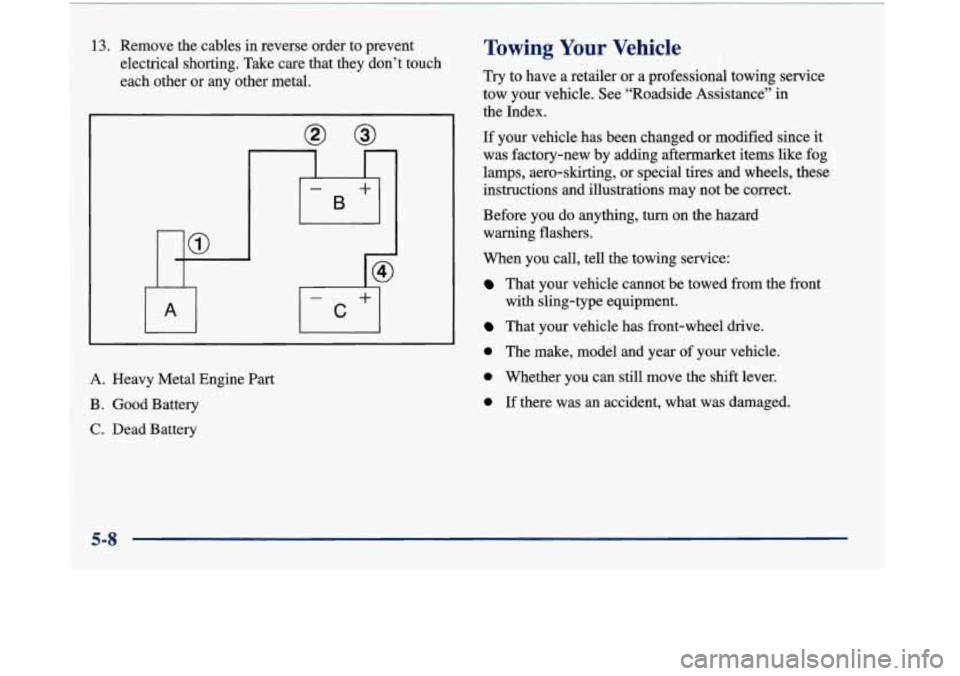
13. Remove the cables in reverse order to prevent
electrical shorting. Take care that they don’t touch
each other or any other metal.
A. Heavy Metal Engine
Part
B. Good Battery
C. Dead Battery
Towing Your Vehicle
Try to have a retailer or a professional towing service
tow your vehicle. See “Roadside Assistance’’ in
the Index.
If your vehicle has been changed or modified since it
was factory-new by adding aftermarket items like fog
lamps, aero-skirting, or special tires and wheels, these
instructions and illustrations may not be correct.
Before
you do anything, turn on the hazard
warning flashers.
When you call, tell the towing service:
That your vehicle cannot be towed from the front
That your vehicle has front-wheel drive.
with
sling-type equipment.
0 The make, model and year of your vehicle.
0 Whether you can still move the shift lever.
0 If there was an accident, what was damaged.
5-8
Page 240 of 380

If a Tire Goes Flat
It’s unusual for a tire to “blow out” while you’re driving,
especially if you maintain your tires properly. If air goes
out of a tire, it’s much more likely to leak out slowly.
But if you should ever have a “blowout,” here are a few
tips about what to expect and what
to do:
If a front tire fails, the flat tire will create a drag that
pulls the vehicle toward that side. Take your foot
off the
accelerator pedal and grip the steering wheel firmly.
Steer to maintain lane position, and then gently brake to
a stop well out of the traffic lane.
A rear blowout, particularly on a curve, acts much like a
skid and may require the same correction you’d use in a
skid.
In any rear blowout, remove your foot from the
accelerator pedal. Get the vehicle under control by
steering the way you want the vehicle to go. It may be
very bumpy and noisy, but you can still steer. Gently
brake to a stop
-- well off the road if possible.
If a tire goes flat, the next part shows how to use your
jacking equipment to change a flat tire safely.
Changing a Flat Tire
If a tire goes flat, avoid further tire and wheel damage
by driving slowly to
a level place. Turn on your hazard
warning flashers.
I-
Changing a tire can cause an injury. The vehicle
can slip
off the jack and roll over you or other
people. You and they could be badly injured.
Find a level place
to change your tire. To help
prevent the vehicle from moving:
1. Set the parking brake firmly.
2. Put the shift lever in PARK (P).
3. Turn off the engine.
To be even more certain the vehicle won’t move,
you can put blocks at the front and rear of the
tire farthest away from the one being changed.
That would be the tire on the other side of the
vehicle, at the opposite end.
5-24
Page 241 of 380

Removing the Spare Tire and Tools
The following steps will tell you how to use the jack and
change a tire. The equipment you'll need is in the trunk.
Instructions for changing your tires are
on the inside of
the tire cover. You can rest the cover near you for easy
reference while you change the tire.
1. Lift the tire cover to gain access to the spare tire and
2. Remove the wheel wrench and jack from the
jacking equipment.
jack
container.
3. Remove the spare tire from the trunk.
5-25
Page 249 of 380
Compact Spare Tire
Although the compact spare tire was fully inflated when
your vehicle was new, it can lose air after a time. Check
the inflation pressure regularly. It should be
60 psi
(420 kPa).
After installing the compact spare on your vehicle, you
should stop as
soon as possible and make sure your
spare tire is correctly inflated. The compact spare is
made to perform well at speeds up to
65 mph
(105 km/h) for distances up to 3,000 miles (5 000 km),
so you can finish your trip and have your full-size tire
repaired or replaced where you want. Of course,
it’s best
to replace your spare with
a full-size tire as soon as you
can. Your spare will last longer and be in good shape in
case you need it again.
NOTICE:
When the compact spare is installed, don’t take
your vehicle through an automatic vehicle wash
with guide rails. The compact spare can get
caught on the rails. That can damage the tire and
wheel, and maybe other parts
of your vehicle.
Don’t use your compact spare on other vehicles.
And don’t mix your compact spare tire or wheel with
other wheels or tires. They won’t fit. Keep your spare
tire and its wheel together.
NOTICE:
~- ~~~~ ~~~ ~~ ~~~ ~~ ~~
~
Tire chains won’t fit your compact spare. Using
them can damage your vehicle and can damage
the chains too. Don’t use tire chains on your
compact spare.
Page 250 of 380

If You’re Stuck: In Sand, Mud,
Ice or Snow
What you don’t want to do when your vehicle is stuck is
to spin your wheels too fast. The method known as
“rocking”
can help you get out when you’re stuck, but
you must use caution.
If you let your tires spin at high speed, they can
explode, and you or others could be injured. And,
the transaxle or other parts of the vehicle can
overheat. That could cause an engine
compartment fire
or other damage. When you’re
stuck, spin the wheels as little as possible.
Don’t
spin the wheels above 35 mph (55 km/h) as shown
on the speedometer.
NOTICE:
Spinning your wheels can destroy parts of your
vehicle as well as the tires. If you spin the wheels
too
fast while shifting your transaxle back and
forth, you can destroy your transaxle.
For information about using tire chains on your vehicle,
see “Tire Chains” in the Index.
Rocking Your Vehicle To Get It Out
First, turn your steering wheel left and right. That will
clear the area around your fiont wheels.
You should turn
your traction control system off. (See “Traction Control
System”
in the Index.) Then shift back and forth
between REVERSE (R) and a forward gear, spinning the
wheels as little as possible. Release the accelerator pedal
while you shift, and press lightly on the accelerator
pedal when the transaxle
is in gear. If that doesn’t get
you out after a few tries, you may need to be towed out.
If you do need to be towed out, see “Towing Your
Vehicle” in the Index.
5-34
I
I