lock Oldsmobile Aurora 1998 s Service Manual
[x] Cancel search | Manufacturer: OLDSMOBILE, Model Year: 1998, Model line: Aurora, Model: Oldsmobile Aurora 1998Pages: 380, PDF Size: 19.75 MB
Page 118 of 380
Convex Outside Mirror
Your passenger’s side mirror is convex. A convex
mirror’s surface is curved so you can see more from
the driver’s seat.
I A CAUTION:
rn 3
A convex mirror can make things (like other
vehicles) look farther away than they really are.
If you cut too sharply into the right lane, you
could hit
a vehicle on your right. Check your
inside mirror or glance over your shoulder
before changing lanes.
Heated Outside Rearview Mirror
When you operate the rear window defogger, a defogger
also warms the heated driver’s and passenger’s outside
rearview mirrors to help clear them of ice and snow.
Storage Compartments
Glove Box
Use the door key to lock and unlock the glove box. To
open, pull the latch release on the left side of the glove
box door.
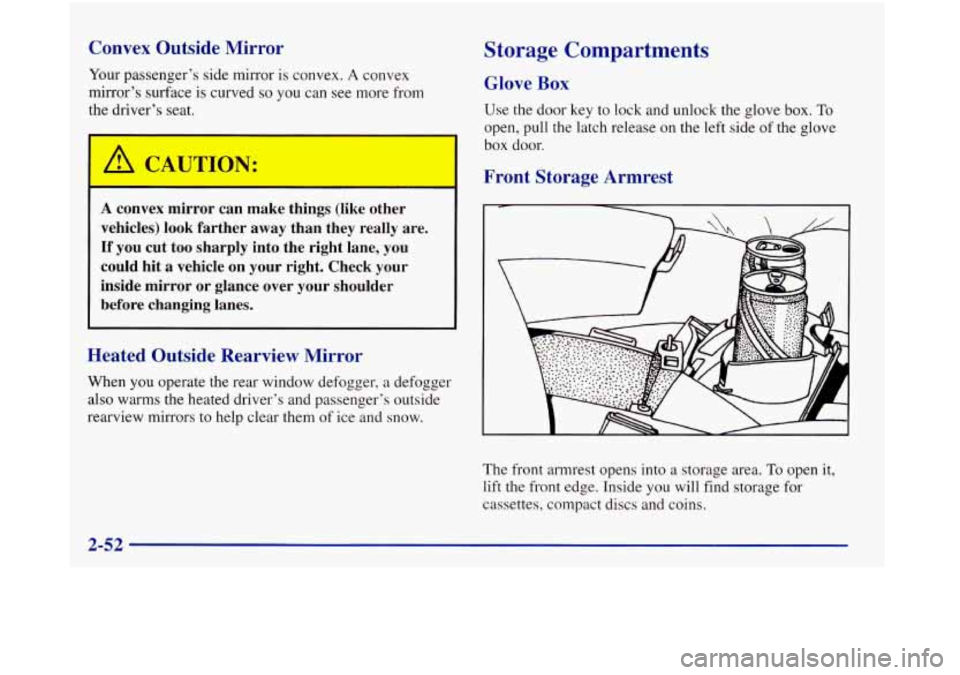
Front Storage Armrest
The front armrest opens into a storage area. To open it,
lift the front edge. Inside you will find storage for
cassettes, compact discs and coins.
2-52
Page 119 of 380

In front of the storage area is a cupholder. Press and
release the cupholder cover
to open. Push the cupholder
forward to lock it when in use. Press the cupholder back
to its recessed position when not in use.
Rear Storage Armrest
Your vehicle has a rear storage armrest with a
pass-through feature.
Pull down the bolster in the back seat to use the armrest
and two cupholders. Lift the top of the armrest for
storage space.
Pull down the interior door to access the trunk.
Convenience Net
Your vehicle has a convenience net just inside the back
wall of the trunk.
Put small loads, like grocery bags, behind the net. It can
help keep them from falling over during sharp turns or
quick starts and stops. The
net isn’t for larger, heavier loads. Store them in the
trunk as far forward as
you can. You can unhook the net
so that it will lie flat when you’re not using it.
Two positions exist for the convenience net, depending
on the size of the cargo.
Use this position for small loads.
2-53
Page 121 of 380
Sun Visors
To block out glare, you can swing down the visors. You
can also remove them from the center mount and swing
them to the side, while the auxiliary visor remains
to
block glare from the front.
To extend the visor at the sides, pull out the extension.
Illuminated Visor Vanity Mirrors
When you open the cover to the driver or passenger side
visor vanity mirror, the lamps will come on. You can
adjust the brightness of the lamps with the switch by
sliding the lever up or down.
Cellular Telephone (Option)
If your vehicle is equipped with the cellular telephone
readiness package, your vehicle has been pre-wired for
the installation
of a cellular telephone. If you choose to
install a cellular telephone, contact your retailer.
Accessory Power Outlet
The power outlet inside the front ashtray can be used to
plug in electrical equipment such as a cellular telephone,
CB radio, etc. Follow the proper installation instructions
that are included with any electrical equipment you
install. The accessory power outlet is
off if the ignition
is turned off.
NOTICE:
When using the accessory power outlet, the
maximum load
of any electrical equipment
should not exceed
15 amps.
Garment Hook
For your convenience, you will find a two-hanger
capacity garment hook above each rear door near the
reading lamps.
Garment hooks are not designed to support clothing
bars. Use assist straps for this if possible.
Assist Handles
A folding handle above each rear door and the front
passenger’s door can be used to help you get in or out
of your vehicle.
Sunroof (Option)
Your express-open sunroof provides an airy, spacious
feel to your vehicle’s interior and can also increase
ventilation. It includes a sliding glass panel and a
sliding sunshade. The control switch will work only
when the ignition is on, or when retained accessory
power is active.
2-55
Page 134 of 380
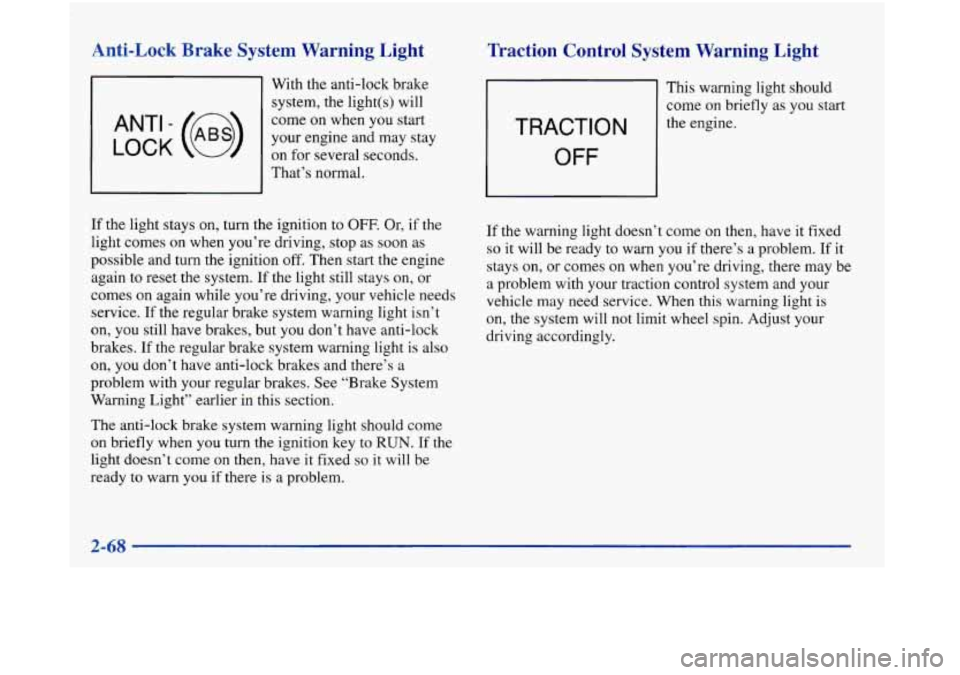
Anti-Lock Brake System Warning Light
With the anti-lock brake
system, the light(s) will
come on when you start
on for several seconds.
LOCK ANT’ - (@)
your engine and may stay
I I That’s normal.
Traction Control System Warning Light
TRACTION
OFF
This warning light should
come on briefly as you start
the engine.
If the light stays on, turn the ignition to
OFF. Or, if the
light comes on when you’re driving, stop as soon as
possible and turn the ignition off. Then start the engine
again to reset the system. If the light still stays on, or
comes on again while you’re driving, your vehicle needs
service.
If the regular brake system warning light isn’t
on, you still have brakes, but you don’t have anti-lock
brakes. If the regular brake system warning light is also
on, you don’t have anti-lock brakes and there’s a
problem with your regular brakes. See “Brake System
Warning Light” earlier in this section.
The anti-lock brake system warning light should come
on briefly when you turn the ignition key to
RUN. If the
light doesn’t come on then, have
it fixed so it will be
ready to warn you if there
is a problem. If
the warning light doesn’t corne on then, have it fixed
so it
will be ready to warn you if there’s a problem. If it
stays
on, or comes on when you’re driving, there may be
a problem with your traction control system and your
vehicle may need service. When this warning light
is
on, the system will not limit wheel spin. Adjust your
driving accordingly.
2-68
Page 146 of 380

When the trip is complete a chime will sound and the
display will show:
TRIP
COMPLETE
The trip complete message will go off when you
press any button,
or when you turn your ignition off,
then on. The display returns to the mode displayed
prior to the interruption.
Elapsed Time (ET)
When the ignition is on, the DIC can be used as a
stopwatch. The display will show hours and minutes.
The elapsed time indicator will record up to
100 hours,
then it will reset to zero and continue counting. Press
ET, and the display will show the amount of time that
has elapsed since the elapsed time indicator was last
reset (not including time the ignition is off), such
as:
01:OS ELAPSED TIME
To reset elapsed time to zero, press RESET while the
elapsed time
is displayed.
Date
Press DATE to display the date. To change the date,
press DATE then RESET. The following display
will appear:
MONTH? XX/DD/YY
MM,
DD and YY represent the month, date and year
you currently have
in your system. Check to make sure
your clock is in the correct AM or PM mode.
Notice that each key has a number. Push the key
to
enter the number. The first XX’s will flash until you
enter the first digit for the month. You don’t need to
enter the leading zero
if the number is under 10. Press
ENTER after you’ve entered the month. The display will change to:
DAY? MM/XX/YY
Set the day just
as you set the month. After the day entry
is made, press ENTER and the display will change to:
YEAR? MM/DD/XX
2-80
Page 151 of 380
@ Section 3 Comfort Controls and Audio Systems
In this section, you’ll find out how to operate the comfort control and audio systems offered with your vehicle. Be
sure to read about the particular systems supplied with your vehicle.
3-2 3-2
3-6
3-7 3-7
3-9
3-9
3- 10
3-10
3-11
3-11
Comfort Controls
Automatic Electronic Climate Control
Air Conditioning
Heating Ventilation System
Defogging and Defrosting
Rear Window Defogger
Passenger Temperature Control Steering
Wheel Controls for Climate Control
Audio Systems Setting
the Clock 3-11
3-18
3-21
3-23 3 -24
3 -24
3-25
3-26
3-26
3-27 AM-FM
Stereo with Cassette Tape and
Compact Disc Player with Automatic
Tone Control
Trunk Mounted CD Changer (Option)
Theft-Deterrent Feature
Audio Steering Wheel Controls
Understanding Radio Reception
Tips About Your Audio System
Care of Your Cassette Tape Player
Care of Your Compact Discs
Care of Your Compact Disc Player
Power Antenna Mast Care
Page 161 of 380

Audio Systems
Your Delco Electronics audio system has been designed
to operate easily and give years of listening pleasure.
You will get the most enjoyment out of it
if you acquaint
yourself with it first. Find out what your Delco
Electronics system can do and how to operate all its
controls, to be sure you’re getting the most out of the
advanced engineering that went into it.
AM-FM Stereo with Cassette Tape and
Compact
Disc Player with Automatic
Tone Control
Setting the Clock
Press and hold HR until the correct hour appears. The
letter
A or P may appear on the display for AM or PM.
Then, press and hold
MN until the correct minute
appears.
The clock may be set with the ignition on
or off.
Standard Radio -- Base@ Not Shown
If your vehicle is equipped with the Base@ AM-FM
Stereo with Cassette Tape and Compact Disc Player (not
shown), automatic tone control is not available. Your radio
will have
a MUTE button rather than a TONE button.
Playing the Radio
PWR-VOL: Press this knob to turn the system on and
off.
To increase volume, turn the knob to the right. Turn
it to
the left to decrease volume.
3-11
Page 162 of 380

RCL: Press this button briefly to recall the station being
played or
to display the clock. To change what is
normally shown on the display (station or time), press
the RCL button until you
see the display you want, then
hold the RCL button until the display flashes.
If you
press the button when the ignition is off, the clock will
show for a few seconds.
MUTE: Press this button to silence the system. Press it
again
to turn on the sound. (This button is available on
the BaseB radio only.)
Finding a Station
AM-FM:
Press this button to switch between AM, FMl
and FM2. The display shows your selection.
TUNE: Press this knob lightly so it extends. Turn it to
choose radio stations. Push the knob back into its stored
position when you’re not using it.
SEEK: Press the up or down arrow to go to the next
higher or lower station and stay there. The sound will
mute while seeking.
SCAN: Press this button and release it to listen to
stations for a few seconds. The radio will go to
a station,
stop for a few seconds, then
go on to the next station.
Press the button again to stop scanning. The sound will mute while scanning, and SCAN will appear on the
display.
If you press SCAN for more than two seconds,
the radio will change to
P SCAN mode. P SCAN will
appear on the display.
PUSHBUTTONS: The five numbered pushbuttons let
you return to your favorite stations. You can
set up to
15 stations (five AM, five FM1 and five FM2). Just:
1.
2.
3.
4.
5.
6.
Turn the radio on.
Press AM-FM to select the band.
Tune in the desired station.
Press TONE to select the equalization that best suits
the type of station selected. (This function is not
available on the Bose radio.)
Press and hold one of the five numbered buttons.
The sound will mute. When it returns, release the
button. Whenever you press that numbered button,
the station you set will return and the tone that you
selected will also be automatically selected for that
button. (The tone will not automatically return on the
Bose radio.)
Repeat the steps for each pushbutton.
Page 171 of 380
RCL: Press this button to see what track is currently
playing. Press RCL again within five seconds to see how
long the track has been playing. EL TM will appear on
the display when in elapsed time mode. When a new
track starts to play, the track number will also appear.
Press RCL a third time and the time of day will
be displayed.
SEEK: Press the SEEK down arrow while playing a CD
to go back to the start of the current track if more than
eight seconds have played. If you press it again, the
changer will
go to previous tracks. Press the SEEK up
arrow and it will go to the next higher track on the disc.
SCAN: Press this button and release to listen to each
selection for a few seconds. The first
few seconds of
each selection on the current disc will be played. The
sound will mute while scanning and SCAN will appear
on the display. Press this button again to stop scanning.
P SCAN: Press and hold the SCAN button for two
seconds to hear the first selection of each loaded disc for
a few seconds. The sound will mute while scanning and
P SCAN will appear on the display. Press SCAN again
to stop scanning.
TAPEKD: Press this button to play a CD if you have a
magazine loaded
in the changer and the radio is playing.
To return to the radio while a CD is playing, press
AM-FM.
You can also press this button to switch
between a cassette tape, CD or the CD changer if all
three are loaded.
Theft-Deterrent Feature
THEFTLOCK@ is designed to discourage theft of your
radio. It works by using a secret code to disable all radio
functions whenever battery power is removed.
The THEFTLOCK feature for the radio may be used or
ignored. If ignored, the system plays normally and the
radio is not protected by the feature. If THEFTLOCK is
activated, your radio will not operate if stolen.
When THEFTLOCK is activated, the radio will display
LOC to indicate a locked condition anytime battery
power
is removed. If your battery loses power for any
reason, you must unlock the radio with the secret code
before it will operate.
Page 172 of 380

Activating the Theft-Deterrent Feature
The instructions which follow explain how to enter your
secret code to activate the THEFTLOCK system. It is
recommended that you read through all nine steps
before starting the procedure.
NOTE:
If you allow more than 15 seconds to elapse
between any steps, the radio automatically reverts to
time and you must start the procedure over at Step
4.
1. Write down any three or four-digit number from
000 to 1999 and keep it in a safe place separate from
the vehicle.
2. Turn the ignition to ACCESSORY or RUN.
3. Turn the radio off.
4. Press the 1 and 4 buttons together. Hold them down
until --- shows on the display. Next you will use the
secret code number which you have written down.
5. Press MN and 000 will appear on the display.
6. Press MN again to make the last two digits agree
with your code.
7. Press HR to make the first one or two digits agree
with your code.
8. Press AM-FM after you have confirmed that the
code matches the secret code you have written down.
The display will show
REP to let you know that you
need to repeat Steps 5 through
7 to confirm your
secret code.
9. Press AM-FM and this time the display will show
SEC to let you know that your radio is secure.
Unlocking the Theft-Deterrent Feature After a
Power Loss
Enter your secret code as follows; pause no more than
15 seconds between steps:
1. LOC appears when the ignition is on.
2. Press MN and 000 will appear on the display.
3. Press MN again to make the last two digits agree
4. Press HR to make the first one or two digits agree
with your
code.
with your code.
5. Press AM-FM after you have confirmed that the
code matches the secret code you have written down.
The display will show SEC, indicating the radio
is
now operable and secure.
3-22