seats Oldsmobile Aurora 1998 Owner's Manuals
[x] Cancel search | Manufacturer: OLDSMOBILE, Model Year: 1998, Model line: Aurora, Model: Oldsmobile Aurora 1998Pages: 380, PDF Size: 19.75 MB
Page 7 of 380

@ The 1998 Oldsrnobile Aurora Owner’s Manual
1-1
2- 1
3-1
4-1
5-1
6-1
7- 1
8- 1
9- 1
Seats and Restraint Systems
This section tells you how to use your seats and safety belts properly. It also explains the “SRS” system.
Features and Controls
This section explains how to start and operate your vehicle.
Comfort Controls and Audio Systems
This section tells you how to adjust the ventilation and comfort controls and how to operate your audio system.
Your Driving and the Road
Here you’ll find helpful information and tips about the road and how to drive under different conditions.
Problems on the Road
This section tells what to do if you have a problem while driving, such as a flat tire or overheated engine, etc.
Service and Appearance Care
Here the manual tells you how to keep your vehicle running properly and looking good.
Maintenance Schedule
This section tells you when to perform vehicle maintenance and what fluids and lubricants to use.
Customer Assistance Information
This section tells you how to contact Oldsmobile for assistance and how to get service and owner publications.
It also gives you information on “Reporting Safety Defects” on page
8-8.
Index
Here’s an alphabetical listing of almost every subject in this manual. You can use it to quickly find
something you want to read.
i
Page 13 of 380
@ Section 1 Seats and Restraint Systems
Here you’ll find information about the seats in your Aurora and how to use your safety belts properly. You can also
learn about some things you should
not do with air bags and safety belts.
1-2 Seats and Seat Controls
1-30 Rear Safety Belt Comfort Guides for Children
1-7 Safety Belts: They’re for Everyone
and Small Adults
1
- 12 Here Are Questions Many People Ask About
1-37 Child Restraints
1
- 13 How to Wear Safety Belts Properly 1-32 Center Passenger Position
1-52
Replacing Restraint System Parts After
1-21 Supplemental Restraint System (SRS) 1-51 Safety Belt Extender
1-20 Safety Belt Use During Pregnancy
1-27 Rear Seat Passengers
a Crash
Safety Belts
-- and the Answers 1-34 Children
1-13 Driver Position 1-48 Larger Children
1-21 Right Front Passenger Position 1-5
1 Checking
Your Restraint Systems
Page 14 of 380
Seats and Seat Controls
This part tells you about the seats -- how to adjust them,
and also about reclining seatbacks and head restraints.
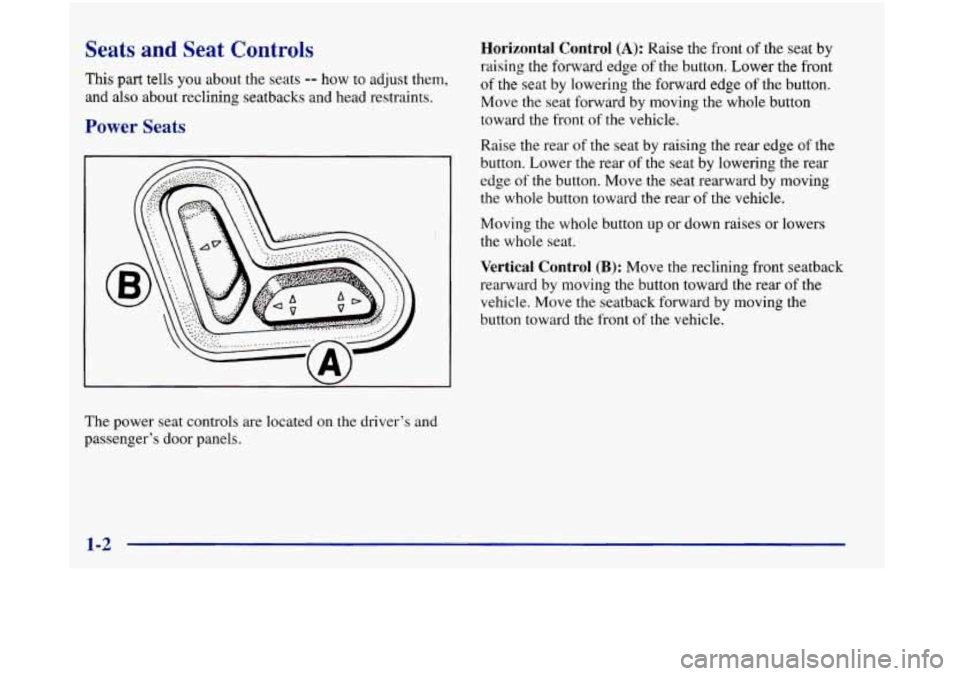
Power Seats
The power seat controls are located on the driver’s and
passenger’s door panels.
Horizontal Control (A): Raise the front of the seat by
raising the forward edge of the button. Lower the front
of the seat by lowering the forward edge of the button.
Move the seat forward by moving the whole button
toward the front of the vehicle.
Raise the rear
of the seat by raising the rear edge of the
button. Lower the rear
of the seat by lowering the rear
edge of the button. Move the seat rearward by moving
the whole button toward the rear
of the vehicle.
Moving the whole button
up or down raises or lowers
the whole seat.
Vertical Control (B): Move the reclining front seatback
rearward by moving
the button toward the rear of the
vehicle. Move the seatback forward by moving the
button toward the front of the vehicle.
1-2
Page 17 of 380
If you prefer to program the exit seat position, which
moves the seat completely down and back, follow
these steps:
1. Press the SET button on the driver’s door panel.
You will hear one beep.
2. Press one of the memory buttons on the driver’s
door panel. You will hear one beep, but the seat
will not move at this time.
3. Press the UNLOCK button on the appropriate
transmitter within five seconds. You will hear
two beeps.
This personalization feature will work only when the
vehicle is in
PARK (P). A beep will sound inside the
vehicle when the UNLOCK button on the transmitter
is pressed to move the seat and mirrors.
To turn this feature off, press
SET and then UNLOCK
within five seconds.
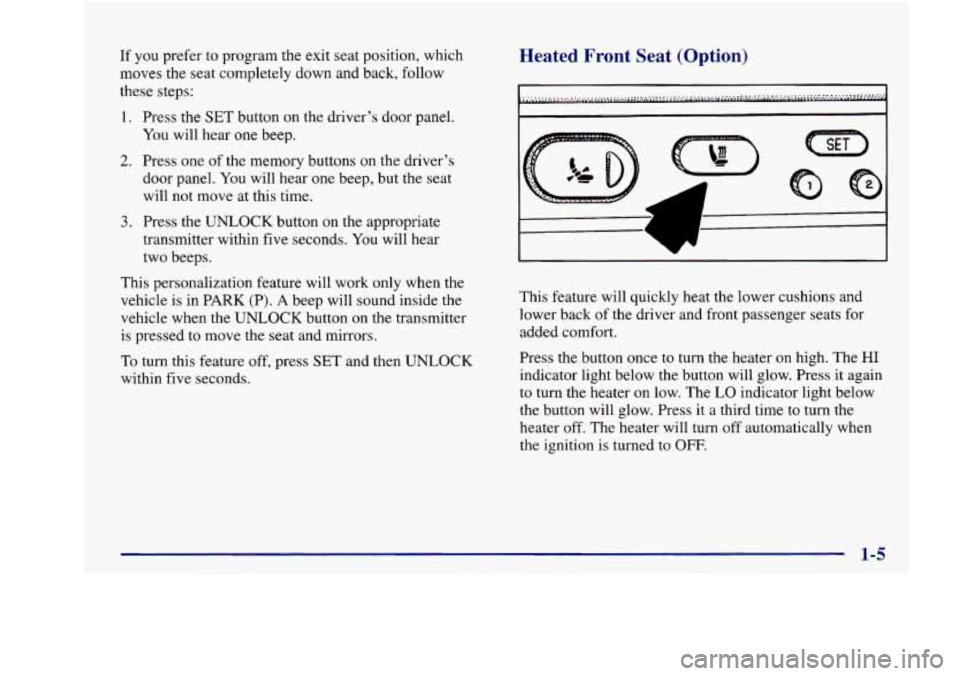
Heated Front Seat (Option)
7- I
This feature will quickly heat the lower cushions and
lower back of the driver and front passenger seats for
added comfort.
Press the button once to turn the heater on high. The
HI
indicator light below the button will glow. Press it again
to turn the heater on low. The
LO indicator light below
the button will glow. Press it a third time to turn the
heater off. The heater will turn
off automatically when
the ignition is turned to
OFF.
Page 20 of 380
It is extremely dangerous to ride in a cargo area,
inside or outside of
a vehicle. In a collision,
people riding in these areas are more likely to
be seriously injured or killed.
Do not allow people
to ride in any area of your vehicle that is not
equipped with seats and safety belts. Be sure
everyone in your vehicle is in
a seat and using a
safety belt properly.
Your vehicle has a light
that
comes on as a reminder
to buckle up. (See “Safety
Belt Reminder Light” in
the Index.)
In most states and Canadian provinces, the law says
to wear safety belts. Here’s why: They work.
You never know if you’ll be in a crash. If you do have
a crash, you don’t know if it will be a bad one.
A few crashes are mild, and some crashes can be
so serious that even buckled up a person wouldn’t
survive. But most crashes are in between. In many of
them, people who buckle up can survive and sometimes
walk away. Without belts they could have been badly
hurt or killed.
After more than
30 years of safety belts in vehicles,
the facts are clear. In most crashes buckling
up does
matter
... a lot!
1-8
Page 25 of 380
How to Wear Safety Belts Properly
Adults
This part is only for people of adult size.
Be aware that there are special things to know about
safety belts and children. And there
are different rules
for smaller children and babies. If a child will be riding
in your vehicle, see the part of this manual called
“Children.” Follow those rules for everyone’s protection.
First, you’ll want to know which restraint systems your
vehicle has.
We’ll start with the driver position.
Driver Position
This part describes the driver’s restraint system.
Lap-Shoulder Belt
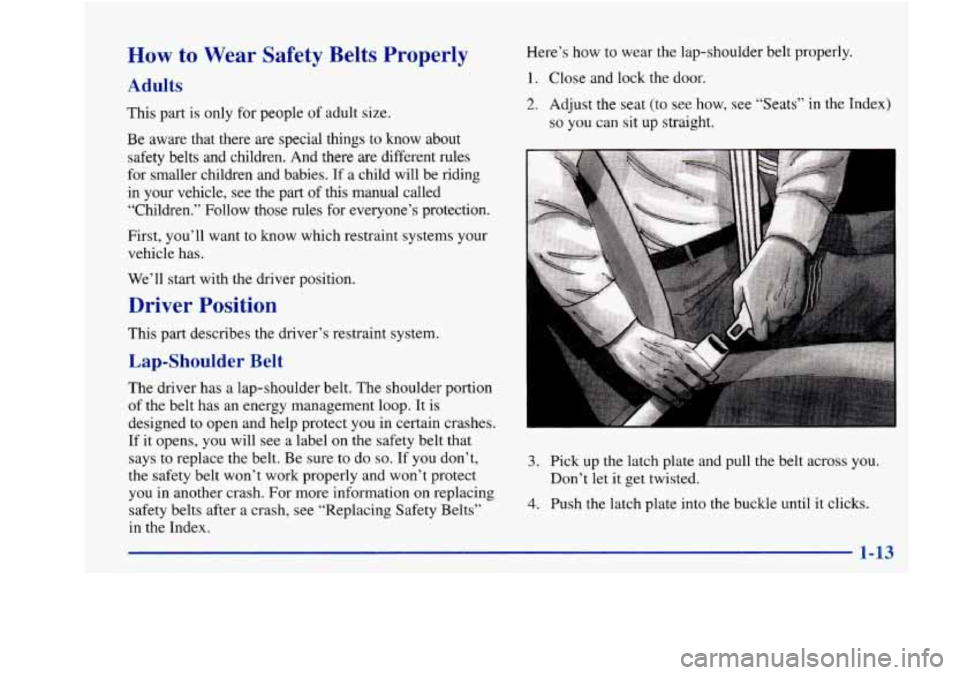
Here’s how to wear the lap-shoulder belt properly.
1. Close and lock the door.
2. Adjust the seat (to see how, see “Seats” in the Index)
so you can sit up straight.
R I
The driver has a lap-shoulder belt. The shoulder portion
of the belt has an energy management loop. It is
designed
to open and help protect you in certain crashes.
If it opens, you will
see a label on the safety belt that
says to replace the belt. Be sure
to do so. If you don’t,
the safety belt won’t work properly and won’t protect
you in another crash. For more information on replacing
safety belts after a crash, see “Replacing Safety Belts’’
in the Index.
1-13
3. Pick up the latch plate and pull the belt across you.
Don’t let it get twisted.
4. Push the latch plate into the buckle until it clicks.
Page 50 of 380
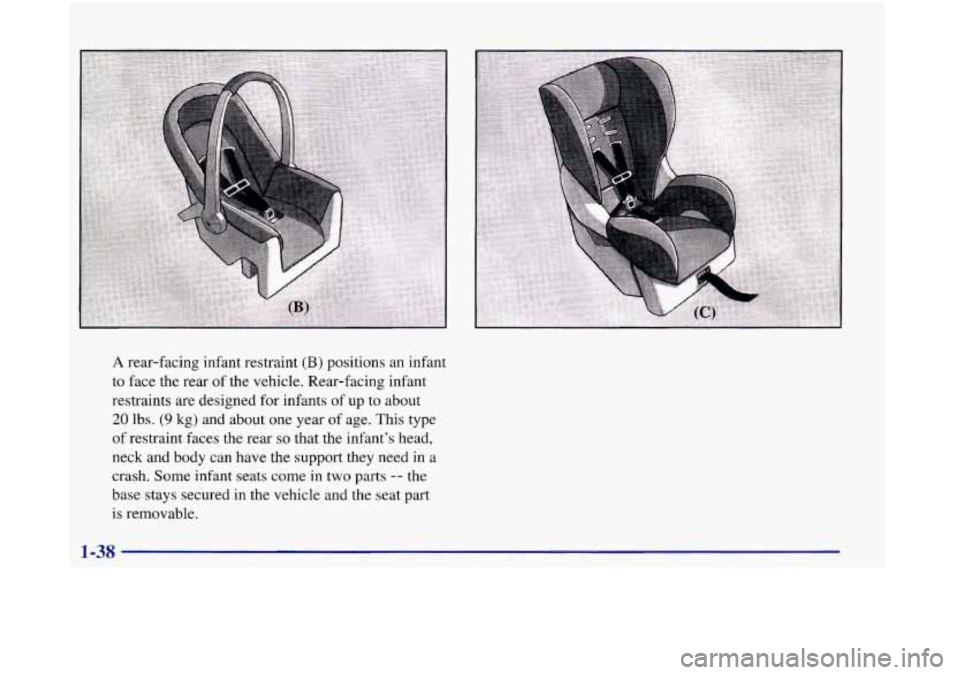
A rear-facing infant restraint (B) positions an infant
to face the rear of the vehicle. Rear-facing infant
restraints are designed for infants of
up to about
20 lbs. (9 kg) and about one year of age. This type
of restraint faces the rear
so that the infant's head,
neck and body can have the support they need in
a
crash. Some infant seats come in two parts -- the
base stays secured in the vehicle and the seat part
is removable.
1-38
Page 52 of 380
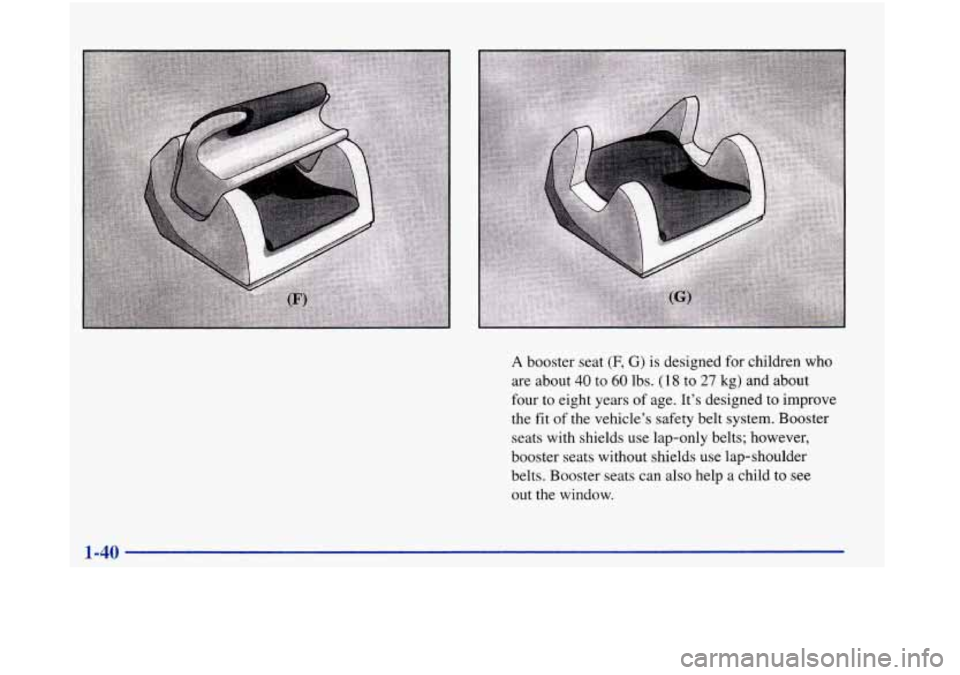
A booster seat (F, G) is designed for children who
are about
40 to 60 lbs. (1 8 to 27 kg) and about
four to eight years of age. It’s designed to improve
the fit of the vehicle’s safety belt system. Booster
seats with shields
use lap-only belts; however,
booster seats without shields use lap-shoulder
belts. Booster seats can also help a child
to see
out the window.
1-40
Page 58 of 380

6. Push and pull the child restraint in different
directions to be sure it is secure.
To remove the child restraint, just unbuckle the vehicle’s
safety belt.
It will be ready to work for an adult or larger
child passenger.
Securing a Child Restraint in the Right
Front Seat Position
n
u
Your vehicle has a right front passenger air bag. Never
put a rear-facing child restraint in this seat. Here’s why:
A child in a rearfacing child restraint can be
seriously injured or killed
if the right front
passenger’s air bag inflates, even though your
vehicle has reduced-force frontal
air bags. This is
because the back of the rear-facing child
restraint would be very close to the inflating
air
bag. Always secure a rear-facing child restraint
in the rear seat.
You’ll be using the lap-shoulder belt. See the earlier part
about the top strap if the child restraint has one. Be sure
to follow the instructions that came with the child
restraint. Secure the child in the child restraint when and
as the instructions say.
I. Because your vehicle has a right front passenger air
bag, always move the seat
as far back as it will go
before securing a forward-facing child restraint. (See
“Seats”
in the Index.)
2. Put the restraint on the seat.
Page 158 of 380

Rotate the control between the rear outlets up to direct
air through the upper outlets. Rotate the control down
to
direct air through the lower outlets. Adjust the direction
of aifflow from side
to side with the controls in
each outlet.
Ventilation Tips
Keep the hood and front air inlet area between the
base of the windshield and the hood free of ice,
snow, or any other obstruction (such as leaves). The
defroster and heater will work far better, reducing
the chance of fogging the inside
of your windows if
this area is clear.
Keep the air path under the front seats clear of
objects. This helps air to circulate throughout
your vehicle.
3-8