ECO mode OLDSMOBILE AURORA 2003 Owners Manual
[x] Cancel search | Manufacturer: OLDSMOBILE, Model Year: 2003, Model line: AURORA, Model: OLDSMOBILE AURORA 2003Pages: 387, PDF Size: 18.05 MB
Page 60 of 387

When an air bag inflates, there is dust in the
air. This dust could cause breathing problems
for people with a history of asthma or other
breathing trouble.
To avoid this, everyone in
the vehicle should get out as soon as
it is safe
to do
so. If you have breathing problems but
can’t get out of the vehicle after an air bag
inflates, then get fresh air by opening a
window or a door.
If you experience breathing
problems following an air bag deployment, you
should seek medical attention.
Your vehicle has a feature that will automatically unlock
the doors and turn the interior lamps on when the air
bags inflate
(if battery power is available). You can lock
the doors again and turn the interior lamps
off by
using
ii~e door iock ana inierior iamp conirois.
In many crashes severe enough to inflate an air bag,
windshields are broken by vehicle deformation.
Additional windshield breakage may also occur from the
right front passenger air bag.
Air bags are designed to inflate only once. After an
air bag inflates, you’ll need some new parts for
your air bag system. If you don’t get them, the air
bag system won’t be there to help protect you
in another crash.
A new system will include air bag
modules and possibly other parts. The service
manual for your vehicle covers the need to replace
other parts.
Your vehicle is equipped with an electronic frontal
sensor, which helps the sensing system distinguish
between a moderate frontal impact and a more
severe frontal impact. Your vehicle is also equipped
with a crash sensing and diagnostic module,
which records information about the frontal air bag
system. The module records information about
the readiness of the system, when the system
commands air bag inflation and driver’s safety belt
usage at deployment. The module also records
speed, engine
RPM, brake and throttle data.
1-53
ProCarManuals.com
Page 74 of 387

Central Door Unlocking System
If the key is held in the outside key cylinder unlock
position for more than two seconds, all doors will unlock.
All doors will also unlock
if the key is turned to the
unlock position twice within three seconds.
Power Door Locks
With power door locks, you
can lock or unlock all the
doors on your vehicle
using the driver’s or the
front passenger’s door lock
switch.
Door Ajar Reminder
If a door is not fully closed when the transaxle is in
gear, a chime will sound and the DIC will display one of
these messages:
DRIVERS DOOR AJAR
e PASSENGER DOOR AJAR
0 LEFT REAR DOOR AJAR
0 RIGHT REAR DOOR AJAR
Delayed Locking
This personalization feature lets the driver delay the
actual locking of the vehicle. When the driver’s power
door lock switch, or the lock symbol on the remote
keyless entry is pressed with the key removed from the
ignition and the driver’s door open, a chime will
sound three times to signal that the lock delay mode
is
active. When all doors have been closed, the doors
will lock automatically after five seconds.
If any door is
itself once all the doors have been closed again.
Pressing the driver’s or passenger’s door lock switch or
the lock symbol on the remote keyless entry a second
time will override this feature.
You must program this feature through the Driver
Information Center (DIC). See
DIC Vehicle
Personalization
on page 3-52.
CpeEed bek-e fhk, the fi\!e-secQnr_! timer \vi!! reset
2-1 1
ProCarManuals.com
Page 98 of 387

Mirrors Compass Operation
Automatic Dimming Rearview Mirror
with Compass
Your vehicle may have an automatic dimming rearview
mirror with a compass. Your vehicle’s mirror may
also contain Onstar@ controls. See
OnStaP System on
page 2-39 for more information.
The mirror also includes an eight-point compass display
in the upper right corner of the mirror face.
When cleaning the mirror, use a paper towel or similar
material dampened with glass cleaner.
Do not spray
glass cleaner directly on the mirror as that may cause
the liquid cleaner to enter the mirror housing.
Mirror Operation
MIRROR: Press this button to turn on the automatic
dimming feature. Press it again to turn
off the automatic
dimming feature.
6 (On/Off): For mirrors equipped with OnStara
controls, press and hold this button for several seconds
to turn on the automatic dimming feature. Press and
hold it again to turn the automatic dimming feature
off.
The green indicator light will come on when this
feature is active. The automatic dimming feature will be
active each time the vehicle is started. COMPASS:
Press this button once to turn the compass
on or
off.
6 (On/Off): For mirrors equipped with Onstar@
controls, press this button once to turn the compass on
or
off.
When the ignition and the compass feature are on, the
compass will show two character boxes for
approximately two seconds. After two seconds, the
mirror will display the compass heading.
Compass Calibration
When on, the compass automatically calibrates as the
vehicle is driven.
If, after two seconds, the display
does not show a compass heading (N for North, for
example), there may be a strong magnetic field
interfering with the compass. Such interference may be
caused by a magnetic antenna mount, magnetic
note pad holder or a similar magnetic item.
If the
letter C shmrld ever anpear in the compass window. the
compass may need calibration.
The mirror can be calibrated by driving the vehicle in
circles at
5 mph (8 km/h) or less until the display reads a
direction.
Mirrors equipped with Onstar@ controls can be placed
in calibration mode by pressing and holding the
on/off button until a
C is shown in the compass display.
2-35
ProCarManuals.com
Page 105 of 387

Programming the HomeLink@
Transmitter
Do not use the HomeLink@ Transmitter with any garage
door opener that does not have the “stop and reverse’’
feature. This includes any garage door opener model
manufactured before April
1, 1982.
Keep the original transmitter for use in other vehicles as
well as for future HomeLink@ programming. It is also
recommended that upon the sale
of the vehicle,
the programmed HomeLink@ buttons should be erased
for security purposes. Refer to “Erasing HomeLink@
Buttons” or, for assistance, contact HomeLink@ on the
internet at: www.homelink.com or by calling
1 -800-355-35 1 5.
Be sure that people and objects are clear of the garage
door or gate operator you are programming. When
programming a garage door, it is advised to park outside
of the garage.
It is recommended that a new battery be installed in
your hand-held transmitter for quicker and more
accurate transmission of the radio frequency.
Your vehicle’s engine should be turned
off while
programming the transmitter. Follow these steps to
program up to three channels:
1. Press and hold down the two outside buttons,
releasing only when the indicator light begins to
flash, after 20 seconds.
Do not hold down the buttons
for longer than
30 seconds and do not
repeat this step to program a second and/or third
transmitter to the remaining two HomeLink@ buttons.
2. Position the end
of your hand-held transmitter about
1 to 3 inches (3 to 8 cm) away from the HomeLink@
buttons while keeping the indicator light in view.
3. Simultaneously press and hold both the desired
button on HomeLink@ and the hand-held transmitter
button.
Do not release the buttons until Step 4
has been completed.
Some entry gates and garage door openers may
require you to substitute Step
3 with the procedure
noted in “Gate Operator and Canadian
Programming” later in this section.
4. The indicator light will flash slowly at first and then
rapidly after HomeLink@ successfully receives the
frequency signal from the hand-held transmitter.
Release both buttons.
5. Press and hold the newly-trained HomeLink@ button
and observe the indicator light.
If the indicator light stays on constantly,
programming is complete and your device should
activate when the HomeLink@ button is pressed and
released.
To program the remaining two HomeLink@ buttons,
begin with Step 2 under “Programming HomeLink@.”
Do not repeat Step 1 as this will erase all of the
programmed channels.
2-42
ProCarManuals.com
Page 107 of 387

Using HorneLink@
Press and hold the appropriate HomeLink@ button for at
least half
of a second. The indicator light will come
on while the signal is being transmitted.
Erasing HorneLink@ Buttons
To erase programming from the three buttons do the
following:
1. Press and hold down the two outside buttons until
the indicator light begins to flash, after 20 seconds.
2. Release both buttons. Do not hold for longer than
HomeLink@ is now in the train (learning) mode and can
be programmed at any time beginning with Step
2
under “Programming HomeLink@.”
Individual buttons can not be erased, but they can be
reprogrammed. See “Reprogramming a Single
HomeLink@ Button” next.
30
seconds.
Reprogramming a Single HomeLink@
Button
To program a device to HomeLink@ using a HomeLink@
button previously trained, follow these steps:
1. Press and hold the desired HomeLink@ button.
Do
not release the button.
2. The indicator light will begin to flash after
20 seconds. While still holding the HomeLink@
button, proceed with Step
2 under “Programming
HomeLink@.”
Resetting Defaults
To reset HomeLink@ to default settings do the following:
1. Hold down the two outside buttons for about
20 seconds until the indicator light begins to flash.
2. Continue to hold both buttons until the HomeLink@
indicator light turns
off.
3. Release both buttons.
For questions or comments, contact HomeLink@ at
1-800-355-351
5, or on the internet at
www.homelink.com.
2-44
ProCarManuals.com
Page 122 of 387

For a single wiping cycle, move the lever down to MIST.
Hold it there until the wipers start, then release it. The
wipers will stop after one cycle.
If you want more cycles,
hold the lever on MIST longer.
For steady wiping at low speed, move the lever up to
the
LO position. For high-speed wiping, move the lever
up further, to HI.
To stop the wipers, move the lever
to OFF.
You can set the wiper speed for a long or short delay
between wiper cycles. Move the lever up to the first
detent, INT (Intermittent). Turn the band labeled
INT ADJ (Intermittent Adjustment) down toward the
shorter lines for fewer wiper passes per minute. As you
turn the band toward the longer lines, the wiper
cycles per minute will increase.
Remember that damaged wiper blades may prevent you
from seeing well enough to drive safely. To avoid
damage, be sure to clear ice and snow from the wiper
blades before using them. If they’re frozen to the
do become damaged, get new blades or blade inserts.
See
Windshield Wiper Blade Replacement on
page
5-59.
Heavy snow or ice can overload your wipers. A circuit
snow or ice to prevent an overload.
\yindrihield, ~~r~f~!Il;/ lcgspn 9~ thl~~! them. !f \/nllr hl=dnc J --’
breaker wi!! stop them unti! the mntnr con!s. C!ear away
RainsenseTM II Wipers
The moisture sensor is mounted on the interior side of
the windshield below the rearview mirror and is used
to automatically operate the windshield wipers.
This system operates by monitoring the amount of
moisture build-up on the windshield. Wipes occur as
needed to clear the windshield depending on the driving
conditions and sensitivity setting. In light rain or snow,
fewer wipes will occur. In heavy rain or snow, wipes will
occur more frequently. The system will operate in the
delay, low speed and high speed modes. If the system is
left on for long periods of time, occasional wipes may
occur without any moisture
on the windshield. This
is normal and indicates that the RainsenseTM system is
activated.
3-9
ProCarManuals.com
Page 137 of 387

Do not cover the solar sensor located in the center of
the instrument panel, near the windshield. For more
information on the solar sensor, see “Sensors” later
in
this section.
To change the automatic climate control display from an
English display to a metric display, push the
OFF
button located in the Driver Information Center (DIC) for
several seconds. The display in the
DIC will also
change from an English to a metric display.
To return to
an English display, repeat the procedure.
Manual Operation
FAN: Turn the right knob clockwise or counterclockwise
to increase or decrease the fan speed. Turning this
knob cancels automatic operation and places the system
in manual mode. Press the knob to return to automatic
operation.
Temperature Control: Maintain the temperature inside
the vehicle using the red and blue arrows located
below the digital display. Push the red arrow for a
warmer temperature level and the blue arrow for
a cooler temperature level. Your selected temperature
setting will be shown on the digital display for five
seconds, and then the outside temperature will be
displayed. To change
the current mode, use the left knob
to select
one of the following:
OFF: Turning the left knob to OFF will cause the fan to
turn
off and the airflow to be directed through the
floor outlets. The display will show the outside
temperature when the system is set to OFF.
/I‘ (Vent): This mode directs air to the instrument
panel outlets. #
(Bi-Level): This mode directs approximately half of
the air to the instrument panel outlets, and then
directs most of the remaining air to the floor outlets.
Some air may be directed toward the windshield.
In automatic operation, cooler air is directed to the upper
outlets and warmer air to the floor outlets.
I# (Floor): This mode directs most of the air to the
floor outlets with some air directed to the outboard
outlets (for the side windows) and some air directed to
the windshield.
The left knob can also be used to select the defog or
defrost mode. Information on defogging and defrosting
can be found later in this section.
3-24
ProCarManuals.com
Page 138 of 387

(Recirculation): Press this button to limit the
amount of outside air coming into the vehicle.
It can be
used to prevent outside air and odors from entering
your vehicle or to help heat or cool the air inside your
vehicle more quickly. Press this button to turn the
recirculation mode on or
off. When the button is pressed,
an indicator light will come on. The recirculation mode
cannot be used with the defrost mode.
a AK (Air Conditioning): Press this button to
override the automatic system and turn the air
conditioning system on or
off. When A/C is pressed, an
indicator light in the button will come on to let you
know that air conditioning is activated. When in
AUTO
the air conditioning compressor will come on
automatically, as necessary.
On hot days, open the windows to let hot inside air
escape; then close them. This helps reduce the time it
takes for your vehicle to cool down. It also helps
the system to operate more efficiently.
For quick cool down on hot days, do the following:
1. Select the vent mode.
2. Select the recirculation mode.
3. Select NC.
4. Select the coolest temperature.
5. Select the highest fan speed.
Using these settings together for long periods of time
may cause the air inside of your vehicle to become too
dry. To prevent this from happening, after the air in
your vehicle has cooled, turn the recirculation mode off.
The air conditioning system removes moisture from
the air,
so you may sometimes notice a small amount of
water dripping underneath your vehicle while idling or
after turning off the engine. This is normal.
Sensors
The solar sensor on your vehicle monitors the solar
radiation and the air inside of your vehicle, then uses the
information to maintain the selected temperature by
initiating needed adjustments to the temperature, the fan
speed and the air delivery system. The system may
also supply cooler air to the side of the vehicle facing the
sun. The recirculation mode will also be activated, as
necessary no not cover the solar sensor located in the
center of the instrument panel, near the windshield,
or the system will not work properly.
3-25
ProCarManuals.com
Page 158 of 387

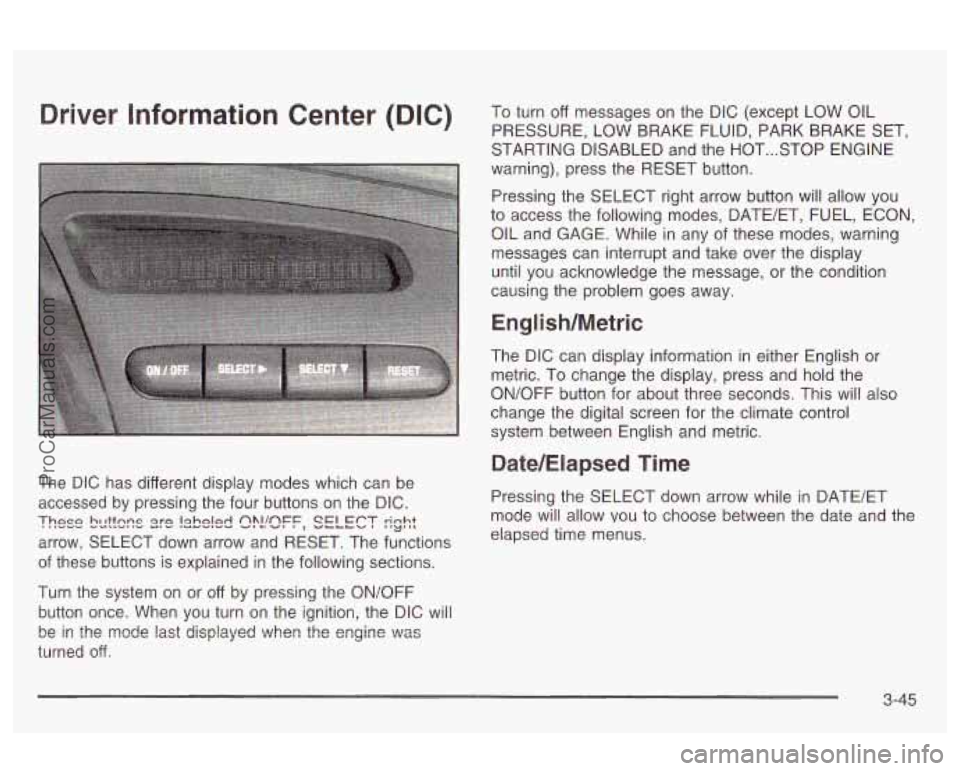
Driver Information Center (DIG) To turn off messages on the DIC (except LOW OIL
PRESSURE, LOW BRAKE FLUID, PARK BRAKE SET,
STARTING DISABLED and the HOT
... STOP ENGINE
warning), press the RESET button.
Pressing the SELECT right arrow button will allow you
to access the following modes, DATE/ET, FUEL, ECON,
OIL and GAGE. While
in any sf these modes, warning
messages can interrupt and take over the display
until you acknowledge the message, or the condition
causing the problem goes away.
English/Metric
The DIC can display information in either English or
metric. To change the display, press and hold the
ON/OFF button for about three seconds. This will also
change the digital screen for the climate control
system between English and metric.
Date/Elapsed Time
The DIC has different display modes which can be
accessed by pressing the four buttons on the DIC. Pressing the SELECT down arrow while in BATE/ET
arrow, SELECT down arrow and RESET. The functions
These bcttsns s)?!!sFF, SELECT rinht I'LJ',L mode will allow vou to choose between the date and the
elapsed time menus.
of these buttons is explained in the following sections.
Turn the system
on or off by pressing the ON/OFF
button once. When you turn on the ignition, the DIC will
turned
off.
be in the mode last displayed ?..lhen the engine \":as
3-45
ProCarManuals.com
Page 159 of 387

Date
To set the date, press and hold the RESET button for
about three seconds while the date is being displayed on
the DIC. When the date set mode is entered the
display will show the following:
YEAR?
M M/D D/OO
The year will be flashing. To increase the item that is
flashing press SELECT right arrow. To decrease
the item that is flashing press SELECT down arrow.
When you reach the current year press the RESET
button. The DIC will ask for the month. The month will
flash the same as the year. Use the SELECT buttons
to
reach the current month and press RESET. The DIC
will then ask for the day. The day will flash the same as
the year. Use the SELECT buttons
to reach the
current day. Press the RESET button again and the set
display will stop flashing and go back to the normal
operation mode.
Elapsed Time (ET)
When the ignition is on, the DIC can be used as a
stopwatch. The display will show hours and minutes.
The elapsed time indicator will record
up to 100 hours,
then it will reset
to zero and continue counting. Press
SELECT down arrow while in the DATE/ET mode, and
the display will show the amount of time that has
elapsed since the elapsed time indicator was last reset
(not including time the ignition is
off), such as:
01 :08 ELAPSED TIME
To start or stop the counting of time, press the RESET
button briefly.
If the colon (:) in the time is flashing,
time is being counted. Time is displayed in hours and
minutes. Seconds are not displayed. Time will continue
to be counted as long as the ignition is on, even
if
another display is being shown on the DIC.
To reset elapsed time to zero, press the RESET button
for three seconds while the elapsed time
is displayed.
Fuel
Press the SELECT down arrow while in the FUEL mode
to see how much fuel has been used and the fuel
range functions.
3-46
ProCarManuals.com