radio controls OLDSMOBILE AURORA 2003 Owners Manual
[x] Cancel search | Manufacturer: OLDSMOBILE, Model Year: 2003, Model line: AURORA, Model: OLDSMOBILE AURORA 2003Pages: 387, PDF Size: 18.05 MB
Page 87 of 387
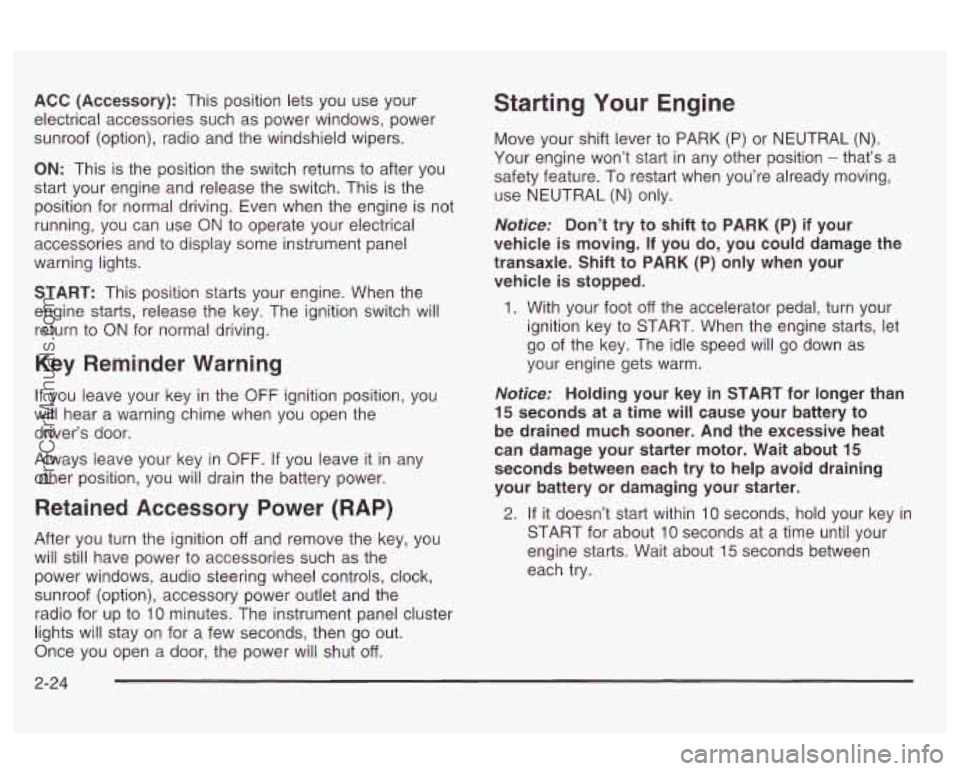
ACC (Accessory): This position lets you use your
electrical accessories such as power windows, power
sunroof (option), radio and the windshield wipers.
ON: This is the position the switch returns to after you
start your engine and release the switch. This is the
position for normal driving. Even when the engine is not
running, you can use
ON to operate your electrical
accessories and
to display some instrument panel
warning lights.
START: This position starts your engine. When the
engine starts, release the key. The ignition switch will
return
to ON for normal driving.
Key Reminder Warning
If you leave your key in the OFF ignition position, you
will hear a warning chime when you open the
driver’s door.
Always leave your key in
OFF. If you leave it in any
other position, you will drain the battery power.
Retained Accessory Power (RAP)
After you turn the ignition off and remove the key, you
will still have power
to accessories such as the
power windows, audio steering wheel controls, clock,
sunroof (option), accessory power outlet and the
radio for up
to 10 minutes. The instrument panel cluster
lights will stay on for
a few seconds, then go out.
Once you open a door, the power will shut off.
Starting Your Engine
Move your shift lever to PARK (P) or NEUTRAL (N).
Your engine won’t start in any other position
- that’s a
safety feature. To restart when you’re already moving,
use NEUTRAL
(N) only.
Notice: Don’t try to shift to PARK (P) if your
vehicle is moving.
If you do, you could damage the
transaxle. Shift to PARK (P) only when your
vehicle is stopped.
1. With your foot off the accelerator pedal, turn your
ignition key
to START. When the engine starts, let
go of the key. The idle speed will go down as
your engine gets warm.
Notice: Holding your key in START for longer than
15 seconds at a time will cause your battery to
be drained much sooner. And the excessive heat
can damage your starter motor. Wait about
15
seconds between each try to help avoid draining
your battery
or damaging your starter.
2. If it doesn’t start within 10 seconds, hold your key in
START for about
10 seconds at a time until your
engine starts. Wait about
15 seconds between
each
try.
2-24
ProCarManuals.com
Page 114 of 387
3 Instrument Panel
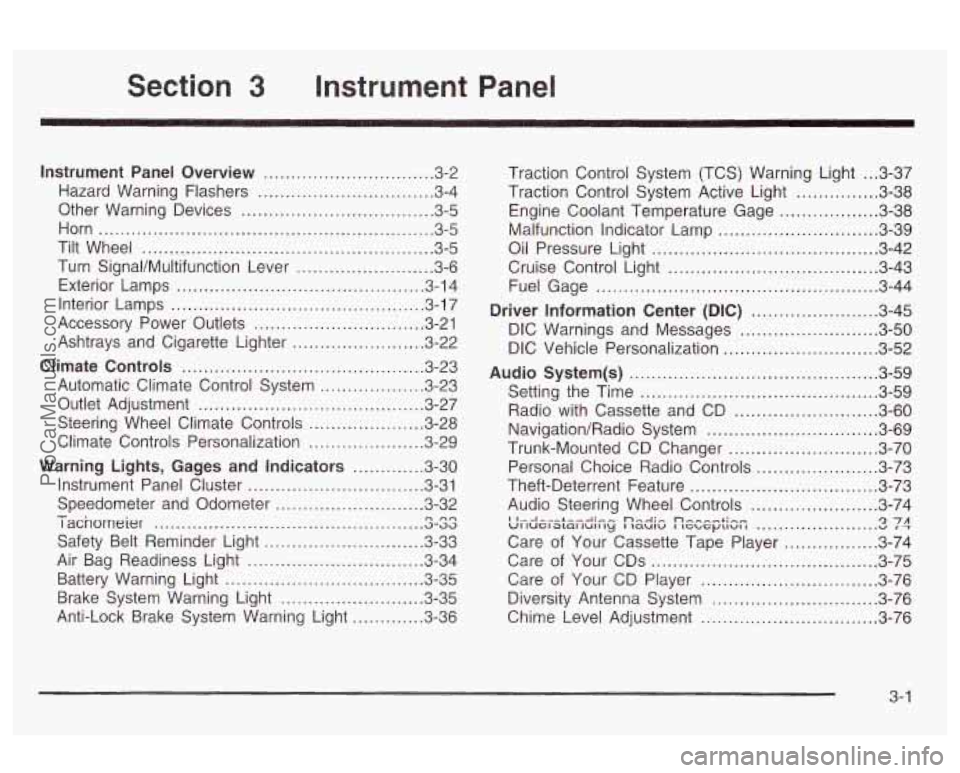
Instrument Panel Overview .............................. -3-2
Hazard Warning Flashers
................................ 3-4
Other Warning Devices
................................... 3-5
Horn
............................................................. 3-5
Tilt Wheel
..................................................... 3-5
Turn SignaVMultifunction Lever
......................... 3-6
Exterior Lamps
............................................. 3-14
Interior Lamps
.............................................. 3-17
Accessory Power Outlets
............................... 3-21
Ashtrays and Cigarette Lighter
........................ 3-22
Climate Controls
............................................ 3.23
Automatic Climate Control System
.................. 3-23
Outlet Adjustment
......................................... 3-27
Steering Wheel Climate Controls
..................... 3-28
Climate Controls Personalization
..................... 3.29
Warning Lights, Gages and Indicators
............. 3-30
Instrument Panel Cluster
............................... -3-31
Speedometer and Odometer
........................... 3-32
I acnorneier .-..
Safety Belt Reminder Light ............................. 3-33
Air Bag Readiness Light
................................ 3-34
Battery Warning Light
.................................... 3.35
Brake System Warning Light
.......................... 3.35
Anti-Lock Brake System Warning Light
............. 3-36
- n no .................................................
Traction Control System (TCS) Warning Light ... 3.37
Traction Control System Active Light
............... 3.38
Engine Coolant Temperature Gage
.................. 3.38
Oil Pressure Light
......................................... 3.42
Cruise Control Light
...................................... 3.43
Fuel Gage
................................................... 3.44
Driver Information Center
(DIC) ....................... 3.45
DIC Warnings and Messages
......................... 3.50
DIC Vehicle Personalization
............................ 3.52
Audio System(s)
............................................. 3.59
Setting the Time
........................................... 3.59
Radio with Cassette and CD
.......................... 3.60
Navigation/Radio System
............................... 3.69
Trunk-Mounted CD Changer
........................... 3-70
Personal Choice Radio Controls
...................... 3.73
Theft-Deterrent Feature
.................................. 3.73
Audio Steering Wheel Controls
....................... 3.74
Care of Your Cassette Tape Player
................. 3-74
Care of Your CDs
......................................... 3-75
Care
of Your CD Player ................................ 3-76
Malfunction Indicator
Lamp
............................. 3.39
I I...I-.-L--A.- ... n,.-J:, n-, --+in- VI luel awl lull ty I laulu I IGL, G~LIUI I u 1 T '2 7A ......................
Diversity Antenna System .............................. 3.76
Chime Level Adjustment
............................... -3-76
3-
1
ProCarManuals.com
Page 165 of 387
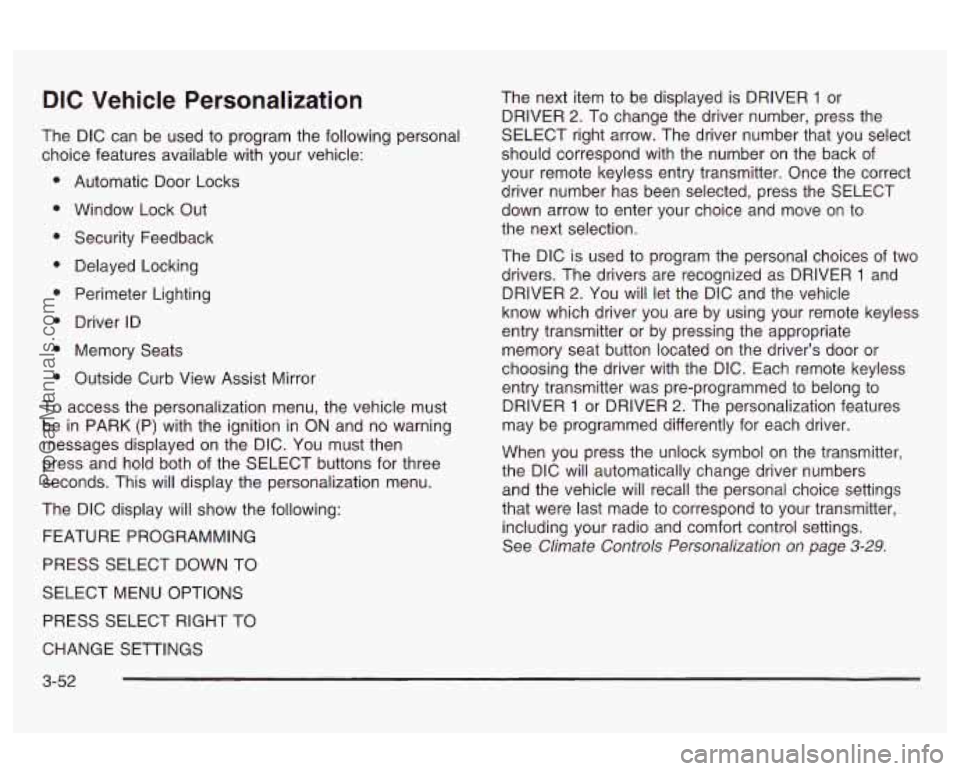
DIC Vehicle Personalization
The DIC can be used to program the following personal
choice features available with your vehicle:
Automatic Door Locks
Window Lock Out Security Feedback
Delayed Locking
Perimeter Lighting
Driver ID
Memory Seats
Outside Curb View Assist Mirror
To access the personalization menu, the vehicle must
be in PARK (P) with the ignition in ON and no warning
messages displayed on the DIC. You must then
press and hold both of the SELECT buttons for three
seconds. This will display the personalization menu.
The DIC display will show the following:
FEATURE PROGRAMMING
PRESS SELECT DOWN TO
SELECT MENU OPTIONS
PRESS SELECT RIGHT TO The next item
to be displayed is DRIVER
1 or
DRIVER
2. To change the driver number, press the
SELECT right arrow. The driver number that you select
should correspond with the number on the back of
your remote keyless entry transmitter. Once the correct
driver number has been selected, press the SELECT
down arrow to enter your choice and move on to
the next selection.
The DIC is used to program the personal choices
of two
drivers. The drivers are recognized as DRIVER
1 and
DRIVER
2. You will let the DIC and the vehicle
know which driver you are by using your remote keyless
entry transmitter or by pressing the appropriate
memory seat button located on the driver’s door or
choosing the driver with the DIC. Each remote keyless
entry transmitter was pre-programmed to belong to
DRIVER
1 or DRIVER 2. The personalization features
may be programmed differently for each driver.
When you press the unlock symbol on the transmitter,
the DIC will automatically change driver numbers
and the vehicle will recall the personal choice settings
that were last made to correspond to your transmitter,
including your radio and comfort control settings.
See
Climate Controls Personalization on page 3-29.
CHANGE SETTINGS
3-52
ProCarManuals.com
Page 172 of 387
Audio System(s)
Notice: Before you add any sound equipment to
your vehicle
- like a tape player, CB radio, mobile
telephone or two-way radio
- be sure you can
add what you want. If you can, it’s very important to
do
it properly. Added sound equipment may
interfere with the operation of your vehicle’s engine,
Delphi Electronics radio or other systems, and
even damage them. Your vehicle’s systems may
interfere with the operation of sound equipment that
has been added improperly.
So, before adding sound equipment, check with
your dealer and be sure to check federal rules
covering mobile radio and telephone units.
Your audio system has been designed to operate easily
and to give years of listening pleasure. You will get
the most enjoyment out of it
if you acquaint yourself with
it first. Find out what your audio system can do and
how to operate all
of its controls to be sure you’re getting
the most out
of the advanced engineering that went
into it. four
vehicle has a feature called Retained Accessory
Power (RAP). With RAP, you can play your audio
system even after the ignition is turned
off. See
“Retained Accessory Power (RAP)” under
Ignition
Positions on
page 2-23.
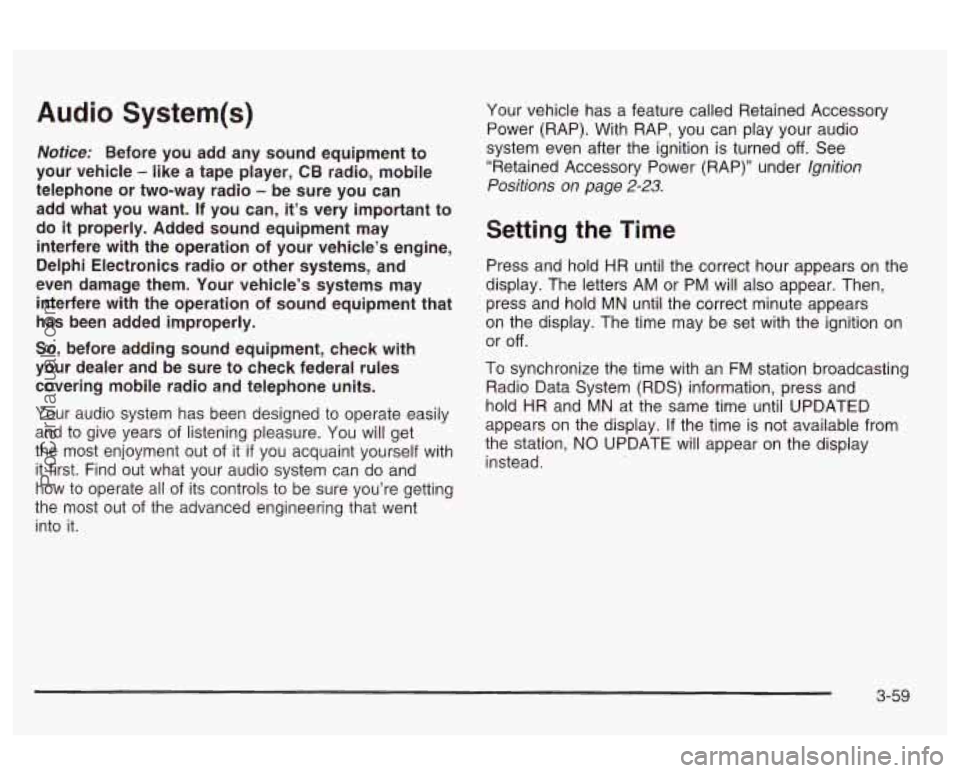
Setting the Time
Press and hold HR until the correct hour appears on the
display. The letters AM or
PM will also appear. Then,
press and hold MN until the correct minute appears
on the display. The time may be set with the ignition on
or
off.
To synchronize the time with an FM station broadcasting
Radio Data System (RDS) information, press and
hold HR and
MN at the same time until UPDATED
appears on the display.
If the time is not available from
the station, NO UPDATE will appear on the display
instead.
3-59
ProCarManuals.com
Page 178 of 387
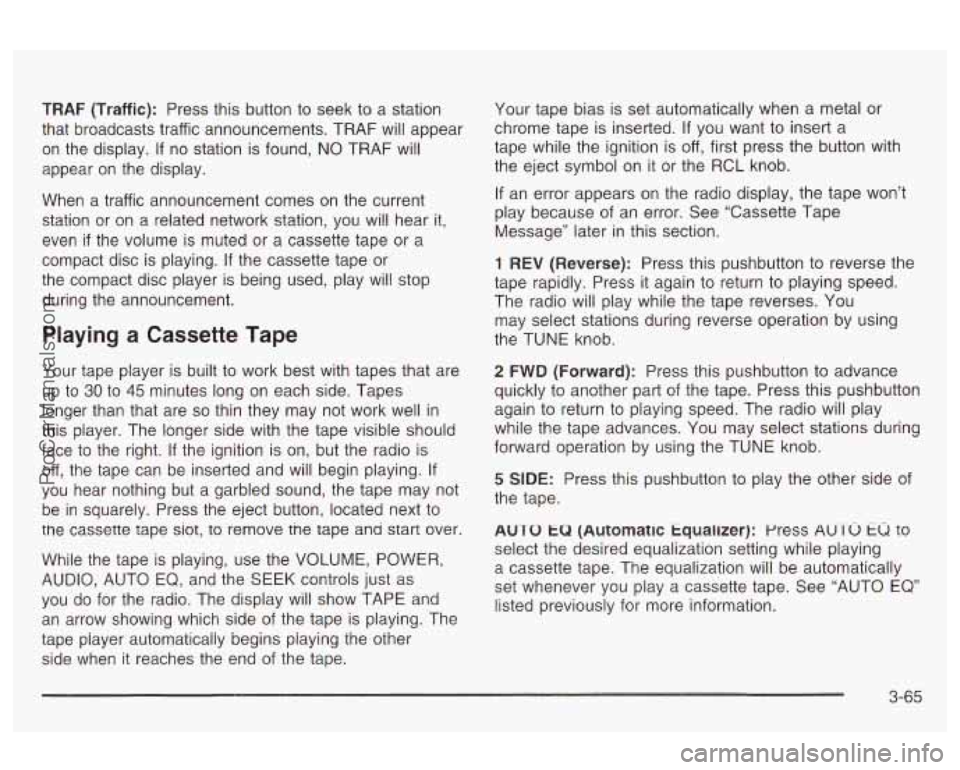
TRAF (Traffic): Press this button to seek to a station
that broadcasts traffic announcements. TRAF will appear
on the display.
If no station is found, NO TRAF will
appear on the display.
When a traffic announcement comes on the current
station or on a related network station, you will hear it,
even
if the volume is muted or a cassette tape or a
compact disc is playing.
If the cassette tape or
the compact disc player is being used, play will stop
during the announcement.
Playing a Cassette Tape
Your tape player is built to work best with tapes that are
up to
30 to 45 minutes long on each side. Tapes
longer than that are
so thin they may not work well in
this player. The longer side with the tape visible should
face to the right.
If the ignition is on, but the radio is
off, the tape can be inserted and will begin playing.
If
you hear nothing but a garbled sound, the tape may not
be in squarely. Press the eject button, located next to
tne cassette tape siot, to remove tne tape ana start over.
While the tape is playing, use the VOLUME, POWER,
AUDIO, AUTO
EQ, and the SEEK controls just as
you
do for the radio. The display will show TAPE and
an arrow showing which side of the tape is playing. The
tape piayer automaticaiiy begins piaying the other
side when it reaches the end of the tape. Your
tape bias is set automatically when a metal
or
chrome tape is inserted. If you want to insert a
tape while the ignition is
off, first press the button with
the eject symbol on it or the RCL knob.
If an error appears on the radio display, the tape won’t
play because of an error. See “Cassette Tape
Message” later in this section.
1 REV (Reverse): Press this pushbutton to reverse the
tape rapidly. Press it again to return to playing speed.
The radio will play while the tape reverses. You
may select stations during reverse operation by using
the TUNE knob.
2 FWD (Forward): Press this pushbutton to advance
quickly to another part of the tape. Press this pushbutton
again to return to playing speed. The radio will play
while the tape advances. You may select stations during
forward operation by using the TUNE knob.
5 SIDE: Press this pushbutton to play the other side of
the tape.
AUTO
tu (Automatic tqualizer): press AUTO tu to
select the desired equalization setting while playing
a cassette tape. The equalization will be automatically
set whenever you play a cassette tape. See “AUTO
EQ’
listed previously for more information.
3-65
ProCarManuals.com
Page 187 of 387
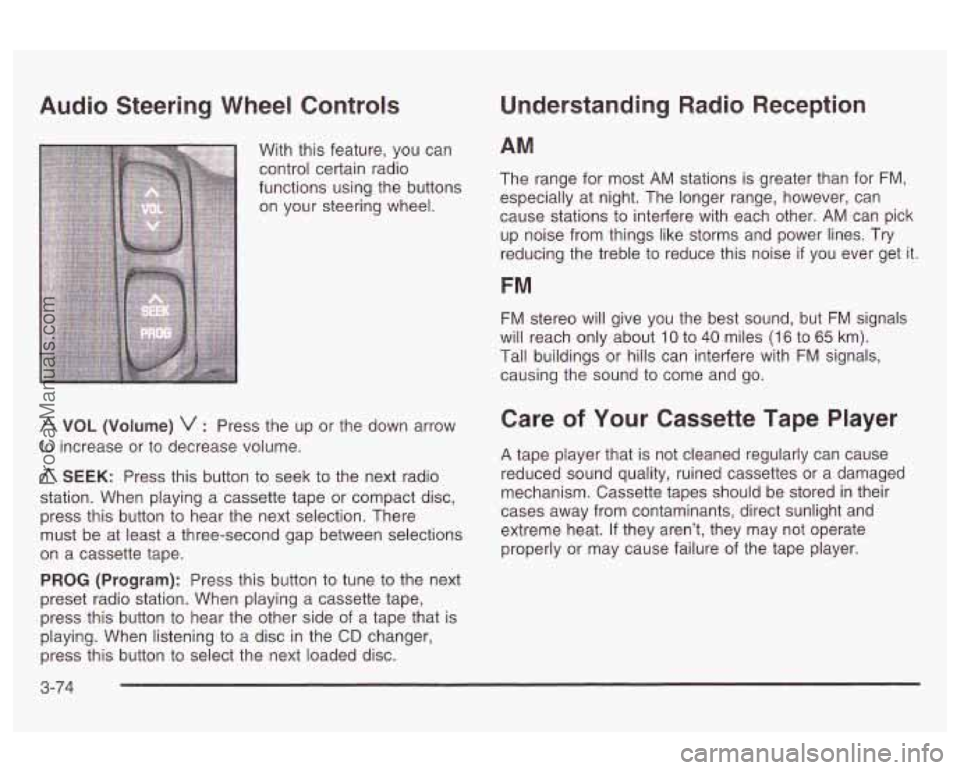
Audio Steering Wheel Controls
With this feature, you can
control certain radio
functions using the buttons
on your steering wheel.
A VOL (Volume) v : Press the up or the down arrow
to increase or to decrease volume.
A SEEK: Press this button to seek to the next radio
station. When playing a cassette tape or compact disc,
press this button to hear the next selection. There
must be at least a three-second gap between selections
on a cassette tape.
PROG (Program): Press this button to tune to the next
preset radio station. When playing a cassette tape,
press this button
to hear the other side of a tape that is
playing. When listening to a disc in the
CD changer,
press this button to select the next loaded disc.
Understanding Radio Reception
AM
The range for most AM stations is greater than for FM,
especially at night. The longer range, however, can
cause stations
to interfere with each other. AM can pick
up noise from things like storms and power lines.
Try
reducing the treble to reduce this noise if you ever get it.
FM
FM stereo will give you the best sound, but FM signals
will reach only about
10 to 40 miles (1 6 to 65 km).
Tall buildings or hills can interfere with
FM signals,
causing the sound to come and go.
Care of Your Cassette Tape Player
A tape player that is not cleaned regularly can cause
reduced sound quality, ruined cassettes or a damaged
mechanism. Cassette tapes should be stored in their
cases away from contaminants, direct sunlight and
extreme heat.
If they aren’t, they may not operate
properly or may cause failure of the tape player.
3-74
ProCarManuals.com
Page 364 of 387

Accessory Power Outlets ................................. 3-21
Adding Washer Fluid
....................................... 5-38
Additional Program Information
........................... 7-8
Additives, Fuel
................................................. 5-6
Add-on Electrical Equipment
............................ 5-91
Adjusting the Speakers (Balance/Fade)
.............. 3-62
Air Bag
Readiness Light
.......................................... 3-34
Air Bag Systems
............................................. 1-47
How Does an Air Bag Restrain? .................... 1-52
Servicing Your Air Bag-Equipped Vehicle
......... 1-54
What Makes an Air Bag Inflate?
.................... 1-52
What Will You See After an Air Bag Inflates? ...... 1-52
When Should an Air Bag Inflate?
................... 1-51
Where Are the Air Bags?
.............................. 1-49
Air CleanedFilter, Engine
................................. 5-21
All Overseas Locations
...................................... 7-4
Aluminum or Chrome-Plated Wheels
.................. 5-86
Antenna, Diversity
........................................... 3-76
Anti-Lock Brake, System Warning Light
.............. 3-36
Appearance Care
............................................ 5-82
Care
of Safety Belts .................................... 5-84
AM
............................................................... 3-74
r-11 It1-Iucln u1anG \JYQLGI II
uw) f-r A,-.+: I ,.-I, D.-~.I,A C?.,-+A- /A DC A7 ...........................
Appearance Care (cont.)
Chemical Paint Spotting
............................... 5-87
Cleaning the inside of Your Vehicle
................ 5-82
Cleaning the Outside of Your Vehicle
.............. 5-85
Finish Damage
............................................ 5-87
GM Vehicle Care/Appearance Materials
.......... 5-88
Sheet Metal Damage
................................ 5-87
Underbody Maintenance
........ ........ 5-87
Weatherstrips
........................... .... 5-84
Ashtrays
..................................... ........ 3-22
Assist Handles
............................................... 2-45
Audio System(s)
............................................. 3-59
Audio Systems
Audio Steering Wheel Controls
...................... 3-74
Care of Your Cassette Tape Player
................ 3-74
Care of Your CD Player
............................... 3-76
Care of Your CDs
........................................ 3-75
Chime Level Adjustment
............................... 3-76
Diversity Antenna System
............................. 3-76
NavigatiodRadio System
.............................. 3-69
Personal Choice Radio Controls
.................... 3-73
Radio with Cassette and CD
......................... 3-60
~eLlilly LIIt: I It lit3 3-a3
Theft-Deterrent Feature ................................ 3-73
Trunk-Mounted CD Changer
.......................... 3-70
Understanding Radio Reception
..................... 3-74
0 -LA:.- - . &I- - -r:.-- n rn ..........................................
1
ProCarManuals.com
Page 374 of 387
Perimeter Lighting ............................... 3.19. 3-57
Personalization. Climate Controls ...................... 3-29
Personalization Features .................................... 2-7
Plan Ahead When Possible ................................ 7-7
Playing a Cassette Tape .................................. 3-65
Playing a Compact Disc .......................... 3-67, 3-71
Power
Playing the Radio
........................................... 3-60
Accessory Outlets ........................................ 3-21
Door Locks ................................................. 2-1 1
Electrical System ......................................... 5-91
Lumbar Controls ........................................... 1-4
Seat ............................................................ 1-2
Steering
Fluid ............................................. 5-37
Windows .................................................... 2-1 8
Power Steering ............................................... 4-10
Programmable Automatic Door Locks ................. 2-1 2
Programming the HomeLink@ Transmitter ........ 2-42
Radios ..........................................................
Care of Your Cassette Tape Player ................
Care of Your CD Player ...............................
Care of Your CDs ........................................
Navigation System .......................................
Personal Choice Radio Controls ....................
Radio with Cassette and CD .........................
Setting the Time ..........................................
Theft-Deterrent ............................................
Trunk-Mounted CD Changer ..........................
Understanding Reception ..............................
RainsenseTM II Wipers .....................................
RDS Messages ..............................................
Rear Reading Lamps ......................................
Rear Safety Belt Comfort Guides ......................
Rear Storage Area ..........................................
Rear Seat Passengers, Safety Belts ..................
3-59
3-74
3-76
3-75
3-69
3-73 3-60
3-59
3-73
3-70 3-74
.. 3-9
3-64
3-20
1-25
1-21
2-46
Rear Underseat Fuse Block .............................. 5-96
................................ n Rear Window Defogger 3-26 U Rearview Mirror, Automatic Dimming with
Questions and Answers About Safety Belts
......... 1-12 Compass .................................................... 2-35
11
ProCarManuals.com