buttons OLDSMOBILE AURORA 2003 Owners Manual
[x] Cancel search | Manufacturer: OLDSMOBILE, Model Year: 2003, Model line: AURORA, Model: OLDSMOBILE AURORA 2003Pages: 387, PDF Size: 18.05 MB
Page 105 of 387
Programming the HomeLink@
Transmitter
Do not use the HomeLink@ Transmitter with any garage
door opener that does not have the “stop and reverse’’
feature. This includes any garage door opener model
manufactured before April
1, 1982.
Keep the original transmitter for use in other vehicles as
well as for future HomeLink@ programming. It is also
recommended that upon the sale
of the vehicle,
the programmed HomeLink@ buttons should be erased
for security purposes. Refer to “Erasing HomeLink@
Buttons” or, for assistance, contact HomeLink@ on the
internet at: www.homelink.com or by calling
1 -800-355-35 1 5.
Be sure that people and objects are clear of the garage
door or gate operator you are programming. When
programming a garage door, it is advised to park outside
of the garage.
It is recommended that a new battery be installed in
your hand-held transmitter for quicker and more
accurate transmission of the radio frequency.
Your vehicle’s engine should be turned
off while
programming the transmitter. Follow these steps to
program up to three channels:
1. Press and hold down the two outside buttons,
releasing only when the indicator light begins to
flash, after 20 seconds.
Do not hold down the buttons
for longer than
30 seconds and do not
repeat this step to program a second and/or third
transmitter to the remaining two HomeLink@ buttons.
2. Position the end
of your hand-held transmitter about
1 to 3 inches (3 to 8 cm) away from the HomeLink@
buttons while keeping the indicator light in view.
3. Simultaneously press and hold both the desired
button on HomeLink@ and the hand-held transmitter
button.
Do not release the buttons until Step 4
has been completed.
Some entry gates and garage door openers may
require you to substitute Step
3 with the procedure
noted in “Gate Operator and Canadian
Programming” later in this section.
4. The indicator light will flash slowly at first and then
rapidly after HomeLink@ successfully receives the
frequency signal from the hand-held transmitter.
Release both buttons.
5. Press and hold the newly-trained HomeLink@ button
and observe the indicator light.
If the indicator light stays on constantly,
programming is complete and your device should
activate when the HomeLink@ button is pressed and
released.
To program the remaining two HomeLink@ buttons,
begin with Step 2 under “Programming HomeLink@.”
Do not repeat Step 1 as this will erase all of the
programmed channels.
2-42
ProCarManuals.com
Page 106 of 387
If the indicator light blinks rapidly for two seconds
and then turns to a constant light, continue with
Steps
6 through 8 following to complete the
programming of a rolling-code equipped device
(most commonly, a garage door opener).
6. At the garage door opener receiver (motor-head
unit) in the garage, locate the “Learn” or “Smart”
button. This can usually be found where the hanging
antenna wire is attached to the motor-head unit.
7. Firmly press and release the “Learn” or “Smart”
button. The name and color of the button may
vary by manufacturer.
You will have
30 seconds to start Step 8.
8. Return to the vehicle. Firmly press and hold the
programmed HomeLink@ button for two seconds,
then release. Repeat the press/hold/release
sequence a second time, and depending on the
brand of the garage door opener (or other rolling
code device), repeat this sequence a third time
io compieie ine proyrarrllllirly.
HomeLink@ should now activate your rolling code
equipped device.
To program the remaining two HomeLink@ buttons,
begin with Step
2 of “Programming HomeLink@.” Do not
repeat Step
1.
Gate Operator and Canadian
Programming
Canadian radio-frequency laws require transmitter
signals to “time out” or quit after several seconds of
transmission. This may not be long enough for
HomeLinkO to pick up the signal during programming.
Similarly, some
U.S. gate operators are manufactured to
“time out” in the same manner.
If you live in Canada, or you are having difficulty
programming a gate operator by using the
“Programming HomeLink@’ procedures (regardless of
where you live), replace Step
3 under “Programming
HomeLinkm’ with the following:
Continue to press and hold the HomeLink@ button while
you press and release every two seconds (cycle)
your hand-held transmitter until the frequency signal has
been successfully accepted by HomeLink@. The
indicator light will flash slowly at first and then rapidly.
Proceed with Step
4 under “Programming HomeLink@”
to complete.
2-43
ProCarManuals.com
Page 107 of 387
Using HorneLink@
Press and hold the appropriate HomeLink@ button for at
least half
of a second. The indicator light will come
on while the signal is being transmitted.
Erasing HorneLink@ Buttons
To erase programming from the three buttons do the
following:
1. Press and hold down the two outside buttons until
the indicator light begins to flash, after 20 seconds.
2. Release both buttons. Do not hold for longer than
HomeLink@ is now in the train (learning) mode and can
be programmed at any time beginning with Step
2
under “Programming HomeLink@.”
Individual buttons can not be erased, but they can be
reprogrammed. See “Reprogramming a Single
HomeLink@ Button” next.
30
seconds.
Reprogramming a Single HomeLink@
Button
To program a device to HomeLink@ using a HomeLink@
button previously trained, follow these steps:
1. Press and hold the desired HomeLink@ button.
Do
not release the button.
2. The indicator light will begin to flash after
20 seconds. While still holding the HomeLink@
button, proceed with Step
2 under “Programming
HomeLink@.”
Resetting Defaults
To reset HomeLink@ to default settings do the following:
1. Hold down the two outside buttons for about
20 seconds until the indicator light begins to flash.
2. Continue to hold both buttons until the HomeLink@
indicator light turns
off.
3. Release both buttons.
For questions or comments, contact HomeLink@ at
1-800-355-351
5, or on the internet at
www.homelink.com.
2-44
ProCarManuals.com
Page 116 of 387
The main components of your instrument panel are the
following:
A. Air Outlet
B. Turn SignaVMultifunction Lever
C. Steering Wheel Controls for Climate Control System
D. Steering Wheel Controls for Audio System
E. Windshield Wiperwasher Control
F. Driver information Center (DIC)
G. Hazard Warning Flasher Button
H. Climate Control System
I. Instrument Panel Brightness Knob
J. Trip Odometer Buttons
K. Hood Release
L. Parking Brake
M. Cruise Control Lever
N. ignition Switch
0. Audio System
P. Accessory Power Outlet
Q. Glove Box (Trunk Release Lockout Switch inside)
3-3
ProCarManuals.com
Page 142 of 387
A $&‘ v (Fan): Press the up or down arrow on the
fan button to override the automatic fan control and
increase or decrease the fan speed.
A TEMP v (Temperature): Press either arrow on
the TEMP button once to display your current
temperature setting in the digital display. Press the up
or down arrow again to provide
a warmer or cooler
temperature setting.
Climate Controls Personalization
If your vehicle is equipped with this feature, up to two
drivers are able to store and recall climate control
settings for the temperature, the fan speed and the
direction of the airflow.
Memory buttons
1 and 2 are located on the driver’s
door panel and correspond to the numbers
1 or 2 found
on the back of each remote keyless entry transmitter.
To store settings, do the following:
1. Select the desired temperature, fan speed and
airflow mode. If desired, a separate temperature
setting may also be selected for the front seat
passenger. For information on how to do this, see
Automatic Climate Control System on page 3-23.
2. Locate memory buttons 1 and 2 on the driver’s door
panel.
3. Press the memory button on the door panel that
corresponds to the number on the back
of the
transmitter you are programming, until you hear two
beeps. The beeps confirm that your selection has
been saved and can now be recalled. For more
information
on the memory feature, see Memory
Seat
and Mkrors on page 2-48.
Follow these steps each time you want to change the
stored settings.
To recall the climate control settings last stored on your
transmitter, press the unlock button on your remote
keyless entry transmitter and put the ignition in
ACC (Accessory) or
ON. The settings will be recalled.
3-29
ProCarManuals.com
Page 145 of 387
Speedometer and Odometer
Your speedometer lets you see your speed in both
miles per hour (mph) and kilometers per hour (km/h).
Your odometer shows how far your vehicle has
been driven, in either miles (used in the United States)
, or kilometers (used in Canada).
The speedometer shows a top speed of
140 mph
(220 km/h). This is not intended to be the vehicle’s top
speed.
You may wonder what happens
if your vehicle needs a
new odometer installed. If the new one can be set to
the mileage total of the old odometer, then it must
be. But
if it can’t, then it’s set at zero and a label must
be put on the driver’s door to show the old mileage
reading when the new odometer was installed.
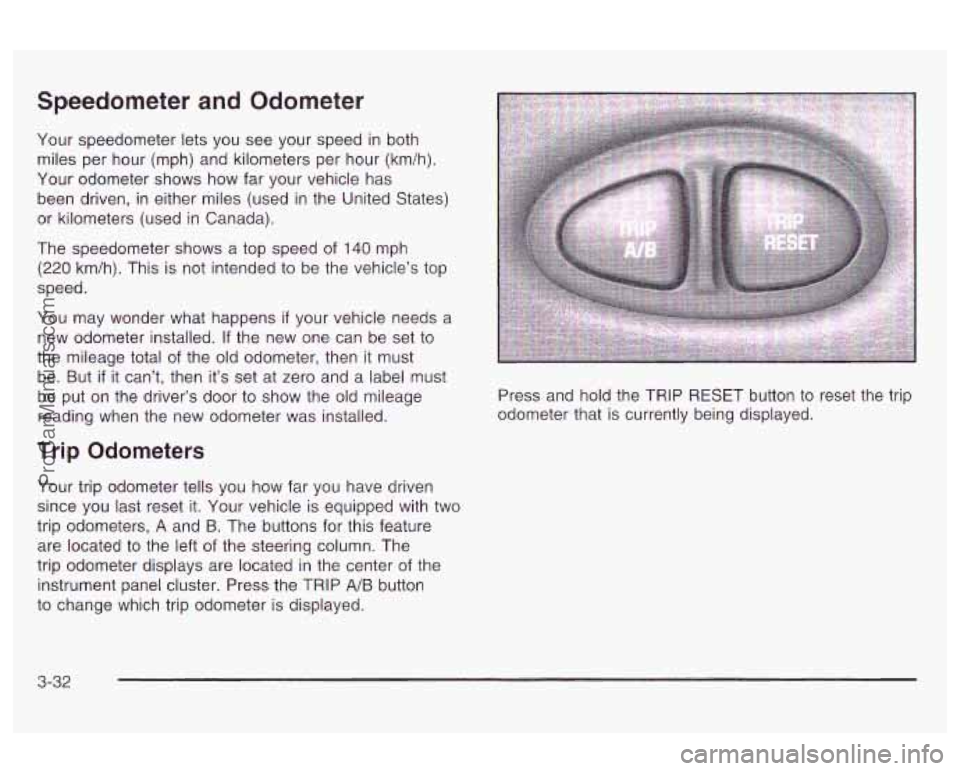
Trip Odometers
Your trip odometer tells you how far you have driven
since you last reset it. Your vehicle is equipped with two
trip odometers,
A and B. The buttons for this feature
are located to the left
of the steering column. The
trip odometer displays are located in the center of the
instrument panel cluster. Press the TRIP
A/B button
to change which trip odometer is displayed. Press and
hold the TRIP RESET button to reset the trip
odometer that is currently being displayed.
3-32
ProCarManuals.com
Page 158 of 387
Driver Information Center (DIG) To turn off messages on the DIC (except LOW OIL
PRESSURE, LOW BRAKE FLUID, PARK BRAKE SET,
STARTING DISABLED and the HOT
... STOP ENGINE
warning), press the RESET button.
Pressing the SELECT right arrow button will allow you
to access the following modes, DATE/ET, FUEL, ECON,
OIL and GAGE. While
in any sf these modes, warning
messages can interrupt and take over the display
until you acknowledge the message, or the condition
causing the problem goes away.
English/Metric
The DIC can display information in either English or
metric. To change the display, press and hold the
ON/OFF button for about three seconds. This will also
change the digital screen for the climate control
system between English and metric.
Date/Elapsed Time
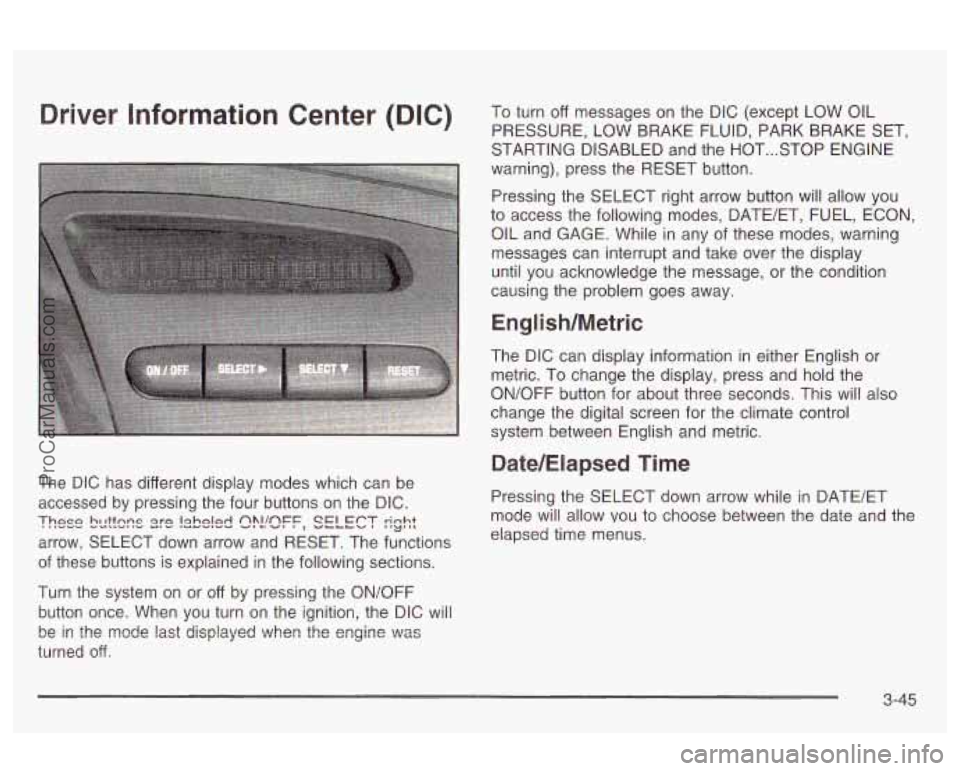
The DIC has different display modes which can be
accessed by pressing the four buttons on the DIC. Pressing the SELECT down arrow while in BATE/ET
arrow, SELECT down arrow and RESET. The functions
These bcttsns s)?!!sFF, SELECT rinht I'LJ',L mode will allow vou to choose between the date and the
elapsed time menus.
of these buttons is explained in the following sections.
Turn the system
on or off by pressing the ON/OFF
button once. When you turn on the ignition, the DIC will
turned
off.
be in the mode last displayed ?..lhen the engine \":as
3-45
ProCarManuals.com
Page 159 of 387
Date
To set the date, press and hold the RESET button for
about three seconds while the date is being displayed on
the DIC. When the date set mode is entered the
display will show the following:
YEAR?
M M/D D/OO
The year will be flashing. To increase the item that is
flashing press SELECT right arrow. To decrease
the item that is flashing press SELECT down arrow.
When you reach the current year press the RESET
button. The DIC will ask for the month. The month will
flash the same as the year. Use the SELECT buttons
to
reach the current month and press RESET. The DIC
will then ask for the day. The day will flash the same as
the year. Use the SELECT buttons
to reach the
current day. Press the RESET button again and the set
display will stop flashing and go back to the normal
operation mode.
Elapsed Time (ET)
When the ignition is on, the DIC can be used as a
stopwatch. The display will show hours and minutes.
The elapsed time indicator will record
up to 100 hours,
then it will reset
to zero and continue counting. Press
SELECT down arrow while in the DATE/ET mode, and
the display will show the amount of time that has
elapsed since the elapsed time indicator was last reset
(not including time the ignition is
off), such as:
01 :08 ELAPSED TIME
To start or stop the counting of time, press the RESET
button briefly.
If the colon (:) in the time is flashing,
time is being counted. Time is displayed in hours and
minutes. Seconds are not displayed. Time will continue
to be counted as long as the ignition is on, even
if
another display is being shown on the DIC.
To reset elapsed time to zero, press the RESET button
for three seconds while the elapsed time
is displayed.
Fuel
Press the SELECT down arrow while in the FUEL mode
to see how much fuel has been used and the fuel
range functions.
3-46
ProCarManuals.com
Page 165 of 387
DIC Vehicle Personalization
The DIC can be used to program the following personal
choice features available with your vehicle:
Automatic Door Locks
Window Lock Out Security Feedback
Delayed Locking
Perimeter Lighting
Driver ID
Memory Seats
Outside Curb View Assist Mirror
To access the personalization menu, the vehicle must
be in PARK (P) with the ignition in ON and no warning
messages displayed on the DIC. You must then
press and hold both of the SELECT buttons for three
seconds. This will display the personalization menu.
The DIC display will show the following:
FEATURE PROGRAMMING
PRESS SELECT DOWN TO
SELECT MENU OPTIONS
PRESS SELECT RIGHT TO The next item
to be displayed is DRIVER
1 or
DRIVER
2. To change the driver number, press the
SELECT right arrow. The driver number that you select
should correspond with the number on the back of
your remote keyless entry transmitter. Once the correct
driver number has been selected, press the SELECT
down arrow to enter your choice and move on to
the next selection.
The DIC is used to program the personal choices
of two
drivers. The drivers are recognized as DRIVER
1 and
DRIVER
2. You will let the DIC and the vehicle
know which driver you are by using your remote keyless
entry transmitter or by pressing the appropriate
memory seat button located on the driver’s door or
choosing the driver with the DIC. Each remote keyless
entry transmitter was pre-programmed to belong to
DRIVER
1 or DRIVER 2. The personalization features
may be programmed differently for each driver.
When you press the unlock symbol on the transmitter,
the DIC will automatically change driver numbers
and the vehicle will recall the personal choice settings
that were last made to correspond to your transmitter,
including your radio and comfort control settings.
See
Climate Controls Personalization on page 3-29.
CHANGE SETTINGS
3-52
ProCarManuals.com
Page 174 of 387
< SCAN > : Press and hold either arrow for
two seconds until
SC appears on the display and you
hear a beep. The radio will go to a station, play for a few
seconds, then go on to the next station. Press either
SCAN arrow again to stop scanning.
To scan preset stations, press and hold either SCAN
arrow for more than four seconds. PRESET SCAN will
appear on the display. You will hear a double beep
and the P will blink with the preset number. The radio
will go to the first preset station stored on your
pushbuttons, play for a few seconds, then go on to the
next preset station. Press either SCAN arrow again
to stop scanning presets.
The radio will scan only to stations that are in the
selected band and only to those with a strong signal.
Setting Preset Stations
The six numbered pushbuttons let you return to your
favorite stations. You can set up to
18 stations (six AM.
six FMI and six FM2), by performing the following
sieps.
1. Turn the radio on.
2. Press BAND to select AM, FMI or FM2.
3. 1-une in the desired station.
4. Press AUTO EQ to select the equalization that best
suits the type of station selected.
5. Press and hold one of the six numbered
pushbuttons until you hear a beep. Whenever you
press that numbered pushbutton, the station
you set will return and the equalization that you
selected will also be automatically selected for that
pushbutton.
6. Repeat the steps for each pushbutton.
Setting the Tone (Bassnreble)
AUDIO: Press and release the AUDIO button until
BASS, MID or TREB appears on the display. Press the
knob above the AUDIO button to extend it, then turn
the knob to increase or to decrease. If a station is weak
or noisy, you may want to decrease the treble.
Pressing and holding the AUDIO button for at least two
seconds will return all tone settings, including balance
and fade to flat.
3-6 1
ProCarManuals.com