towing OLDSMOBILE BRAVADA 1998 Owners Manual
[x] Cancel search | Manufacturer: OLDSMOBILE, Model Year: 1998, Model line: BRAVADA, Model: OLDSMOBILE BRAVADA 1998Pages: 380, PDF Size: 19.2 MB
Page 76 of 380

New Vehicle “Break-In”
NOTICE:
Your vehicle doesn’t need an elaborate
“break-in.” But it
will perform better in the
long run if you follow these guidelines:
a
0
a
0
Keep your speed at 55 mph (88 knlhj or
less for the first
500 miles (805 kmj.
Don’t drive at any
one speed -- fast or
slow
-- for the first 500 miles (805 km).
Don’t make full-throttle starts.
Avoid making hard stops for the first
200 miles (322 km) or so. During this time
your new brake linings aren’t yet broken
in. Hard stops with new linings can mean
premature wear and earlier replacement. Follow this breaking-in guideline every
time you get new brake linings.
Don’t tow
a trailer during break-in.
See “Towing a Trailer” in the Index for
more information.
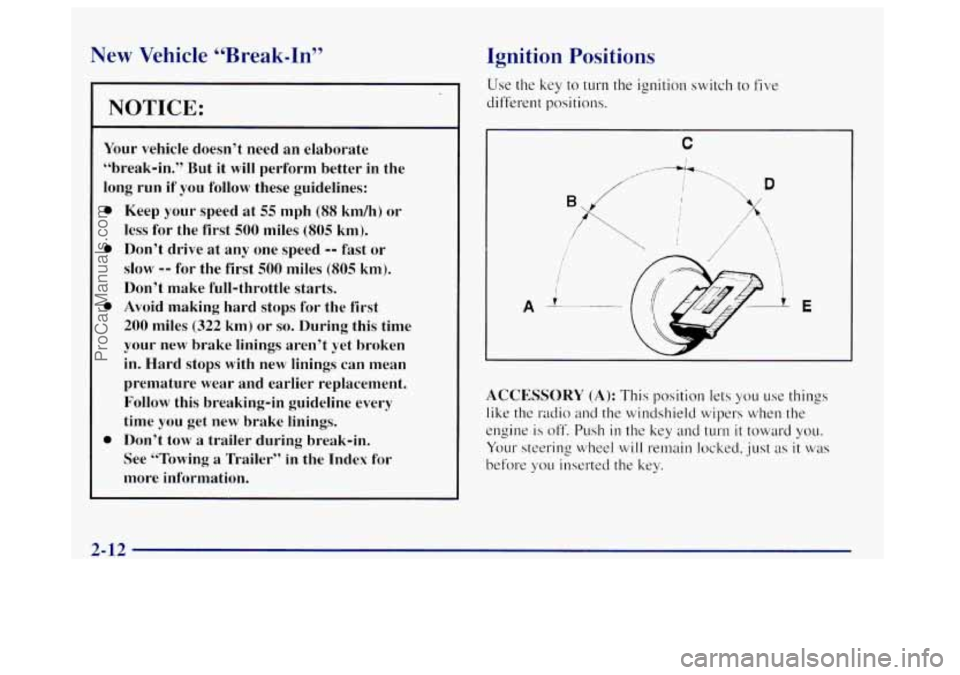
Ignition Positions
Use the key to turn the ignition switch to five
different positions.
C
E
ACCESSORY (A): This position lets you use things
like the radio and
the windshield wipers when the
engine is off. Push in the key and turn it toward you.
Your steering wheel will remain locked, just
as it was
before
yo~l inserted the key.
2-12
- . -~
ProCarManuals.com
Page 78 of 380

Starting Your Engine
Move your shift lever to PARK (P) or NEUTRAL (N).
Your engine won’t start in any other position -- that‘s a
safety feature. To restart when you’re already moving,
use NEUTRAL
(N) only.
NOTICE:
Don’t try to shift to PARK (P) if your vehicle is
moving. If you do, you could damage the
transmission. Shift to PARK
(P) only when your
vehicle is stopped.
1. Without pushing the accelerator pedal. turn your
ignition key to START. When the engine starts. let
engine gets warm.
2 *o of the key. The idle speed will go down as your
NOTICE:
Holding your key in START for longer than 15
seconds at a time will cause your battery to be
drained much sooner. And the excessive heat can
damage your starter motor.
2. If it doesn’t start right away, hold your key in
START. If it doesn’t start in 10 seconds, push the
accelerator pedal all the way down for five more
seconds, or
until it starts.
3. If your engine still won’t start (or starts but then
stops), wait
15 seconds and start over.
When the engine starts, let
go of the key and the
accelerator pedal.
NOTICE:
Your engine is designed to work with the
electronics
in your vehicle. If you add electrical
parts or accessories, you could change the
way
the engine operates. Before adding electrical
equipment, check with your retailer. If you don’t,
your engine might not perform properly.
If you ever have to have your vehicle towed, see
the part of’this manual that tells how to
do it
without damaging your vehicle. See “Towing
Your Vehicle” in the Index.
2-14
ProCarManuals.com
Page 80 of 380

Automatic Transmission Operation
P
R
N
0
3
2
1
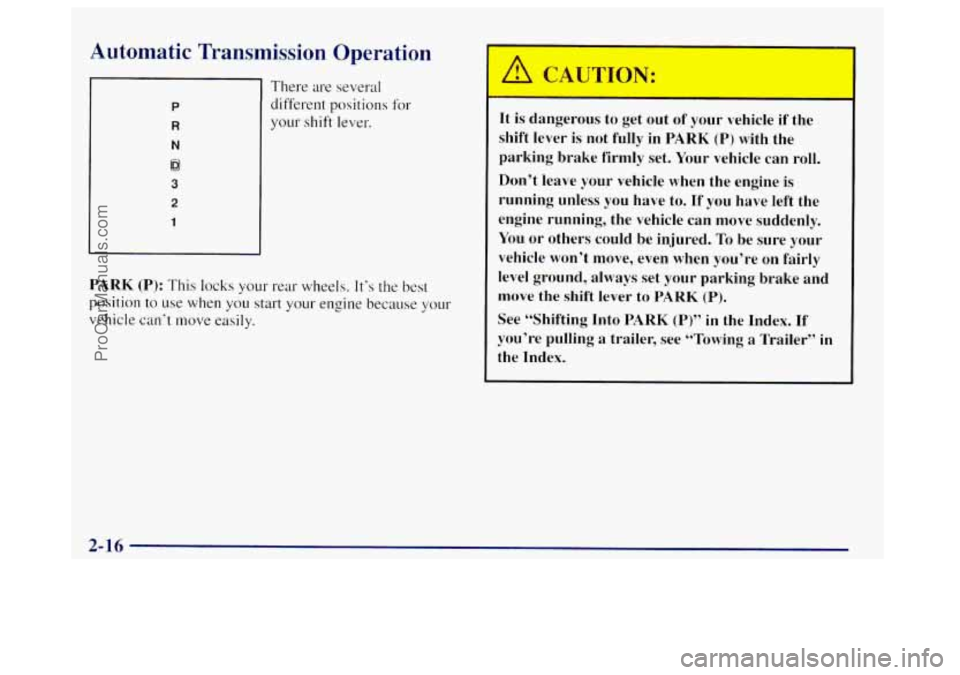
There are several
different positions for
your shift lever.
PARK (P): This locks your rear wheels. It’s the best
position to use when you start your engine because your
vehicle
can‘t move easily.
r
It is dangerous to get out of your vehicle if the
shift lever
is not fully in PARK (P) with the
parking brake firmly set. Your vehicle can roll.
Don’t leave your vehicle when the engine is
running unless you have to. If you have left the
engine running, the vehicle can move suddenly.
You or others could be injured. To be sure your
vehicle won’t move, even when you’re
on fairly
level ground, always set your parking brake and
move the shift lever to
PARK (P).
See “Shifting Into PARK (P)” in the Index. If
you’re pulling
a trailer, see “Towing a Trailer” in
the Index.
ProCarManuals.com
Page 82 of 380

DRIVE (D): This position is for normal driving. If you
need more power for passing, and you’re:
Going less than about 35 mph (5.5 km/h), push your
accelerator pedal about halfway down.
Going about 3.5 mph (5.5 km/h) or more, push the
accelerator all the way down.
You’ll shift down to
the next gear and have more power.
DRIVE (D) should not be used when towing
a trailer,
carrying a heavy load, driving on steep hills or for
off-road driving. Select THIRD
(3) when operating the
vehicle under any of these conditions.
THIRD (3): This position is also used for nornlal
driving, however
it offers more power but lower fuel
economy than DRIVE (D). You should use THIRD
(3)
when towing a trailer, carrying a heavy load, driving on
steep hills or winding roads or for off-road driving.
SECOND (2): This position gives you more power but
lower fuel economy than THIRD
(3). You can use
SECOND
(2) on hills. It can help control your speed as
you go down steep mountain roads, but then you would
also want to use your brakes off and on. You
can also use SECOND
(2) for starting your vehicle
from a stop
on slippery road surfaces.
FIRST (1): This position gives you even more power
(but lower fuel economy) than SECOND
(2). You can
use
it on very steep hills, or in deep snow or mud. If the
selector lever
is put in FIRST (I ) while the vehicle is
moving forward, the transmission won’t shift into
FIRST
(1) until the vehicle is going slowly enough.
-
NOTICE:
If your rear wheels can’t rotate, don’t try to
drive. This might happen if
you were stuck in
very deep sand or mud or were up against a solid
object.
You could damage your transmission.
Also, if you stop when going uphill, don’t hold
your vehicle there with only the accelerator
pedal. This could overheat and damage the
transmission. Use your brakes or shift into
PARK (P) to hold your vehicle in position
on a hill.
2-18
ProCarManuals.com
Page 83 of 380

Parking Brake
To set the parking brake, hold the regular brake pedal
down
with your right foot. Push down the parking brake
pedal with your left foot.
If the ignition is on, the brake
system warning light
will come on.
To release the parking brake, hold the reg~dar brake
pedal down.
I NOTICE:
~
Driving with the parking brake on can cause
your rear brakes to overheat. You may have to
replace them, and you could also damage other
parts
of your vehicle.
If you are towing a trailer and you must park on a hill,
see “Towing a Trailer” in the Index. That section shows
what to do first to keep the trailer fl-om moving.
Pull the BRAKE RELEASE lever. It is located on the
bottom
of the instrument panel on the driver‘s side.
2-19
ProCarManuals.com
Page 84 of 380

Shifting Into PARK (P)
c
It can be dangerous to get out of your vehicle if’
the shift lever is not fully in PARK (P) with the
parking brake firmly set. Your vehicle can roll.
If
you have left the engine running, the vehicle can
move suddenly. You or others could be injured.
To be sure your vehicle won’t move, even when
you’re on fairly level ground, use the steps that
follow. If you’re pulling a trailer, see “Towing a
Trailer” in the Index.
1. Hold the brake pedal down with your right foot and
set the parking brake.
!. Move the shift lever into PARK (P) position like this:
P
a
Hold in the button on the lever.
Push the lever all the way toward the front of
the vehicle.
3. Turn the ignition key to LOCK.
4. Remove the key and t,&e it with you. If you can leave
your vehicle
with the key, your vehicle is in PARK (P).
2-20
ProCarManuals.com
Page 88 of 380

Locking Rear Axle
It can be dangerous to get out of your vehicle if
the shift lever
is not fully in PARK (P) with the
parking brake firmly set. Your vehicle can roll.
Don’t leave your vehicle when the engine is
running unless you have to.
If’ you’ve left the
engine running, the vehicle can move suddenly.
You or others could be injured.
To be sure your
vehicle won’t move, even when you’re on fairly
level ground, always set your parking brake and
move the shift lever to
PARK (P).
Follow the proper steps to be sure your vehicle won’t
move. See “Shifting Into
PARK (P)” in the Index.
If you’re pulling a trailer, see “Towing a Trailer” in
the Index. Your
locking rear axle can give you additional traction
on snow, mud, ice, sand or gravel.
It works like a
standard axle most of the time, but when one of the rear
wheels has no traction and the other does, this feature
will allow the wheel with traction to move the vehicle.
All- Wheel Drive
Your engine’s driving power is sent to all four wheels
for extra traction. All-wheel drive is like four-wheel
drive, but there is no lever
or switch to engage or
disengage the front axle. It
is fully automatic and
adjusts itself
as needed for road conditions.
2-24
ProCarManuals.com
Page 91 of 380

Turn and Lane Change Signals
The turn signal has two upward (for right) and two
downward (for left) positions. These positions allow
you to signal
a turn or a lane change.
To signal
a turn, move the lever all the way up or down.
When
the turn is finished. the lever will return automatically.
An arrow on the
instrument panel
will
flash in the direction of
the
turn or lane change.
To signal a lane change, just raise or lower the lever
until the arrow starts to flash. Hold it there until you
complete your lane change. The lever will return by
itself when you release
it.
As you signal a turn or a lane change, if the arrows don't
flash but just stay on,
a signal bulb may be burned out
and other drivers won't see your
turn signal.
If a bulb is burned out, replace it to help avoid an
accident.
If the arrows don't go on at all when you
signal
a turn, check the fuse (see "Fuses and Circuit
Breakers''
in the Index) and for burned-out bulbs.
If you have a trailer towing option with added wiring for
the trailer lamps,
a different turn signal flasher is used.
With this flasher installed, the signal indicator
will flash
even
if a turn signal bulb is burned out. Check the front
and rear
turn signal lamps regularly to make sure they
are working.
Turn Signal On Chime
If your turn signal is left on for nwre than 3/4 of a mile
( I .2 km), a chime will sound at each flash of the turn
signal. To
turn off the chime., move the turn signal lever
to the
off position.
Headlamp High/Low Beam Changer
To change the headlamps from low to high beam or high
to low beam.
pull the multifunction lever a11 the way
toward you. Then release
it.
When the high beams are
on, this indicator light
on
the instrument panel will
also be on.
ProCarManuals.com
Page 120 of 380

Brake System Warning Light
When the ignition is on, the brake system warning light
will come on when you set your parking brake. The light
will stay on
if your parking brake doesn’t release fully.
If it stays on after your parking brake is fully released, it
means you have a brake problem.
Your vehicle‘s hydraulic brake system is divided into
two parts.
If one part isn’t working, the other part can
still work and stop you. For good braking, though. you
need both parts working well.
If the warning light comes on, there could be a brake
problem. Have your brake system inspected right away.
This light should come on
BRAKE
-
briefly when you turn the
ignition key to
RUN. If it
doesn’t come on then,
have
it fixed so it will be
re.ady to warn you
if
there’s a problem.
If the light comes on while you are driving, pull off the
road and stop carefully.
You may notice that the pedal is
harder to push. Or, the pedal may go closer to the floor.
It may take longer to stop. If the light is still on, have. the
vehicle towed for service. (See “Towing Your Vehicle“
in the Index.)
I CAUTION:
Your brake system may not be working properly
if the brake system warning light is on. Driving
1 with the brake system warning light on can lead
~ to an accident. If the light is still on after you’ve
pulled off the road and stopped carefully, have
the vehicle towed for service.
2-56
ProCarManuals.com
Page 123 of 380

If the Light Is Flashing
The following may prevent more serious damage to
your vehicle:
0 Reducing vehicle speed.
0 Avoiding hard accelerations.
0 Avoiding steep uphill grades.
0 If you are towing a trailer, reduce the amount of
cargo being hauled
as soon as it is possible.
If the light
stops flashing and remains on steady, see "If
the Light
Is On Steady'. following.
If the light continues to flash, when it is safe to clo so,
stop the vel?icle. Find a safe place to park your vehicle.
Turn the key off, wait at least 10 seconds and restart the
engine.
If the light remains on steady, see "If the Light
Is On Steady" following. If the light is still .flashing,
follow the previous steps, and drive the vehicle to your
retailer or qualified service center for service.
If the Light Is On Steady
YOLI may be able to correct the emission system
malfunction by considering
the following:
Did you recently
put fuel into your vehicle'?
If so, reinstall the fuel cap, making sure to fully install
the cap. The diagnostic system can determine
if the fuel cap
has been left off or improperly installed.
A loose or
missing fuel cap
will allow fuel to evaporate into the
atmosphere.
A few driving trips with the cap properly
installed should turn the light off.
Did you just drive through a deep puddle
of water?
If so, your electrical system may be wet. The condition
will usually be corrected when the electrical system
dries out. A few driving trips should
turn the light off.
Have you recently changed brands
of fuel?
If so, be s~~re to file1 your vehicle with quality fuel (see
"Fuel"
in the Index). Poor fuel quality will cause your
engine not
to run as efficiently as designed. You may
notice
this as stalling after start-up, stalling when you put
the vehicle into gear, misfiring, hesitation on acceleration
or stumbling on acceleration. (These conditions may go
away once the engine is warmed up.) This
will be detected
by the system and cause the light to turn
on.
If YOLI experience one or more of these conditions,
change the fuel brand
yo^^ use. It will require at least one
full tank of the proper fuel to turn the light off.
If none of the above steps have made the light turn off,
have your retailer or qualified service center check the
vehicle. Your retailer has the proper test equipment and
diagnostic tools
to fix any mechanical or electrical
problems that may have developed.
ProCarManuals.com